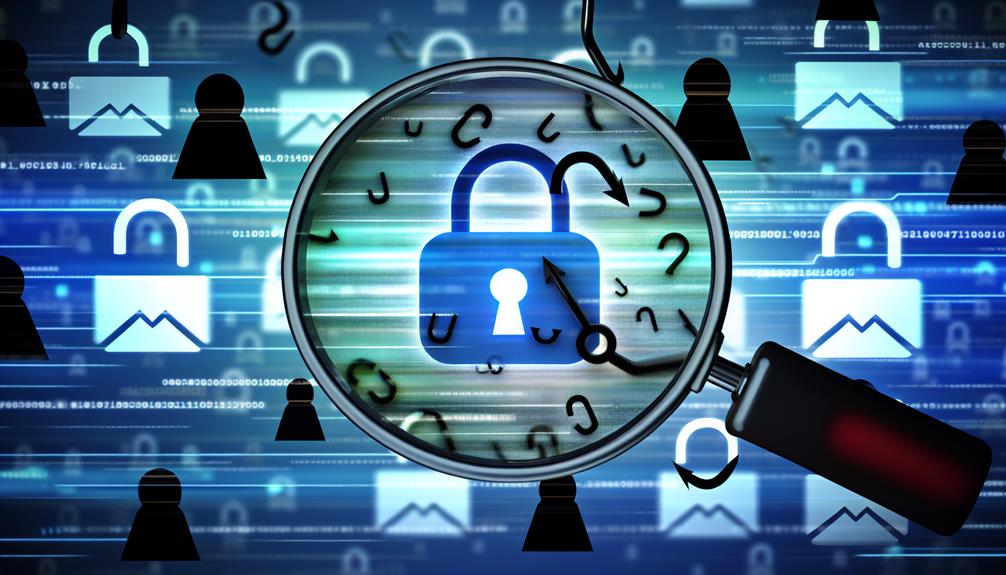
Online investment scams are costing Ghanaians millions of cedis. According to the Cyber Security Authority (CSA), victims lost a total of GH¢3.4 million to such fraud in just six months. The figure highlights a growing threat that targets everyday people looking for ways to grow their money.
How the scams work
Fraudsters often set up fake investment platforms that promise unusually high returns in a short time. They use social media, messaging apps, and even phone calls to lure victims. Once someone invests, the scammers may show fake profits to encourage more deposits. Eventually, the platform disappears, and the investor cannot withdraw any money.
The CSA warns that many of these schemes operate without any regulatory approval. They may claim to be registered with the Bank of Ghana or other bodies, but these claims are false. Some scammers even use the names of legitimate companies to appear trustworthy.
Who is at risk
Anyone can fall for these scams, but they often target people who are new to investing or desperate for quick returns. Students, young professionals, and retirees have all been victims. The promise of easy money can be hard to resist, especially when friends or family members appear to be making profits.
The GH¢3.4 million loss is likely an undercount, as many victims do not report the crime due to shame or fear of embarrassment. The actual amount lost could be much higher.
How to protect yourself
The CSA advises Ghanaians to take the following steps before investing in any online opportunity:
Verify the company’s registration. Check with the Bank of Ghana or the Securities and Exchange Commission to see if the platform is licensed.
Be skeptical of high returns. If an investment promises returns that are much higher than what banks or reputable funds offer, it is likely a scam.
Do not rush. Scammers create urgency to pressure you into investing quickly. Take your time to research.
Check for red flags. Poor website design, lack of contact information, and spelling errors can be signs of a fake platform.
Talk to someone you trust. Before sending money, discuss the opportunity with a friend, family member, or financial advisor.
What to do if you have been scammed
If you suspect you have lost money to an online investment scam, report it to the Cyber Security Authority immediately. The CSA has a dedicated reporting system on its website. You should also contact your bank to try to stop any further transactions. While recovering lost funds is difficult, reporting helps the authorities track down scammers and warn others.
The GH¢3.4 million loss in six months is a stark reminder that online investment fraud is a serious problem in Ghana. By staying informed and cautious, you can avoid becoming the next victim.
Preparing well and taking the proper steps to ensure that you pass the BECE can be invaluable to your future success in life, but one of the most important factors in being prepared is knowing what exactly will be on the test, as well as how you’ll need to go about answering each question.
Luckily, if you know where to look, there are multiple sources available to you that can help familiarize yourself with both past questions and answers so you can prepare yourself properly.
About BECE Examination
The Basic Education Certificate Examination (BECE) is a national examination in Ghana that is administered by the West African Examination Council with the support of the Ghana Education Service to access basic level final year students who wishes to continue their education to the secondary level.
What you should know about past papers
Past papers are often a go-to resource for students who are looking for questions and answers. They’re also a helpful study tool if you’re taking the exam soon.
Where can I find BECE past questions and answers?
There are several ways one can have access to past BECE questions and answers. With the use of the Internet, there are several websites who boast of assisting students who wish to have access to bece past questions in order to prepare towards the exams.
1. PasscoGH
Passco.com.gh is a web and USSD Portal where students are able to download all PASSCO easily to prepare for exams. They also have popular mocks like best brains and mocks from SHS accross Ghana.
It is usually free to download. You can dial *790*700# to download or visit their website.
2. Question Bank Gh
Question Bank Gh is an online repository of learning resources for BECE and WASSCE candidates in order to better equip them for their final examination. The website contains past exam questions, possible answers and examiners’ review.
The materials in the system were obtained directly from the West African Examinations Council (WAEC) and are therefore authentic in every way. They remain the property of the Council and were compiled with the express consent of the Council.
Questionbankgh is user-friendly and can be accessed through the steps below;
Wordpub BECE download boast of uploading free bece past question pdf for their visitors. All you need to do is to visit their website and glance through for what you wish to download. In no time, you will have a full pdf of past questions and answers at your glance.
For more information and queries, call 0248506613.
There are sseveral apps on Google playstore that updates their system with BECE past questions. Others for free and others too for a fee. Syllabus GH and BECE Passco is an example of such apps.
5. Book shops, tutors and peers
The internet should not be your only source of search for past questions. The old search method of seeking can still be applied. There are several bookshops who has in their possission past questions for final year students and all. Visit any bookshop nearby and make a request. You can also ask from your peers and tutors and a positive results may possibly come out.
Conclusion
Every final year student would want past questions as their study guide. The search for some has now been made easier through the Internet. Load your wallet, pick your phone, and within a short possible time, you can have loads of them of your phone with any of the steps above.
Getting a verified PayPal account in Ghana is really easy with the appropriate steps. Though Ghana is not among the countries that has direct access to PayPal, a verified PayPal account can be created using the PayPal Business account option.
If you a freelancer in Ghana or across Africa, PayPal can be reliable platform to receive payment for your services. While there are various alternatives to PayPal available, it remains the preferred choice trusted by numerous online sources.
This tutorial will take you through the easy steps to successfully create a verified PayPal account in Ghana. It covers all the essential requirements and details needed for creation. Continue reading to quickly obtain your verified account.
Verified PayPal Account Requirements in Ghana
To create a verified PayPal account in Ghana there are three essential things you will need:
Active Email account: You will need an active email address that has not been used to register a PayPal account before.
Active Phone Number: The phone number you will use to create the PayPal account needs to be active. MTN and Telecel is best required as is reliable to receive OTP from PayPal.
Your Full Name: You must use your official name that is displayed on your National ID for added security.
Steps to create a Verified PayPal account in Ghana
You will need to read carefully to successfully create your free verified PayPal account. Follow the steps outlined below:
1. Visit the PayPal website using Google Chrome.
The first step is to visit the PayPal website with your web browser, preferably Chrome which is mostly secure. If you choose to use your mobile phone, you can set to desktop view for better user experience.
2. Select ‘Sign Up for Business Account’
After the web page loads click on ‘Sign up” on the top right and choose the PayPal Business account option as seen below.
image source: PayPal
Now select ‘Get Started‘ to begin your account creation.
3. Verify your PayPal Account
Fill in all necessary information, including your active email, your first and last name and your password to remember.
After you provide all necessary information, a pop-up will be shown to email you with a code. Click on it and enter the code sent to you on the web page to verify your PayPal account.
4. Enter Valid Personal and Business Details
When you are done with your code activation, you will be asked to provide your valid business information, including your name, business name, home address, and your tax ID number (the PIN on your Ghana Card is now your TIN).
Note: Provide valid information as fake or unrelated information can block your account information.
5. Confirm Your PayPal Account from your Email
After providing all necessary personal and business information you will receive an email from PayPal to confirm your account. Click on the link in the email and follow the instructions to fully activate your account.
6. Sign into your new PayPal Account
After confirming your email, sign into your PayPal account with your credentials used to create your account.
You can now access the PayPal dashboard with full access to all features including adding, sending and receiving payments.
Further to Explore
How to link your bank account to PayPal in Ghana
To link your bank account to your PayPal account in Ghana you will need a credit card from a bank that works well with PayPal. Some of these banks in Ghana include United Bank for Africa (UBA), Access Bank, and First Atlantic Bank.
Follow these steps to link your bank card to your PayPal account:
On your PayPal Dashboard click on ‘Pay & Get Paid‘
A drop-down menu will appear locate ‘wallet’ and click on ‘Banks & Cards‘
Scroll down and click on ‘Link a Card‘
Enter your credit card number and fill in all required details
Finally. click on ‘Link Card‘
Your card will link successfully to your PayPal account if is from one of the accepted banks. Additionally, make sure there is a minimum balance of $1 to $3 in your account or card as PayPal will verify its validity during the linking process.
How to fund your PayPal account in Ghana
Funding your PayPal account in Ghana can be done through various methods. Here’s a brief guide:
Transfer from friends: Talk with a friend who has a PayPal account, calculate the amount you want to transfer, send them the funds, and have them transfer it to your PayPal account.
Fund from Debit Card: Obtain a debit card from a bank that works well with PayPal, add it to your PayPal account, and use the card to load funds onto your PayPal account.
Buy from Online Exchanges: Research reputable online exchanges in Ghana, compare rates, verify their reputation, and proceed with caution when purchasing PayPal funds.
You’ll be able to successfully add funds to your PayPal account in Ghana, making it easier to carry out online transactions.
How to withdraw money from your PayPal in Ghana
On your PayPal dashboard click on the ‘Transfer Money‘ option.
In the next window, select ‘From‘ and choose your PayPal Balance.
Next, click on ‘To‘ and select your linked Credit Card.
Enter the amount you wish to withdraw.
Take a moment to review the transaction details provided on the following screen.
Finally, click on ‘Transfer‘ to instantly send the money to your linked card.
If your PayPal status reads (Complete), then your cash has been transferred to your card successfully. You can check your updated balance at any ATM.
Conclusion
By following this article, you can easily create a verified PayPal account in Ghana up and running. You will have access to great features with a verified account, like online shopping, receive payments, and easily withdraw funds.
Feel free to drop a comment about this article and we will reach out to you ASAP!
You forgot your MTN Mobile money PIN, now you are considering how you can get your PIN back before you block access to your money, or you have already messed up with failed attempts.
In either view, is very painful to forget your MTN mobile money PIN. But do not stress out, there is always another way, and with this guide, you can successfully regain access to your Mobile Money account again with simple steps. Let’s get started!
Call MTN Costumer Service
The first thing to do is to call 100 to reach out to an MTN customer service agent to help you reset your PIN. You will need required information to verify your PIN reset such as:
Your ID Card Number used for the SIM registration.
Your name your ID Card.
Your Date of Birth
Your last transaction and amount.
Your available Mobile money balance
Carefully give this information to the agent and do not give out any false information when asked as it may fail or block your access to restore your MTN mobile money PIN.
If you have trouble reaching out to an MTN customer service agent, then you will have to go through the next method.
Visit Nearest MTN Office
You can visit the nearest MTN office branch to talk to an agent in person to assist you to get your Momo PIN back.
Make sure you go along with your ID Card used for the SIM registration and keep in mind your last transaction and mobile money balance.
This solution is much quicker to resolve when you forget your MTN Mobile money PIN since is in person. If you don’t know any nearest MTN branch you can use the Maps app on your smartphone. Simply search ‘MTN Office’ to reveal the closest branch near you.
How Do I Reset My MTN Mobile Money PIN?
If you want to reset your MTN Momo Pin due to any circumstance dial *170# and follow these prompts:
Choose option 6 for “My Wallet.”
Next, choose option 6 for “Change & Reset PIN.”
Choose option 1 for “Change PIN.”
Now, Enter your Old Momo PIN.
Finally, Enter and Confirm your New Momo Pin.
You will receive an SMS on your phone that your pincode has been successfully changed. Is best to always store your new Momo pin in your head only and avoid writing it down somewhere as it may lead your account to exposal of fraud.
Conclusion
When you forget your Mobile money PIN the only best solution to get your PIN back is to call MTN costumer service or visit the nearest MTN Office branch to speak to an agent.
If you find it hard to remember your PIN, is best to reset it to a digit that is much easier to remember.
Share this article and be free to drop down your comments.
Not everyone wants to show their birthday in public, most of all on Facebook. Birthdays are special that’s why we celebrate with our close friends, not “Facebook Friends”, and well that’s not the case, your birthday showing publicly on Facebook could pose some security risks.
So, if you want to know how you can stop Facebook from announcing your birthday to friends, this step-by-step guide got you covered.
How To Stop Facebook from Announcing Your Birthday
If you are a mobile or desktop user, you can follow the below steps to prevent Facebook from announcing your birthday to your friends.
Mobile Users
On your Facebook homepage locate ‘Menu’ and tap on ‘Setting & Privacy.’
Tap on ‘Settings’ and scroll down to locate ‘Audience and visibility.’
Now tap on ‘Profile details’ from the list of options.
Scroll down and locate ‘Basic info.’
Finally, tap ‘Edit’ and change your date of birth to ‘Only me.’
Desktop Users
On your Facebook homepage, click on your ‘Account’ on the top right (your Account is displayed with your profile picture)
Click on ‘Settings and Privacy’ from the list of options.
Click on ‘Settings’ and scroll down to locate ‘Audience and visibility.’
Now click on ‘Profile details’ from the list of options.
Scroll down and locate ‘Basic info.’
Now a pop up will show, click on ‘Who can see your birthday on Facebook.’
Finally, click on ‘Change visibility on Facebook’ and choose ‘Only me.’
Is it risky to show Birthday on Facebook?
It is generally considered risky to display your birthday on Facebook, though it might set as a reminder to some friends, it may pose some potential privacy and security concerns.
Here are a few reasons why:
Targeted Advertising: Facebook collects user data, including birthdates, to personalize advertisements. By revealing your birthday, you may receive targeted ads.
Identity Theft: Your birthdate is a key piece of personal information that can be used by identity thieves to gain access to your accounts or commit fraud. Cybercriminals can use this information in combination with other details to impersonate you or gain unauthorized access to your accounts.
Job-Related issues: Employers may inspect your online presence, and certain information like your birthday could impact your current or future employment.
Summing Up
This guide is proven effective, and by following you can stop Facebook from announcing your birthday to friends. Share this article after reading and always remember to recheck for any future updates.
Honestly speaking, GBWhatsApp is fun to use if you asked me. With its cool features like editing and downloading your own themes, changing font styles, and even seeing deleted messages (diabolical right?). Well, all these features are available on GBWhatsApp because is a third-party app, and we all know Apple doesn’t play with their security.
For Android users, GB WhatsApp can be downloaded in a form of APK with no hassle, but why can’t we do same as iPhone users? Is GBWhatsApp even safe to use? Keep on reading to find out!
Why You Can’t Use GBWhatsApp on your iPhone
GBWhatsApp is a modified version of WhatsApp, but it falls under third-party apps. Unfortunately, you cannot use GBWhatsApp on your iPhone because Apple does not permit the installation of third-party apps.
The official WhatsApp version is the only one available for download on the App Store.
In addition, most third-party apps are primarily designed for Android devices that’s why most modified apps are only available for download for Android users.
Is there any GBWhatsApp version for iPhone?
As of my knowledge in April 2024, there’s no version of GBWhatsApp for iPhone users on AppStore or the Web. The only solution to this is to switch to Android if you can, and there you can enjoy GBWhatsApp and its amazing features it offers.
Is GBWhatsApp even safe to use?
If you are more concerned about security and privacy issues, then I wouldn’t recommend using GBWhatsApp. In addition, modified versions of official apps always aren’t safe to use making GBWhatsApp no different. Using GBWhatsApp is only at your own risk.
Conclusion
So if you are wondering why you can’t use GBWhatsApp on iPhones, then this article answers your question. GBWhatsApp is fun to use along with its cool features, but security is the key when it comes to Apple.
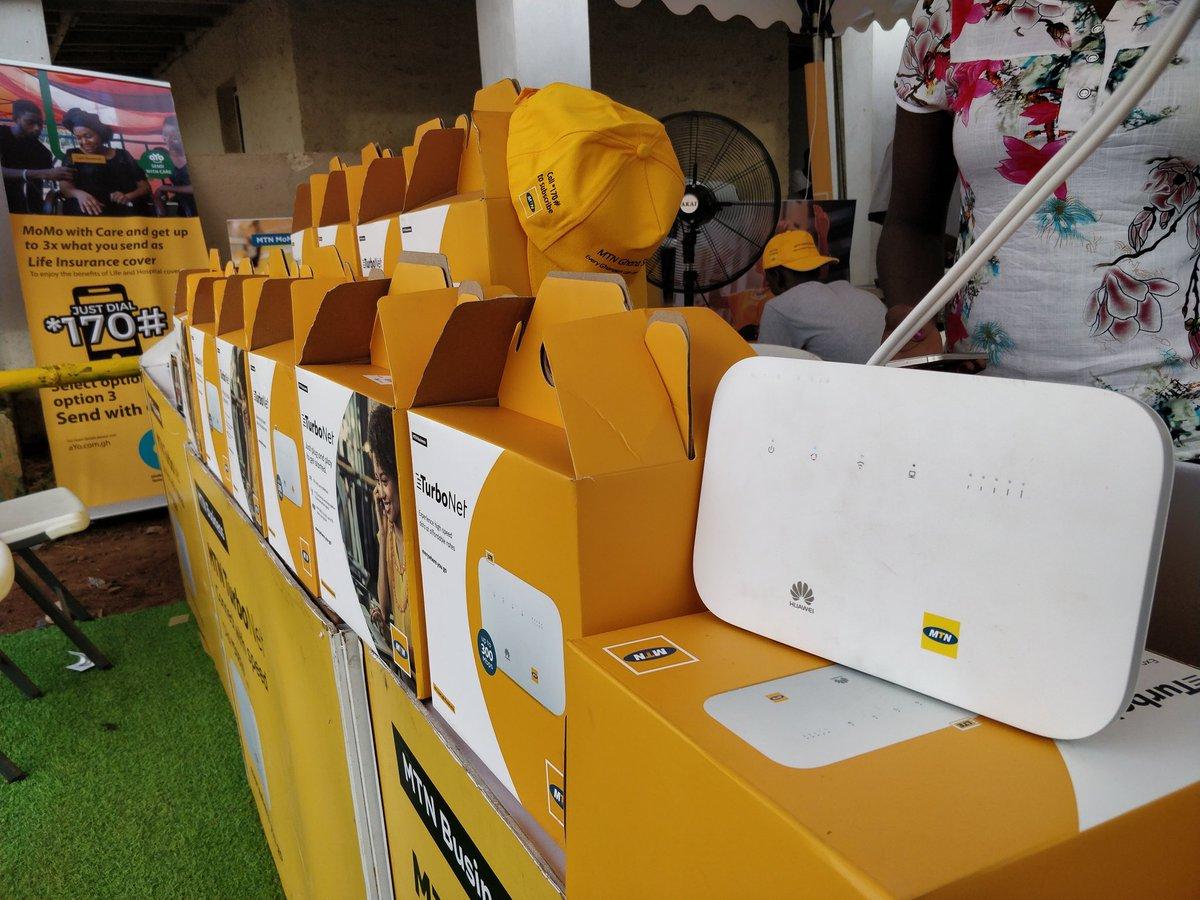
Follow this guide to unlock the full lightning-fast internet experience with MTN Turbonet from where you can buy it to exploring all the internet packages it offers.
Why You Should Get MTN Turbonet
MTN Turbonet offers unlimited benefits. MTN Turbonet will give you fast internet connection that will make your daily online activity more reliable. Aside that, these are among the numerous benefits you will get from using MTN Turbonet:
Free 5GB data when you register and activate your MTN Turbonet.
Free 5GB bonus data for the next 5 months upon recharge.
Unbeatable data plans with the option to rollover for 30 days.
Voice-enabled software to make your calls more convenient.
Exceptional internet experience for browsing, streaming, and communication.
MTN Turbonet Price & Where to Buy
The super-fast MTN Turbonet
MTN Turbonet comes with at a one-time cost of GHS 500. You can purchase MTN Turbonet at any MTN Service Centre or you can decide to buy from online retailers.
Just visit the nearest MTN Service Center and get your hands yours or buy from online retail shops like Hubtel’s online shop, Jumia and Jiji. Online retail shops always offer discounts for their stores so be sure to check it out.
Note: Remember to register your SIM card for your Turbonet to make it more compatible and work properly.
How To Set Up Your MTN Turbonet
Now you have hands on your MTN Turbnet, is time to set it up. Setting it up is straight forward and does not require any technical knowledge.
Just follow these steps to get your MTN Turbonet up and running:
Insert your registered MTN 4G SIM card into the MTN Turbonet.
Position the Turbonet router in a central location of your home or office for optimal Wi-Fi coverage.
Plug the Turbonet into a power source with the provided adapter.
The router will power on and search for a network signal.
Once the network signal is established, connect your devices to the Turbonet Wi-Fi network for fast and reliable internet connectivity.
MTN Turbonet Bundles & Plans
To access MTN Turbonet packages, simply dial *5057# on your linked MTN number, choose your preferred package, and finally make payment. With MTN Turbonet bundles, you get key features such as:
Affordable prices
High data volumes
No expiry Data
Rollover option
Below is the latest prices and bundle packages available for MTN Turbonet.
Data Volume
Price
4.30GB
GHS 43.75
8.69GB
GHS 87.50
91.81GB
GHS 253.75
350.54GB
GHS 516.25
How to Check Your MTN Turbnet Balance
If you want to keep track of your bundle usage, simply dial *5057# on your linked MTN number. This also allows you to know if you have enough bundle package for your internet needs.
Simply follow the steps below to check your balance:
Dial *5057# on your linked MTN number.
Select option 3 for ‘Check balance‘.
Choose your account from the list of options displayed.
You will receive a prompt showing the details of your bundle, including the bonus bundle and airtime on your MTN Turbonet.
MTN Turbonet Specs
MTN Turbonet is a high-speed 4G internet router which comes with the following specifications:
Product Type: Huawei WiFi Router with Ethernet port
Category: LTE Cat.6
Chipset: HiSilicon LTE Cat6 Chip
Data rates: DL 300Mbps/UL 50Mbps
WLAN: 802.11 b/g/n/ac, single-band 2.4GHz
Max supported users: 32 users
MIMO: 4 x 4 MIMO
Connector for external antenna: Two, SMA-female jacks
These specifications highlight the advanced features offered by MTN Turbonet.
Conclusion
Get hands on your MTN Turbonet today! Not only will it provide you with lightning-fast internet experience but also you will save some extra cash on internet bundles and plans. This article has always been updated from time so kindly recheck and share to your folks to enjoy the best internet experience too.
Are you confused about zip and postal codes? Or you want to know that zip code you must use to create that PayPal account, or even fill online forms. No need to worry. Here at Mfidie, we receive valuable feedback. Thanks to you, we have provided everything you need to know about Ghana zip and postal codes.
Learn how you can use the GhanaPostGPS App to determine the correct code for all locations in Ghana and much more.
Understanding Ghana Postal & Zip Codes
Zip codes are codes used by postal services to identify the destination of mail. ‘ZIP’ stands for Zone Improvement Plan and can consist of five or nine digits, or a combination of numbers and letters.
Postal codes are codes designated for sending letters, posts, and deliveries to different locations. It’s worth noting that Zip Codes and Postal Codes are assigned by the government mailing service of each country.
What’s the difference? To know the difference between zip codes and postal codes, then you must understand their usage and origin:
Zip codes are primarily used in the United States. They consist of numbers (and sometimes letters) and help postal services identify the destination of mail.
Postal codes, on the other hand, are used worldwide for sending letters, posts, and deliveries to various locations.
In Ghana, the postal code is issued by Ghana Post, the government mailing service.
Does Ghana Use Zip or Postal Codes? Answered
Ghana uses postal codes, not zip codes. Zip codes are designed for subdivisions within a country or larger area. Therefore, it doesn’t make sense to talk about a single ‘Ghana Zip Code’ that applies to the entire country.
Postal codes were introduced in Ghana on 18 October 2017, as part of the launch of the National Digital Address System.
To know the postal code for any location in Ghana, then using the GhanaPostGPS App is the best solution. We will cover everything you must know to use the GhanaPostGPS App in the next topic.
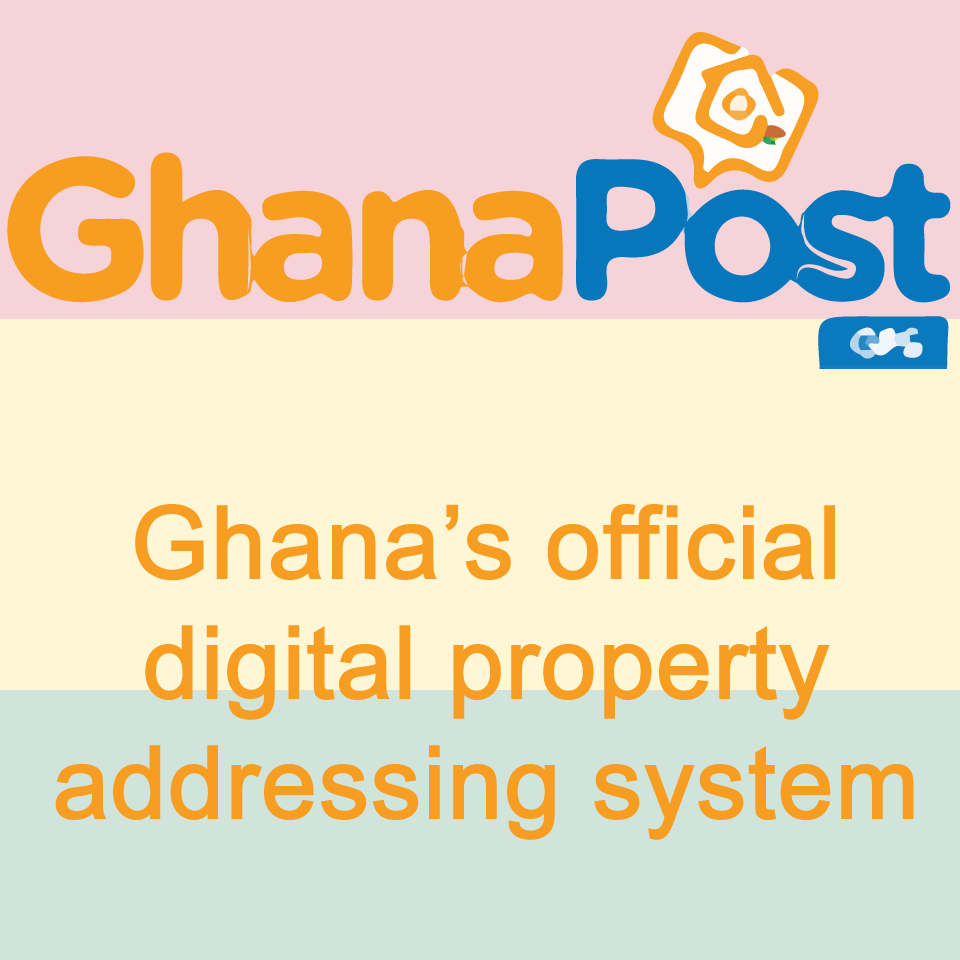
The GhanaPostGPS App
The GhanaPostGPS App is Ghana’s official digital property addressing system. It assigns a unique digital address to every location in Ghana, ensuring all places are accurately addressed. The app translates GPS locations into user-friendly digital addresses, integrating with Google Maps for easy navigation.
GhanaPostGPS App is essential for creating bank accounts, accessing loans for small businesses, and simplifying door-to-door delivery services.
If you have the app downloaded already, follow the below steps to successfully find your postal code.
Launch the GhanaPostGPS app and set your preferred language to English.
Verify your phone number, which will be used for the app.
After verification, provide your information, including your full name, gender, and date of birth.
Allow the app to access your location when prompted.
The app will then display your digital address and show your location on the map.
To find your postal code, tap on ‘GPS,’ and your postal code will be shown.
The GhanaPostGPS app will provide your postal code along with important information such as your street address, area, region, district and universal address.
Zip and Postal Codes for Ghana: Download
You can download this PDF to view the zip and postal codes for various areas in Ghana.
Tips to Fill Online Address Information
Provide accurate address information for reliable package delivery.
Include your phone number in case there are any issues with shipping your order.
Provide your active email address for confirmation and tracking information purposes.
Include the Ghana Postal Code from the GhanaPostGPS App.
Add your area name and a notable landmark if unsure about the house number.
Use the addresses provided by the GhanaPostGPS App, which offers a 5 x 5 addressing system for all locations in Ghana.
Summary
Now you know what it takes to know your zip and postal code in Ghana. Simply download the GhanaPostGPS App, provide all necessary details and instantly get the answers you want. It’s an easy process, so feel free to share this helpful tool with others and leave any comments or feedback below.
You’re enjoying a YouTube video that’s getting a lot of attention, with a lively comment section and millions of likes. Have you ever wondered when it was uploaded? Could the timing affect its popularity or why it keeps showing up on your feed?
This article will explore these topics and provide you with the simple tools to view the exact time a YouTube video was uploaded.
Importance of Knowing YouTube Upload Time
To start using the YouTube upload time tools, why should you know the exact time a YouTube Video was uploaded? Well, there are real benefits of knowing the upload time of a YouTube video, especially if you are a creator and below are four key reasons why:
Content authenticity: If you have news channel on YouTube, the upload time plays an important role as it will represent how authentic your video or upload is and this is particularly valuable for journalists, fact-checkers, and researchers who rely on timely information.
Engagement Tracking: You benefit from the upload time by analyzing the video’s performance and engagement. You can do this by tracking the exact upload time and comparing it with views, likes, and other metrics, this helps you gain insights into audience behavior.
Copyright Protection: Creators can identify unauthorized copies of their content by knowing the precise upload time. This information enables them to handle copyright issues effectively.
Trend Analysis: This is a fact for trending videos as the upload time will help you as a creator stay ahead of the curve. The upload time will help you understand what contents resonates with your audiences and you can adapt your strategies accordingly.
How to See the Exact Time a YouTube Video
So how do you find the exact upload time of a specific video? Follow the methods below with each provided with a step-by-step guide:
Method 1: Using YouTube Data Viewer
You can find out when a YouTube video was uploaded by using a tool called YouTube Data Viewer. It also provides other useful information. Follow these steps:
1. Locate the video on YouTube and copy its URL.
2. Visit the YouTube Data Viewer site using any web browser.
3. Enter the video’s URL into the site’s search field.
4. Press the “Enter” button to get the video’s details.
You’ll receive precise details such as the upload date and time, along with other information like the number of views, likes, comments, and the video’s monetization status. Remember to adjust the upload time to your local time zone to determine the exact time of upload relative to where you are.
Method 2: Using an Extension
If you find it a hassle to leave your YouTube page or just don’t want to use a third-party website, there’s a Chrome extension that shows the upload time of videos. Just download the YouTube upload time extension from Google. Follow these steps:
Search for ‘YouTube Upload Time’ and navigate to Chrome store.
Click on ‘Add to Chrome’ and give it a small time to download.
On your YouTube page, click ‘Extensions’ on the top right corner and find the ‘YouTube upload time’ extension.
Click on the icon and your preferred YouTube upload time will be displayed on the top right.
Just pin the extension to your browser’s toolbar, and you can click on it to see the video’s upload time while you watch.
Why YouTube Don’t Share Videos Upload Time
One of the primary why YouTube don’t share the exact upload of a video is to prevent data misuse. For example, individuals might re-upload a trending video to give the illusion that it’s recent, which can detract from the original creator’s authenticity.
What is the best time to upload a YouTube Video?
Most estimates suggest the best time to upload a video is 3 – 4pm in the afternoon however a YouTube video really depends on the specific time zone and viewing habits of your intended audience.
Conclusion
Getting to know the upload time of a specific video can be beneficial however such information is not made public as people can misuse such feature. Following mfidie.com tips will allow you to view any YouTube upload time, which can assist in perfecting the timing of your content.
Starting a blog in Ghana can be a frightening thought, especially when you are not too much of a tech person. In fact, for many people I have met over the last few years, starting a blog was as easy as saying, “Just go to WordPress.com and follow the instructions.”
This well-prepared guide will help you to start and maintain a good blog, even if you have no technical or technological idea whatsoever in blogging. It is written out of over five years in online campaigns and blogging.
The process of starting a blog, although straightforward, can be very complicated and lead to a lot of problems if you do not do it right.
When I started my first blog sometime back, I wish I had someone to tell me to do this or to do that or to explain what permalink meant or what “self-hosted” meant.
Too bad I had to rely on Google every step of the way until I made all the mistakes a beginner would make.
Well, you do not have to make the same mistakes if you are starting a blog.
This article will take you through creating and maintaining a good blog, making your readers happy and satisfying your need to write or inform people.
If you would want help starting your blog, I offer a free WordPress blog setup. But first, read everything on this page to understand what you are getting yourself into.
Got any questions about starting a blog? Leave them in the comment below, and I will reply to every last one of them. All the best.
Is blogging for you?
Before we even start talking about starting a blog, you need to be sure if it is the right thing for you, especially blogging, to make money.
Blogging in itself is a means to let people know what goes on in your mind.
It’s an opportunity to showcase yourself, and your work makes people from far and near read and experience it.
People are at the center of blogging. Therefore if all you want to achieve from blogging is money and you can not relate with people very much, you might have to look away from blogging.
Every blogger should have some characteristics to increase their chances of success.
Here are some abilities you need to possess as a blogger:
A good amount of discipline
If you are looking to blog for a living or as a primary source of income, you should be very disciplined about it.
Discipline comes in the form of being consistent about writing and making sure you put your content first.
A disciplined blogger always sets blogging goals and pushes himself to achieve them promptly.
The most important of these goals is mostly writing engaging content regularly.
Ability to write decently
I don’t mean the ability to write prize-winning literature articles. But the critical thing in blogging is to write (and avoid plagiarism).
You don’t have to write as well as Ama Ata Aidoo, but you should be able to express yourself in your chosen language of blogging.
A good understanding of tenses, grammar and sentence structures is enough to get you started and take you on top.
Just like other things, the more you blog, the better your writing. But first, you need to start from a good point.
A social person
Wait! I don’t mean you need to be the most extroverted person on the planet. However, as a blogger, you should be open to connecting with people and speaking with them.
If it’s challenging to get along with people, you might have a hard time blogging. However, this is a skill you can learn by attending more events and putting yourself out.
Be open to criticism
You have to keep in mind that people are going to judge every content you put out there. Some may encourage you, and some may even hate you.
But in all this, you need to be willing to accept all the criticism that comes your way, whether constructive or not.
But there is another set of “criticism” – trolls. In my early days of blogging, Ameyaw Debrah told me: “… I just ignore them; all of these trolls, you just have to ignore them. Use your time wisely and don’t try to fight them all”. And that’s precisely what you have to do with trolls.
Be a helper
You want to blog to make money, right? That means you should have something to sell. In this case, it is your content.
Whatever you write has to help people or lead them to where to find help. Your content can best be described as your product, and the people are your customers.
Give them the best product, and they will keep coming for more. Business 101, right?
Why Start a blog in Ghana?
There are a million reasons why you should start a blog. If you are a good writer and feel you would want to reach a broad audience, then blogging may just be it – after all, there are over 12 million Internet users in Ghana alone as of January 2020.
Apart from the desire to write, there are many other reasons why you should start a blog. Here are some of them:
Blogging is relatively easy
Yes, you read that part right. Blogging is effortless if you follow the proper steps. For most people, the most challenging part is setting up the blog in the first place.
If you follow this guide step by step, that should not be a problem at all. Don’t forget Plugnom offer a free WordPress blog setup.
Become a published author
If you would want to publish a book, the best way to start is by a blog.
Publishers would always want to work with authors who already have an online presence because it makes it easier for them to sell their books.
A blog also gives you the platform to market your books to your audience.
Blogging Improves your Life
Blogging can help make you a better person in several ways. More basically, blogging helps you to improve your writing and communication skills.
People who blog can express themselves much more than those who don’t.
Blogging can also help you build skills such as interpersonal relationships and good thinking abilities.
For blogs that encourage comments and interaction, the blogger learns to respect the views of others.
Self-promotion and New Opportunities
If you blog in your “official name,” then when you apply for a job or position and your name is googled, your blog will likely show up very much.
Apart from giving you that very much-needed online presence in today’s world, blogging can also help you tell the world what you can do and what your skills are.
If your blog gains a lot of recognition and respect, it will not be too surprising to have someone directly contact you with an offer or job opportunity.
You can make money out of blogging
Yes, you can make money out of blogging but don’t get it all twisted in your brain. You should read the part of this series that talks about making money from your blog.
After deciding on what to blog, you will have to jump into starting your blog.
There are five things you need to start a WordPress blog:
Dedication and time
A domain name idea (this will be the name of your blog i.e., mfidie.com)
A web hosting account (this is where your website lives on the internet)
Good Content
Content Marketing Strategy
How to start a blog in Ghana
Follow the steps below to start a blog in Ghana:
Decide on your blogging niche
Choose a good domain name
Choose a reliable hosting and blogging platform
Set up your blogging software (WordPress)
Start writing content for your blog
Market your blog’s content
Start making money from your blog
The steps are further explained below.
Decide on your blogging niche
It is not easy to decide on what you want to blog about. You would want to look at two things when deciding on what to blog at are your readers and your blogging subject or niche.
First, keep in mind that you are writing for your readers (unless you want to write for yourself only). You need to blog about a topic that will interest your readers and help you gain the kind of readership you want.
Most people will read a blog post if it helps them to solve a problem. Therefore, try to get your blog posts to solve problems, if that is possible.
Also, most readers will want to learn something new. It is no surprise that blogs that do a lot of “how-to” gain more readers. People are willing to learn, and you can help teach them.
Your readers are going to be an integral part of your blog, and you must satisfy them.
Your blog should not be boring for readers as most of them want to be entertained in one way or the other. You should also provide quality content for your readers so that they know you are serious.
The other thing you need to look at when deciding on what to blog is the subject your posts are going to be about. It is true that you can choose to blog about everything and anything at all, but getting a niche is very important if you want to grow and maintain your blog.
Choosing a niche is a bit tricky, but you should choose a niche that is broad. For example, I blog about “Technology in Ghana” and not “Mobile Apps in Ghana.” Choosing a broad niche will help you to get content for your blog.
When you start blogging, you would realize the need to have fresh ideas and to corner yourself to a particular niche like “Life of Ladies in Teshie” would limit the number of posts you can churn out regularly. Another example of a wrong niche is “Christian Events in Accra”.
You could make this a bit broad by saying “Events in Accra” or “Christian Events in Ghana”.
Also, check out other people in the niche that you want to enter. If people are blogging about a subject and they are getting enough content, there is a good chance you would be getting the right amount of content too.
Here are some niches you could consider if you are looking to start a blog with a Ghanaian-focused audience:
How to make money
Health and fitness
Tech news and review
Job search tips
Education blog
Prayer points and Spirituality
Beauty and fashion
Lifestyle
Satire
Sexual education and tips
Sports betting tips
Personal Development
Choose a good domain name
Choosing a domain name is very critical for the success or failure of your blog. Your domain name is how most people are going to know your blog by.
Before starting Mfidie.com, I spent close to 3 days deciding on what to use for a domain name.
Most of the domains I wanted to use were already taken.
When choosing a domain name, you need to be intelligent and careful. You should choose a name that is “generic” enough, yet captures in entirety, or to a full extent, your blogging niche. Here, I would like to state that avoid names that end with “gh”; they are not intelligent.
My friends at 247filla.com and afrowired.com have testified why adding “gh” to your domain name is a bad thing.
For example, I could have chosen “techideasgh.com.” It was available all right, but it wasn’t smart. I chose Mfidie.com because it was original and authentic. “Media” in the Akan language means gadgets, and gadgets are a huge part of the technology bit.
A domain name should be something people will be familiar with. For example, you cannot register modernsecurity.com and say it is for a blog about shoes.
It won’t work.
For a fashion blog, you could go for a meaningful name like classywardrobe.com.
You can always check which domain names are available and which ones are not on whois.net.
If you want to purchase a domain name for a cheap price, check out namecheap.com
Choose a reliable hosting and blogging platform
Web hosting confuses a lot of people. Buying a domain is not all you need to get your website up and running.
To simplify this, let’s just say a domain name, is like the address of your home; web hosting, on the other hand, is the space of your house where you place your furniture and other stuff. Without web hosting, your domain will just be a name without a body.
Web hosting is where your blog’s files are kept, which is always more expensive than the domain. It is essential that you pick the right hosting that can meet the traffic needs of your website.
When I started blogging, I used to entertain shared hosting a lot. Over time, I realised they could not be trusted to a large extent when my traffic increases and were much more expensive.
Nowadays, I am more inclined towards cloud hosting, which you could get from $5 a month.
When it comes to blogging platforms, the lists are endless. I would be biased and tell you straight forward to go for WordPress.
The other options like blogger, drupal, ghost, etc can accomplish a decent blog, but if you want to make it big, then WordPress is the best platform for you.
WordPress is free, has excellent support and allows multiple users. It gives you great control over your blog’s future and allows you to grow your blog however you want it while enabling you to add functionalities like forums, online store, and paid membership.
It is also the most accessible blogging platform to set up as you will find below.
Set up your blogging software (WordPress)
Depending on the hosting that you choose, there are straightforward ways to set up your WordPress software.
Most shared hosting panels will let you enter an admin username, password and email. Make sure you use a unique username and set a strong password.
Next, you will be able to login to your WordPress. At this stage, you can use a free theme to style the site and experiment colours and upload your logo.
You can also set up your categories and tags for WordPress and do basic SEO.
You can opt for a professional WordPress website builder, like Elementor. Enabling you to build a WordPress website without having to code, Elementor offers a variety of templates designed specifically for blogs.
Here is a list of free WordPress plugins you must add to your site for much needed added functionality and features:
Yoast SEO or RankMath
Akismet Anti-Spam
Jetpack
Wordfence Security
UpDraftplus
WP Super Cache
Once your WordPress blog is set up, you can move to plan and writing your content.
If you find it overwhelming to configure the blog by yourself and have it running, you can take advantage of our free WordPress blog setup.
Start writing content for your blog
Once your blog is set up, the next thing you have to do is to write content. This is probably the most challenging part of blogging, and without discipline and passion, you might fall off at this stage or resort to plagiarism (which is worse).
There are various ways to start writing content for your new blog. Let’s go through them.
Know your audience/readers
Depending on your niche, you need to know about the people who are to read your blog. For example, if you are writing an educational blog, there are two different audiences you should write for.
These are parents searching for schools for their kids and the kids searching for the schools themselves.
Knowing who your readers are, it is far easier to come up with great topics that will interest them. Your tone and choice of words also vary depending on who you are writing for.
Take, for instance, Mfidie.com.
This is a tech blog focused on everyday people (who may most likely not be tech-inclined). Since I know my readers may not have the best tech knowledge, I avoid unnecessary jargon in my writeups and go straight to the point in plain relatable English language.
By knowing your audience, you can adjust your topics and writing to fit their interest and earn their love.
Write great topics down
Getting blog post ideas and topics has been one of my major headaches. Sometimes, you feel so worn out that you can’t write because you have no topics to write on.
But that does not have to happen with you.
The first thing to do is look at what other players in your chosen niche are writing about. This could give you the first set of topics you can focus on and write about.
However, remember you need to be original and provide your readers with something they probably have not heard about.
What better way than to ask your readers what they want you to write about? This can be done in the form of questions at the end of some articles.
You could also head to google and type a question related to your niche. All those other suggested questions (usually at the bottom) are topic ideas you can put down and write on.
Get a clean Google Doc or notepad and write all of these topics and ideas when they come to you. Trust me, you may forget some very nice topics if you don’t make writing them down a thing.
Organise your content – make it readable
The whole purpose of blogging is to get views and reads. No one wants to spend time creating a blog and have no views.
Sometimes, the lack of views is so disheartening that it kills the vim that people start their blogging journey with.
The first thing I would say about making your content readable is to sound very natural when writing. Write as if the person you were writing for was standing in front of you. That way, the reader does not feel tired midway.
Also, make sure you keep paragraphs as short as possible. Ideally, for your blog post, no paragraph should have more than three sentences.
One of the most important aspects of organizing your content includes as many visuals (pictures, videos, infographics) as possible. And don’t forget to organise categories and tags too.
Organising your content will make your readers stay longer on your page, and you will have a higher chance of converting your users.
Be consistent
It is imperative to be consistent in your blogging. If you write one article a day, try to maintain that standard. It is better to post once a day every day for one week than to post seven articles in one day.
Consistency signals to your readers and search engines that your blog is active, well updated and continuously has fresh content.
In order words, once you start your blog, keep going.
Market your blog’s content
The next thing after writing content is to get it to the eyes of readers.
If you followed this article carefully, all we have been doing is making sure that the content we put up is meaningful. That way, it is easier to market it.
For instance, if you chose topics that are beneficial for your niche audience and your article provides a certain degree of help, they will be more than willing to click and read more.
Marketing your content means pushing your articles so people can read, find them helpful and reshare.
The most important of this cycle is resharing, because, well, referrals are powerful! People believe and trust information that has been shared by someone they know.
Let’s look at the various ways you can market your blog posts.
Social Media
This is an obvious one. Treat your blog like a person. Set up social media accounts for the blog and invite your family and friends to like and follow the pages.
Every blog should have a presence on at least 3 of the following social media channels:
Facebook
Twitter
Instagram
Pinterest
Telegram
Anytime you publish a new post, make sure you share it on the social media pages. A plugin like Jetpack for WordPress can automate this for you.
Also, make sure you invite your blog readers to follow you on social media so you can still reach them when they are on their favourite social media channels.
With social media, you can make sure your readers won’t forget about you.
WhatsApp
WhatsApp has a different space since it is so popular and not considered traditional social media.
With WhatsApp, you can take advantage of groups, broadcast lists and status to reach more individuals.
Make sure you are not spamming them with unnecessary information, and that’s why you have to join those in line with your niche with the groups.
A post a day for your various WhatsApp groups is enough. Sending more will only reduce the attention that future posts will be receiving.
Family and Friends
In my experience, the support from family and friends when you start blogging is priceless.
You can get a few family and friends also to do all of the sharing you do on WhatsApp and social media to complement your efforts.
Just ask them politely and maybe guide them on how to share and they most probably will do for you.
Don’t forget to appreciate their deeds by saying thank you every time you can,
Start making money
Once you have passed the blog writing phase and have achieved a certain level of the audience, you are not opened to monetising your blog.
A lot of people have asked how to make money blogging in Ghana. The truth is, there are a lot of ways you can make money with your blog, and the options available depend on your niche and the work you are willing to put into it.
Let’s look at some of the ways you can make money with your blog in Ghana.
Providing a service
This is one of the easiest ways to make money from your blog.
For instance, if you write about personal development, you can encourage your readers to book you to talk at their school, church, or personal development themed event.
Tech bloggers who talk about web development can offer to build websites for their readers at a fee.
By providing a service through your blog, you are more likely to be hired because already, there is a connection between you and the reader via the article that brought them to you.
Adsense
Google Adsense helps publishers make money by showing ads on their website. You can apply for Google Adsense, and once you are approved, you can start showing ads on your website.
Google Adsense might sound simple, but it involves a lot of work.
Research has shown that websites that get a fair amount of search traffic are more likely to accept Google’s Adsense programme.
With Adsense, the more traffic you get, the more money you will make. However, do not expect to make a lot from Adsense in Ghana if you do not have more than 5000 pageviews a day due to the low CPC.
Ghanaian advertisers don’t bid high amounts, so the cost of clicking ads is not high.
However, Adsense is an assured revenue stream with traffic and you should highly consider it.
Direct Placements
This is one of my favourite ways of making money.
Direct ad placements just mean companies and small businesses are contacting you to advertise their business on their website.
This works very well for niched blogging. A health blog might receive offers from a dental clinic to put their hospital on the blog for more visibility.
When it comes to direct ad placements, you charge the business or individual that contacts you based on your charges.
Mostly, you take part payment before starting to show the ad.
Top 10 Bloggers in Ghana
According to Avance Media, here are the top 10 bloggers in Ghana as at 2021:
Rashad Kojo Emmanuel – ghpage.com
Chris Handler – ghbase.com
Felix Adomako Mensah – zionfelix.net
Dennis Dwomoh – thedistin.com
Shepherd Yaw Morttey – mfidie.com
Shadrach J. Annang – eventlabgh.com
Ameyaw Debrah – ameyawdebrah.com
Jonathan Appiah-Adu – nanansem.com
Cobby Collins – bestshowbiz.com
Isaac Yawson-Brown – browngh.com
Bonus: Free WordPress blog set up for all Ghanaians by Mfidie.com and Plugnom.com
As part of the activities involved in celebrating our 3rd Anniversary at Mfidie.com, we have collaborated with the bespoke hosting provider, Plugnom, to offer free domain and blog setup once you buy hosting.
You can buy your hosting by checking out the Plugnom Blogger Pack.
https://plugnom.com/blogger-pack/
We believe everyone deserves to let the world see their works and maybe make some money along the way.
What does our free WordPress blog setup offer contain?
Check out the table below:
WordPress Installation
We guide you to install the latest version of WordPress on your server. We make sure the installation meets all the right standards to avoid the most common WordPress Installation problems.
Theme and Design
We help you choose from the wide range of available themes and designs to style your blog. This would give you the freedom to let your blog
Blog Structure
We help you choose a clean blog structure so that readers can easily find their way around your blog.
Search Engine Optimisation
We make your blog friendly to search crawlers so search engines like Google Can easily crawl your website.
Caching
We install plugins that help to make your blog load faster.
Security
We install security plugins to bring the risk that your blog will be hacked to a minimum.
Why do we provide all this for free?
We believe blogging should not be complicated and difficult. Everyone should have a voice online, the way they want it.
Get a good hosting and domain and we will help you set up your blog for free. Yes, Free! Interested? Send an email to [email protected] or Call/WhatsApp Alfred on +233200809182