If you’re familiar with computers, you may be used to using the right-click on your mouse to do various things with websites, such as looking up a word or checking the URL address.
Most people don’t know that the iPhone has something similar, and you can use it in some of the same ways as you would on your computer.
This blog post will cover how to right click on an iPhone, and what some of its uses are in order to get more from your device.
What is a Right Click?
On a computer, a right click is the action of pressing the right mouse button.
This brings up a menu of options that can be performed. On an iPhone, a right click is performed by holding down the home button and then tapping the screen with three fingers.
This brings up a menu of options that can be performed. The options will vary depending on what app you are using and where you are in the app.
Why do I need it?
There are many reasons why you might need to right click on your iPhone. Maybe you want to save an image from the web or move a file from one app to another. Whatever the reason, knowing how to do it can come in handy.
How to right click on an iphone
To right click on an iPhone, you need to tap and hold on the screen. This will bring up a menu of options. You can then tap on the option you want. One great use for this is when viewing pictures in your phone.
If you’re in your photos folder and want to copy an image from one album to another, for example if you wanted to copy it from your phone camera album into your favorites album, all you have to do is go to the picture that you want, tap and hold it until a pop-up appears with three tabs at the top: ‘Open,’ ‘Copy,’ and ‘Cancel.’
Tap on ‘Copy’ then go to your other album where you want it copied. There will be two tabs at the top of this album: Add and Paste. Tap on Paste and now that photo has been copied over.
Uses of a Right Click on my iPhone
A right click on my iPhone can be used for a number of things. I can use it to access the app switcher, force quit apps, take screenshots, activate Siri, and more. Each of these functions can be useful in different situations.
What kind of devices can I use it on?
You can use it on any device that has a built-in Apple Pay feature, which includes;
iPhone 6s or later
iPad Pro
iPad (5th generation or later)
iPad Air 2 or later
iPad mini 3 or later.
You can also use it on some Android devices that have NFC support. Right clicking gives you additional options beyond what is available with a simple tap. For example, you can access contextual menus, edit text, copy and paste, and more.
How to use 3D touch feature on your iPhone to right click
You can use the 3D Touch feature on your iPhone to right-click. This is helpful because it gives you access to more options and features. For example, you can access the Edit menu in apps like Photos and Mail. Plus, you can use 3D Touch to quickly preview links and files. Finally, 3D Touch can be used as a virtual trackpad to move the cursor around on your screen.
Pioneer has built an impressive collection of A/V receivers over the years, but at some point, they’re bound to stop working due to an internal malfunction or user error.
This can be a frustrating experience if you don’t know how to reset the receiver and get it working again properly. Fortunately, there are ways you can restore your A/V receiver to its original settings so you can get back to enjoying your favorite programs and movies with ease.
What is a pioneer media receiver
Pioneer media receivers are devices that allow you to connect your TV to other devices in your home, such as a DVD player or gaming console. They can also be used to connect your TV to the Internet.
If you’re having trouble with your Pioneer media receiver, you may need to reset it. Here’s how:
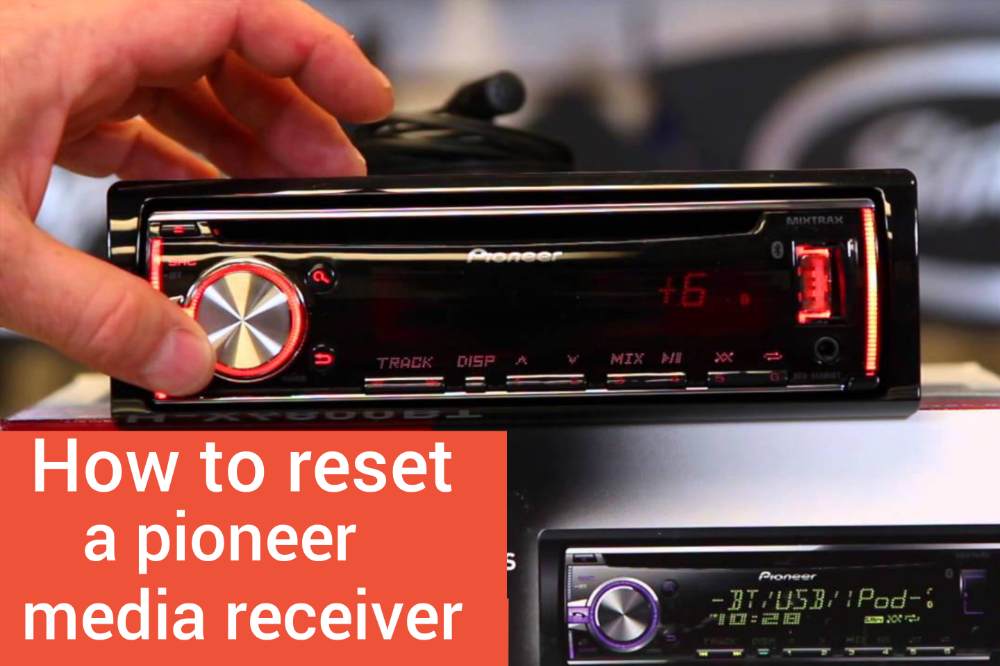
How to reset a pioneer media receiver
Locate the reset button on the receiver.
Press and hold the reset button for about five seconds.
The receiver will reboot itself and should be working properly again.
If the receiver still isn’t working, try unplugging it for a few minutes and then plugging it back in.
How to prevent your Pioneer receiver from breaking
One way to prevent your Pioneer receiver from breaking is by resetting it regularly. This will help keep the software updated and can clear any minor glitches that may have developed. To reset your Pioneer receiver, simply follow these steps above.
What can cause Pioneer receiver to stop working
There are a few things that can cause your Pioneer receiver to stop working. If you have recently updated your software, this could be the cause. Sometimes updates can cause compatibility issues. Another thing that could be causing your receiver to stop working is a loose connection.
Check all the connections to make sure they are secure. A power surge can also damage your receiver. If you live in an area with frequent power outages, consider investing in a surge protector.
How do I troubleshoot my Pioneer receiver?
If your Pioneer receiver is not working properly, there are a few things you can do to troubleshoot the issue.
First, check all of the connections to make sure they are secure.
Next, power cycle the receiver by unplugging it for 30 seconds and then plugging it back in.
If the receiver still isn’t working, try resetting it by pressing and holding the power button for 10 seconds.
If none of these solutions work, you may need to contact Pioneer customer support for further assistance.
Some common problems with Pioneer receivers
Pioneer receivers are a type of home theater receiver that are known for their high quality audio. However, they can occasionally have problems, such as:
sound dropouts
distorted audio
problems with connecting to devices.
If you’re experiencing any of these issues, you may need to reset your Pioneer receiver.
Conclusion
Pioneer media receivers are great for any home theater setup. They offer excellent sound quality and a wide variety of input and output options. If you’re having trouble with your receiver, or just want to start fresh, resetting it is a good solution.
Did you know you can use your keyboard to make an awesome kirby character? You don’t need any special hardware to do this and it doesn’t cost anything.
All you need is your keyboard and 2 minutes of your time to make this awesome Kirby character on your screen. Follow the steps below to learn how to make Kirby on your screen.
About Kirby character
Kirby is a lovable little pink puffball who has been the star of many Nintendo games over the years. If you’re a fan of Kirby, you can use your keyboard to create your own Kirby character.
What you need to make a Kirby character
In order to make a Kirby character with your keyboard, you will need:
A computer with internet access
A keyboard.
An email account.
You will also need access to a printer.
Once you have all of these things, you will be ready to begin.
Step 1: Create The Bottom Half
Start by creating the bottom half of the Kirby character. To do this, use the O key for the head, the N key for the left arm, and the M key for the right arm. For each one of these, type in all lowercase letters except O which should be typed in uppercase letters (except when typing on a mobile device).
Step 2: Draw the face and top half
Now that you have the basic shape of Kirby, it’s time to start drawing his face and adding some details. Start by drawing two small circles for his eyes, then add a large oval for his mouth.
Draw a horizontal line across the oval for his teeth, and don’t forget to give him a big red tongue! For the top half of his body, start by drawing two small rectangles for his arms, then add a large oval for his belly.
Step 3: Add color and details
Now that you have the basic shape of Kirby, it’s time to add some color and details. Use the paint bucket tool to fill in Kirby’s body with pink.
Then, use the black paintbrush to add Kirby’s eyes, mouth, and any other details you want. Finally, use the eraser tool to clean up any stray lines. And voila! You now have an adorable Kirby character.
Conclusion
Kirby is a pink, spherical character who made his first appearance in the 1992 game Kirby’s Dream Land. He has since appeared in over twenty games, most of which have been released on Nintendo consoles.
Follow the above instructions and make a Kirby character using your keyboard.
If you have ever been on 4Chan, you have probably noticed that some of the text on the site is blacked out. While it may seem like the site’s moderators have taken an intense dislike to you and are trying to ruin your day, there’s actually an explanation for it.
If you want to know how to get around this little annoyance and see all of the posts as they were intended, read this guide on how to turn black text into regular text on 4Chan.
4Chan Spoiler
If you’re a fan of the television show, Breaking Bad, then you may have seen the recent spoilers that were posted on 4chan.
For those who don’t know, 4chan is an online imageboard where users can post anonymously. The site is divided into various boards, each with its own topic.
How to create an account on 4Chan
Creating an account on 4Chan is easy and only requires a few steps.
First, go to the 4Chan website and click on the Create an account.
Second, fill out the required information including a username, password, and email address.
Third, verify your email address by clicking on the link sent to you by 4Chan.
Fourth, agree to the terms of service and privacy policy. Finally, start posting.
How to Black text on 4Chan
If you want to add a spoiler alert to your message on 4chan, you can do so by blacking out the text. Here’s how it works in case you’re not sure.
What happens is that when somebody tries to quote and reply to your post (in order to see what was said), all they will see is spoiler and then have to scroll down in order to see what was originally posted before reading any replies below it.
The result is that nobody but the person who posted it gets to read its contents. Pretty clever huh?
If you want to avoid spoilers on 4chan, you can black out the text. To do this,
Simply type a code at the beginning of your post which will make all subsequent text blacked out.
The code is SPOILER ALERT followed by a space and then whatever text you would like to be unreadable until clicked on by the viewer.
Then you close the text with the same code, SPOILER ALERT again.
If you want to go back to regular mode type endofspoiler. A lot of people think that clicking on the first line of text reveals the second line and vice versa, but unfortunately this is not true. After putting four lines in spoiler mode, try clicking on each individual line to see which ones are revealed.
It should be noted that only one line appears when looking at a given spoiler tag after hitting enter twice, which means if you want two lines of content protected you need to create two separate spoiler tags – one for each paragraph.
Conclusion
Anonymity is one of the most appealing aspects of 4chan. No one knows who you are, which can make for some interesting and sometimes wacky conversations.
That said, there are certain etiquette rules that users should follow, one of which is not to spoil things for others. To go in a spoiler mode, make sure to insert the the spoiler alert code in the beginning and the end to blackout your text.
Have you ever needed to create some sort of simple ticket system, such as if you’re the president of an organization and you need to have people send you emails with their questions?
Well, creating such a system could take up a lot of time, but luckily there’s Google Docs! With this nifty little tool, you can easily create your own ticket system that allows people to submit tickets and view them in one convenient place.
What is Google docs?
Google Docs is a word processing program that lets you create and edit documents online. You can share your documents with others and work on them collaboratively in real time. Google Docs is free to use.
To make the most of it, download the latest version of Chrome or Firefox, which are both free programs. When you open up Google docs, it will ask for a username and password- this is where you’ll put your information to log in.
Does Google docs support ticketing system?
If you’re looking for a way to streamline your customer support process, you may want to consider using Google Docs. With this system, you can create and track support tickets all in one place.
Since it’s all stored in the cloud, you can access it from anywhere. A support ticket system is a great way to keep track of customer questions and issues. Using Google Docs makes it easy to share your tickets with others on your team.
How to login your Google docs account
To login to your Google docs account, first open your web browser and go to the Google docs website.
Enter your email address in the Email field and click Next.
Enter your password in the Password field and click Sign In.
If you have two-step verification enabled, you’ll need to enter a code that is sent to your phone or generated by an app.
How do I create a support ticket system with Google docs
One way you can streamline customer support is by using a support ticket system. This way, you can keep track of each customer’s inquiries and make sure they’re all addressed in a timely manner.
Using a Google Doc as your support ticket system has the added benefit of being easily accessible by anyone on your team.
Here’s how to set it up:
Create a Google doc with the following: support tickets in the title;
Create columns for different topics such as title, description, timeline, and assigned to;
Assign permissions so that others can edit the document but not view or delete it;
Add an email address at the top of your doc. Now people can email your team with their inquiry and automatically have their own ticket created. You’ll also get notified via email when new tickets are created.
How do I contact Google customer service?
If you’re having trouble with your Google account or have a question about any of our products or services, please Google via email at [email protected].
Conclusion
If you’re looking for a simple, effective way to manage customer support requests, consider using Google Docs. By creating a form and utilizing the power of automation, you can quickly and easily keep track of all your incoming requests.
Using Google Docs means that you can access your support system from anywhere perfect for when you’re on the go. Give it a try today and see how it streamlines your customer support process.
PowerPoint and Publisher are two very different programs. Because of that, files created in one program aren’t always compatible with the other.
Converting Publisher documents to Powerpoint can get the job done in situations where you need to share information between coworkers or between programs, but do it wrong and you could end up losing quality, damaging information or even introducing new mistakes into your content.
Let’s take a look at how to convert Publisher documents to Powerpoint right so you don’t have to worry about any setbacks.
What is Publisher documents
Publisher is a desktop publishing application from Microsoft. It’s similar to Word in that it’s designed for creating documents, but it has additional features and tools for laying out pages and creating more complex designs. You can create newsletters, flyers, brochures, and other marketing materials with Publisher.
What is Microsoft PowerPoint
Microsoft PowerPoint is a presentation program. It was released on April 20, 1987, initially for Macintosh computers only. Microsoft acquired PowerPoint for $14 million three months after it appeared. This was Microsoft’s first significant acquisition, and Microsoft set up a new business unit for PowerPoint in Silicon Valley where it remained for the next 17 years. The current version for Windows is PowerPoint 2019.
Steps to convert publisher documents to Powerpoint
If you have a Microsoft Publisher document that you want to use as a PowerPoint presentation, there’s good news: you can convert it. Here’s how:
Open the Publisher document that you want to convert.
Click File, click Save As, and then click PowerPoint Presentation.
In the File name box, type a name for the presentation, and then click Save.
Congrats! your Publisher document has now been saved as a Powerpoint.
To open the saved presentation in PowerPoint,
Double-click the file name.
Choose the Open option if you see a message that says, this file will be converted when opened.
Choose Yes or No if prompted by another message saying, the original publisher document will be deleted.
If you select Yes, the original document is deleted.
If prompted by another message asking, do you want to save this presentation? Select an answer to indicate whether you want to save your changes or not.
When PowerPoint finishes converting your .pub file into a .ppt presentation, choose one of these options: (1) Close without saving; (2) Close with saving; (3) Keep both files (.pub and .ppt); or (4) Cancel conversion.
The steps are different if you are using Windows Vista or Windows 7:
Right-click on the file, and then click Open With.
Click Choose Program from the dropdown menu, and then browse for PowerPoint 2007 on your computer.
Finally, click Open. You’ll see a Convert PowerPoint to Word screen.
Select Finish & Merge to Creates a merged version of your Word document and converts it back to PDF.
You’ll need Adobe Acrobat software installed on your computer.
Note that, you won’t lose any formatting during the process but you may lose any tracked changes made in Word before exporting because PDFs don’t support this feature
One of the most useful features of Windows task manager is the ability to give a process or programme its own name instead of calling it programme X or programme Y.
This helps in tracking certain processes, especially when there are too many of them on your screen and you need to know which one you are after. It also helps if you need to give the same process different names in different instances.
In this article, we look at how to change the name of an existing process in Windows task manager.
What is Task Manager
Task Manager is a system monitor for Microsoft Windows that provides detailed information about computer performance and running applications, as well as an advanced tool for managing processes and programs.
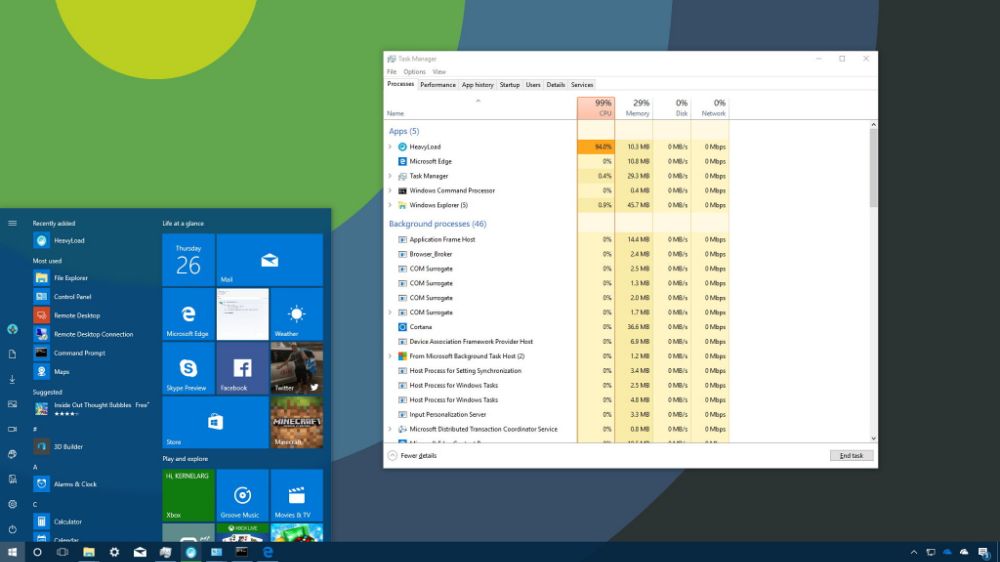
Where to find windows task manager on your pc
To find the Windows Task Manager on your computer, press the Ctrl + Alt + Delete keys at the same time. This will bring up the security screen. From here, click on Task Manager. If you’re using Windows 8 or 10, you’ll need to click on More details first.
How to change a program name in task manager
In Windows 10, the Task Manager has been redesigned with more features than ever before. One of these new features is the ability to change the name of a program.
Open the Task Manager by pressing CTRL+ALT+DEL or by right-clicking the taskbar and selecting Task Manager.
On the Processes tab, find the process you want to rename.
Right-click on the process and select Rename.
Type in the new name for the process and press Enter.
The program will now be renamed in the task manager window.
You can also rename programs by right-clicking on them in the File Explorer and selecting Rename from the contextual menu.
If you want to change the name of a program that’s already running, you can do so from the Windows Task Manager.
To open the Task Manager,
Press Ctrl+Shift+Esc or right-click the taskbar and select Task Manager from the menu.
Find the program you want to rename in the list of processes and click on it once to select it.
To undo your changes,
Simply open File Explorer and navigate to C:\ProgramData\Microsoft\Windows\Start Menu\Programs.
Selecting any program in that folder and hitting F2 will allow you to rename it back.
If you’ve used Omegle or chat apps in the past, you might have noticed that sometimes users type in ASL to their message and you’re wondering what it means. But what does ASL mean on Omegle and other chat apps? Let’s find out!
ASL Meaning
ASL is an acronym that stands for age, sex, and location. This is a common question asked in online chat rooms and forums, and it helps people determine whether or not they are interested in talking to someone.
What is Omegle
Omegle is a social networking website that allows its users to chat to one another without the need to register or start an account.
The site matches users up to one another who remain anonymous to one another throughout the chat. Users can change their user name every time they enter a chat with someone new, but their IP address will always be visible to others.
It is also possible for two people at the same time in different locations to use Omegle at the same time, but only one person will see the other person’s IP address during each simultaneous connection.
What does ASL mean on Omegle
ASL is an acronym that stands for age, sex, location. It’s a common request made by people on Omegle and other chat apps in order to quickly know the gender, age and sex of the person they are having the chat with and to see whether or not they are compatible with the person they are talking to.
When to use ASL in Omegle
ASL in Omegle is properly useused when the two parties are strangers and has started the chat with greetings. Some users may ask for names, but most of the users will be using Omegle to be anonymous. However, sharing age, sex, and location is fine to share for some. A few of the users will just answer the age and sex, but not the location.
Why you must use ASL in Omegle
The question ASL? means what is your age, sex, and location. The response to that question should show the same information in reply. It’s recommended that you not give out personal information such as address or phone number unless you know the person very well because it can be used against you by people looking for revenge.
What other abbreviations are used on Omegle
ASL is just not the only word commonly used in Omegle. There are others that also sounds interesting and also makes chatting more fun and simple.
If you’ve ever worked with electrical equipment in the past, you know that there are plenty of hazards that you need to be aware of. Even though the devices you work with are designed to be safe and easy to use, it doesn’t mean that all accidents are impossible.
For example, if the transformer in your facility blows, what should you do? What does this mean? How can you prevent it from happening again?
This article will help shed some light on the topic of electrical transformers and how they operate, as well as what happens when they blow and how to fix them when they do.
What is an Electrical Transformer
Electrical transformer
An electrical transformer is a device that transfers electrical energy between two or more circuits through electromagnetic induction.
A changing current in the first circuit creates a magnetic field that induces a voltage in the second circuit.
Transformers are used to increase or decrease the alternating voltages in electric power applications.
Different types of electrical transformers
The most common type of transformer is the power transformer, which transforms the voltage of electric power from one level to another.
A distribution transformer is another type of transformer that steps down the voltage of electricity before it reaches homes and businesses.
An isolation transformer is used to electrically isolate two circuits by transforming the voltage between them.
A step-up transformer steps up (increases) voltage and a step-down transformer steps down (decreases) voltage.
What causes an electrical transformer to blow?
Step down converter, step up transformer
There are many reasons why an electrical transformer can blow. One of the most common causes is due to overloaded circuits. When too much electricity is running through the transformer, it can cause the transformer to overheat and eventually fail.
Other causes include lightning strikes, faulty wiring, and physical damage to the transformer itself. Regardless of the cause, a blown transformer can be a serious problem that can lead to power outages and other problems.
What happens when an Electrical Transformer blows?
Step up & down voltage converter
Electrical transformers are a vital part of the electrical grid. They step up or step down voltages as needed so that electricity can flow through the grid to homes and businesses.
But what happens when one of these transformers blows? Well, it’s not good. The system overloads and either breaks down, leading to blackouts in the area served by the transformer, or kicks into overdrive, leading to power surges in other areas served by other transformers.
In addition, there is always a fire risk because high voltage wires carry more current than lower voltage wires. Meaning more amps (amps equal watts) flowing at any given time for less resistance which equals more heat which equals more fire risk.
How can you prevent an electrical transformer from blowing?
If you want to prevent your electrical transformer from blowing, you should do the following:
Make sure that the transformer is properly rated for the voltage and amperage that it will be handling.
Check the transformer regularly for signs of wear and tear, and replace it if necessary.
Do not overload the transformer by using too much power.
Keep the transformer clean and free of debris.
Don’t operate a damaged transformer.
How do you know if your transformer needs to be repaired or replaced?
If your transformer is making strange noises, emitting sparks, or giving off a burning smell, it’s definitely time to call in a professional. These are all signs that the transformer is overloaded and at risk of failure.
In some cases, you may even notice fluctuations in power levels or flickering lights. In these cases, we recommend turning off the electricity immediately so that you don’t accidentally cause more damage while trying to repair the electrical transformer.
Electrical Transformers – Questions To Ask Your Contractor
When a transformer blows, it can cause a lot of damage and even disrupt the power supply to homes and businesses. Here are some questions you should ask your contractor if you think your transformer has blown.
What caused my transformer to blow in the first place?
Why did it blow on that particular day and not a different day?
Is there anything I can do to prevent similar damage occurring again in future?
If you are unsure of your answers, make sure you contact a licensed electrical contractor who can inspect your electrical system for defects.
Things to Consider When Choosing an Electrical Transformer
When choosing an electrical transformer, there are several things you need to take into account in order to make sure you’re getting the best possible product for your needs. Here are few of the most important factors to consider
The size of your electrical transformer needs to be compatible with your home’s electrical system. To calculate how much power you’ll need for your specific application, use a device called a Power Factor Corrector (PFC) which is connected to your circuit breaker panel.
You can also find out what size transformer you need by looking at the wattage on your light bulbs or appliances. If it says 115V, then it means that it requires 115 volts and can only be used with one-phase transformers. If it says 230V, then it means that it requires 230 volts and can only be used with three-phase transformers.
The type of electrical transformer you choose will also depend on how it’s going to be used. For example, commercial transformers are used in things like restaurants, hotels, schools and medical facilities whereas residential transformers are used in homes.
Industrial transformers are often used by power plants and other manufacturing facilities. Choosing a transformer that’s compatible with your specific application will make installation easier, prevent damage and increase its lifespan.
Conclusion
While the damage from a blown transformer can be extensive, the good news is that it can be repaired. The first step is to identify the source of the problem. Once the source is identified, the next step is to determine the extent of the damage.
After that, you can begin making repairs. In some cases, you may need to replace the transformer entirely. No matter what, though, getting professional help is always a good idea.
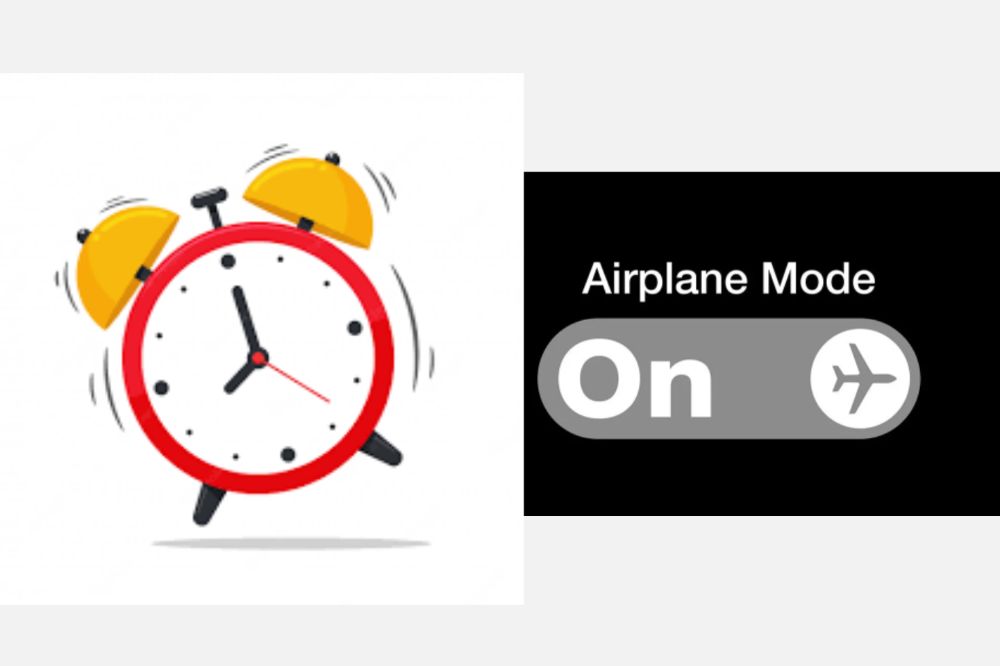
Alarm is one of the most important features of your smartphone. Whether you’re an iPhone or Android user, you’re likely to use it in different scenarios throughout the day.
One common question many users ask themselves is, does alarm work on iPhone and Android when on Airplane Mode or Off?
This guide will provide some advice on answering this question to the best of your ability.
How do I set an alarm on my iPhone
To set an alarm on your iPhone,
Open the Clock app and tap the Alarm tab.
Then, tap the + button in the upper-right corner to create a new alarm.
Next, set the time for the alarm, choose its sound, and decide whether you want it to repeat.
Finally, tap Save in the upper-right corner.
How do I set an alarm on my Android Phone
There are a few different ways to set an alarm on your Android phone, depending on which version of the operating system you’re using. If you’re running Android Marshmallow or later, you can use the Clock app to set an alarm.
Just open the app and tap the plus sign to add a new alarm.
You can also set an alarm from the home screen by long-pressing on the clock widget and tapping the + icon.
What Happens to my iPhone or Android When Airplane Mode is on?
Your device will no longer be able to connect to the internet via a cellular connection. This means you won’t be able to make or receive phone calls, send or receive text messages, or use data services. Your device will still be able to connect to Wi-Fi networks for you to be able to connect to the Internet whiles on airplane mode.
Does Alarm work on iPhone or Android when on Airplane Mode or Off?
If you’ve ever been in a situation where you need your phone to be on silent but still want to be able to be woken up by an alarm, you know how frustrating it can be when your alarm doesn’t go off.
So, does Alarm work on iPhone and Android when on Airplane Mode or Off? Yes! The app detects if you’re on Airplane Mode or not, so even if the app is running in the background with sound disabled, your alarm will still sound.
You won’t get any push notifications during this time either, which might be for the best if you don’t want to give anyone around you any idea that you’re using your phone while sitting quietly at the back of a meeting.
Does Alarm work on iPhone or Android when in a silent mode?
When your phone is in silent mode, your alarm will still sound. But if you have Do Not Disturb turned on, your alarm won’t go off.
Can I set an iPhone or Android alarm to vibrate only?
You can set an iPhone alarm to vibrate only by
Opening the Clock app
Tapping the Alarm tab
Tapping the alarm you want to edit, and then turning off the Sound toggle.
On Android, you can do this by
Opening the Clock app
Tapping the three dots in the top-right corner.
Tapping Settings
Tapping Alarms, and then turning off the Play sound toggle.
Conclusion It seems that the consensus is that yes, the alarm will still go off even if your phone is in airplane mode or turned off. So if you’re worried about oversleeping or getting late for the meeting, you can rest assured that your alarm will still sound.