Author: Mfidie

  • How to Book Ghana Card Appointment Online to Avoid Queues

    How to Book Ghana Card Appointment Online to Avoid Queues

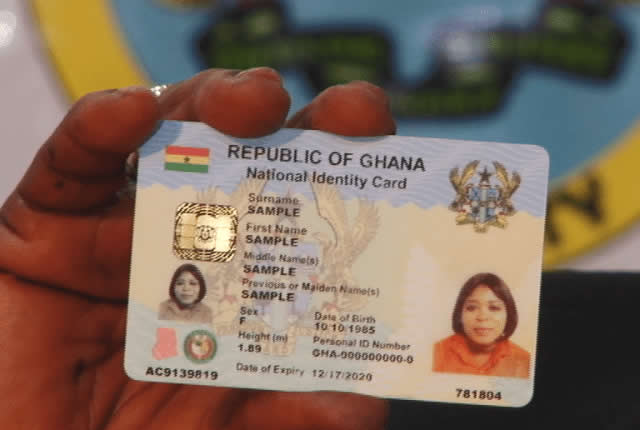
    The Ghana Card, also known as biometric national ID card, was recently launched in Ghana in order to streamline government processes and provide easier access to government services for all Ghanaians.

    However, because the public has to pay the cost of getting their Ghana Cards, there has been an increase in demand and long queues at card registration centers around the country.

    This has led many people to wonder if there is any way they can avoid standing in line or booking an appointment online instead of standing in line at the local registration center.

    About Ghana card

    The Ghana Card is a national identity card issued by the National Identification Authority (NIA) of Ghana. It is used for identification, verification and authentication purposes. It also serves as a travel document within the West African sub-region.

    All Ghanaian citizens aged 15 years and above are eligible for the Ghana Card. To apply for the Ghana Card, applicants are required to schedule an appointment with the NIA in order to avoid long queues, applicants are encouraged to book their appointments online.

    Is Ghana card mandatory?

    Yes, the Ghana card is mandatory for all Ghanaian citizens 15 years and older.

    Who qualifies for a Ghana card

    To be eligible for a Ghana card, you must be a citizen of Ghana and have a valid ID. You must also be at least 15 years old and have a valid email address. If you are not a citizen of Ghana, you will need to provide proof of residency. You will also need to provide a photo ID and pay the registration fee of GHS 250.

    How to apply for Ghana card online

    The process of applying for a Ghana card is quite simple and can be done entirely online.

    • On the homepage, you will see a link that says Apply for Ghana Card. Click on this link and you will be taken to the application form.
    • Fill out the form completely and then submit it. You will then be given a confirmation number.

    Use this number to book an appointment at your nearest registration center.

    How to book Ghana card online appointment

    If you want to apply for a Ghana card, you can do so online. This process is much faster than going to a government office and will help you avoid long queues.

    1. To be able to book an online appointment, visit the NIA appointment portal.
    2. Fill in the personal details you will be required to provide.
    3. After you are done, select New Registration (Premium Service) which will require a fee of GHS 250.
    4. Make sure to tick (✔)the (Select this service) Box.
    5. When done, proceed to load and choose a favorable date and time for your appointment and to complete the registration.
    6. Once the application form has been completed, pay the fee by credit card, bank transfer or mobile money and then wait to receive an email confirming your booking.
    7. Go to the NIA office you chose to finish and receive your Ghana Card.

    What are the benefits of Ghana card

    The Ghana Card is an identification card that serves as a national identity card, electoral register, and passport. It is issued by the National Identification Authority (NIA) of Ghana. The benefits of the Ghana Card are:

    1. Helps prevent identity theft and fraud
    2. Makes it easier to open a bank account
    3. Allows you to apply for a job or get a driver’s license
    4. Serves as a proof of citizenship
    5. entitles you to social security benefits and other services from the government
    6. Provides access to health care at public hospitals in Ghana and abroad
    7. Boosts international trade by providing companies with verified information about their employees and customers.

    And many other benefits when you have it. As a citizen, it is very much advisable to get your Ghana card asap.

  • Creativity: Things You Can Do with a Broken LCD TV

    Creativity: Things You Can Do with a Broken LCD TV

    Most people think that LCD TVs aren’t worth the investment when they break. However, in many cases, you can still get plenty of use out of your broken LCD TV and actually save some money by doing so.

    Here are ten fun things you can do with a broken LCD TV when it breaks beyond repair, and how to do them.

    Things You Can Do with a Broken LCD TV

    1. Turn it into an indoor aquarium

    A broken LCD TV can make a great indoor aquarium! Just remove the back panel and seal the edges with silicone to create a water-tight seal. Then, add some gravel, plants, and fish and you’re good to go!

    2. Make a homemade solar oven

    You can make a homemade solar oven with a broken LCD TV. This is a great way to recycle and upcycle your old television. Plus, it’s a fun project that the whole family can enjoy. Here’s how you do it

    1. Remove the back of the TV so you can see all of the wires.
    2. Get some aluminum foil and place it on top of the screen (or remove it if there isn’t one).
    3. Tape or tie down any loose wiring inside of the casing so they don’t fall out when moving the panel around.
    4. Cover the panel in plastic wrap, leaving an opening for light to enter at the bottom.
    5. Put this outside in direct sunlight and watch it cook.

    3. Use it as a firewood heater

    Are you tired of your old, inefficient fireplace? If you have a broken LCD TV, you can use it as a firewood heater. Just prop it up in front of your fireplace and let the heat from the fire reflect off the screen. You’ll be toasty in no time.

    4. Turn it into an emergency radio

    A broken LCD TV can still be used as an emergency radio. Simply hook up a small FM radio to the audio output of the TV. You can then use the TV’s power cord to plug into a wall outlet or battery pack to power the radio. This setup will allow you to listen to your favorite FM stations even when the power is out.

    5. Use it in your garden as soil pH monitor

    Broken LCD TVs can actually be pretty useful, even if they don’t work anymore. For example, you can use one in your garden as a soil pH monitor. All you need to do is bury the screen in your garden bed and wait a few days.

    The soil’s acidity will cause the screen to change color, giving you a visual indication of the pH level. This can be helpful information when it comes to choosing plants that will thrive in your garden.

    6. Keep critters out of your yard

    Are you tired of finding little critters in your yard? If so, then consider using a broken LCD TV to keep them out. All you have to do is place the TV in your yard and turn it on. The critters will be afraid of the noise and light, and they’ll stay away.

    7. Place it on top of your car to block the sun

    We’ve all been there. You’re driving along, minding your own business, when suddenly the sun is in your eyes. It’s so bright and distracting that you can’t see anything else on the road.

    Well, next time this happens, don’t reach for those expensive sun shades. Just grab your broken LCD TV and place it on top of your car. The sun will be blocked out and you’ll be able to see the road again.

    8. Use it as a photo frame

    LCD TVs make great photo frames! All you need is a little bit of creativity and voila instant photo frame. Here’s how to do it:

    1. Start by removing the back panel of your LCD TV.
    2. Carefully remove the LCD screen, being careful not to damage it.
    3. Turn the LCD screen around so that the front is facing outwards. It should now be a blank white surface.
    4. Gather together some photos or printouts of pictures you want to display in your picture frame and place them on the screen.
    5. Arrange them until they are all as desired, then use tape or staples to hold them in place.
    6. Replace the back panel with the LCD screen inside (still flipped over) and tighten up any screws that might have come loose during this process.

    9. Turn it into an art piece to display in your home or office

    You can use the broken LCD TV as a canvas and create a one-of-a-kind art piece for your home or office. All you need is some paint, markers, and/or other materials to decorate the screen. Let your creativity flow and come up with a design that reflects your personal style.

    10. Paint and decorate it

    One of the best things about decorating your own broken LCD TV is that you can make it as personal and unique as you want. Plus, it’s a great way to add a pop of color or personality to your home.

    Here are a few ideas to get you started;

    1. Paint one side white and one side black for a classic style.
    2. Create an abstract art piece by painting stripes all over the screen.
    3. Decorate with mirrors for a reflective look.
    4. Stencil words in different fonts for a retro vibe. Etc.

    Conclusion

    A broken LCD TV can be a pain, but it doesn’t have to be the end of the world. There are actually quite a few things you can do with it. So, before you throw it out, consider some of the options above.

  • CR2016 Vs CR2032: Which Battery Should you Use?

    CR2016 Vs CR2032: Which Battery Should you Use?

    When it comes to choosing the right battery, it’s crucial to know what you’re looking for and which features are most important to you.

    Both the CR2016 and CR2032 batteries provide an affordable option that has a lot of advantages when compared to other types of batteries available on the market today, but there are some differences between the two that you need to understand before making your purchase decision.

    The key differences between these two types of batteries will be outlined in this guide, allowing you to make an informed purchasing decision that will benefit you in the long run.

    CR2016 battery

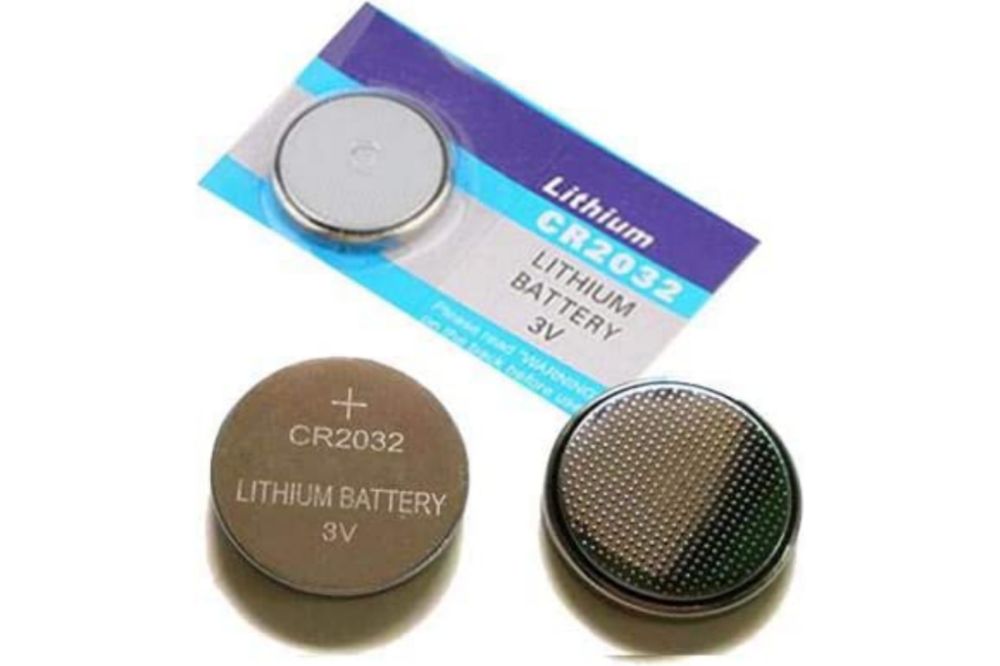
    The CR2016 is a 3 volt lithium coin cell battery. It’s often used in small electronics, like watches and calculators. It has a diameter of 20 mm and a height of 1.6 mm. The CR2016 has a capacity of 55 mAh and a voltage of 3 V.

    CR2032 battery

    CR2032 batteries are button cell batteries that are often used in small electronic devices, like watches, calculators, and keyless entry systems. CR2032 batteries are also popular in some larger devices, like TVs and computer motherboards.

    CR2032 batteries have a higher capacity than CR2016 batteries, meaning they can power a device for longer. However, CR2032 batteries are also more expensive.

    Advantages of CR2016 battery

    1. CR2016 batteries are small and lightweight, making them ideal for devices that need to be portable.
    2. They have a long shelf life, so you can stock up and not worry about them going bad before you need them.
    3. CR2016 batteries are also low-drain, meaning they don’t lose power as quickly as other types of batteries when not in use.
    4. They’re relatively inexpensive, so you can buy a few extras without breaking the bank.

    Advantages of CR2032 battery

    1. CR2032 batteries are smaller in size, making them more versatile for use in a variety of devices.
    2. They have a longer shelf life than CR2016 batteries, so you can stock up and not worry about them going bad before you need them.
    3. CR2032 batteries also have a higher capacity, so they will last longer in your devices before needing to be replaced. 4. You may be able to find cheaper CR2032 batteries than the equivalent CR2016 battery pack, which makes them worth considering if you’re looking for a way to save money on replacement costs.

    Disadvantages of CR2016 battery

    1. CR2016 batteries are not rechargeable.
    2. They have a shorter lifespan than other types of batteries.
    3. They may leak if not used correctly.
    4. They are more expensive than other types of batteries.
    5. They are not as widely available as other types of batteries.

    Disadvantages of CR2032 battery

    1. CR2032 batteries are more expensive than CR2016 batteries.
    2. They also have a shorter lifespan, so you’ll have to replace them more often.
    3. Additionally, they don’t work as well in cold temperatures and have a higher self-discharge rate, meaning they’ll lose power even when not in use.

    Differences between CR2016 battery and CR2032 battery

    When it comes to button cell batteries, the two most common types are CR2016 and CR2032. So, which one should you use?

    Here’s a look at the key differences between these two types of batteries so that you can make an informed decision about which ones to purchase for your device.

    The first thing that people usually notice is that the CR2016 is thinner than the CR2032 and, as such, will fit in more places.

    The other difference worth noting is that while both will last up to 3 years in storage, the CR2016 has a shorter shelf life of around 2 years because its power diminishes quicker over time. That said, they’re equally powerful when they’re new.

    In general, CR2016s are best used in devices with low-drain circuits like watches or keyboards; whereas the CR2032 would be better suited for devices with high-drain circuits like remote controls or calculators.

    Conclusion

    CR2032 batteries are more expensive than CR2016 batteries, but they also last longer. If you need a battery that will last a long time, then a CR2032 is the better choice. However, if you don’t need the extra longevity, then a CR2016 will suffice. The above explanation might not be much but it is enough to let you know one will be best for what you want to use them for.

  • Do SIM Cards Go Bad? How to Know If Your SIM Card is Damaged

    Do SIM Cards Go Bad? How to Know If Your SIM Card is Damaged

    SIM cards don’t last forever, but with proper care they should last up to six years before needing to be replaced.

    However, even the most careful of us can still get caught off guard by an out of service message or dropped calls that won’t go away on their own, and these issues could point to an expired SIM card or one that has been damaged.

    Keep reading to learn about how SIM cards work and what you can do if your SIM card is damaged, expired, or isn’t working properly anymore.

    What is a SIM Card

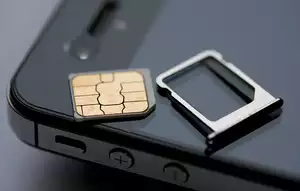
    A SIM card is a small, removable memory card that stores information like your contacts and text messages. Your phone uses this information to connect to the right network and provide you with service.

    Do SIM cards go bad?

    While most people have never had a problem with their SIM card, it is possible for them to go bad. If you are having problems with your phone service, it may be due to a damaged SIM card.

    What are the signs that your SIM card is damaged

    If you’re having trouble making or receiving calls, or connecting to the internet, it could be a sign that your SIM card is damaged. Other signs include: your phone showing No Service, Emergency Calls Only, or Searching. You can’t send or receive text messages; and you can’t access some features on your phone.

    If you think your SIM card might be damaged, the best thing to do is take it out and inspect it for any physical damage.

    Is it possible to fix a damaged SIM card?

    Unfortunately, once a SIM card is damaged, it’s impossible to fix it. You’ll need to get a new one from your service provider.

    Should I replace my Sim card immediately if I suspect it’s damaged

    If you think your SIM card is damaged, the first thing you should do is check for physical damage. If there are scratches or cracks, it’s definitely time for a new one.

    If there’s no visible damage, try restarting your phone. If that doesn’t work, try using the SIM card in another phone. If the other phone can’t read the SIM card, then it’s time to get a new one.

  • How to Use Your Real Picture on IMVU

    How to Use Your Real Picture on IMVU

    It seems as though everyone on IMVU has an avatar that they’ve come to know and love, but are you one of the many people who wish they could change it?

    Maybe you think your avatar looks silly or embarrassing, or maybe you would simply like to use a real picture of yourself instead of the pixelated version you’re using now.

    Whatever the reason, it’s easy to change your picture on IMVU when you follow these simple steps. Your photo will be be changed in no time.

    About IMVU

    IMVU is a social entertainment website where members use 3D avatars to chat, play games, and connect with other people. You can customize your avatar to look however you want, but many people choose to use pictures of themselves.

    Once you have an account, you can upload a photo or take one in the app. If you don’t have one available yet, then get yourself one.

    How to create an account on IMVU

    IMVU is a virtual world where you can create and customize your own 3D avatar, meet other people, chat, and play games. You can also buy and sell products in the IMVU marketplace.

    If you want to use your real picture on IMVU, you’ll need to create an account.

    1. Visit IMVU website to create an account with your email address and choose a password.
    2. Choose if you would like to get notifications by email or push notification when someone adds you as their friend.
    3. Add some personal information like gender, birthday, etc.
    4. Upload a photo of yourself.
    5. Write about yourself in the bio field.
    6. Click Create at the bottom of the page to complete registration.

    How to upload your picture on IMVU

    In order to personalize your experience, you can upload a real picture of yourself as your avatar’s profile picture. Here’s how;

    1. Log in to your account on the IMVU website.
    2. Click My Account in the top right corner.
    3. Choose Personalization from the drop-down menu at the top left of the page that appears.
    4. Click Profile Picture from the Personalization menu on the left side of the screen.
    5. Upload a photo from your computer or use one of the many camera options if you want to take a selfie.
    6. Resize or crop it so it’s in the required dimensions (450 x 450 pixels).
    7. Preview it to make sure it looks okay before uploading it.
    8. If needed, click Edit Your Avatar under Edit Your Profile and choose an outfit for your character.
    9. Select Gender and Age.
    10. Finally, click Submit Changes

    How to use your picture as an avatar on IMVU

    1. Take or upload a photo of yourself with a plain background.
    2. Upload the photo into the IMVU Photofit feature, which automatically creates an avatar based on your photo.
    3. Customize the avatar to suit your needs using custom features such as hair color, eye color, skin tone, clothing style, etc.
    4. Once you are satisfied with the look of your new avatar you can start interacting with other people in this virtual world.

    Conclusion
    Now that you know how to use your real picture on IMVU, it’s time to start customizing your avatar! Whether you want to look like yourself or create a completely new persona, the possibilities are endless. Just remember to have fun and be creative.

  • Should You Use a Nano Liquid Screen Protector or a Regular Screen Protector

    Should You Use a Nano Liquid Screen Protector or a Regular Screen Protector

    Screen protectors have been around for several years, and there are many people who swear by them. There are also many people who swear at them, claiming that they hinder the sensitivity of the screen, that they collect dirt and dust, or that they simply scratch too easily and need to be replaced far too often.

    So which should you use? A liquid screen protector or a regular screen protector? I’ll tell you what’s so great about each option and then let you decide which one to go with.

    Nano Liquid Screen Protectors

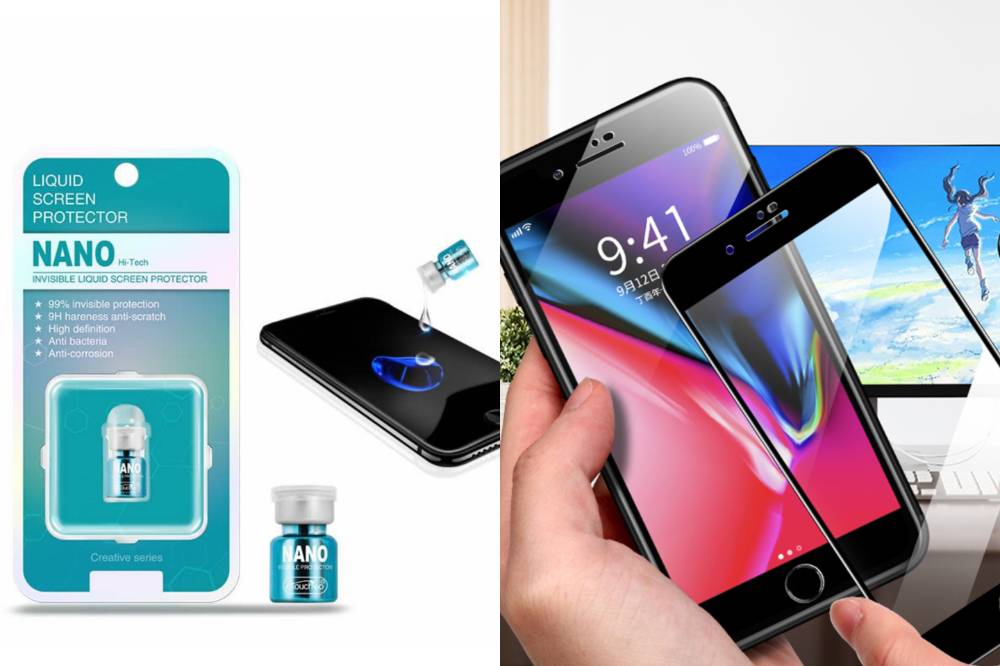
    Nano liquid screen protectors are becoming increasingly popular, but are they worth the investment? These protectors are applied as a liquid and then harden into an invisible coating that bonds to your phone’s screen.

    They claim to be more durable than traditional film-based screen protectors and offer better protection against scratches, fingerprints, and smudges.

    Regular screen protectors

    A regular screen protector is made of a thin piece of plastic that adheres to your phone’s screen. They’re designed to protect your screen from scratches and everyday wear and tear.

    Regular screen protectors can be found for a few dollars at most electronics stores. Some people prefer regular screen protectors because they’re less likely to cause bubbling or peeling.

    Why you need a screen protector

    Your phone is an important investment, and you want to keep it looking new for as long as possible. A screen protector can help protect your phone from scratches, fingerprints, and other everyday wear and tear.

    But with so many different types of screen protectors on the market, how do you know which one is right for you?

    In this post, we’ll compare nano liquid screen protector vs regular screen protector to help you make the best decision for your needs.

    Things to Consider When Choosing A Screen Protector

    When it comes to choosing a screen protector, there are a few things you should take into consideration.

    • First, consider the type of device you have and what kind of screen protector would work best with it. For example, if you have an iPhone, you might want to consider a tempered glass screen protector.
    • Secondly, think about your budget and how much you’re willing to spend on a screen protector.
    • Thirdly, decide how important durability and scratch-resistance are to you.

    Nano liquid screen protector vs regular screen protector comparisons

    When it comes to phone screen protection, there are two main types of products on the market: nano liquid screen protectors and regular screen protectors. But which one is better?

    1. Nano liquid screen protector

    Positive side

    • Nano liquid screen protector offers a much smoother feel when using your touch screen than a regular screen protector.
    • Unlike traditional screen protectors that need to be reapplied or replaced every few months, this type of product has been known to last up to six months with no need for reapplication or replacement.
    • In addition, the process for installing a nano liquid screen protector takes less time than applying a traditional screen protector so you’ll save time and frustration in the long run.
    • Nano liquid screen protectors are thinner than regular glass-based screens so it’s not necessary to put a case on your phone because there will be no additional bulk added.

    Negative Side

    • One thing to note about this type of protector is that, it they often does not come with a warranty.
    • It doesn’t absorb shock as well as some other types. So if you drop your phone or use it during physical activity, don’t expect this type of protection to do much for you in those cases.

    2. Regular screen protector

    Positive Side

    • Regular screen protectors offer more protection from dust particles and scratches.
    • You also won’t have to worry about bubbles forming under the film as you might with a nano liquid screen protector.
    • Regular screen protectors are made of tempered glass, which is tough and scratch-resistant. They’re also usually cheaper than nano liquid screen protectors.
    • If you choose a good quality product, a regular screen protector can last a long time. Some even come with warranties that cover your device for up to two years.
    • If you have an older device that doesn’t work well with touch screens, then the thicker protective layer will ensure that the problem doesn’t get worse over time.

    Negative side

    • The downside to regular screen protectors is that they take longer to apply and sometimes the edges don’t adhere as well as they should, causing them to peel off easily or create bubbles that obscure the screen.

    Conclusion

    That being said, not everyone wants the extra thickness on their device’s screen so it really just depends on what you’re looking for.

    So if you’re not too concerned about added thickness and want something thinner with more longevity, go with a nano liquid screen protector. If having some extra protection against scratches and general wear-and-tear matters to you, stick with a regular screen protector.

  • Move Secure: Use this Escrow to avoid MOMO Fraud from Sellers

    Move Secure: Use this Escrow to avoid MOMO Fraud from Sellers

    Mobile money fraud is on the rise in countries where it’s widely used, and it’s crucial to know how to avoid being scammed.

    Move Secure Escrow by BMT Micro enables sellers and buyers to conduct secure transactions on any website that uses iFrame, such as PayPal, BMT Micro and more. But if you aren’t familiar with the escrow process, it can seem like a daunting task to set up and use.

    This article will explain the escrow process and give you step-by-step instructions on how to set up your own escrow account with Move Secure.

    About Move Secure

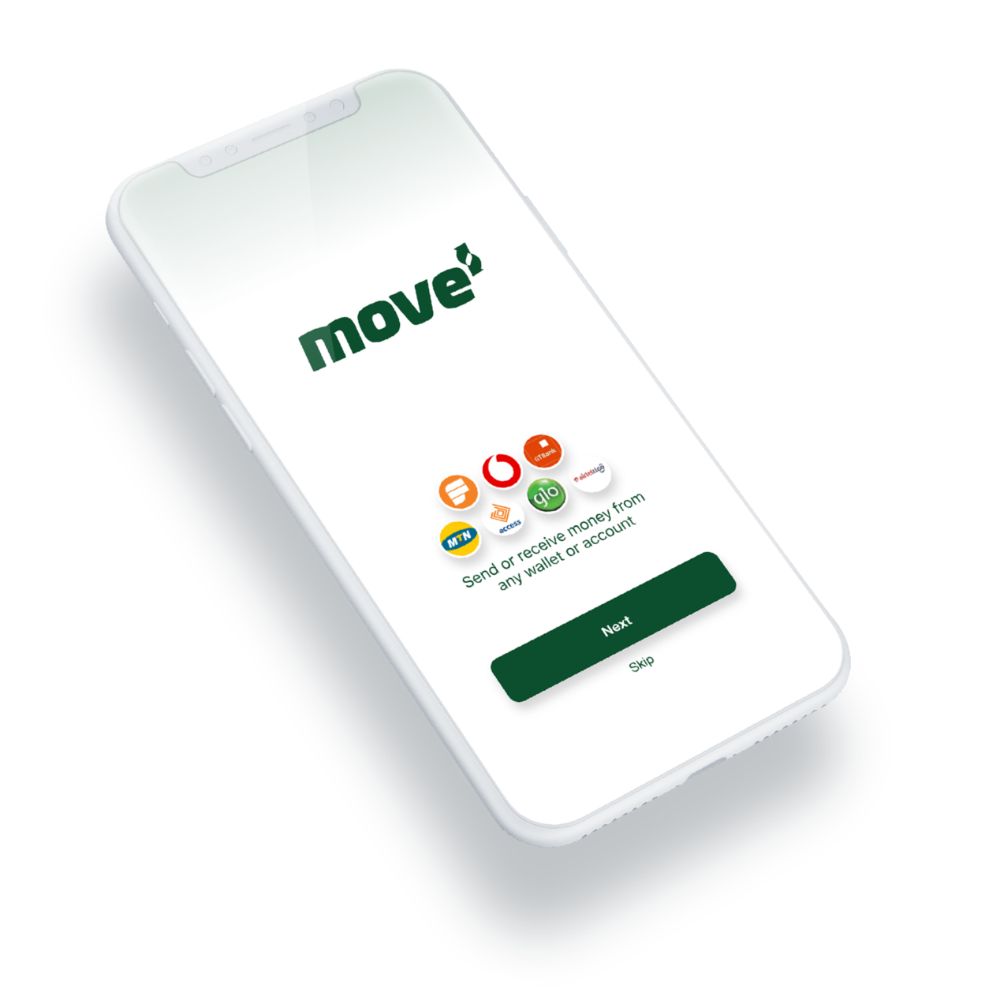
    Move Secure is a secure escrow service that helps protect buyers and sellers from mobile money fraud by holding payments in escrow until both parties are satisfied.

    Move Secure ensures that everyone gets what they’re owned. Their 24/7 customer support team is always available to help resolve any disputes.

    What is an escrow

    An escrow is a third-party service that holds funds during a transaction. This can be useful for ensuring that both parties in a deal are satisfied before money changes hands.

    Escrow services can also help protect against fraud by holding onto the funds until both parties have completed their obligations. To use an escrow service, you’ll need to find a reputable provider and set up an account.

    How does mobile money fraud happens

    With mobile money fraud, scammers will often send a text message or email that looks like it’s from your service provider. The message will say there’s been a problem with your account and ask you to click on a link.

    Once you click the link, you’ll be taken to a fake website that looks like your account site. The fake site will ask you to enter your mobile money password. Once you do, the scammers will have access to your account and can clean it out.

    How to use move secure using mobile app

    If you’re looking for a way to secure your mobile money transactions, look no further than Move Secure Escrow. This app provides a safe and easy way to send and receive money without worry of fraud. Here’s how to get started.

    1. Download the Move Secure Escrow Android app from the Play Store. If you are an iPhone user, you can also download the Move Secure Escrow App from the App Store.
    2. Click on the create account button
    3. Enter your email address.
    4. Enter your password
    5. Confirm your password by re-entering it in the second box.
    6. Fill out the rest of the information needed, including an alternate email address or phone number in case you forget your credentials.
    7. You now have a fully functioning Move Secure Escrow account.

    How to use move secure using USSD

    1. Dial *718# on your device
    2. Select Move Secure.
    3. Select Make Payments.
    4. Enter the merchant code or phone number you are sending the money to.
    5. Select the network of the number.
    6. Enter the amount.
    7. Enter the description of the product or service.
    8. The details will be shown to you. Press 1 to confirm or 2 to Cancel.
    9. A confirmation will be sent for you to authorize the payment.

    How to use move secure using their website

    If you’re looking for a secure way to escrow your mobile money, look no further than Move Secure. Using their website is easy.

    Create account

    1. Visit their website https://movegh.com
    2. Select merchant sign up.
    3. Provide your name and number
    4. Fill in the necessary information required
    5. Click on next to proceed and create your account to send and receive money.

    Send money

    1. Add your desired amount of funds, and then select your recipient.
    2. The funds will be securely held until both parties confirm that the transaction is complete.
    3. This way, you can rest assured that you won’t be scammed out of your hard-earned money.

    Conclusion

    If you’re selling something online, especially if it’s a high-value item, you should definitely consider using Move Secure Escrow. By doing so, you can protect yourself from mobile money fraud and scams. It’s a very easy system to use and it’s completely free. So there’s really no reason not to use it.

  • What is a PIN Drive and its uses

    What is a PIN Drive and its uses

    Even though you may not have heard of the term before, you’ve probably seen plenty of media involving PIN drives on TV and movies, from movies to television shows.

    However, what are PIN drives? And how are they used? This article will explain all about PIN drives and how they’re used. If you’re wondering what exactly a PIN drive is and its uses, this article should help you figure it out.

    What is a PIN Drive?

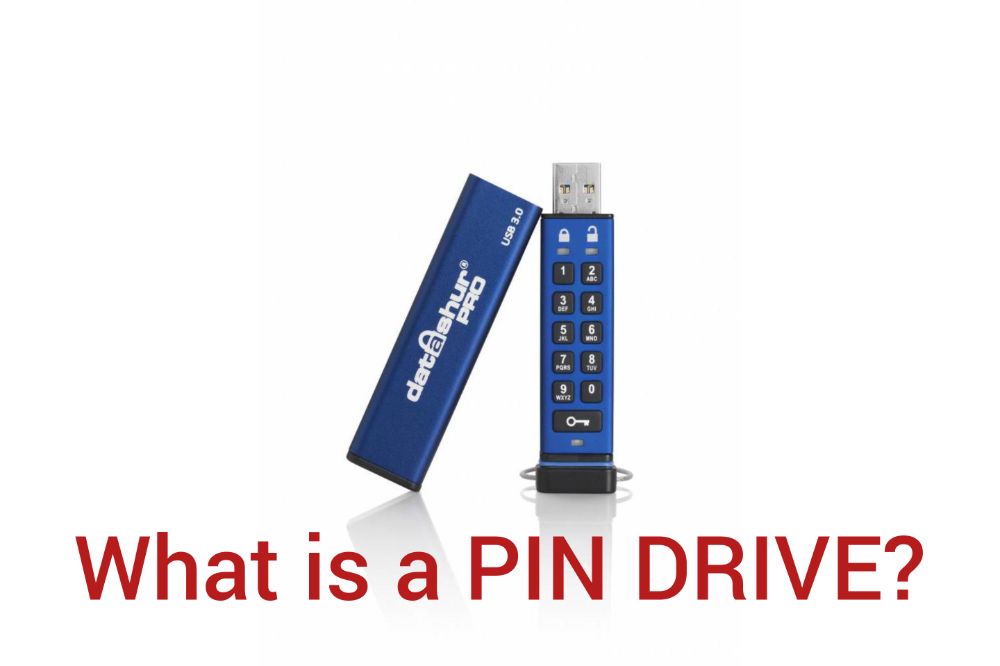
    A PIN drive is a data storage device that uses an integrated circuit to store information. Unlike other data storage devices, such as hard drives and flash drives, PIN drives do not have any moving parts.

    This makes them more durable and resistant to data loss. Additionally, PIN drives are typically smaller in size, making them more portable. They can be used for backup purposes or to transport data from one computer system to another without using cables.

    The primary disadvantage of a PIN drive is the potential for being lost or stolen, which could result in the loss of all of the stored data. To minimize this risk, users should keep their PIN drives in locked containers when they are not being used.

    How does it work?

    A PIN drive is a type of USB flash drive that uses a personal identification number (PIN) for security. The PIN is used to encrypt the data on the drive, and can be used to prevent unauthorized access to the data.

    To use the PIN drive, you must first enter the correct PIN into the drive. Once the PIN is entered, the drive will unlock and allow you to access the data. If the wrong PIN is entered, the drive will remain locked and the data will not be accessible.

    Types of PIN Drive

    There are three main types of PIN drives:

    1. Encrypted
    2. Password-protected
    3. Unencrypted

    1. Encrypted PIN drive

    A PIN drive is a type of external hard drive that uses encryption to protect your data. When you connect the drive to your computer, you will be prompted to enter a PIN.

    This PIN is used to unlock the drive and view your data. Without the correct PIN, the data on the drive is unreadable. This makes PIN drives an ideal way to store sensitive data, such as financial information or confidential business documents.

    2. Password-Protected PIN drive

    When you insert a PIN drive into your computer, it will prompt you for a password. Once the password is entered, the drive will be unlocked and you’ll be able to access the files stored on it. It’s a way of storing personal information that can’t be accessed by other people unless they know the passcode.

    3. Unencrypted PIN drive

    With a drive being ununencrypted, it means there is totally no pin, password or any sort of encryption on the drive and it can be accessed by anyone without sress.

    Various ways you can use your PIN drive

    A PIN drive is a small, physical device that allows you to store data. You can use your PIN drive to store:

    1. pictures
    2. videos
    3. music
    4. documents and more.

    Plus, you can take your PIN drive with you wherever you go, making it a convenient way to keep your important files with you at all times. If you’re storing sensitive information, make sure to encrypt the drive before you use it.

    Benefits of using your own PIN drive

    A PIN drive is a great way to keep your important files safe and secure.

    1. You can use it to store any type of file, including photos, videos, music, documents, and more.
    2. You can use it to back up your computer or phone in case of an emergency.
    3. It’s portable, so you can bring it with you anywhere.
    4. If someone steals your laptop or phone, they won’t be able to access the information on the drive without your PIN code.
    5. If something happens to the device while it’s plugged into a USB port on your laptop or desktop computer, all of the data will be saved and will still be accessible even if the device malfunctions.

    Can you make your own PIN Drive?

    You can purchase a PIN Drive from many electronics stores. You can make your own PIN Drive which depends on how you have planned towards it.

  • Will iMessages Appear Blue if the Recipient’s iPhone is Dead or Turned Off?

    Will iMessages Appear Blue if the Recipient’s iPhone is Dead or Turned Off?

    If you have ever sent an iMessage, you have likely seen the blue bubble next to your contact’s name as well as their name in the iMessage bar on top of your screen when you go to send them a message, even if they’re offline or their iPhone is dead or turned off.

    But do iMessages actually get delivered to the recipient’s device even if they aren’t online or even if their iPhone has no power?

    This article explains how and why this happens, and what it means for you and your contacts.

    What is iMessage?

    iMessage is a messaging service that allows users to send and receive text, photos, videos, and other information through the Messages app on their devices. If you have an iPhone, iPad, or iPod touch with iOS 5 or later, you can use iMessage.

    iMessage is different than SMS and MMS because it uses data rather than cellular minutes to send and receive messages. So, if you’re connected to a Wi-Fi network, you can use iMessage without using your cellular data plan.

    iMessage requirement

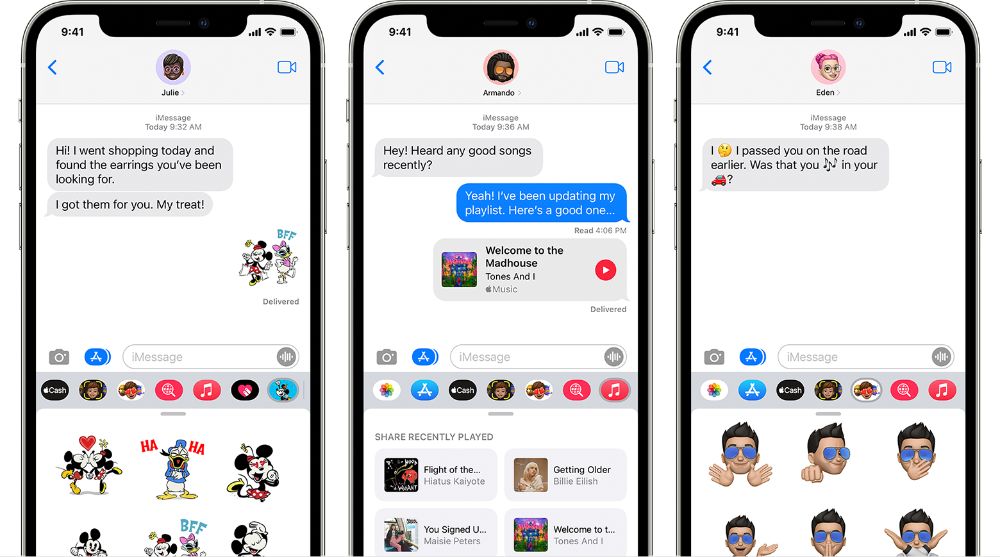
    For the messages to appear blue, both sender and receiver need to have iMessage turned on. If one person has iMessage turned off, the messages will be sent as standard text messages and will appear green.

    If your iPhone is dead or turned off, you will not receive any messages until you turn it back on. If you have no service, you will also not receive any messages until you have service again.

    What does it mean if your iMessage shows blue

    When your iPhone sends an iMessage, it will appear blue. This is because blue is the color that Apple has chosen to represent iMessages. If the recipient’s iPhone is turned off or dead, the message will still appear blue on your screen.

    It won’t be delivered until the recipient picks up their phone. The other thing to keep in mind is that a blue read indicator means that you have read the text, but it doesn’t mean they have read it yet. They might not have seen it. You can always ask them when they received the message and whether or not they read it.

    What does it mean if your iMessage shows green

    If you see a green message bubble instead of a blue one, that means the person you’re sending the message to is using a non-Apple device such as an Android phone.

    Messages sent between Apple devices using iMessage appear as blue bubbles. Green bubbles indicate that traditional SMS text messages are being sent.

    Will iMessages shows blue if the receivers iPhone Is dead or turned off?

    If you send an iMessage to someone with an iPhone who doesn’t have an active data connection, the message will appear as a blue bubble. Once the recipient turns on their device and has an active data connection, they will be able to see the message.

    In addition, if the person who receives your message deletes it before they are able to read it, they will not be able to retrieve it. It also goes without saying that deleting messages from your own phone can result in them being lost forever.

    Conclusion

    If you’re wondering whether your recipient will still receive your iMessage even if their iPhone is dead or turned off, the answer is yes. As long as your message is sent through Apple’s servers, it will be delivered to your recipient as soon as they turn their phone back on.

    So next time you need to get in touch with someone, don’t hesitate to send them an iMessage, even if their phone is off.

  • 3 Best Instagram Password Hacking Apps in 2022

    3 Best Instagram Password Hacking Apps in 2022

    Social media plays a great role in this socialized world. Instagram is one of the major forums in the social media world. Along with being famous, it also happens to be a very secure and safe forum with masses of users around the globe.

    Of course, an application this safe would be very difficult to hack or spy on. This is also the case of Instagram too. With its super quality security, it is very difficult to hack into someone’s Instagram account.

    in some cases, however, you don’t know what else to do. On the off chance that your partner, kid, or a cherished one is using a lot of Instagram recently, you have to get to their record to discover what they’re doing.

    We suggest maintaining a distance from online Instagram tricks. They’re simply misleading content. Some of them can also take your personal data or even contaminate your gadget with any dangerous virus.

    However, at this point, you would be pondering, how can you hack somebody’s Instagram account without their secret password? Would you be able to try and do it? Here, we have laid out some techniques for you! They’re anything but difficult to execute and don’t require any specialized science whatsoever.

    Part 1: Spyier – Instagram Hacking On The Go

    The list topper is, without any doubt, Spyier – the perfect app to hack someone’s Instagram without their password. It is the most direct and safe approach to hacking Instagram without even knowing the account’s password.

    Spyier is a top of the line application for social media hacking and phone tracking. Having a user base of millions in more than 190 countries around the globe, it is used by guardians, businessmen, and people who are having problems in their relationships.

    You would be wondering now how it is used? Simple, you can directly hack the relative person’s Instagram account secretly in very less time and from anywhere and anyplace. Only setting up the application needs to be done, which only takes a few minutes. At that point, you can begin hacking anyway.

    Spyier is one of the most highly-dependable and client-confirmed Instagram hacking app. You will definitely not want to miss out on something that has been reviewed and highly praised by big international media like Forbes, TechRadar, and Digital Trends.

    What can you do with Spyier?

    In Instagram hacking itself, there are a lot of things that you can do on Spyier. From viewing the relative Instagram account’s messages to downloading its media, Spyier includes everything.

    Read Messages: Spyier allows you to read the Instagram messages of the account being hacked, you can read both, the incoming and outgoing, messages. In addition, you can also know the time of the message being sent or received as every message accompanies a timestamp, permitting you to discover when the discussion occurred.

    Look into Contact Information: You are also provided with the feature to look into the details of the account’s followers and contacts. You can also find out about the contacts’ addresses, pictures on display and much more.

    Access Media Files: Spyier also allows you to access all the media that the account’s owner uses. You can even download all the media, that the account is sending or getting from other people, onto your device.

    Access Deleted Messages: Leave alone simple messages, you also have access to the messages deleted by the account’s user(children, spouse, etc.). This way you have complete knowledge of what they are up to nowadays.

    Simple steps to Instagram Hacking with Spyier

    Step 1: First you need to create an account on Spyier. For the purpose, provide the email id that you use. Once you have signed in, you need to select one of the subscription plans offered by Spyier, depending on the amount of time for which you want to use Instagram hacking services.

    Step 2: All the information and instructions for setting up Spyier will be mailed to you on the email you provided while signing in. Start off by selecting the target’s OS, Android or iOS, depending on the device the other person uses.

    For iOS, you will have to give the iCloud information. For Android, you will need to install the Spyier app on the target phone to hack its Instagram account.

    Step 3: Now that the installation process is complete, you can start using its services. For Instagram hacking, you need to go to the ‘Social Apps’ tab on the left side of the dashboard. Click on the ‘Instagram’ option afterward.

    Step 4: Now you are all set and ready to go. You can start spying on Instagram right away.

    Part 2: Minspy

    Runner-up is normally the most difficult position to decide. But not for us, as we have the exact competitor that has this place in our list and that is Minspy. Not only is Minspy an exceptional Instagram hacking software but it also has many unique features implemented in it.

    With some top of the line qualities, Minspy has gained much fame and praise from all over the world. Within a short span of time, it has made a mark and has revolutionized the hacking industry. Quality services at a very less cost, what more can one want.

    Part 3: Spyic

    Spyic is one of the forefronts of Instagram hacking applications. Spyic is considerably more than just a normal Instagram hacking app. The application can hack an individual’s whole phone. You can view messages, get to other social media applications, see where the device is at the moment, access SIM card data, and considerably more.

    Spyic is so far the safest and secure solution for Instagram hacking. In the case of iOS, there is even no need of installing the app on the target device hence your identity can never be exposed. While in the case of Android, the application is so small and so well hidden that no one will ever know about it.

    When we come to using the app, it is so easy that even a person having less knowledge will be able to understand it. There is no specific browser or software you need to have in order to use it. You can use Spyic on any web browser and also on any device you like.

    Conclusion

    As you can see, we have done our best to guide you completely about some of the best Instagram hacking applications in the market. Instagram hacking is not an easy thing to do as this social medium involves high security.

    However, with these apps, it is super duper easy to not only hack an Instagram account but also keep an eye on your children or partner. Choosing the right and most suitable application is your job now. If you have read this guide carefully, then it would be easy for you to make up your mind.