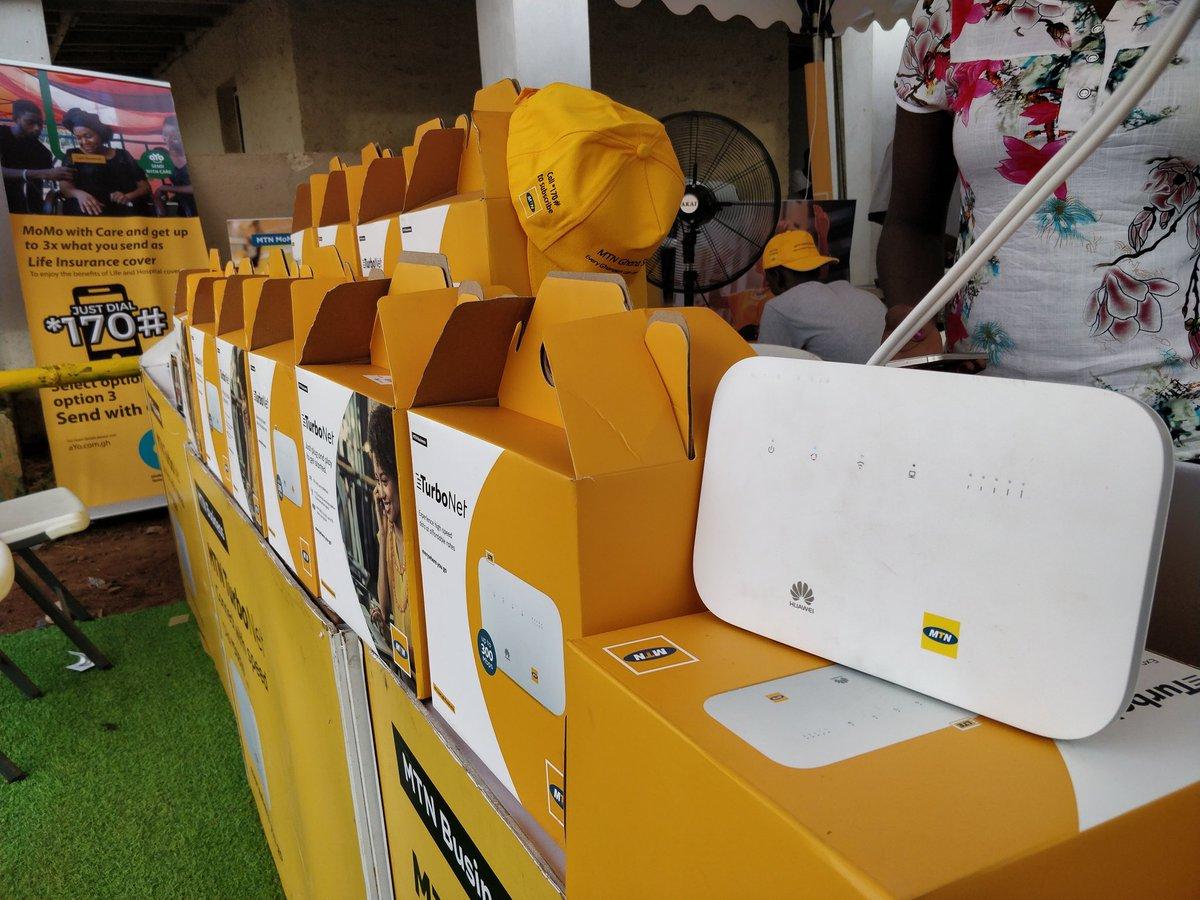
Author: Shepherd Yaw Morttey

  • How To Skip Songs With Airpods

    How To Skip Songs With Airpods

    Have you ever been listening to a song on your AirPods and wanted to skip ahead to the next one? With Apple’s latest technology, it’s easier than ever before. In this article, I’ll be walking through how to quickly and easily skip songs with AirPods.

    No need for any extra buttons or hardware – everything you need is right in the palm of your hand. So if you’re ready to take control of your music experience, let’s get started!

    Doing away with traditional controls, AirPods are all about convenience. All you have to do is double tap either side of your earbud housing and voila! You can instantly jump ahead to the next track without breaking stride.

    And best of all, you don’t even have to look at what you’re doing – just use a quick flick of the wrist and you can keep rocking out while skipping tracks.

    For those who want an even more hands-free approach, there’s another option available: voice commands! Just say “Hey Siri” followed by something like “skip this song” and watch as your request is fulfilled almost instantaneously – no matter where you are or what else is going on around you. It really doesn’t get much simpler than that!

    Checking Airpod Compatibility

    Before you can skip songs with your AirPods, you’ll need to make sure they’re compatible. Apple’s AirPods are designed for iOS devices and Macs. If you have an iPhone, iPad, or iPod Touch running iOS 10 or later, the AirPods should be automatically detected when you turn them on.

    On a Mac computer running macOS Sierra or later, they’ll show up in your Bluetooth menu.

    If your device isn’t compatible but supports other Bluetooth-enabled headphones, you may still be able to use the AirPods – though some features like voice control won’t work. To check whether it will work with your system, consult the official compatibility guide from Apple.

    Once everything is set up correctly, playing music through your AirPods is easy: just hit play on whatever app you’re using (like Spotify or iTunes), then adjust the volume or skip tracks with Siri commands like “Hey Siri, next song.” That way of skipping songs works with almost any audio streaming service. Enjoy!

    Setting Up Music Controls

    Setting up music controls with your AirPods is easy. To begin, you’ll need to pair them with a compatible device. Both Apple and Android devices are supported – just make sure they’re updated to their latest operating system versions.

    Next, open the Bluetooth settings on your device and connect it to your AirPods. Once connected, you’ll be able to adjust audio playback from your headphones directly.

    Using the volume buttons on either side of the AirPod will enable you to quickly increase or decrease sound output levels without having to go into any menus or extra steps.

    If you want more control over what’s playing, then you can access various music-related options in the dedicated app for that particular type of device. For instance, if you have an iPhone, then you could use the Music app to manage playlists and other functions related to songs stored on your phone.

    Conveniently enough, most apps now allow users to control audio playback from the lock screen so that they don’t even have to unlock their phones when wanting to skip a song or select something else entirely. You can also easily switch between different devices without needing to re-pair them each time as long as both devices are within range of one another; this makes life easier when dealing with multiple sources of audio playback at once!

    Utilizing Siri For Skipping Songs

    Skipping songs with AirPods is a cinch – all you need to do is use Siri. With your AirPods connected to your device, simply activate Siri and give it commands such as “skip this song” or “go back to the previous track”. You can also ask for specific music by saying something like “play my favorite artist”, and Siri will respond quickly! All in all, using Siri on your AirPods makes it incredibly easy to control your music without ever having to take out your phone.

    The best part? No matter what type of music service you’re using (iTunes Music, Apple Music, Spotify, etc.), Siri has got you covered. As long as you’ve enabled voice recognition within each app’s settings menu, Siri should be able to recognize any command that you give it related to skipping tracks and playing new ones. It doesn’t get much simpler than that!

    Overall, utilizing Siri on your Airpods is an effective way of controlling the tunes playing from your device without any fuss. Whether it’s changing up the playlist or going back a few tracks, giving simple commands through siri allows for seamless transitions between different types of music. So go ahead: put on those pods and enjoy some hassle-free listening!

    Final Words

    It’s easy to skip songs with Airpods! As long as your device is compatible, you’ll be able to quickly set up music controls and have access to the ultimate hands-free experience. I find it especially helpful when I’m out running or biking — all I need to do is double-tap my earbuds and say “skip this song” for a quick change of tune.

    Overall, using Siri has been incredibly convenient in allowing me to switch between tracks without having to pause what I’m doing. It may take some getting used to if you’re not an Apple user, but after that initial learning curve, you won’t want to go back! With a few simple steps, anyone can become an Airpod pro in no time.

    So whether you’re hitting the gym or lounging around the house, don’t forget about your Airpods’ abilities: they just might be one of the best ways for you to listen to music on the go.

  • How To See Blocked Numbers On an iPhone

    How To See Blocked Numbers On an iPhone

    Have you ever been frustrated by a blocked number on your iPhone? Do you want to know how to see the caller’s identity and why they are calling? You’re in luck! In this article, we’ll discuss how to view blocked numbers on an iPhone.

    If you can’t identify who is calling and think it might be important, there are several steps you can take to find out who it is. We’ll show you some quick tips and tricks that will help you uncover those pesky blocked callers. From using third-party apps to trying carrier settings, there are multiple methods that may work for you.

    Today, smartphones have become an integral part of our lives — but when the wrong person calls or texts us, it can make them feel like more of a burden than a blessing. Don’t let yourself get caught up in the frustration; read on and find out how easy it is to figure out who was behind those mysterious blocked calls!

    Settings Options

    In order to see blocked numbers on an iPhone, it’s important to understand the call blocking settings. To access these settings, open the ‘Settings’ app and navigate to ‘Phone > Call Blocking & Identification.’ This will provide a list of all numbers that have been blocked from calling you.

    To unblock a number, select ‘Edit’ in the top right corner of the page and then hit the red circle next to any contact or phone number you wish to remove from your block list. Keep in mind that if a caller has blocked their Caller ID, they may still be able to get through even if you’ve put them on a block list. You can also restrict third-party apps like WhatsApp or FaceTime by tapping ‘Block Contact…’ at the bottom of this menu.

    It’s essential to familiarize yourself with these various call blocking settings so you are aware of what is being blocked and how. Understanding call blocking allows users to manage who can reach them more effectively.

    Understanding Call Blocking

    Call blocking is an important tool for managing who can reach you on your iPhone. It allows users to block certain numbers, contacts, or even third-party apps like WhatsApp and FaceTime from contacting them. With call blocking enabled, any calls coming in from these blocked sources will be automatically rejected and sent straight to voicemail when they try calling.

    However, this feature isn’t foolproof – a caller with their Caller ID blocked may still be able to get through the call blocking settings if they know the right steps. To ensure your phone stays secure, here are five key tips to remember while using the call blocking feature:
    •\tBlock calls from unknown numbers
    •\tAdd frequently contacted numbers to contacts list so it doesn’t inadvertently get blocked
    •\tCheck regularly for unwanted calls that have been accidentally blocked
    •\tAvoid using ‘block all’ features unless absolutely necessary as it could lead to missing legitimate calls
    •\tWatch out for spoofed numbers which appear very similar but have slight differences such as an extra digit at the end of the number
    By following these steps and understanding how call blocking works, users can better control who has access to their personal information and protect themselves against malicious activity. Additionally, unblocking caller IDs from recent incoming numbers gives additional peace of mind that no one’s trying to contact without being noticed.

    Unblocking From Recent Calls

    Unblocking numbers from recent calls on an iPhone can be done quickly and easily. To unblock a number that has been blocked, simply open the Recent Calls page in your Phone app and tap the ‘i’ icon next to the contact. This will bring up their details page where you can select ‘Unblock this Caller’ to remove them from your block list.

    If you’ve accidentally blocked someone’s incoming call or message, it’s important to remember that they may still be able to reach you if their caller ID is hidden – so keep an eye out for any suspicious activity coming through! Additionally, if you’re unsure of who’s calling, don’t hesitate to ask before unblocking a caller.

    Once a number has been successfully unblocked, all future incoming communications should arrive as usual – no more missed calls or messages! With these simple steps, users can ensure they never miss another important call again while having full control over whom they accept calls from. Moving forward, users now have everything they need to confidently manage their call blocking settings on their iPhones.

    Unblocking From Contacts App

    Another way to unblock numbers on an iPhone is through the Contacts app. This method can be useful for users who have accidentally blocked a contact, as well as those looking to view their list of blocked callers. To begin, open up the contacts app and locate the desired caller in your address book. Once you’ve found them, tap ‘Edit’ located at the top right corner of your screen. From here, scroll down until you see ‘Block this Caller’, which should now appear unchecked – indicating that they are no longer being blocked from calling or messaging you!

    To view all of your currently blocked numbers, select ‘Settings’ followed by ‘Phone’. Here you will find a full list of contacts whom you have chosen to block from contacting you via phone calls or messages. If needed, individual entries can also be removed quickly and easily by simply tapping the ‘Unblock’ button next to each entry.

    By keeping these steps in mind, users will be able to confidently manage their call blocking settings within both the Phone and Contacts apps on their iPhones.

    Unblocking From Phone App

    Unblocking numbers from the Phone app on an iPhone is just as simple and straightforward. This method can be especially useful for users who have accidentally blocked a contact, or those wishing to check their list of blocked contacts at any time. To start off, open up the ‘Phone’ app and select ‘Recents’ in order to view your call history. From there, tap the ‘i’ icon next to each entry that you wish to unblock and then toggle off the switch located next to ‘Block this Caller’. In a matter of moments, your chosen caller will no longer be restricted from calling or messaging you!

    If desired, all currently blocked numbers can also be found within the Phone app by selecting ‘Settings’ followed by ‘Blocked Contacts’. Here one can find a full list of individuals whom they’ve previously opted not to receive calls from – which can then be individually removed with ease through tapping the ‘Edit’ button located at the top right corner of their screen and then hitting ‘Unblock’ next to every single desired number.

    Through using both these methods, anyone with an iPhone will easily be able to manage their phone settings without missing a beat. With that said, it’s now time move onto viewing individual caller ID information when receiving incoming blocked calls…

    Viewing Blocked Caller Id

    Sometimes, it can be difficult to keep track of blocked phone numbers – even if they have already been unblocked. Fortunately, there is an easy solution for viewing the caller ID information of incoming restricted calls on your iPhone. Simply open up the ‘Phone’ app and select ‘Recents’ in order to view your list of recent callers. If a number appears as ‘Blocked’, tap the ‘i’ icon next to that entry in order to reveal their caller-ID details. This will allow you to easily identify who called without having unblock them first!

    TIP: Take screenshots or take notes from these call logs so that you can refer back to them later if desired. That way, you won’t need to worry about remembering each specific blocked caller’s name when looking through your records.

    Another great tool for managing both blocked and non-blocked contacts alike is by making use of third-party apps such as Truecaller or Hiya Caller ID & Block which offer convenient features like automatic blocking and reverse lookup capabilities. With this type of software installed, users are able to quickly identify unknown numbers while also being able to maintain control over whom they choose not receive calls from at any given time.

    With all these options available, anyone with an iPhone will now have complete access over their personal settings regarding incoming calls and messages – allowing them some much needed peace of mind in today’s world. Up next we’ll discuss how best utilize such applications in order stay informed…

    Caller Id Apps

    Caller ID apps are an incredibly useful tool for managing incoming calls on your iPhone. These programs can be used to both block and unblock caller-ID information, depending on the user’s needs. For example, if you wish to permanently block someone from calling or messaging you, then you can use a caller-ID software like Truecaller or Hiya Caller ID & Block to do so with just a few taps. On the other hand, if you want to temporarily unblock someone who has been restricted by accident or otherwise, then these same apps will provide an easy way of doing this as well.

    Moreover, many of these third-party applications even offer handy features such as reverse lookup capabilities – which allow users to quickly search for any unknown contact info associated with a particular phone number. This is especially helpful when trying to track down those pesky telemarketers that call at all hours of the day! In addition, some apps also offer automatic blocking options so that specific contacts never have access to your line in the first place.

    Overall, using one of these types of programs makes it much easier for anyone with an iPhone to take control over their own personal settings regarding incoming calls and messages – providing them with peace of mind knowing that they’re always in charge of deciding who does (and doesn’t) get through.

    Third-Party Apps

    Figuring out how to see blocked numbers on an iPhone can be a tricky endeavor, especially when it comes to unblocking them. Fortunately, there’s a way around this issue – and it involves the use of third-party apps. These programs are specifically designed to help users manage their incoming calls and messages in more streamlined ways than what is available through Apple’s native features.

    Here are 3 key benefits of using such caller-ID apps for identifying or unblocking contacts:
    1) Easily trace unknown numbers from any region
    2) Quickly block or unblock specific calls
    3) Instantly view contact info associated with a number

    In other words, these types of applications make managing your call settings much simpler than ever before – allowing you to take control over who does (and doesn’t) have access to your line at any given time. And if you’re curious as to how exactly one would go about unblocking a number manually? Well… that’s where we’ll head next!

    Unblocking A Number Manually

    If you’re looking to manually unblock a number, the process can be surprisingly straightforward. To start off, simply open up your phone’s settings menu and select “Phone” from the list of available options. From here, scroll down until you find an option labeled “Blocked Contacts” or something similar – this is where all blocked numbers are stored for easy reference.

    Now that you’ve located the correct section within your phone’s settings menu, it’s time to begin unblocking the desired caller. Simply tap on their name (or number) in order to access additional info about them – then hit the “Unblock Contact” button to immediately unblock them. After doing so, they should have full access to contact you once again via text message or call!

    Of course, if things don’t go as planned after attempting a manual unblock of a number, there may still be some hope left yet. The next step in our journey will be devoted towards troubleshooting these types of issues should one arise during the process of trying to re-establish communication with someone who was previously blocked.

    Troubleshooting

    Unblocking a number can sometimes be like trying to find the right key for a lock; you may have all the right pieces but still fail to unlock what’s inside. Such is often the case when dealing with call-blocking issues on an iPhone – no matter how many times you try, it just won’t work! Thankfully though, there are some troubleshooting steps that can help alleviate these block number errors and unblock numbers without any additional hassle.

    First off, if you’re having trouble making calls or sending messages after unblocking someone, make sure caller ID is enabled in your settings menu. This should allow the phone to recognize incoming calls from blocked numbers as long as they’ve been successfully unblocked previously – otherwise nothing will happen even after hitting ‘unblock’! Additionally, another common issue that arises during this process is failure of the device to properly identify which contacts have actually been blocked; this can lead to confusion and frustration until its resolved. To fix this problem quickly and easily, simply check the list of blocked contacts on your device periodically so that all numbers are up-to-date before attempting further action.

    Finally, don’t forget about resetting your network connection if none of these solutions seem to solve your blocking problems. In most cases this should do the trick in terms of allowing new numbers through while resolving any lingering issues with existing ones – leaving you free once again to communicate as desired with whoever you need to talk/text!

    Conclusion

    In conclusion, there are several ways to unblock a phone number on an iPhone. With the settings options, you can understand and manage who is blocked from calling you or messaging you. You can also unblock numbers from recent calls, contacts app, and the phone app. There are even apps available that show caller ID information for unknown numbers.

    Third-party apps are another way to view blocked numbers as well. And if all else fails, you can manually enter in a blocked number yourself to see it appear on your device’s screen like a beacon of hope—like a lighthouse guiding lost ships back home.

    If any issues arise while attempting to unblock a phone number on an iPhone, troubleshooting steps should be taken right away so users don’t get stuck with faulty service. In the end, learning how to see blocked numbers on an iPhone is not only simple but empowering too! It’s like having complete control over who gets access to your personal communication line.

  • How To Pin People On Snapchat

    How To Pin People On Snapchat

    Are you looking to stay connected with your friends, family and followers on Snapchat? Pins are a great way to do just that! They enable you to pin important conversations to the top of your chat list so they’re always easily accessible. But how exactly do you go about pinning someone on Snapchat? Read on for an easy-to-follow guide on how to get started.

    This article will show you step-by-step how to effectively use pins in your chats. You’ll learn what kind of content can be pinned, who is eligible for pins, and other helpful tips along the way. Whether you’re new to Snapchats or have been using it for years, this guide has something for everyone. So grab some popcorn, kick back, and let’s dive into the world of pins!

    By the end of this tutorial, you’ll know everything there is to know about pinning people on SnapChat. Ready? Let’s get started!

    How To Add Friends On Snapchat

    Adding friends to your Snapchat is easy, and there are lots of ways to do it. To get started, you’ll need the app installed on your phone – so if you haven’t already done that, head over to the App Store or Google Play to download it now.
    Once it’s downloaded, open up the app and sign in with your details. You should then be taken to a home page where you can find options for adding contacts and finding people you know. There are several different ways to add friends on Snapchat: by searching their username; scanning someone’s Snapcode which looks like an intricate QR code; using Add Nearby which allows users within a certain radius access each other’s accounts; or sending out invites via email or SMS. Once you’ve followed these steps and added some contacts, start browsing through stories from all of your friends! If any of them interest you, consider following them for more content down the road. That’s all it takes – simple as that!

    How To Find And Follow People On Snapchat

    Snapchat is one of the most popular social media apps today and it’s no surprise why. It’s easy to use, offers tons of creative features, and provides a great platform for staying connected with friends. But if you’re new to Snapchat or just looking to find some more people to follow, this guide will show you how to do that quickly and easily.

    The first step in finding people on Snapchat is using their search feature. You can access this by tapping the magnifying glass icon at the top of your screen. This will open up a search bar where you can type in someone’s username or phone number to locate them. You can also search by name, email address, or even interest keywords like “travel” or “cooking.” Once you’ve found someone you want to follow, click on their profile picture and select ‘Follow.’

    If you don’t have anyone specific in mind but still want to discover new people on Snapchat, there are plenty of ways to do that too. The Discover tab gives you an easy way to browse public content from influencers and brands as well as see what stories your friends are sharing. Additionally, the Add Nearby feature lets you connect with other nearby users who have enabled location services – perfect for connecting with people when out and about!

    No matter which method you choose for finding people on Snapchat, all it takes is a few simple steps before you’ll be following all sorts of interesting accounts and keeping up-to-date with everyone’s latest snaps! So go ahead – start exploring now and make sure your Snapchats stay fun and fresh!

    How To Create And Manage Groups On Snapchat

    Creating and managing groups on Snapchat is a great way to keep in touch with your friends, family members, and coworkers. To start creating a group, open the Snapchat app, tap the Chat icon at the bottom-left corner of the screen, then tap ‘Create Group’. You’ll be asked to select up to 16 people you’d like to add to your group. When selecting those people from your contacts list or via search, make sure to double-check that all of them are listed correctly before tapping ‘Create’ at the top right corner of the screen.

    Once everyone has been added to your new group chat, it’s time for some housekeeping! Tap ‘Group Info’ (the gear icon) at the top left corner of the chat window and there you can change things like who can post messages, what type of notifications each member will receive when someone posts something in the chat room, whether or not members should have access to view others’ stories within this particular group chat only etc. This section also provides you with an easy way to find out which members are active users versus inactive ones by viewing their last seen status information.

    Now that you’ve created and managed your snapchat group(s), why not invite more friends? From inside any individual group conversation just tap on ‘add friends’, then either use your phone’s contacts list or search for specific individuals if they’re already registered as a user on SnapChat. With these features available it becomes much easier than ever before staying connected with multiple groups of people while being able to stay organized with how many conversations & notifications one person receives during a given day/week.

    Final Words

    Snapchat is a great way to stay connected with friends and family. It’s easy to use, and by following these steps you can quickly get up-and-running on the platform. You can add friends, follow people, create groups, and even pin them so they’re easier to find in your contact list.

    The best part about using Snapchat is that it allows me to keep in touch with my loved ones without having to worry about privacy concerns. With its secure messaging options and user friendly interface, I’m able to easily share photos and videos with those closest to me while staying safe online!

    Overall, if you’re looking for an efficient way to stay connected with your friends and family then Snapchat is definitely worth checking out. By taking just a few moments out of your day you can start adding contacts and sending messages right away – no matter where you are in the world!

  • How 1xBet is Revolutionizing the Relationship Between Esports and Betting

    How 1xBet is Revolutionizing the Relationship Between Esports and Betting

    1. Introducing 1xBet and the Relationship Between Esports and Betting
    2. Unlocking the Potential of Esports Gambling with 1xBet Case Study
    3. Taking Advantage of Esports with Sponsored Events by 1xBet
    4. Breaking Down Barriers at the Intersection of Esports and Betting with 1xBet
    5. Exploring The Future of Esports Betting through 1xBet’s Initiatives
    6. Concluding Thoughts on How 1xBet is Building Bridges between esports and betting

    Introducing 1xBet and the Relationship Between Esports and Betting

    1xBet thinks esports and bookmakers work together very well. They recently sponsored a really exciting Counter Strike event to show this. Casino Review asked 1xBet how they can make the most of this market and what things like sponsoring events can do to help.

    Unlocking the Potential of Esports Gambling with 1xBet Case Study

    The potential of esports in betting is incredible – almost half the world population plays games today! This revelation has been met with enthusiasm within the gambling sphere. Esports are becoming more popular, like the big match between NAVI-2010 and NAVI-2020 teams.

    Many people watched it and enjoyed it. 1xBet Team thinks that esports https://in.1xbet.com/virtualsports will keep getting more popular around the world, making it even more fun for everyone who enjoys playing games.

    Thanks to 1xBet, more than 900,000 dedicated viewers around the world were able to watch NAVI-2010’s much awaited match. In anticipation of this occasion, we launched a unique promotion that allowed players to place bets on possible results.

    This event is one of many examples showing how rapidly esports are growing in popularity; heroes and iconic teams have gained passionate followings among thousands of fans! Through our efforts, 1xBet was delighted to make the return match for NAVI-2010 into a reality.

    Taking Advantage of Esports with Sponsored Events by 1xBet

    For many, esports and video games have become the go-to source of entertainment. Even if one does not succeed in this field, most would still follow every competition closely and provide their support for a particular team. 1xBet takes it up a notch by giving fans even more reason to get excited over wins via predictions. Cheering on your idols is already fun enough but making an accurate forecast adds another level of thrill into the mix!

    In what other ways does 1xBet obtain visibility in the esports world? Are affiliates just as critical to its success here as they are with more traditional sports betting organizations?

    The 1xBet Team is proud to partner with NAVI, Cascade and other teams. We invest in esports organizations so they can do their best and make a difference in the gaming world. We like working with these companies because they are passionate and have new ideas. We know that success comes from people who work hard, try new things, and impress others – this is what we believe at 1xBet!

    Breaking Down Barriers at the Intersection of Esports and Betting with 1xBet

    Affiliates should not be overlooked when discussing esports. They are essential in driving engagement and providing an opportunity to make money through betting on the games.

    Our company was happy to help our partners during the spring sports break. We used esports to bring attention. Lots of websites about esports wanted to know more. Other websites, not just about esports, also wanted to learn more. Both us and our affiliates are beyond pleased with this result!

    How much has esports grown and contributed to 1xBet’s overall success in recent years? Has there been a surge of growth during the past few months?

    At 1xBet, we value esports immensely and recognize its ever-growing popularity among the youth. As a bookmaker, ignoring this thriving sector is simply not an option. Our team constantly monitors Esports trends to ensure that our bettors get access to all the latest news and events in their favorite sport!

    Exploring The Future of Esports Betting through 1xBet’s Initiatives

    For the past 13 years, we have been pushing boundaries with creative and innovative ideas. Conspiracists can now wager on UFO sightings, sci-fi enthusiasts place bets on rocket launches to Mars, and esports fanatics make predictions for their favorite tournaments – all of these opportunities are made possible by our out-of-the-box thinking! Our willingness to explore new avenues has enabled us to realize bolder visions than ever before.

    During the last few months, the interest around esports has increased. There were several reasons for this, including a pause in most other sports. At the same time a number of big tournaments in esports were held online. All this attracted many fans, plus newcomers looking to learn more about the esports competitions.

    What hurdles does the esports market currently face? Are gaming publishers more inclined to collaborate with gambling corporations now?

    At 1xBet Team, we are open to the possibilities of exploring new collaborations with game developers. We believe that there is still so much potential for us to find creative ways to engage and interact, and it would be exciting if you can join us on this journey!

    Today, there are a lot of people who make amazing games with not much money. If these people work together, their ideas can come true and be exciting for lots of fans! We know that gamers and game makers go together well. Working together will help everyone get the most out of it.

    Technology is undeniably a catalyst for the growth of esports, so what does 1xBet anticipate to be the future developments and trends in this domain? What are you most excited about in terms of technological or other innovations on the horizon?

    Get ready for an amazing gaming experience with the upcoming launch of PlayStation 5 and XBOX Series X! Avid gamers will appreciate the power and creativity these new consoles offer, as they have been completely updated to provide a remarkable level of visual detail. Prepare yourself for incredible advancements in video game design – you won’t be disappointed!

    Concluding Thoughts on How 1xBet is Building Bridges Between Esports and Betting

    Developers have a lot to gain from us in terms of game mechanics. In many video games, players can open cases or buy special things for real money. A lot of gamers like this. Companies should listen to what gamers say so they can make the game better and more fun.

    We think there will be more esports tournaments around the world at nice places. We want 1xBet to have a big role in these events and make even more people like us who enjoy the excitement and winning!

  • How To Turn On Subtitles On Disney Plus

    How To Turn On Subtitles On Disney Plus

    Have you ever wanted to watch a show on Disney+ but needed subtitles? Don’t worry, because with this guide, turning on subtitles is easy! You’ll be able to enjoy your favorite movies and shows without missing any of the dialogue. No matter if you’re watching from your laptop or phone, I’m here to walk you through how to turn on subtitles for Disney+. Let’s get started!

    The first step is knowing which device you’re streaming from. Whether it’s an Apple TV, Android phone, or laptop computer – these steps will work across all devices. Next up are the language settings – not everyone needs English subs so make sure that your preferred language is chosen in the Settings menu. Finally there’s a simple switch within the app itself where you can enable subtitles right away. It doesn’t take long at all and once activated they appear automatically whenever a supported movie or show starts playing.

    So don’t wait any longer – follow along with me as we go over each step in detail and have those captions running smoothly in no time! With some patience (and my help) getting subtitles set up won’t be a problem anymore. Ready to learn more? Let’s dive into our comprehensive guide on how to turn on subtitles on Disney+ now!

    Accessing Subtitles In Disney+

    Turning on subtitles in Disney+ is easy and can be done in a few steps. All you need to do is log into your Disney+ account and start streaming content. Once that’s done, head over to the Settings tab located at the bottom right of the screen.

    From there, select Audio & Subtitles from the menu options. You’ll then be presented with several language options for both audio and subtitles – choose whichever ones you’d like! To turn on subtitles for Disney+, just click ‘on’ next to the desired language option and voila – it’s as simple as that! Now you can watch all your favorite shows or movies with subtitles enabled in Disney+.

    It couldn’t be easier to access this feature in Disney+, so why not give it a try today?

    Selecting Preferred Language

    To turn on subtitles on Disney Plus, first select your preferred language. You can choose from several different languages, including Spanish subtitles.

    To do this, log in to your account and go to the Profile page. From there, you’ll see an option that says Select Language – click it. A list of available languages will appear; simply pick the one you want and hit save.

    Once you’ve done that, all future streaming content should be presented in your selected language with subtitles enabled. However, if you ever need to change it again or disable subtitles altogether, just follow the same steps above and make the necessary adjustments.

    If you’re a fan of foreign films or shows, enabling subtitles could make for a more enjoyable experience since reading them is often easier than trying to understand what’s being said at full speed! So take some time to explore which options are best suited for your needs and preferences today.

    Adjusting Subtitle Appearance

    Now that you’ve enabled subtitles on Disney Plus, it’s time to customize how they appear. The platform allows subscribers to adjust the font, size, color, background and position of their subtitle text. Here are some tips for making sure your captions look just right:

    Font

    • Select an easy-to-read font that won’t strain viewers’ eyes while they watch.
    • Sans serif fonts like Arial or Verdana are always a safe bet.
    • Avoid script fonts like Comic Sans as these can be difficult to read at small sizes.

    Size

    • Adjusting the size of your captions is key for legibility on different screen sizes.
    • Consider using larger sizes if you’re watching from farther away.
    • Smaller fonts may work better if you’re watching up close.

    Color

    • To ensure contrast with the show’s visuals, choose a caption color that stands out against what’s happening onscreen without being too distracting.

    Background

    • If needed, add a subtle background behind your captions so they stand out even more clearly from the show itself.

    Position

    • Lastly, make sure that the placement of your captions doesn’t interfere with any important visual elements in the scene by shifting them around until they fit nicely into the frame.

    With all these options available, you’ll be able to create subtitles tailored specifically to each user’s needs! So grab some popcorn and start experimenting with how your captions should look — hours of entertainment await!

    Final words

    Turning on subtitles in Disney+ is relatively simple and can be done with just a few clicks. It’s important to remember that the exact process may vary depending on what type of device you’re using. Once you’ve got your preferred language selected, you’ll also have the option to customize how those subtitles appear – whether you prefer them to show up as white text on a black background or vice versa.

    Having access to subtitles makes it easier for viewers who are deaf or hard of hearing to enjoy movies and shows without missing out on key plot points or dialogue. And if English isn’t your first language, being able to watch something with subtitles can make all the difference when trying to understand an unfamiliar culture or story. For anyone looking to get more out of their streaming experience, I highly recommend giving this feature a try!

  • How To Turn Off Safesearch On iPhone

    How To Turn Off Safesearch On iPhone

    Are you an iPhone user who’s looking for a way to turn off safe search? Well, look no further! In this article, I’ll be walking you through the steps necessary in order to make sure your online searches are unrestricted. It may sound intimidating at first, but trust me – it’s actually easier than you think!

    Whether you’re looking to access adult websites or just want more control over what results show up when searching online, here’s how you can take back full control of your Safari browser and switch off safesearch on your iPhone. Let’s get started!

    Overview Of Safesearch

    Are you fed up with the nanny state of your iPhone’s SafeSearch settings? Do you feel like Big Brother is watching over your internet activity? Well, no need to worry! That’s what this guide is here for! We’ll give you an overview of what SafeSearch is — and how to adjust its settings on your iPhone.

    So, what exactly is SafeSearch? It’s a feature designed by Apple to help block out inappropriate content from search results. This means that when you use Safari or any other browser on your device, only age-appropriate websites will show up in the list of results. The filter works both ways: it prevents minors from accessing explicit material, as well as protecting adults from seeing offensive webpages they don’t want to see.

    But there are additional benefits to using SafeSearch too. Besides blocking out adult-oriented sites, it also filters out hate speech, violent images, and other potentially dangerous content. So if you’re worried about accidentally stumbling across something disturbing while browsing online, then having this feature active can really come in handy. Plus, it helps keep kids safe when they’re using the internet — allowing parents some peace of mind while their children explore the digital world without fear of being exposed to anything troubling.

    How To Adjust Settings On Iphone

    Adjusting the SafeSearch settings on your iPhone is actually a fairly simple process. Here’s what you need to do:

    1. Go to Settings > Safari and select ‘Content Blockers’.
    2. You should see an option for enabling or disabling the filter – simply switch it off if desired.
    3. To further refine the filter, choose ‘Advanced’ from the same menu. This will allow you to customize which types of content are blocked and displayed in search results.
    4. Finally, scroll down and toggle on “Limit Adult Websites” if you want to restrict access to any explicit material as well.

    Once these steps have been completed, all that’s left is to test them out! So go ahead and try searching for something with either Safari or another browser — if everything looks good then your new settings are working properly. And don’t worry if they’re not perfect right away; you can always tweak things later until you get just the right balance of safety vs convenience.

    But before we move onto disabling SafeSearch in other search engines, let’s take a closer look at how this feature works within Apple devices specifically.

    Disabling Safesearch In Search Engines

    Now that we’ve covered how to disable SafeSearch within Apple devices, let’s take a look at other search engines. Disabling safesearch in these platforms is also relatively easy – all you need to do is locate the appropriate settings page and switch off the filter. While this process may vary slightly between different browsers and operating systems, it generally follows the same basic steps:

    First, open up your browser of choice and navigate to the ‘Settings’ section. Here you should be able to find an option for enabling or disabling safesearch. Simply toggle this off and save your changes. Some browsers will even allow you to customize which types of content are blocked from appearing in search results — so if you want more control over what appears in searches then this could be worth looking into as well.

    Once everything has been configured properly, just give it a quick test run by searching for something on Google or another search engine – if all goes according to plan then your new settings should now be working! From here it’s simply a matter of maintaining these preferences going forward; while there’s no guarantee they won’t change again eventually, keeping them turned off can help ensure greater privacy and safety when browsing online.

    Alternative Ways To Disable Safesearch

    It’s not just about the settings page – there are also alternative methods for disabling SafeSearch. For instance, if you’re using a different search engine than those listed above, then it’s likely that they will have their own options and settings pages – so be sure to take a look at these as well. You may even find some useful tools or features that can help adjust your safesearch preferences more quickly and easily.

    Additionally, many websites offer their own customization options which allow users to turn off safesearch in various ways. If you come across one of these sites then make sure to check out what kind of control they offer over content filtering; this could save you time when trying to get your searches set up properly.

    Ultimately, while the process might seem daunting at first, with enough patience and research it’s possible to figure out how to turn safesearch off on any platform or device. All it takes is the willingness to explore all available search engine options, tweak your settings accordingly, and ensure that everything remains turned off until you decide otherwise!

    Conclusion

    In the end, it’s important to remember that SafeSearch is only one way parents can protect their children and teens from inappropriate content. In fact, a recent survey found that over two-thirds of parents in the US feel as though online safety has become an increasingly difficult issue for them to manage.

    That said, there are alternative ways to ensure your child or teen’s safe web browsing experience without having to rely solely on SafeSearch. You could use parental control apps such as Net Nanny or Qustodio to customize filtering settings according to age group and device type. Additionally, you could teach digital literacy skills such as researching responsibly, using strong passwords, and being aware of potential cyberbullying tactics.

    By taking these steps – along with adjusting settings on any iOS devices – you’ll be able to give yourself peace of mind knowing that your loved ones are staying safer while they explore the internet. I hope this article has been helpful in showing how you can turn off Safesearch on iPhone so you can find better balance between protection and freedom when it comes to your family’s online activity.

  • How To Leave A Life360 Circle

    How To Leave A Life360 Circle

    Have you ever wanted to leave a Life360 circle? With the right guidance and understanding of how these circles work, leaving a Life360 circle can be easy. In this article, I’ll break down the steps on how to leave a Life360 circle so that you can feel confident in taking action.

    First off, let’s talk about why people choose to join or leave Life360 circles in the first place. For many parents, joining one of these circles is seen as an ideal way for them to keep tabs on their children throughout the day – ensuring they’re safe and secure wherever they go. On the other hand, some users may want more autonomy over their movements and privacy from those monitoring them; thus looking for ways to exit their current circle without consequence.

    Regardless of your reason behind wanting to leave a Life360 circle, there are several basic steps that you should take when doing so. Keep reading if you’d like to learn more!

    Understanding Life360

    Leaving a life360 circle can be like taking off your shoes after a long day; often, it’s the most liberating feeling. Life360 is an app that helps family members know each other’s whereabouts and stay connected. It offers features such as location sharing, notifications when someone arrives at their destination, messages, check-ins, and more. Setting up a Circle (aka group) with Life360 is simple–all you need to do is sign up for an account on the website or app and add people in your family or group of friends to join. Once they accept your invitation, everyone will have access to all the features offered by Life 360.

    The features available vary depending on which subscription plan you choose but typically include 24/7 location tracking so everyone knows where their loved ones are located at any given time. You can also set up custom alerts if one of your contacts goes somewhere out of their usual routine or travels outside of specific geographic boundaries. Additionally, the chat feature allows family members to communicate quickly without having to type out lengthy emails or text messages. Finally, users can opt into privacy settings that allow them to hide their exact location from certain members in the circle if desired.

    By understanding how Life 360 works and exploring its various features and setup options, you’ll be well prepared to leave a circle whenever necessary – no matter what kind of situation arises.

    Setting Up A Circle

    Setting up a Life360 circle is easy and takes just a few steps. Here’s how to get started:

    1. Download the app on your device – The first step to creating a Circle with Life 360 is downloading the free app from either Android or iOS stores, depending on what kind of phone you have. Once downloaded, create an account using your email address and password before moving onto the next step.
    2. Create a Circle – After signing up, it’s time to create your own private circle by adding family members or friends who will join in on location sharing. To do this, tap “Create A Circle” at the bottom of the screen then enter names and click “Invite” for those people you want to add into the group. Your contacts will receive an invite via text message that they can accept if they wish to join.
    3. Join existing Circles – If someone has already created their own Circle and invited you, simply search for it under “Join An Existing Circle” found in the main menu of Life360. Clicking on it will bring up all available Circles that you can be added too. Select one and hit Accept Invitation when prompted; after doing so, you’ll instantly become part of that person’s private network!
    4. Customize settings & notifications – Now that everyone is connected in a particular Circle, users can customize each member’s visibility within the group as well as set custom alerts (arrive/depart notification etc.) based on individual preferences or locations they visit frequently such as work or school campus. There are also options like Panic Alert buttons which allow members in distress to quickly alert others about their whereabouts without needing to call out loud for help!
      With these simple steps done, families and groups alike can now enjoy peace of mind knowing where everyone is located while having fun messaging with each other throughout their day-to-day lives. Moving forward from here, let’s explore how leaving a Life360 circle works – no matter what situation arises – so we know exactly what needs to be done when the time comes.

    Leaving The Circle

    Leaving a Life360 circle can be an emotional experience, whether you’re exiting because of a disagreement or just need to step away from the group. Whatever your reasons may be, it’s important to know how to properly remove yourself and delete your account so that everyone is on the same page.

    First off, if you’re looking to exit a particular Circle but still remain in others, all you have to do is open up the app and select “My Circles” at the bottom of the screen. Once there, tap on whichever one you want to leave then choose “Leave This Circle.” You’ll be prompted with a confirmation message asking if you really want to go through with this action – click “Yes” and that’s it! The process takes only seconds and will immediately take effect for all other members involved in that particular network.

    For those wanting more permanent solutions such as deleting their entire Life360 account altogether, simply head over to ‘Settings’ located within the main menu then scroll down until “Delete Account” appears towards the bottom of this list. Selecting this option will prompt another confirmation message warning about what happens when accounts are removed; after double-checking everything looks correct (No turning back!), hit Delete My Account once again before signing out completely from Life360 – no matter what type of device was used originally for registering your profile information!

    With these steps done right now it’s time to explore alternatives available outside of life360 like different location sharing apps or even setting up private circles manually without any tech assistance whatsoever.

    Alternatives To Life360

    Now that you’ve officially left the Life360 circle, it’s time to explore some other location tracking apps available out there. From family locator apps for keeping tabs on your loved ones’ whereabouts to GPS tracking apps for monitoring vehicles and phone monitoring services – there are plenty of options when it comes to staying connected with those in your life or keeping an eye on property from afar.

    One popular alternative is Find My Friends which allows users to share their exact locations with one another through a private network – this can be especially helpful if you’re worried about someone getting lost while traveling! Additionally, Glympse has been gaining traction lately due its ability to follow people’s movements in real-time via car trips, walks around town etcetera; plus they offer extra features such as setting up temporary groups so everyone knows exactly where each person stands at any given moment.

    Lastly, there are many vehicle tracking solutions like Tile Trackers or LoJack systems specifically designed towards locating automobiles in case they get stolen or misplaced – these options provide peace of mind by allowing owners access 24/7 even when not physically present near their cars. Allowing remote control over various aspects (like engine start & stop) makes them particularly attractive too! Whatever your needs may be, there’s sure to be something out there worth exploring once you leave behind the confines of Life360 circles.

    Conclusion

    Life360 is an app that can offer peace of mind to families who want a way to keep in touch and know where their loved ones are. It’s easy to set up, but sometimes leaving the circle isn’t as straightforward. Knowing how to do it correctly can be helpful if you’re ready to move on from Life360.

    The process of exiting a Life360 circle might feel overwhelming at first, but with patience and persistence, anyone can make it happen. All it takes is following the steps outlined above: disabling notifications for the individual or family member in question, deleting them from your contacts list, and uninstalling the app from any device they were using. Like taking off a pair of shoes, once complete these tasks will ensure that all ties with Life360 have been cut cleanly and completely.

    If this method doesn’t quite fit your needs or lifestyle, there are always alternatives available like Google Maps or Apple’s Find My Friends app which provide similar tracking capabilities. Whether you choose one of these options or opt out entirely – make sure that whatever step you take feels right for you! Just like finding the perfect shade of lipstick; when it comes down to choosing an appropriate safety measure -you’ll know it when you see it!

  • How To Get Free Skins In Fortnite

    How To Get Free Skins In Fortnite

    Are you looking for a way to get the coolest skins in Fortnite without spending any money? It’s totally possible, and I’m here to tell you how. With just some patience and dedication, anyone can join the ranks of elite gamers with sweet looks in no time at all. In this article, we’ll explore what free skins are available in Fortnite and how to unlock them. So read on if you want to up your style game!

    For those who don’t already know, Fortnite is an online video game that has become hugely popular over the past few years. The battle royale mode allows players to fight it out against each other – or team up – as they scavenge resources and build structures while trying to be the last one standing. But part of what makes the game fun is having awesome-looking characters with unique outfits. And if you want to put together a great look without breaking your bank account, then getting free skins is definitely something worth exploring.

    Fortunately, Fortnite offers plenty of ways for players to score exclusive items without shelling out cash. Whether it’s through promotions or challenges, there are loads of opportunities for savvy gamers to snag themselves some seriously cool cosmetics without putting down any dough. So let’s dive into what kind of free skins are out there and learn exactly how to get our hands on them!

    Overview Of Fortnite Skins

    Fortnite skins are a popular form of customization for players in the game. Whether you’re looking for an outfit to complete your look, or just something eye-catching and unique, there’s plenty to choose from. Skins come in several types: outfits, which provide full coverage; pickaxes, gliders, back blings and emoticons that can be used with any outfit; and wraps, which allow you to customize individual pieces of gear. The rarest type of skin is the legendary outfit – these are extremely hard to get hold of! Skin customization also allows you to change up your look as often as you like.

    When it comes to collecting Fortnite skins, there are two main ways to do so: purchasing them directly from the item shop (using V-Bucks) or earning them through special events such as limited time challenges. Some skins may also be earned randomly by opening loot boxes purchased in the item shop. Of course, some rarer skins will require more effort than others – but if you’re willing to put in the work, it could pay off big time!

    No matter what kind of skin collection you’re after – whether it’s a classic look or something totally wild – getting free Fortnite skins is always worth exploring. And luckily enough, there are eligibility requirements that need to be met before claiming one…

    Eligibility Requirements For Free Skins

    It’s a common theory that the only way to get your hands on free Fortnite skins is through completing limited-time challenges or opening loot boxes – but this isn’t necessarily true. In fact, there are various eligibility requirements you must meet in order to qualify for these exclusive skin offers. Let’s take a closer look at how you can snag yourself some of those hard-to-get cosmetics without spending any money!

    First and foremost, it should be noted that not everyone will be eligible for free Fortnite skins – certain conditions have to be met before claiming them. For starters, players must meet all age qualifications set by Epic Games (i.e., 13+ years old). Other criteria may also include having an active subscription with Twitch Prime or being part of a specific group such as Xbox Live Gold members. Additionally, users may need to complete certain tasks like downloading apps or watching ads in order to acquire their desired skin.

    In short, meeting the necessary free skin qualifications takes more than just luck – planning ahead and keeping up with events and promotions can help increase your chances of getting ahold of one of these rare items! That said, once you’ve found out what rules apply to your preferred method of acquisition, then you’ll be ready to start collecting those elusive cosmetics.

    Methods Of Acquiring Free Skins

    So, now that you know the eligibility requirements for acquiring free Fortnite skins, let’s take a look at some of the methods available to those seeking these rare cosmetics. There are a few different avenues one can explore when it comes to unlocking free skins – though these strategies may vary from platform to platform and region to region.

    For starters, depending on your location, certain companies may offer exclusive promotions in which users can redeem their points for specific items like V-Bucks or even Fortnite skins. In addition, players with Twitch Prime subscriptions often have access to special offers such as bonus content or loot boxes containing random cosmetic rewards. Finally, participating in limited-time events or challenges is another great way to score yourself some extra goodies!

    It should be noted that while all three of these options provide unique chances of receiving free skins, they’re not guaranteed – so it pays (literally!) to stay vigilant and keep an eye out for any new deals or giveaways that might pop up during your hunt! That said, with the right combination of luck and strategy you’ll soon be well on your way towards filling up your wardrobe with stylish accessories without spending a dime.

    Tips To Maximize Your Chances

    With so many opportunities for free skins in Fortnite, it’s important to make sure you’re taking full advantage of all the available options. To do this, there are a few tips and tricks players can use to maximize their chances of obtaining cosmetic rewards.

    First off, those playing the popular battle royale mode should take every opportunity they can to level up their Battle Pass and unlock any special season-exclusive items – as these often come with even more bonus content. Additionally, daily challenges are also great as they offer additional V-Bucks which can be used to purchase cosmetics or upgrade your pass. Finally, keeping an eye out for competitions within the community is essential if you want to earn unique rewards that cannot otherwise be obtained through normal game play.

    Knowing where (and how) to look for new promotions and giveaways is key when it comes to getting those hard-to-find cosmetics without spending any money! So keep your finger on the pulse of what’s happening in the world of Fortnite and take full advantage of whatever offers you see coming your way – before someone else beats you to them!

    Conclusion

    It’s no secret that Fortnite skins are incredibly popular among gamers. With more than 250 million players worldwide, the game has become an international phenomenon. And while many people purchase these cosmetic items to customize their characters, others seek out ways of getting them for free.

    By familiarizing yourself with eligibility requirements and various methods of obtaining free skins in Fortnite, you can maximize your chances of scoring some sweet loot without spending a dime. In fact, if you’re lucky enough to snag one through Twitch Prime or another promotion, you could even earn up to 10 times the amount of V-Bucks it would cost to buy!

    So why not give it a try? It doesn’t take much effort and there’s no harm in trying – after all, around 30% of Fortnite players have reportedly been able to acquire at least one free skin during their time playing the game. Now that’s something worth checking out!

  • How To Find Lost Airpods That Are Offline

    How To Find Lost Airpods That Are Offline

    Lost AirPods often feel like a tragedy. You’ve spent hundreds of dollars on these little pieces of technology – not to mention the hours you’ve spent listening to your favorite tunes with them! But when they go missing, it can be hard to find those tiny things again. Don’t give up hope yet though: I’m here to help you get those precious earbuds back in no time. In this article, I’ll teach you how to find lost AirPods even if they’re offline.

    We’ve all been there before: frantically searching for our missing AirPods, but with no luck. It’s frustrating and discouraging when we don’t know where that one single pod is hiding or why it won’t connect anymore. If this sounds familiar, then keep reading—there are still ways to track down your beloved tech even if it’s out of range or has run out of battery power.

    Don’t let lost AirPods make you lose hope; there are plenty of tricks up my sleeve (and yours) that can help reclaim what was once thought lost forever. With just a few simple steps and some clever detective work, you can have your earbuds back in no time! So read on to learn some tips and tricks that will help you locate those rogue pods without breaking a sweat.

    What are Airpods? (In case you have not been on earth)

    Airpods have become a popular choice of headphones for many people. Not only are they convenient and easy to use, but they also offer superior sound quality compared to other types of headphones. Apple’s Airpods are wireless earphones that provide users with noise-cancelling capabilities and the ability to connect via Bluetooth to any device. They come in two sizes (regular and pro) so there is something for everyone. Unlike traditional wired earbuds, you don’t have to worry about getting tangled up or having to carry around cumbersome cables.

    The convenience of Airpods has made them a go-to accessory for busy people who need their music on the go. Whether you’re commuting, working out at the gym, or just listening while walking around town – it’s all possible with these innovative headphones from Apple. The best part about Airpods is that they’re incredibly lightweight, making them ideal for anyone looking for an effortless way to listen to music without compromising sound quality.

    These days more than ever, it seems like we could all use some peace and quiet – this is where noise cancelling technology comes in handy! With noise cancellation enabled on your Airpod Pro model, background noises won’t stand a chance against your favorite tunes. So if you’re looking for an excellent pair of wireless earphones that can give you great audio quality as well as some much needed silence when necessary, then Apple’s Airpods might be just what you need!

    Locating Your Airpods When Online

    It’s every headphone user’s worst nightmare – you take out your Airpods to use them, but suddenly they’re nowhere to be found. Whether it was a careless moment of carelessness or an accidental misplacement, locating lost Airpods can seem like mission impossible. Thankfully, there are a few ways that you can track down those missing earbuds so that you don’t have to deal with the hassle and expense of buying a new pair. Here are some strategies for finding your misplaced Airpods:

    • Locate Airpods When Online:
    If your Airpods are online (connected to one of your devices), then you can easily locate them via Apple’s “Find My” app on iOS or iCloud website on Mac/PC. This will allow you to view their last known location as well as give you options such as playing a sound through the headphones in case they were simply misplaced nearby. You can also choose to put them into Lost Mode which will lock them remotely and prevent anyone else from using them until they are returned to you.

    • Track Airpods When Offline:
    In cases where the headphones aren’t connected to any device, this is when more creative methods may need to be employed. For instance, if you know approximately where the headphones were left behind, consider using another Bluetooth enabled device (like a smartphone) in conjunction with apps such as Find My Headphones or Tile Finder which search for Bluetooth signals within range. Additionally, if all else fails, try retracing your steps from around the time that the headphones went missing – sometimes old-fashioned detective work pays off!

    The good news is that no matter what situation arises when trying to find misplaced headphones, there is likely always going to be something that can help get back on track and reunite with those treasured pieces of audio equipment once again!

    Strategies For Finding Lost Airpods That Are Offline

    Let’s face it, losing your Airpods can be a major inconvenience – and in some cases, an expensive one if you have to replace them. But if the headphones are offline (not connected to any of your devices), all hope is not lost! There are strategies for tracking down those misplaced earbuds that don’t involve shelling out more money for a new pair. Here’s what to do when trying to find lost Airpods that are offline:

    First, consider using another Bluetooth enabled device such as a smartphone or laptop with apps like Find My Headphones or Tile Finder to search for nearby signals from the missing headphones. It may take some patience and trial-and-error but these types of programs can be quite effective at locating items within range.

    Second, retrace your steps around the time the Airpods went missing. Sometimes this classic detective work pays off – try searching through areas where they may have been placed before being forgotten about. If you still aren’t having any luck then reach out to friends who were around during that time and ask if they remember seeing them anywhere.

    Finally, while finding lost Airpods can seem daunting, there’s no need to give up just yet! With a bit of ingenuity and effort it might be possible to locate those beloved headphones once again without needing to buy replacements.

    Concluding Steps

    With a few strategies in hand, it’s time to finalize your search for the missing Airpods. There are still some steps that need to be taken after you’ve exhausted all possible locations and found nothing – don’t give up just yet! Here’s what to do next:

    1) Review any lost-and-found listings near where the headphones were last seen. It may be worth asking around or checking online resources like Craigslist and Facebook Marketplace if they haven’t been turned into an official space yet.

    2) If no luck there either, try contacting Apple support. They can provide helpful advice on how to go about finding them or even offer replacement options under warranty depending on when they were purchased.

    3) Once located (or replaced), make sure to reinstate the connection between your device and the Airpods so that they sync properly again. This involves turning off Bluetooth on one device before connecting with another via the settings menu of both devices.

    4) Finally, take extra precautions against losing them in the future by regularly cleaning out their case and investing in a tracking accessory such as Tile Finder for added peace of mind.
    By following these post-search steps, you should have some success in recovering those lost Airpods quickly and easily — hopefully without too much stress along the way!

    Conclusion

    The search for lost Airpods is a common problem, and it can be incredibly frustrating when they become offline. Fortunately, there are a few steps you can take to help locate them. With patience and determination, your missing Airpods may soon be reunited with their owner.

    Locating your Airpods starts with understanding how they work–knowing their range and any Bluetooth-enabled devices that could have moved the pods. Once I had an idea of where they might be, I then used my phone’s Find My app to track down the exact location of my misplaced Airpods. If this doesn’t work, however, more creative approaches like using audio cues or enlisting the help of others will come in handy.

    At times like these, it’s helpful to remember that everything has its place; even if it takes some extra effort to find our beloved Airpods again! Taking a step back allows us to look at our situations from different angles so we can figure out what works best for us—and hopefully reconnect with our much needed earbuds soon enough. Good luck on your treasure hunt!

  • How To Unpin Someone On Snapchat

    How To Unpin Someone On Snapchat

    Are you confused about how to unpin someone on Snapchat? You’re not alone! Many people find themselves in the same boat, struggling with questions about what it means to “unpin” and why they might need to do so. In this article, we’ll give you a step-by-step guide for unpinning someone from your friends list. We’ll also explain why you may want to consider doing this – and how it could benefit both of you. So if you’ve ever been curious about un-pinning on Snapchat, read on!

    Have you recently added someone new to your friends list who’s too active or maybe even sending inappropriate messages? If that’s the case, then pinning them can be a great way to manage their activity without having to completely remove them from your contacts. But perhaps now you’re wondering how exactly one goes about unpinning someone they’ve already pinned? Don’t worry – it’s easier than you think.

    It doesn’t take much effort at all to unpin someone once you know where and how to do it properly. With just a few taps of your finger, that person will no longer appear in the top section of your friend’s list (which is known as “Pinned Friends”). Don’t let yourself get overwhelmed by the process; our simple guide will walk you through everything from start to finish. Read on for more info!

    Overview Of Pinning

    Since Snapchat’s 2018 launch of its pinning feature, users have been able to stay connected with their closest friends. Pinning allows people to easily access conversations and stories from the same 10 people they talk to most frequently. It’s no wonder then that a whopping 95% of 18-24 year olds use this popular platform on at least an occasional basis!

    The basics of pinning are simple: you select up to 10 individuals or groups who can appear in your chat bar for quick access whenever needed. This is great for keeping track of those special connections, as well as making sure important messages don’t get lost among less relevant conversation threads.

    Though it’s easy enough to set up pins– just open a conversation window and tap the pushpin icon located at the top right corner — there may come a time when removing someone from your pinned list is necessary. We’ll take a look at how to do that next.

    How To Pin And Unpin Friends

    Pinning a friend on Snapchat is super easy. Simply open the conversation window and tap the pushpin icon at the top right corner of your screen. When you do this, that person’s profile picture will appear in your chat bar for quick access whenever needed.

    Unpinning someone is just as simple. To remove them from your pinned list, all you have to do is long press their profile image in the chat bar until it pops up with an ‘X’ sign next to it. Tap that X and they’ll be unpinned right away!

    It’s important to note that pinning or unpinning someone won’t affect any ongoing conversations—all messages are still accessible even after the process is complete. So if you need some breathing room but don’t want to lose touch completely, simply unpinning them can help make sure things stay organized without cutting ties altogether.

    Benefits Of Pinning Someone On Snapchat

    Pinning someone on Snapchat has its advantages. Whether it’s to quickly catch up with a friend or simply stay organized in your conversations, the feature comes with some great privileges. Here are three of the many benefits you can enjoy when pinning people:

    1) Easier access: Pinning friends allows for quicker and easier access to their messages. This is especially helpful if you’re looking to have a quick chat but don’t want to scroll through all your conversations just yet.

    2) Organization: Keeping track of who said what can be tough with all the different conversations going on at once. But with pinned contacts, you’ll always know where to look for that particular person’s chat history!

    3) Priority notifications: You may find yourself wanting to keep an eye out for certain people more than others—be it family members, close friends, or colleagues. With priority notifications enabled, any message from those individuals will appear first so you never miss anything important even when away from your phone for longer periods of time.

    Overall, pinning someone gives you numerous advantages that make navigation around Snapchat smoother and more efficient overall!

    Troubleshooting Tips

    Now that you know the benefits of pinning someone on Snapchat, let’s dive into some troubleshooting tips. Having trouble with your Snapchat friend pinning? Or maybe it’s time to unpin an old flame and need help removing their pin? Look no further! Here are a few key pointers to keep in mind when dealing with snapchat pinning issues:

    First things first, make sure you have the latest version of the app installed on your device. It may sound simple but having the most up-to-date technology can really make all the difference when trying to solve any snapchat pin removal or other related problems.

    Next, always double check who exactly is pinned before sending messages—especially if you don’t want those conversations going public! To do this, simply tap on the ‘pinned’ tab at the top of your chat list and review its contents. This will allow for greater control over what gets shared and who sees it.

    Finally, should anything go wrong while attempting to unpin someone from Snapchat (or vice versa), there’s no harm in reaching out directly to customer support via email or phone call. They’ll be more than happy to provide assistance with any snafus regarding pinning problems and beyond.

    Whatever issue you find yourself facing, remember these helpful tricks so you can get back to chatting with friends quickly and confidently!

    Conclusion

    In conclusion, pinning someone on Snapchat is a great way to show your friends that you care about them and want to keep up with their stories. Pins are an easy way to ensure you don’t miss updates from the people you love most. But if you need to unpin someone for any reason, it’s important to know how to do so quickly and effectively.

    Unpinning someone on Snapchat is just as simple as pinning them in the first place; all it takes is one tap of a button. To make sure everything goes smoothly when you’re trying to manage your pins, be sure to double-check before hitting confirm – like a lighthouse guiding ships away from danger!

    Overall, managing your pins can help add structure and organization into your day-to-day interactions with friends and family on Snapchat. With careful consideration of who I’d like to stay connected with, I’m always able to find my favorite snaps without missing out on important life events shared by those closest to me.