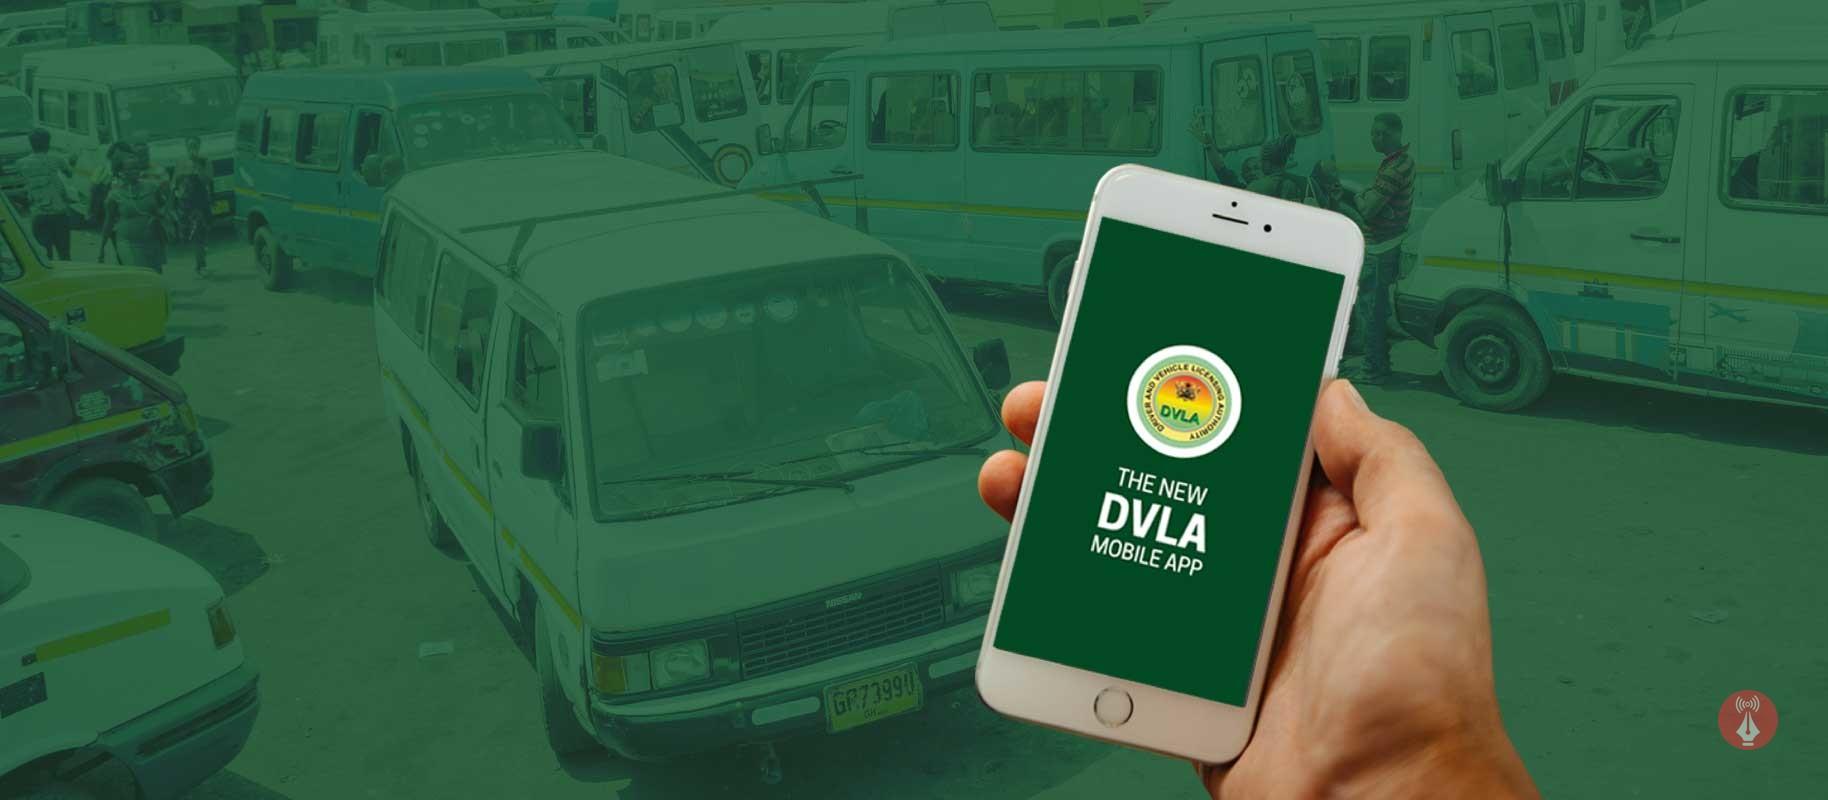
Author: Shepherd Yaw Morttey

  • How To Buy More Storage On iPhone

    How To Buy More Storage On iPhone

    Buying more storage on an iPhone can be a daunting task. It’s not always clear which options are available, how to make the purchase, or even how much it will cost. But with just a few taps in Settings and some money in your Apple ID account, you’ll soon have plenty of space for photos, music, apps, and other data. Here’s everything you need to know about buying more storage on your iPhone.

    Looking at the capacity of your current phone may feel like looking into a bottomless pit — no matter how many GBs you’ve got, it seems like there’s never enough storage for all those files and apps you want to keep around.

    Fortunately, adding extra room is easier than ever before: Apple now offers up to 1TB on its latest iPhones. Whether that’s too little or way too much depends entirely on what kind of user you are — but either way, here’s how to buy more storage if you find yourself running low.

    If you’re ready for more memory so that your device can store larger files without slowing down or crashing completely, read on! We’ll show you exactly where to look in order to increase your phone’s capacity as well as provide tips on budgeting out the right amount of space for your personal needs. Ready? Let’s go shopping!

    Overview Of iPhone Storage Capacity

    iPhone storage capacity varies from model to model, but all iPhones offer a range of different types. The latest iPhones come with up to 256 GB of on-board memory that can be used for storing photos, music and other data. Older models may have less storage space than newer ones, but they still provide plenty of room for most users’ needs.

    The type of built-in storage available also depends on the iPhone model you own: some offer flash memory while others use solid-state drives (SSD). Flash memory is faster and more reliable than traditional hard drives, so it’s worth considering if you need extra speed or reliability when running apps or downloading large files. SSDs are even faster, but they cost more to purchase upfront. Ultimately, it comes down to your individual requirements when deciding which type of internal storage best suits your needs.

    How To Free Up Space On Your iPhone

    If you’ve been using your iPhone for a while, it’s likely that the amount of storage space available is beginning to dwindle. Fortunately, there are several ways to free up some room on your device and make more room for photos, apps and other content.

    One option is deleting photos or videos if you don’t need them anymore. This can be done by opening the Photos app and tapping Select at the top right corner before selecting an individual picture or multiple pictures in order to delete them. You can also uninstall any unnecessary apps – those that you haven’t used in months – as they often take up quite a bit of memory. If you’re an iCloud user, reducing backups can help save some significant space too: go into Settings > iCloud > Storage & Backup > Manage Storage and tap each device under Backups to remove unused data from its backup file. Lastly, clearing out caches will clear up some extra space without having any tangible impact on how your phone works; this can be done through Settings > Safari and then scrolling down until you see Clear History and Website Data.

    With these steps followed, you should have a good amount of additional storage space on your iPhone with minimal effort required.

    Cloud Storage Options

    If your iPhone’s storage space is running low, you may want to consider purchasing a cloud storage solution. There are several online storage options that can give you more room for photos, videos, and apps.

    Some of the most popular cloud storage services include iCloud Drive, Google Drive, Dropbox, and Microsoft OneDrive. These services all offer extra storage space at an affordable cost.

    Depending on your needs, you can choose from different plans with varying amounts of data (and prices). You’ll also get access to convenient features like syncing across multiple devices and sharing files with other users. Overall, these solutions provide a great way to free up some extra space on your iPhone without breaking the bank.

    Purchasing Additional Storage For Your Iphone

    If you’re an iPhone owner and find yourself needing more storage, you can buy additional space directly from Apple. In most cases, that means upgrading your iCloud storage plan to one of the higher tiers — 50GB for $0.99 a month, 200GB for $2.99 a month or 2TB for $9.99 a month — though there are other options available as well.

    You can also purchase extra room on your phone itself by trading in your old device through Apple’s trade-in program or buying an external hard drive like SanDisk’s iXpand Flash Drive to store photos and videos outside of the cloud.

    If you really need more space than what these solutions offer, then it could be worth looking into replacing your current device with something larger if you don’t want to switch over to Android entirely. That said, upgrades aren’t cheap so it may be best to just start off small and get used to managing your data better before making any big decisions about storage purchases.

    Final Thoughts

    The iPhone is a great way to stay connected and store important memories, but it can become cramped quickly. To keep your phone running smoothly and free of clutter, you need to know how to buy more storage.

    The good news is that there are plenty of options for expanding the amount of space on your device. Freeing up space by deleting unnecessary files or moving them to cloud-based services will help extend the life of your phone. If you still find yourself needing extra storage, there’s always the option of purchasing additional capacity from Apple or a third-party provider.

    Ultimately, the best approach when dealing with limited iPhone storage is understanding what’s taking up so much room in the first place — then deciding if freeing up some space through other means or buying extra storage makes sense for you. With these tips in mind, you should have no problem keeping your phone organized and running smoothly!

  • How and Where To Buy Apple Watch

    How and Where To Buy Apple Watch

    Are you looking for the perfect wearable tech device, but don’t know how to find an Apple Watch? If so, then this article is for you. With a few simple steps and tips, we can help make your search easier so you can find the ideal watch for your needs. Whether you’re new to wearables or just want to upgrade, here’s what you need to know about finding an Apple Watch.

    From researching different models to understanding features like cellular connectivity, there are plenty of factors to consider when shopping around for an Apple Watch. But with our guide in hand, you’ll be able to narrow down your options quickly and easily make sure that the model you pick fits your lifestyle perfectly. Plus, we’ll look at where the best deals are available right now!

    So if you’re ready to start searching for your next timepiece, let’s dive into everything you need to know about finding an Apple Watch. We’re confident that by following these steps, it won’t take long before you’ve got a beautiful piece of technology on your wrist – one that will stay with you for years to come!

    About Apple Watches

    Apple Watch is a line of smartwatches produced by Apple Inc. It’s designed to be worn on the wrist and offers features such as fitness tracking, messaging, health monitoring, smartphone integration and wireless payments. With its sleek design and powerful technology, the Apple Watch has become one of the most popular wearables in the world.

    The latest models come with a range of options for users to choose from depending on their needs. There are three main designs: aluminum or stainless steel cases; waterproofed plastic sport bands; and luxurious leather bands. The watch also comes with several different display sizes ranging from 38mm to 44mm in diameter. Additionally, each model includes a variety of features including heart rate sensors, GPS, NFC support, water resistance up to 50 meters, an activity tracker, cellular connectivity (for some models), app store access and more. Depending on your budget and preferences, there’s an Apple Watch that will meet all your needs.

    Types Of Apple Watches

    Apple has released several distinct types of its Apple Watch. The company categorizes them into three different lines: Apple Watch Series, Apple Watch Edition, and Apple Watch Sport.

    Each watch line is available in a variety of sizes, ranging from 38mm to 42mm case heights. The watches also come with various interchangeable bands that can be swapped out for a more personal look.

    The most feature-rich of the lineup is the Apple Watch Series — it includes features like GPS tracking and access to third party apps. It’s available in both stainless steel and aluminum cases, depending on which you prefer. In addition, the Series comes with an improved processor speed over other models.

    For luxury seekers, there’s the Apple Watch Edition. This model has all the same features as other watches but with an added touch of class thanks to its choice materials such as 18-karat gold or rose gold finishes and sapphire crystal displays.

    Finally, there’s the sporty version — the Apple Watch Sport — which offers many of the same features at a lower price point than either of the previous two lines due to its use of lighter weight materials like plastic and rubber straps instead of metal ones found on other versions.

    No matter what your needs are when looking for an Apple product, there’s sure to be one that meets them since there are so many options available within each type of watch line offered by the company. With careful consideration you should have no trouble finding an ideal combination size and band style that fits your lifestyle perfectly!

    Where To Purchase

    Having reviewed the various types of Apple Watches, it’s now time to consider where you can buy one. You’ll find a few outlets for Apple Watch purchasing:

    1. The official Apple Store – Of course, the most obvious place to look is Apple’s own online store and retail locations. Here, you’ll be able to compare all models side-by-side and pick up any accessories that may come in handy. Prices are fairly consistent across the board — though there are sometimes discounts on certain watches from third-party sellers — but you won’t find any deals at an Apple Store near you or online. Additionally, reviews from verified purchasers make it easy to see how customers feel about their purchase after using them for some time.
    2. Third Party Retailers – If you’re looking for more variety in terms of price or availability, then turn your attention towards other retailers like Best Buy or Target. They usually carry multiple models of the watch at varying prices as well as discounted versions when they become available. Many also have helpful staff who’ve used these products before and can give advice based on experiences with different models and features. It’s worth considering these places if you want more options than what’s offered by The Apple Store alone.

    These two sources should provide plenty of opportunity to get your hands on an Apple Watch at whatever cost suits your budget best — whether its full priced model or something pre-owned that might still offer value for money compared to buying new. Whatever route you take, read reviews carefully and ask questions so you know exactly what kind of product you’re getting before making a commitment!

    Setting Up Your Device

    When you get your Apple Watch, it’s time to get started setting up and customizing it. Connecting the watch to your iPhone is easy. All you need is a few minutes and some simple steps.

    StepActionExperience
    1PairingConnected & Ready To Go!
    2SyncingCustomized For You!
    3Downloading AppsYour Watch Is Alive!
    4Setting Up NotificationsGet Notified Instantly!
    5PersonalizationMake It Truly Yours!

    Once everything is set up, you can start using all of the features available on your new Apple Watch. From messaging friends and family, tracking workouts, or checking notifications – there are endless possibilities with this device.

    With over 40 million units sold in 2019 alone, the Apple Watch has become one of the most popular smartwatches in the world. Now that yours is ready to use, you’re part of an incredible community of people enjoying their watches every day. Enjoy exploring what yours can do!

    Conclusion

    In conclusion, the Apple Watch is a great device for anyone looking to stay connected and keep track of their health. The wide variety of models makes it easy to find one that fits your needs and budget. You can purchase an Apple watch from many retailers both online and in store, or directly from Apple. Setting up your new watch may be confusing at first but with some simple steps you’ll have it ready to go quickly.

    All in all, if you’re looking for a reliable way to stay on top of your fitness goals while staying connected, an Apple Watch could be the perfect choice for you. It has plenty of features that make managing your life easier than ever before, so why not give it a try? With its robust design, intuitive user interface, and array of useful apps, there’s no doubt that the Apple Watch will continue to be popular among users for years to come.

  • How To Turn Off Shuffle On Spotify

    How To Turn Off Shuffle On Spotify

    If you’re looking to get the most out of your Spotify listening experience, turning off shuffle should be top priority. Shuffle mode makes it impossible to listen to albums from start to finish and can ruin the sound quality of some tracks. But with a few simple steps, you’ll have full control over what plays in no time.

    Spotify’s ‘shuffle’ feature is often seen as an annoyance by many listeners who want more control over their music library. By default, songs are played randomly instead of allowing users to select specific tracks or playlists they’d like to hear.

    Luckily, disabling this setting isn’t difficult – all it takes is a few clicks and taps within the app itself.

    For those unfamiliar with how to turn off shuffle on Spotify, we’ve got you covered: In just three easy steps, you’ll be able to take complete control over your streaming service and enjoy uninterrupted playback of your favorite tunes!

    Some Spotify Features

    Spotify is one of the most popular music streaming services, offering users access to millions of songs from their extensive library. It’s a great way to listen to your favourite artists and discover new ones, with personalized artist radio stations that are tailored just for you. The service also has some helpful features when it comes to song selection, like shuffle mode or playlists created by other users.

    However, sometimes you might want more control over what plays next – which is where turning off shuffle on Spotify can come in handy. This simple setting change allows you to take back the reigns and pick exactly what tunes will be playing. To help out we’ll explain how to turn off shuffle on Spotify so you have complete control over your music listening experience.

    How To View And Customize Playlist Settings

    Shuffling your music can be great for discovering new songs, but if you want to listen to a playlist in order, you need to turn it off. Fortunately, Spotify makes it easy to do just that. Here’s how.

    Viewing and customizing playlist settings is simple on Spotify. To get started, open up the playlist or album of your choice from the Library page and click the three-dot menu button near the top right corner of the window. That will reveal several options – one of which should be “Shuffle Play.” Click that option to toggle shuffle on or off (if it has a checkmark next to it then shuffle is enabled).

    If you’d like more control over your playlists’ settings than just shuffling them, there are a few other options available as well:

    • You can add tracks from any other artist or album by clicking ‘Add Tracks’ at the bottom of the list
    • Reorder tracks by dragging and dropping them in place with your mouse cursor
    • Remove unwanted tracks by selecting ‘Remove Track’ when hovering over an entry
    • Rename your playlists by clicking the pencil icon next to its current title

    Spotify also lets you determine who can view each playlist, though this setting only appears once saved within Your Library. Just select any desired playlist and then choose either Public (anyone) or Private (just yourself) under Visibility Settings below its description area. With these various controls – along with regulating whether or not shuffle is enabled – users have full access to customize their experience exactly how they would like.

    Disabling Shuffle Play On Mobile Devices

    If you want to disable shuffle play on the Spotify mobile app, you can do it easily. On both iOS and Android devices, simply open up the Spotify app and click on the song or album that’s currently playing. You’ll see a small ‘shuffle’ icon in the bottom left corner of your screen – just tap that to toggle off shuffle play. It’ll be replaced with a sideways arrow pointing right which means tracks will now play sequentially.

    It’s worth noting that this only applies to individual albums or songs: if you’re listening from an artist page, playlist, radio station, etc., then their order won’t change regardless of whether shuffle is enabled or not. But overall, disabling shuffle is simple enough on any device with the Spotify app installed.

    Disabling Shuffle Play On Desktop Computers

    To turn off shuffle play on desktop computers, start by opening the Spotify app. From here, go to your account settings and click “Playback” from the left-hand sidebar. Here you’ll find an option for “Shuffle Play.” Uncheck this box to disable it — when enabled, the songs in any playlist or album that you listen to will be shuffled around randomly. If you’d rather keep things up as they were before, just uncheck this box and everything should revert back.

    You can also customize how exactly your music is played through a variety of options within the same menu. These include manually setting which song you want to start with, repeating certain songs or albums over again, and more. With these options at hand, you have plenty of ways to control what plays when using Spotify on desktop computers.

    Final thoughts

    Spotify is a great music streaming service that offers plenty of features to help you customize your listening experience. It’s easy to turn off the shuffle feature on both mobile and desktop devices, allowing you to listen to songs in order or create custom playlists with specific tracks. With this newfound control over your playlist settings, it should be easier than ever for you to enjoy the exact musical experience you’re looking for.

    Whether you prefer an uninterrupted album from start to finish or just want more control over what comes next, turning off shuffle mode on Spotify can make all the difference. You can also take advantage of other customization options like setting up repeat mode or selecting specific genres and moods for auto-generated radio stations. All these small tweaks can add up to a much better listening experience without having to do any extra work.

    At the end of the day, controlling when and how we listen to our favourite tunes really enhances our enjoyment of them. Now that you know how to quickly switch between shuffling and linear playback modes on Spotify, there’s no limit to how creative and enjoyable your music sessions can be!

  • How To Turn On Comments On Youtube

    How To Turn On Comments On Youtube

    Are you looking to get more engagement on your YouTube videos? It’s time to turn on comments. But how do you do it? Don’t worry: we’ve got the answers.

    In this article, we’ll walk you through exactly how to enable comments so that viewers can start discussing your content and leaving reactions.

    Plus, we’ll go over some of the tips for moderating comments and dealing with any trolls or spam. So if you’re ready to take your channel to the next level, let’s dive in!

    Overview Of Youtube’s Comment System

    YouTube’s comment system is a powerful tool for interacting with your audience. It lets viewers leave comments on videos, and it also helps you to moderate those conversations.

    To enable comments on YouTube, first head over to the settings page in your account. You can then adjust the visibility of each video’s comment section – or disable them entirely if desired. Additionally, you can choose whether or not to approve any new comments before they appear live.

    By doing so, you ensure that all conversation happening around your content remains safe and appropriate. With these options available, YouTube provides a great way to stay connected with viewers while keeping control of how conversations happen.

    Steps To Enable Comments On Your Youtube Video

    Enabling comments on your YouTube video is fairly simple. To do so, open the YouTube Studio app and select the video you’d like to enable comments for.

    Then, from the left menu, go to the “Comments” tab. From there, click on the switch next to “Allow Comments.” This will turn on commenting for that particular video.

    You can also allow or disallow other viewers from responding to any comment made by clicking on “Enable replies” or “Disable replies” as needed.

    Lastly, if you want to ensure only approved comments appear publicly on your videos, you can opt-in for using a moderation system such as Community Guidelines Moderation.

    Doing this will require a manual review of each comment before it appears online, allowing you greater control over what people are saying about your content. With these steps completed, you should have successfully enabled comments on your YouTube video!

    How To Respond To Comments On Youtube

    Responding to comments on YouTube videos is an important part of engaging with your audience. It’s a great way to start conversations, thank people for their support, or just show that you care about what your viewers have to say. Here are some tips for managing the comment section and responding appropriately:

    • Comment Moderation
      • Review incoming comments before they’re posted
      • Set up automated filters to catch potentially inappropriate language
      • Give yourself time to respond thoughtfully
    • Managing Comments
      • Delete any spammy or off-topic comments
      • Flag any offensive or inappropriate ones
      • Reply to positive messages right away if possible
    • Replying To Comments
      • Take the time to craft thoughtful replies that address each comment individually
      • Show appreciation when someone has something nice to say
      • Acknowledge criticism in a polite manner without getting defensive

    By taking these steps, you can ensure that your comment section stays friendly and helpful. And by being active in the conversation around your videos, you can build relationships with viewers who will become loyal subscribers over time. So take advantage of this opportunity – it’s worth it!

    Tips For Managing Youtube Comments

    Managing comments on YouTube can be a daunting task. To make it easier, you need to know how to turn on the comment settings and control what’s visible to viewers.

    The first step is to open your video manager page, then click ‘Edit’ next to the video you want to manage. From there, select ‘Advanced Settings’, which will bring up a section labelled ‘Comments’. This is where you’ll find options for controlling who can post comments, as well as deciding whether or not replies are allowed.

    When managing comments, moderation should be at the top of your list. You can choose from several different levels – ranging from allowing all posts without review to only accepting approved ones – so pick whichever one works best for you.

    Additionally, if you’re worried about spam or offensive content showing up in the comments, setting visibility restrictions may help keep those out of view until they’ve been moderated. Once you have everything set up, don’t forget to save your changes! With these tips in mind, you’ll be able to easily handle any feedback that comes your way.

    Final Thoughts

    In conclusion, the ability to turn on comments for your YouTube videos is a great way to engage with viewers and foster meaningful conversations. It’s also an excellent opportunity to hear feedback about what works and what doesn’t so you can make better content in the future.

    With that said, it’s important to remember that managing comments takes time – but if you stay active and respond quickly, it’ll be worth it in the end.

    Once your comments are enabled, make sure you’re actively responding as soon as possible. This shows users that their opinions matter and that they’re being heard. Plus, staying up-to-date with responses will help reduce spam or offensive posts before they have a chance to spread too far.

    Finally, take advantage of YouTube’s comment moderation tools like blacklisting words or hiding certain types of posts.

    That way, you can keep unwanted chatter away from your channel while still having open discussions about high-quality topics related to your video content.

    All in all, turning on comments is a great way to create more meaningful connections with your audience!

  • How To Print On Mac

    How To Print On Mac

    Printing on a Mac can feel like an intimidating task. With all of the different options and settings, it’s easy to get lost in the tech jargon and end up feeling frustrated or confused. But don’t worry — printing from your Apple computer doesn’t have to be so hard. This guide will break down how to print from your Mac quickly and easily, no matter what type of printer you’re using.

    Let’s start with connecting your printer to your Mac. If you’re using a USB-connected printer, simply plug it into one of your available ports and make sure that both the hardware and software are properly installed. For wireless printers, set them up according to their instructions by connecting them directly to your Wi-Fi network or through AirPrint if they support it.

    Once everything is connected, it’s just a matter of selecting which documents you’d like to print out, setting any additional preferences such as paper size and quality, then clicking “print”! We’ll walk through these steps in more detail below — but first let’s take a look at some other important things you should know before getting started.

    Overview Of Mac Printing Options

    When it comes to printing on a Mac, there are several options available. You can print directly from the macOS or use any of the compatible printers that offer mac printing features. There’s also an array of third-party solutions for those looking to go beyond what their printer offers.

    No matter which option you choose, your Mac will have access to all its built-in printing tools and features like page layout settings, resolution controls, colour management, and more. Plus, with so many mac compatible printers out there offering specialised features such as wireless setup and direct PDF printing capabilities, finding one that suits your needs won’t be difficult.

    That said, when selecting a printer for your Mac make sure to check if it is officially supported by Apple’s OS before buying it — some models may not work properly with macOS.

    Adopting the right approach when setting up a new printer is essential in order to get the most out of your machine. As long as you take into consideration all the above-mentioned factors, you should be able to find and set up a reliable printer quickly and easily without much hassle.

    Printer Setup And Configuration

    Now that you have a good idea of the available printing options on Mac, it’s time to get your printer set up and configured. The first step is connecting your Mac to the printer itself.

    If you’re using an AirPrint-capable printer, this should be relatively easy—just make sure it’s connected to the same Wi-Fi network as your Mac, then open System Preferences > Printers & Scanners and add it by clicking the Plus button. Otherwise, if you don’t see it listed here, check with your printer manufacturer for instructions on how to connect it.

    Once your printer is added, setting up other basic configuration steps can be done from within System Preferences. You’ll want to configure settings like paper size and orientation; these will vary depending on the model of printer you’ve got. Some printers may also allow you to change or customize things like brightness levels or resolution quality directly from within macOS. And if that doesn’t work for some reason, there are usually more advanced options available through specific software provided by the printer manufacturer.

    Software Requirements For Printing

    In order to print on a Mac, you’ll need the right software. This includes both printer drivers and other printing-specific applications. Printer driver setup is essential if you’re using an external printer that isn’t already supported by your computer’s operating system; otherwise, the two won’t be able to communicate with each other.

    To find compatible printer drivers for your mac, start by researching mac compatible printers – some brands are more widely supported than others. Then search for their specific model numbers and look for any available downloads or updates from the manufacturer’s website. Once installed, these drivers should enable you to access all of the necessary features needed for successful printing from your Mac.

    It’s important to note that not all models will have compatible printer drivers specifically designed for macOS, so it can take time to find one that works with your setup. Fortunately, there are plenty of third-party solutions available online that may provide support where official manufacturers don’t offer it. All in all, having proper mac printing software is key to achieving good quality results when printing from a Mac device.

    Printing Troubleshooting Tips

    Moving on from software requirements, troubleshooting tips are important to keep in mind when printing documents. The first step is checking the printer driver and making sure it’s up-to-date. If there’s no wifi connection between your device and the printer, that could cause issues as well. Additionally, a paper jam can be frustrating but hopefully easily fixable by opening up the back of the printer and gently removing any obstructions.

    The resolution settings for a document also need to be checked before you hit print — make sure they match what kind of paper or material you’re printing on. Finally, take a look at your print queue: if multiple jobs are queued up then one might be interfering with another which would prevent anything from being printed off correctly. Keep these troubleshooting tips in mind next time you have trouble getting something printed!

    Conclusion

    All in all, printing from a Mac is relatively straightforward. With the right configuration and some basic knowledge of what’s required for your particular printer, you can get up and running quickly. Printer setup may take a bit of trial and error, but once everything’s configured properly there shouldn’t be any major troubleshooting issues that come up.

    I hope this article has been helpful in getting you started with setting up printing on your Mac. Whether you’re using an old inkjet or a brand new laser printer, having the correct settings in place will make sure you can use it to its fullest potential. If something isn’t working as expected, try out some of the tips outlined here – they should help point you in the right direction!

    Printing from a Mac doesn’t need to be difficult; with just a few steps you’ll have no trouble getting documents printed out quickly and easily. So go ahead – get those papers ready and give it a shot!

  • How To Turn Off Dark Mode On Instagram

    How To Turn Off Dark Mode On Instagram

    We all know that Instagram has a cool new dark mode feature, but what if you want to turn it off? It’s easy! Just follow these simple steps and you’ll be back in the light in no time. Jacob Kastrenakes is here to show you how to disable dark mode on Instagram with just a few taps.

    Dark Mode can give your eyes some much-needed rest from bright screens – or maybe you just don’t like the way it looks. Either way, turning it off isn’t difficult once you know where to look for the settings. We’re here with a quick guide to help walk you through disabling dark mode on Instagram so you can go about your scrolling without any hassle.

    It only takes a couple of seconds and anyone can do it. So let’s get started and learn how we can switch back from Dark Mode to regular ol’ Light Mode on Instagram!

    Overview Of Instagram Dark Mode

    Instagram Dark Mode is a feature that allows users to change the app’s colors from light to dark. This setting can be found in the app’s settings menu, and it offers several benefits for those who prefer darker colors on their phone or tablet screens.

    Dark mode features are designed to help reduce eye strain when using devices with bright displays. It also helps conserve battery life by reducing the amount of power used by certain components inside phones and tablets. Furthermore, dark mode makes text easier to read in low-light environments such as at night or outdoors. To turn off Instagram Dark Mode, simply head into your device’s settings and access the ‘Display & Brightness’ option where you’ll find an option to toggle between ‘Light’ and ‘Dark’ modes. From there, just switch back over to Light mode if you no longer wish to have Dark Mode turned on.

    Accessing Settings

    Accessing settings to turn off dark mode on Instagram is an easy process. To get started, open the app and tap the profile icon in the lower right corner of your screen. Then click the three lines in the top-right corner and scroll down until you find Settings & Privacy.

    Under this menu, select ‘Account’ and choose ‘Theme’. Here you’ll have two options: one for enabling Dark Mode and another for disabling it. Once disabled, it can easily be reactivated by following these same steps. Below are five key points about how to access settings to disable dark mode on Instagram:

    • Go to your profile page
    • Tap the three lines in the upper-right corner
    • Scroll down until you reach ‘Settings & Privacy’
    • Click ‘Account’ and then ‘Theme’
    • Select either Light or Dark mode as desired

    That’s all there is to turning off dark mode on Instagram! Whether you’re looking to reduce eye strain or just want a change of pace, those simple instructions should help you out.

    Disabling Dark Mode

    Dark mode is a popular feature on Instagram, but it’s not for everyone. Luckily, you can disable dark mode if you decide that you’re done with it. Here’s how to turn off dark mode on Instagram.

    First, open the app and tap your profile icon in the bottom right corner of the screen. Then select ‘Settings’ from the menu and scroll down until you find ‘Appearance’. Tap ‘Appearance’, then choose either “Light” or “System Default”. Selecting either will disable dark mode and reactivate the standard light theme.

    That’s all there is to turning off dark mode on Instagram! If you ever want to switch back, just go through these steps again and select “Dim” or “Dark”, depending upon which one was active before disabling dark mode settings.

    Reactivating Dark Mode

    Instagram dark mode is a popular way to give users a darker color palette while browsing the app. But if you’re looking to change it back, there’s an easy way to do it.

    To reactivate Instagram dark mode, open the app and tap on your Profile icon at the bottom right of the screen. Then scroll down until you see “Settings” and press that option. Once in Settings, look for “Theme” and select that option from the list. You’ll be presented with two choices: “Dark” or “Light”. If you want to turn off Dark Mode, simply select Light theme instead. That will return Instagram back to its original white interface.

    If you’d like to enable dark mode again later on, just follow these same steps but choose the Dark option this time around. Reactivating Instagram dark mode is as simple as that!

    Conclusion

    Dark mode is an increasingly popular way to use Instagram, but some people just don’t like the look of it. It’s easy to switch back and forth between light and dark modes, so if you’re not sure which one you prefer, there’s no harm in giving them both a try! To turn off dark mode on Instagram, all you have to do is open your settings menu and tap the toggle for Dark Mode. After that, your app will return to its lighter appearance – though with just a few taps you can always reactivate dark mode again whenever you want. So whether you’re trying out something new or just need a change of pace from time to time, turning off dark mode on Instagram is quick and simple.

  • How To Change Notes Password

    How To Change Notes Password

    Have you ever forgotten your Notes password and been unable to access important information? It’s an annoying problem that happens too often. But don’t worry – there is a solution! In this article, I’ll show you how to easily change your Notes password so that you can get back into your account in no time.

    With just a few steps, you can have a new secure password for all of your Notes data and documents. You won’t need any technical expertise or complex software; changing the password will be quick and easy. After reading this guide, you’ll know exactly what to do when it’s time to reset your security credentials.

    So if you’re ready to make sure that only you have access to your personal information, let’s get started! We’ll walk through each step together so that by the end of this article, you’ll feel confident enough to update your own Notes password without missing a beat.

    Creating A Secure Password

    Creating a secure password is the first step to take in order for your notes account to stay safe and protected. It’s important to understand the guidelines around crafting an effective password that works well—not just one that meets the bare minimum requirements of length or complexity but also offers long-term protection from potential cyber threats.

    To begin, it’s best to start with making sure you have adequate password strength by incorporating both upper and lowercase letters, numbers, symbols, and at least 10 characters. Strong passwords should be unique; avoid using any combinations found in books or films (or any other easily guessed words). Changing up capitalization can help make your login more complex without having to add additional characters.

    Next comes creating a plan for managing multiple passwords: consider setting up two-factor authentication if available on your platform as an extra precautionary measure. The same goes for utilizing different passwords across accounts whenever possible. This helps protect against hackers who may try to use a single compromised password to gain access into all of your online data sources.

    Finally, while keeping these tips in mind will go far towards protecting your personal information online, don’t forget about taking proactive steps such as regularly changing or updating existing passwords every few months—especially when it comes to sensitive sites like banking services or financial portals!

    Updating An Existing Password

    It’s easy to get complacent when it comes to protecting our data, but updating an existing password can be a powerful tool in enhancing your notes security. Like the locks that safeguard our homes and cars, passwords are often the first line of defense against potential hackers. Resetting your notes password regularly is one way you can protect yourself from digital threats.

    Here are 3 steps on how to change your notes password:

    1. Log into your account and select “Settings” in the top-right corner.
    2. Select “Change Password” from the list of options.
    3. Enter your current password followed by a new, secure, unique combination of numbers, letters, and symbols.

    By making sure to update existing passwords every few months or so—especially for sensitive websites like banking services—you’re taking proactive measures towards safeguarding your online accounts and personal information. With just a few small changes here and there, we can all take back control over our digital lives with ease!

    Securing Your Data With Backup

    As far as data security goes, having a backup of your notes password is just as important as updating it regularly. Just think—if you were to forget your existing password or lose access to the account somehow, how would you be able to recover it? A secure data backup plan can provide peace of mind in knowing that if anything were to happen, you’d still have access to all your valuable information.

    There are several ways you can back up and protect your passwords without compromising their integrity. Password managers like LastPass allow users to store and manage credentials securely. You may also consider keeping written records of passwords in locked safes or deposit boxes for extra security.

    No matter what strategies you choose to employ, backing up passwords and other sensitive data is essential when safeguarding accounts from potential hackers. Utilizing multiple layers of defense will help ensure your digital assets remain safe—even if one layer fails!

    Conclusion

    When it comes to safeguarding your data, protection starts with a strong password. Changing your Notes password is a great way of ensuring that your notes are kept secure and confidential. Taking the time out to ensure that you create a unique and complex password will go a long way in keeping your information safe from malicious actors online.

    I recommend using symbols, numbers, caps lock letters, and other characters when creating a new or updated password for your Notes account. Additionally, make sure to back up all necessary data just in case any unforeseen incidents occur. That way, if anything happens you’ll have an extra layer of security protecting yourself from potential hackers or viruses.

    In conclusion, changing your Notes password can be intimidating at first but taking the time to do so properly ensures that no one else has access to your personal information without permission. By following these steps outlined here you’ll be able to rest easy knowing that both you and your data are safe!

  • Ghanaian Excellence Shines Bright: Inspiring Young Ghanaian Appointed Global Peace Ambassador in Dubai

    Ghanaian Excellence Shines Bright: Inspiring Young Ghanaian Appointed Global Peace Ambassador in Dubai

    An exceptional young Ghanaian entrepreneur is making headlines in the world of technology and peace initiatives. Kofi Obo Wood, Founder and CEO of Limitless Artificial Intelligence, has been chosen to represent his nation at the esteemed Global Peace Summit in Dubai this March. This distinguished event brings together world leaders, visionaries, and young influencers from diverse backgrounds, all committed to promoting social equity and nurturing harmonious coexistence among various communities across the globe.

    The Global Peace Summit Dubai 2023’s primary mission is to engage youth from around the world in achieving the United Nations’ 17 Sustainable Development Goals by 2030. With global unity more vital than ever amid potential geopolitical tensions and economic challenges, efforts like this are crucial in maintaining international stability and fostering empathy and collaboration across borders.

    Kofi Obo Wood’s appointment is undoubtedly well-deserved. As a respected AI authority and a member of the MIT Global Technological Review Panel, he has consistently demonstrated his devotion to using his expertise for the greater good of peace and stability worldwide. Kofi’s vast knowledge in AI, agricultural technology, and financial technology has already made a significant impact on discussions and initiatives centered on finding sustainable resolutions to conflicts and advancing peace.

    This outstanding achievement is not only a tremendous honor for Ghana but also a beacon of hope for young people throughout the nation. Kofi’s involvement in the Global Peace Summit Dubai 2023 exemplifies the transformative power of technology and the boundless capacity of young individuals to create positive change, ultimately contributing to a more harmonious world for all.

    Kofi’s journey to the Global Peace Summit began with his innovative work in artificial intelligence. His company, Limitless AI, focuses on developing solutions to global challenges such as food security, access to education, and financial inclusion. By harnessing the power of AI, Kofi’s groundbreaking technologies are poised to reshape the world for the better and create lasting, positive change.

    In addition to his technological prowess, Kofi is also an advocate for youth empowerment, believing that the energy and creativity of young people are key to solving the world’s most pressing issues. His leadership in various youth initiatives has inspired a new generation of change-makers, instilling the belief that they, too, can make a difference on the global stage.

    Furthermore, Kofi’s dedication to promoting peace extends to his philanthropic efforts. He has founded several non-profit organizations aimed at providing educational opportunities and resources for underprivileged children in Ghana, ensuring that they have access to the tools needed to succeed and contribute to a brighter future for their communities and the world at large.

    As Kofi Obo Wood takes the stage at the Global Peace Summit Dubai 2023, his story serves as a powerful reminder of the incredible potential that lies within every young person. With the right combination of innovation, determination, and a passion for positive change, there’s no limit to what the youth of today can achieve. The world eagerly awaits the lasting impact Kofi and his fellow global peace ambassadors will have on our collective journey towards a more peaceful, prosperous, and unified planet.

  • How To Block People On Snapchat

    How To Block People On Snapchat

    Are you tired of the constant notifications from a certain user on Snapchat? Do their messages make it hard for you to stay focused and enjoy your day?

    Don’t worry, there’s an easy way to block people on Snapchat. In this article, we’ll give you step-by-step instructions so that you can keep out any unwanted contact without having to delete them as a friend.

    We’ll also tell you how to unblock someone if you change your mind down the line. So let’s get started – here’s what you need to know about blocking people on Snapchat!

    If you’re not sure why blocking someone is important, it comes down to maintaining control over who contacts you while using social media platforms like Snapchat. It can be uncomfortable when strangers or even acquaintances don’t respect your boundaries and bombard your account with messages. Blocking them gives back some of that control and lets users decide who has access to their accounts.

    Finally, taking steps against cyberbullying is an increasingly relevant issue in today’s world—especially among younger generations—and knowing how to use features like these could help protect yourself and those around us from becoming victims of online harassment or abuse.

    Fortunately, all it takes is just a few taps in order for users to take full control of their accounts and regain peace of mind when interacting with others on Snapchat!

    Creating A Snapchat Account

    Creating a Snapchat account is easy. All you need to do is download the app from your respective app store and sign up with an email address, phone number, or even just a username. When setting up your profile, you’ll be asked for some basic information like age and gender.

    Once that’s done, it’s time to start adding contacts. You can search for people by their usernames or add them directly through their phone numbers if they’re already using Snapchat. That way, you can keep in touch with friends and family without having to worry about exchanging contact info.

    And that’s all there is to creating a Snapchat account! It takes only minutes to get started and start swapping snaps with others.

    Navigating The App

    Navigating the app is an important part of using Snapchat. There are several ways to do this, and it’s relatively straightforward no matter what device you’re using.

    The first step in navigating around Snapchat is to familiarize yourself with the interface. On iOS devices like iPhones or iPads, there will be a bottom bar containing options such as ‘Discover’, ‘Chat’, ‘Stories’, and more. Tapping on each option will take you into its respective section of the app.

    To access different settings within the app, look for the cog icon located at the top right corner of your screen – tapping it will open up a page filled with various settings navigation options that can help you customize your experience accordingly.

    From here you’ll also find where you can block people from contacting or viewing your content on Snapchat. By scrolling down the list and selecting who to block, you’ve taken control of your account by preventing unwanted interaction from certain users.

    Identifying People To Block

    To begin blocking people on Snapchat, you’ll need to identify which accounts you want to block. You can do this by looking through your user profile and messages for any unwanted or inappropriate content from other users.

    If someone is sending you repeated messages that make you feel uncomfortable, look into their user profile before deciding whether or not to block them. Make sure the criteria for blocking match what makes you feel unsafe or insecure.

    Once you’ve identified an account that meets your blocking criteria, open up their profile in the app and tap the three-dot icon located at the top right of the screen.

    This will bring up a menu where you can select “Block” to prevent that person from messaging or viewing your stories. Keep in mind that blocked users won’t be alerted when they are blocked; however, if they try to view something like a story that was posted after being blocked, they’ll get a message saying it couldn’t be found.

    How to block someone on Snapchat

    Blocking users on Snapchat is a relatively simple process. To block contacts, open the app and go to your profile page. Then tap the gear icon in the top-right corner of your screen—this will bring up the Settings menu. From there, scroll down until you find ‘My Friends’ and select it.

    You should see all of your friends listed here; beside each name or username will be a ⋮ button that you can press to pull up additional options. One of these options should read something like ‘Block [Username]’:

    1. Tap this option
    2. Select ‘Yes’ when prompted with a confirmation message
    3. User has been successfully blocked
    4. Block remains in place until the user is unblocked

    This process may also differ slightly depending on whether you’re blocking someone from existing as a contact, or if they haven’t yet accepted/sent a friend request.

    Either way, once you’ve taken care of blocking a user, they’ll no longer have access to view any of your stories or send messages to you — unless their account was set to private before being blocked by you, in which case those settings remain unchanged even after being blocked by another user.

    In other words, though it’s not always obvious when somebody has been blocked on Snapchat, if someone isn’t appearing in search results for new contacts then chances are they were indeed blocked at some point prior.

    Final Thoughts

    When it comes to blocking people on Snapchat, it’s important to remember that you have the power. You can take full control of your account and who is able to interact with you there. By following these steps, you’ll be able to keep unwanted users away from your profile so that you can stay comfortable when using the app.

    It may seem like a daunting task at first, but this process is actually quite simple once you get through each step. It only takes a few minutes and then you’re done – no more worrying about annoying messages or inappropriate content.

    With just a few taps and swipes, anyone can block someone they don’t want interacting with them on Snapchat.

    So if you find yourself in need of protection from an unwelcome contact on the app, now you know how to do it! A little bit of effort goes a long way towards keeping yourself safe while using social media platforms like Snapchat — so why not give it a try?

  • How To Remove Table Formatting In Excel

    How To Remove Table Formatting In Excel

    Have you ever been working in Excel and noticed the table formatting is giving you trouble? Don’t worry, it’s a common problem. But don’t despair—removing table formatting from your spreadsheet is actually pretty easy once you know how to do it. In this article, we’ll show you just how simple it can be with our step-by-step guide.

    Are you ready to get started? Great! All you need to do is follow these instructions and before you know it, those pesky table formats will be gone for good. We’ll also provide some helpful tips along the way so that next time, removing them won’t take nearly as long.

    So if you’re looking for an easy solution on how to remove table formatting in Excel quickly and efficiently, then read on! This comprehensive guide has all the answers to make life easier when dealing with tricky table format issues.

    Understanding Table Formatting

    Table formatting is a great way to quickly organize and structure your data in Excel. It can help you make sense of complex information, so it’s important to understand what table formatting is before you try to remove it. Tables are essentially a collection of rows and columns that all have common formatting rules, like column widths or background colors. When you create a table in Excel, the program will automatically apply certain styles to each cell within the table, making it easier for users to read and interpret their data. Table styles also let you easily sort and filter your data with just a few clicks.

    It’s helpful to think about tables as an organized structure for your data. Every element contained within a table has its own set of formatting rules; this means that even if two cells appear exactly alike on the surface, they may contain different formats underneath. Understanding how these elements interact with one another allows you to take full advantage of all the features available in Excel tables. With some practice, anyone can master table formatting!

    Step-By-Step Guide To Removing Table Formatting

    Now that you know all about table formatting, it’s time to learn how to unformat them. Removing the formatting from a table in Excel is easy once you have the steps down. Here’s a step-by-step guide on how to do just that.

    The first thing you’ll need to do is select the cells of your table within Excel. This can be done by clicking and dragging over the entire area or selecting each cell separately. Once selected, right click on any cell inside of this selection and navigate to Table > Convert to Range option. Doing so will remove all of the formatting and turn your table back into normal text without any special styling applied.

    You may also want to check out the Clear command which can be found under Home -> Editing section located at the top ribbon of Excel window. It allows you to quickly remove all sorts of data, including formats like font size, color, borders etc., while leaving behind only raw values intact. To use this feature simply select cells with existing formatting then click Clear -> All button located near bottom right corner of editing section which should clear away everything except for actual content stored in these cells.

    By following either one of these methods, you should now have an unformatted set of data ready for further processing or manipulation as needed – no more fussing around with those pesky tables!

    Alternatives To Removing Table Formatting

    If you want to remove table formatting in Excel, there are a few alternatives to disabling the entire table. One way is to disable only the formatting while keeping the data intact. To do this, select the cells with formatting and click on “Format Cells” from the Home tab of your ribbon. Here, under the “Number” category, choose “General.” This will strip away any special formats that have been applied and leave just the raw values behind.

    You can also replace all existing table formatting by selecting a new style for it. In Excel, go back to the Design tab where you can see different predefined styles available or create your own custom one. Just select a new format or design and activate it – this will override any current configurations without affecting your actual data set.

    Another option is to convert your formatted tables into plain text instead of deleting them entirely. Select either specific cells or an entire range before going up to Copy (under Home) and then Paste Special from Edit menu bar. From here, make sure you check off as Text so that when pasted onto another sheet, it no longer has any formattings attached to it anymore.

    These techniques provide effective ways for removing certain parts of table formats without having to delete everything altogether – allowing users more control over their workbooks!

    Conclusion

    Removing table formatting in Excel can be a daunting task, especially if it’s been applied to your spreadsheet for some time. But with the right guide, you can get the job done quickly and efficiently! In this article, I’ve outlined all of the steps necessary to remove table formatting from any Excel sheet. Additionally, I provided some alternative methods that may work better depending on your particular situation.

    No matter which approach you take when removing table formatting in Excel, always remember to double-check your results afterwards. It’s important to make sure that none of the data was accidentally changed or removed during the process. With these tips in mind, you should now have no trouble getting rid of any unwanted table formatting in no time at all!

    When it comes down to it, being able to effectively manage and format spreadsheets is one of those essential skills everyone needs nowadays — so why not start by mastering how to remove table formatting from an Excel document? By following these simple steps and exploring alternatives where appropriate, you’ll soon be an expert at optimizing spreadsheets for maximum efficiency!