Hello, recently, a lot of people have been asking for short-codes for MTN services. I had wanted to compile a whole list of them but I found a couple of them on the internet, and added all of the missing ones.
MTN is the biggest telecommunication network in Ghana, with pension schemes and mobile money services, it doesn’t look like they will leave the number one spot soon.
MTN Ghana continues to lead Ghana’s Telecommunications mobile voice market as at December 2015, according to an NCA report at the time.
Please call me service. Send a message with 024x xxx xxx 1 to 1399.
*124#
Balance enquiry. Check your credit balance.
*567#
MTN Pulse
*5055#
MTN Jara
*567*4#
MTN Mashup Balance
154[0244000000]
MTN pay for me. Dial 154 followed by number without space. This will make the recipient of the call pay for the call.
100
Call Center
*156#
Check your MTN mobile number
*144*number to recharge for*voucher number#
To recharge airtime for someone
1515
Report Mobile Money fraud. Send a text message to 1515 from your phone with the name of the merchant and date of the incident.
*138#
Internet Bundles, SMS bundles
*138*1*3#
Internet monthly bundle. From 300MB – 10GB
*138*1*5#
Internet social bundle. For Accessing Twitter, Facebook and WhatsApp only.
*138*16#
YouTube bundle. For streaming videos on youtube.
*170#
MTN mobile money access code
*138*4#
Super saver bundles
1355
Caller tunez
STOP to 1355
Unsubscribe caller tunez
<register><4-digit pin number> send to 1329
Register Me2U
108
Voicemail sending
109
Voicemail receiving
<amount to share/Transfer><leave a space><enter the number><leave space><Type 4 digit pin> TO 1329
To share credits dial *198# reply with 2 and follow the prompts. Just go to messages. Then type in <amount to share/Transfer><leave a space><enter the number><leave space><Type 4 digit pin> and send to 1329.
*138*1*4#
Internet unlimited bundle
*506#
To borrow Some Credit
*511#
Generate Mobile Money ATM token
*138*1*1#
Internet daily bundle. From 20MB – 350MB
*585#
To check 4G device compatibility
*138*1*2#
Internet weekly bundle. From 25MB – 500MB
*595#
To exempt (or include) yourself from mobile money interest payments to your account.
*140#
Blackberry Plans
*198#
Share credit with friends and family
*1552#
WeChat monthly data bundle
PORT to 600
Number portability
*400#
To know if your number is registered
02xxxxxxxx Simbox to 419
Report SIM-Box fraud
*585#
Request internet settings. Send a blank text message (SMS) to 585 from your MTN. Save the settings you received, to your phone. Select MTN DATA as default access point.
*455#
Accurate weather forecast (8p/SMS)
*1390#
Reserve your number for 2 years
1303
MTN Radio
30037
MTN Farm Direct. Access the best farming tips.
*300*20#
Get cool jokes
MOVIES to 1412
Get Silverbird movie schedule
MTN Free Call 6 months Offer
*550# (New Subscribers)
MTN Free After 1 (MTN Nkomode)
*550# (Option 6)
List / De-activate all MTN Services
*175#
If there is any service you would want a shortcode for but can’t find, it may be on the 2023 list of shortcodes for MTN or just leave a comment below and we will get it for you.
When it comes to buying smartphones and other electronics in Ghana, Franko Trading Enterprise stands out because they have proven times over to deliver quality in an accessible manner.
A lot of Ghanaians are always on the lookout for the latest Tecno, Infinix and Huawei phones. Usually, we know for a fact that we can get them from Franko Phones at a good rate.
Franko Phones, a part of the large Franko Trading is a well-accepted brand nationwide and that’s why we have decided to cover the price of the latest phones in their shops as well as give directions and information on how to find the prominent of their over 40 branches all over Ghana.
If you are looking to contact them via phone or other means, we have also included all contact details.
However, if you want to check the prices or specifications of the latest Tecno, Infinix, and Huawei phones, then a reverse image search tool is the best option. This tool helps you find all the latest mobiles at Franko Trading Enterprise with the help of an image, keyword, or URL.
Let’s get started.
Phones Price List at Franko Trading Phones
There are a lot of phones for sale at Franko that sometimes it is a bit difficult to surf through the whole site and make the right decision.
That is why we have compiled a full list of all the phones available for sale and their prices in Ghana Cedis
Here are the current prices of Mobile Phones as they are sold at Franko Phones:
Phone Model
Price
Huawei Nova 5T
GHS 1888
Huawei P30 Lite
GHS 1350
Huawei Y7 Prime 2019
GHS 830
Huawei Y9 Prime 2019
GHS 1250
Huawei Y9s (128GB/6GB)
GHS 1400
Infinix Hot 8 (32/2)
GHS 605
Infinix Hot 8 (32/3)
GHS 655
Infinix Hot 8 Lite (32/2)
GHS 535
Infinix S5 (128/6)
GHS 1035
Infinix S5 LITE (32/3)
GHS 725
Infinix S5 Lite (64/4)
GHS 885
Infinix Smart 4 (16GB/1GB)
GHS 485
itel 2160
GHS 40
Itel 5081
GHS 65
itel 5606
GHS 50
itel A14
GHS 185
itel A56
GHS 340
itel S15 (32/2GB)
GHS 430
Itel S15 Pro
GHS 515
Nokia 7.2
GHS 1600
Nokia C1
GHS 290
Samsung A01
GHS 595
Samsung A2 Core (16GB)
GHS 435
Samsung A20S
GHS 959
Samsung A51
GHS 1789
Samsung A71
GHS 2499
Samsung E1205
GHS 100
Samsung E1207
GHS 105
Samsung Galaxy Note 10 Plus
GHS 5850
Samsung Galaxy S10 Plus
GHS 4980
Samsung Galaxy S10e
GHS 3800
Samsung Note10Lite
GHS 3099
Samsung S20 Ultra
GHS 6999
Samsung S20+
GHS 5499
Samsung Tab A (2019) 10.1″
GHS 1500
Samsung Tab A8 (8.0″)
GHS 820
Tecno Camon 11 (64/4)
GHS 800
Tecno Camon 12 (64/4)
GHS 830
Tecno Camon 12 Air (32/3)
GHS 730
Tecno Camon 12 Pro (64/6)
GHS 1030
TECNO Camon 15
GHS 965
Tecno Phantom 9
GHS 1360
Tecno Pop 3
GHS 365
Tecno Spark 4 (32/2)
GHS 605
Contact Franko Phones
We always offer you a discount and delivery when you buy directly from Mfidie.com by calling our sales rep on 0245269141 or visiting the Mfidie Shop.
Franko Phones can be reached directly on 0555939311 and 0265593002
Franko Phones Shop Locations
Greater Accra Region
Adabraka Online Shop, Opposite Roxy Bus Stop, Adabraka, Accra – See Directions
Nkrumah Circle Shop 1, Near Odo Rice Building, Circle – Accra
Nkrumah Circle Shop 2, Opposite Odo Rice – Circle, Accra
Osu Oxford Street Shop, Near Vodafone Cyber Cafe, Osu – Accra
Haatso Shop, Haatso Station Near Beige Capital Building, Haatso – Accra
Madina Shop, Madina Old Road Near Blaclays And Hfc Building, Madina – Accra – See Directions
Tema Shop, Comm. 1 Stadium Road Opposite Water Works, Tema – Accra
Ashanti Region
Kumasi Shop 1, Near Ajaba Jewelry Shop, Adum – Kumasi – See Directions
If you are looking to apply for a Ghana Passport, then we are here to guide you through the process. Kindly note that this article is a bit long so that you get all the information you need.
Kindly take your time and read and we have a section to ask questions if you don’t understand anything.
At Mfidie.com, we delight in giving you the right and up-to-date information so that no one cheats you anywhere else.
Ghana’s Online Passport Application system was introduced in 2017; as at 1st March 2020, it is the only process to use to apply for a Ghanaian Passport in the country.
The once very tiring application process took an online turn when the Ministry of Foreign Affairs and Regional Integration launched an online passport application service for Ghanaians to ease the mode of the application while ensuring maximum security for applicants.
Since then, there has been a lot of talk about the process, with some Ghanaian been sceptical about the whole “online application” process.
I personally like the online process because of the integration with Mobile Payment solutions. This means that I don’t have to even go to the bank to buy a pin for the online form. Wonderful!
What do I need to apply for the Ghana Passport Application Online?
Documents to support Identity such as Driver’s Licence, National ID card
Proof of Profession (An introductory letter from the applicant’s employer that is if the applicant is currently employed or a work ID card that bears the applicant’s name, organisation’s name and position. A student ID if the applicant is currently in school. Homemakers/housewives and applicants that are unemployed and those in the non-formal sector of employment like mechanics, hairdressers seamstresses, traders etc. do not need proof. Registered Business Owners and self-employed applicants must produce their business registration certificate as proof)
Renewing Applicants (Biometric)
First page and bio-data page with picture and information page
Valid Visa if the applicant has any in Old Passport
Last page
Proof of Profession if changed
Types of Ghanaian Passport Application and their Prices
There are two types of Application. The first one is the Expedited Application aka “Express” and the other one is the Standard application that takes a longer time to process. Each of these Applications has a 32 booklet page or a 48 booklet page.
Here is how much it costs to get a passport in Ghana:
Application Type
Booklet Pages
Price (GHS)
Standard Application
32
100.00
Standard Application
48
150.00
Expedited Application
32
150.00
Expedited Application
48
200.00
New Prices by the Ministry of Foreign Affairs are effective 1st February 2020.
How to Apply for a Ghanaian Passport Online
Online Passport Application Centres in Ghana
There used to be only 5 Online Passport Application Centres in Ghana. Right now, all 11 application centres in the country take care of online applications.
You can select any of them during the application process and you will go there for your biometrics and receiving of the passport when it is done.
Here is the list of the Passport Application Centres in Ghana to finish your biometric application process and where you can find them:
Passport Application Centre
Location
Accra Premium PAC
Accra Digital Center, Adjacent State Housing Company, Ring Road West, Accra – See Directions
Kumasi Premium PAC
2nd Floor, Thankful Heights Building, Adum, Kumasi – See Directions
Ghana Immigration Head Quarters (Within the Regional Administration)
Sunyani PAC
Adjacent to Jubilee (shares a wall with the Park)
Ho PAC
Regional Administration (Shares building with Immigration)
Tamale PAC
Police Park (Old Library)
Kindly note that the Premium Passport Application centres in Ghana give a faster and VIP experience at an additional cost.
How to get your Ghanaian Passport in 15 days
Starting from this year, 2019, the Government of Ghana has introduced the premium service for Passport to make the process even faster. This was after the passport form was made available for free to download and fill.
To use this passport service, applicants will go through the usual vetting and passport applications. They will fill the form online (as described in this article below).
At the end of the application process, there are two options to choose from. Choose premium application centre
You will be given a date to go to the office. There, you will pay GHS 60 and the process will be underway.
You will receive text confirmation messages from the Ghana Passport Application Centre on the status of your passport.
When you receive the final message, which looks like: “Hello Mfidie, Your passport G2****1 is ready for collection at Premium PAC – Accra Passport Office. The collection time is 9:30 am to 3 pm. Thank you.”, you can go to the Premium Passport Application centre to collect your passport.
In total, you pay the following for passport and processing:
GHS 160 for Standard Application (32 Booklet Page) + Premium PAC
01/03/2020: The online process is now the only way to apply for a Ghana Passport.
31/01/2020: The Ministry of Foreign Affairs and Regional Integration has reviewed upwards, the prices for the various passport services. This article has been updated to reflect that.
24/01/2020: All Passport Application Centres in Ghana now support the online application. The manual way of applying for Ghana Passport will no longer work from 1st March 2020.
23/01/2020: Note: The Passport Application Centre has confirmed that they don’t accept laminated birth certificates.
01/01/2020: There have been lots of reports of delays at the Kinbu Passport Application Centre so it’s best to choose the Premium Centre @ Accra Digital Centre.
13/11/2019: There are now 5 places nationwide to process your online passport. The latest in the list is Kumasi Premium Passport Application centre at Adum.
20/06/2019: There are now 4 places to process your passport application at.
21/03/2019: By paying an additional GHS 50, you can have your passport delivered to your home.
01/11/2018: From November 2018, the offline process of the application for a Ghanaian passport has been partially taken online. This involves downloading the passport application form for free in PDF. You can also transfer PDF to iPhone so you always have it handy.
29/01/19: Banks in Ghana are no longer selling Passport Forms starting from 28th February 2019.
We will continue to update you the process for acquiring the passport form for free. Share this article with your friends who might need it on Facebook and other social media and don’t forget to ask your questions here.
Remember that process required you to pay a processing fee of either GHS 50 or GHS 100.
What is a Passport?
A passport is an official document issued by a government, certifying the holder’s identity and citizenship and entitling them to travel under its protection to and from foreign countries.
Without a passport, it is almost impossible to travel between Countries and or Jurisdictions.
How was the Ghana Passport Application done before the introduction of the online process?
Before the introduction of the Ghana Passport Application Online, applicants had to buy a form and fill. This was a very tedious process because most of the requirements were not easy to understand.
The grim nature of the application process led to a lot of Middle Men. Although some of the Middle Men were genuine, a lot of them were fake and often squandered the money of unsuspecting applicants.
In the worst case, the Middle Men would deliver fake passports to applicants, especially prior to the biometric passport usage in Ghana. Although the Ministry of Foreign Affairs introduced the Bio-metric Passport registration, middlemen and other con men were not deterred. They have continued to “operate” thus far under different stratagems.
Another negative of the former application process was that it led to a lot of queues at the Passport Application Centres which often led to fights and disorganisation with a lot of pressure on passport office workers.
Can you apply for a Ghanaian Passport through the old method too?
No. You have to complete the process via the online process. Starting from 1st March 2020, you can not use the old manual process to apply for a Ghana Passport.
Anyone who tries to sell to you a “physical passport form” is most likely a con man. Beware.
Is the Whole Process of the Online Ghana Passport Application fully Online now?
No! The whole process is not online. After completing the online part of the application, you would book an appointment with the application centre in Accra or any of the Passport Application centres nationwide to complete the process.
The Log In Screen for the Online Ghana Passport Application
If you have questions, kindly click this link and ask: Ghana Online Passport Application Discussion – Tips, Problems, Process and More
Please know that this form is only to serve as a guide and you are not to actually fill it or submit it anywhere. The form lets you know which information is needed.
Where can I pay to Apply for Ghana Passport Online?
There are a lot of options when it comes to paying for the online form. You can use the MTN Mobile Money, Tigo Cash or Vodafone Cash. Find the partner banks too and their mode of payment.
Bank
Available Purchase Channels
EcoBank Ghana
Branches nationwide, Airtel Money, VISA & MasterCard, MTN Mobile Money, Tigo Cash, Vodafone Cash.
GCB Bank
Branches nationwide, Vodafone Cash.
Zenith Bank Ghana
Branches nationwide, Airtel Money, MTN Mobile Money, Tigo Cash, Vodafone Cash, VISA & MasterCard.
Paying for a new or renewal of Ghanaian Passport Online using Mobile Money
If you would want to use Mobile Money to pay for the Passport online:
When Payment comes, choose EcoBank, GCB Bank or Zenith Bank
After that, choose MTN Mobile Money or your preferred network
Enter your number and confirm the payment via your phone
The Portal will now allow you to continue the application process
Information Worth Mentioning About Ghana Passport Application
If you have all the correct documentation that you are supposed to have ready and you upload your information on the online passport application and you have paid your processing fees and there is nothing wrong with your supporting documentation, it is expected that you get your new passport in 10 to 30 days.
What is your experience using the online application process for the Ghana passport? You can click the link below and let us know. Thank you for reading.
If you have questions, kindly click here to ask and we will answer shortly: Ghana Online Passport Application Discussion – Tips, Problems, Process and More
Frequently Asked Questions about Passport Application in Ghana
How much does it cost to get a passport in Ghana?
It cost GHS 100 for the Standard Passport Application online in Ghana. However, the price might increase when you choose a premium, express service or a 48-page passport booklet.
How long does it take to get a Ghanaian passport?
It takes a minimum of 15 days to get a passport in Ghana when it is expedited and submitted at the premium passport application centre.
How can I apply for passport online?
To apply for a Ghana Passport, follow the online steps that have been outlined on the Ministry of Foreign Affairs website or learn more here.
What do I need to get a passport in Ghana?
To apply for a new passport in Ghana, you need your Ghana Birth Certificate or other proof of Ghanaian citizenship, other identity documents, proof of profession and a guarantor.
How do I renew my Ghana Passport online?
Renewing a Ghana passport online is the same process as applying for a new one. However, you the only document you need to present is your old biometric passport.
Starting a blog in Ghana can be a frightening thought, especially when you are not too much of a tech person. In fact, for many people I have met over the last few years, starting a blog was as easy as saying, “Just go to WordPress.com and follow the instructions.”
This well-prepared guide will help you to start and maintain a good blog, even if you have no technical or technological idea whatsoever in blogging. It is written out of over five years in online campaigns and blogging.
The process of starting a blog, although straightforward, can be very complicated and lead to a lot of problems if you do not do it right.
When I started my first blog sometime back, I wish I had someone to tell me to do this or to do that or to explain what permalink meant or what “self-hosted” meant.
Too bad I had to rely on Google every step of the way until I made all the mistakes a beginner would make.
Well, you do not have to make the same mistakes if you are starting a blog.
This article will take you through creating and maintaining a good blog, making your readers happy and satisfying your need to write or inform people.
If you would want help starting your blog, I offer a free WordPress blog setup. But first, read everything on this page to understand what you are getting yourself into.
Got any questions about starting a blog? Leave them in the comment below, and I will reply to every last one of them. All the best.
Is blogging for you?
Before we even start talking about starting a blog, you need to be sure if it is the right thing for you, especially blogging, to make money.
Blogging in itself is a means to let people know what goes on in your mind.
It’s an opportunity to showcase yourself, and your work makes people from far and near read and experience it.
People are at the center of blogging. Therefore if all you want to achieve from blogging is money and you can not relate with people very much, you might have to look away from blogging.
Every blogger should have some characteristics to increase their chances of success.
Here are some abilities you need to possess as a blogger:
A good amount of discipline
If you are looking to blog for a living or as a primary source of income, you should be very disciplined about it.
Discipline comes in the form of being consistent about writing and making sure you put your content first.
A disciplined blogger always sets blogging goals and pushes himself to achieve them promptly.
The most important of these goals is mostly writing engaging content regularly.
Ability to write decently
I don’t mean the ability to write prize-winning literature articles. But the critical thing in blogging is to write (and avoid plagiarism).
You don’t have to write as well as Ama Ata Aidoo, but you should be able to express yourself in your chosen language of blogging.
A good understanding of tenses, grammar and sentence structures is enough to get you started and take you on top.
Just like other things, the more you blog, the better your writing. But first, you need to start from a good point.
A social person
Wait! I don’t mean you need to be the most extroverted person on the planet. However, as a blogger, you should be open to connecting with people and speaking with them.
If it’s challenging to get along with people, you might have a hard time blogging. However, this is a skill you can learn by attending more events and putting yourself out.
Be open to criticism
You have to keep in mind that people are going to judge every content you put out there. Some may encourage you, and some may even hate you.
But in all this, you need to be willing to accept all the criticism that comes your way, whether constructive or not.
But there is another set of “criticism” – trolls. In my early days of blogging, Ameyaw Debrah told me: “… I just ignore them; all of these trolls, you just have to ignore them. Use your time wisely and don’t try to fight them all”. And that’s precisely what you have to do with trolls.
Be a helper
You want to blog to make money, right? That means you should have something to sell. In this case, it is your content.
Whatever you write has to help people or lead them to where to find help. Your content can best be described as your product, and the people are your customers.
Give them the best product, and they will keep coming for more. Business 101, right?
Why Start a blog in Ghana?
There are a million reasons why you should start a blog. If you are a good writer and feel you would want to reach a broad audience, then blogging may just be it – after all, there are over 12 million Internet users in Ghana alone as of January 2020.
Apart from the desire to write, there are many other reasons why you should start a blog. Here are some of them:
Blogging is relatively easy
Yes, you read that part right. Blogging is effortless if you follow the proper steps. For most people, the most challenging part is setting up the blog in the first place.
If you follow this guide step by step, that should not be a problem at all. Don’t forget Plugnom offer a free WordPress blog setup.
Become a published author
If you would want to publish a book, the best way to start is by a blog.
Publishers would always want to work with authors who already have an online presence because it makes it easier for them to sell their books.
A blog also gives you the platform to market your books to your audience.
Blogging Improves your Life
Blogging can help make you a better person in several ways. More basically, blogging helps you to improve your writing and communication skills.
People who blog can express themselves much more than those who don’t.
Blogging can also help you build skills such as interpersonal relationships and good thinking abilities.
For blogs that encourage comments and interaction, the blogger learns to respect the views of others.
Self-promotion and New Opportunities
If you blog in your “official name,” then when you apply for a job or position and your name is googled, your blog will likely show up very much.
Apart from giving you that very much-needed online presence in today’s world, blogging can also help you tell the world what you can do and what your skills are.
If your blog gains a lot of recognition and respect, it will not be too surprising to have someone directly contact you with an offer or job opportunity.
You can make money out of blogging
Yes, you can make money out of blogging but don’t get it all twisted in your brain. You should read the part of this series that talks about making money from your blog.
After deciding on what to blog, you will have to jump into starting your blog.
There are five things you need to start a WordPress blog:
Dedication and time
A domain name idea (this will be the name of your blog i.e., mfidie.com)
A web hosting account (this is where your website lives on the internet)
Good Content
Content Marketing Strategy
How to start a blog in Ghana
Follow the steps below to start a blog in Ghana:
Decide on your blogging niche
Choose a good domain name
Choose a reliable hosting and blogging platform
Set up your blogging software (WordPress)
Start writing content for your blog
Market your blog’s content
Start making money from your blog
The steps are further explained below.
Decide on your blogging niche
It is not easy to decide on what you want to blog about. You would want to look at two things when deciding on what to blog at are your readers and your blogging subject or niche.
First, keep in mind that you are writing for your readers (unless you want to write for yourself only). You need to blog about a topic that will interest your readers and help you gain the kind of readership you want.
Most people will read a blog post if it helps them to solve a problem. Therefore, try to get your blog posts to solve problems, if that is possible.
Also, most readers will want to learn something new. It is no surprise that blogs that do a lot of “how-to” gain more readers. People are willing to learn, and you can help teach them.
Your readers are going to be an integral part of your blog, and you must satisfy them.
Your blog should not be boring for readers as most of them want to be entertained in one way or the other. You should also provide quality content for your readers so that they know you are serious.
The other thing you need to look at when deciding on what to blog is the subject your posts are going to be about. It is true that you can choose to blog about everything and anything at all, but getting a niche is very important if you want to grow and maintain your blog.
Choosing a niche is a bit tricky, but you should choose a niche that is broad. For example, I blog about “Technology in Ghana” and not “Mobile Apps in Ghana.” Choosing a broad niche will help you to get content for your blog.
When you start blogging, you would realize the need to have fresh ideas and to corner yourself to a particular niche like “Life of Ladies in Teshie” would limit the number of posts you can churn out regularly. Another example of a wrong niche is “Christian Events in Accra”.
You could make this a bit broad by saying “Events in Accra” or “Christian Events in Ghana”.
Also, check out other people in the niche that you want to enter. If people are blogging about a subject and they are getting enough content, there is a good chance you would be getting the right amount of content too.
Here are some niches you could consider if you are looking to start a blog with a Ghanaian-focused audience:
How to make money
Health and fitness
Tech news and review
Job search tips
Education blog
Prayer points and Spirituality
Beauty and fashion
Lifestyle
Satire
Sexual education and tips
Sports betting tips
Personal Development
Choose a good domain name
Choosing a domain name is very critical for the success or failure of your blog. Your domain name is how most people are going to know your blog by.
Before starting Mfidie.com, I spent close to 3 days deciding on what to use for a domain name.
Most of the domains I wanted to use were already taken.
When choosing a domain name, you need to be intelligent and careful. You should choose a name that is “generic” enough, yet captures in entirety, or to a full extent, your blogging niche. Here, I would like to state that avoid names that end with “gh”; they are not intelligent.
My friends at 247filla.com and afrowired.com have testified why adding “gh” to your domain name is a bad thing.
For example, I could have chosen “techideasgh.com.” It was available all right, but it wasn’t smart. I chose Mfidie.com because it was original and authentic. “Media” in the Akan language means gadgets, and gadgets are a huge part of the technology bit.
A domain name should be something people will be familiar with. For example, you cannot register modernsecurity.com and say it is for a blog about shoes.
It won’t work.
For a fashion blog, you could go for a meaningful name like classywardrobe.com.
You can always check which domain names are available and which ones are not on whois.net.
If you want to purchase a domain name for a cheap price, check out namecheap.com
Choose a reliable hosting and blogging platform
Web hosting confuses a lot of people. Buying a domain is not all you need to get your website up and running.
To simplify this, let’s just say a domain name, is like the address of your home; web hosting, on the other hand, is the space of your house where you place your furniture and other stuff. Without web hosting, your domain will just be a name without a body.
Web hosting is where your blog’s files are kept, which is always more expensive than the domain. It is essential that you pick the right hosting that can meet the traffic needs of your website.
When I started blogging, I used to entertain shared hosting a lot. Over time, I realised they could not be trusted to a large extent when my traffic increases and were much more expensive.
Nowadays, I am more inclined towards cloud hosting, which you could get from $5 a month.
When it comes to blogging platforms, the lists are endless. I would be biased and tell you straight forward to go for WordPress.
The other options like blogger, drupal, ghost, etc can accomplish a decent blog, but if you want to make it big, then WordPress is the best platform for you.
WordPress is free, has excellent support and allows multiple users. It gives you great control over your blog’s future and allows you to grow your blog however you want it while enabling you to add functionalities like forums, online store, and paid membership.
It is also the most accessible blogging platform to set up as you will find below.
Set up your blogging software (WordPress)
Depending on the hosting that you choose, there are straightforward ways to set up your WordPress software.
Most shared hosting panels will let you enter an admin username, password and email. Make sure you use a unique username and set a strong password.
Next, you will be able to login to your WordPress. At this stage, you can use a free theme to style the site and experiment colours and upload your logo.
You can also set up your categories and tags for WordPress and do basic SEO.
You can opt for a professional WordPress website builder, like Elementor. Enabling you to build a WordPress website without having to code, Elementor offers a variety of templates designed specifically for blogs.
Here is a list of free WordPress plugins you must add to your site for much needed added functionality and features:
Yoast SEO or RankMath
Akismet Anti-Spam
Jetpack
Wordfence Security
UpDraftplus
WP Super Cache
Once your WordPress blog is set up, you can move to plan and writing your content.
If you find it overwhelming to configure the blog by yourself and have it running, you can take advantage of our free WordPress blog setup.
Start writing content for your blog
Once your blog is set up, the next thing you have to do is to write content. This is probably the most challenging part of blogging, and without discipline and passion, you might fall off at this stage or resort to plagiarism (which is worse).
There are various ways to start writing content for your new blog. Let’s go through them.
Know your audience/readers
Depending on your niche, you need to know about the people who are to read your blog. For example, if you are writing an educational blog, there are two different audiences you should write for.
These are parents searching for schools for their kids and the kids searching for the schools themselves.
Knowing who your readers are, it is far easier to come up with great topics that will interest them. Your tone and choice of words also vary depending on who you are writing for.
Take, for instance, Mfidie.com.
This is a tech blog focused on everyday people (who may most likely not be tech-inclined). Since I know my readers may not have the best tech knowledge, I avoid unnecessary jargon in my writeups and go straight to the point in plain relatable English language.
By knowing your audience, you can adjust your topics and writing to fit their interest and earn their love.
Write great topics down
Getting blog post ideas and topics has been one of my major headaches. Sometimes, you feel so worn out that you can’t write because you have no topics to write on.
But that does not have to happen with you.
The first thing to do is look at what other players in your chosen niche are writing about. This could give you the first set of topics you can focus on and write about.
However, remember you need to be original and provide your readers with something they probably have not heard about.
What better way than to ask your readers what they want you to write about? This can be done in the form of questions at the end of some articles.
You could also head to google and type a question related to your niche. All those other suggested questions (usually at the bottom) are topic ideas you can put down and write on.
Get a clean Google Doc or notepad and write all of these topics and ideas when they come to you. Trust me, you may forget some very nice topics if you don’t make writing them down a thing.
Organise your content – make it readable
The whole purpose of blogging is to get views and reads. No one wants to spend time creating a blog and have no views.
Sometimes, the lack of views is so disheartening that it kills the vim that people start their blogging journey with.
The first thing I would say about making your content readable is to sound very natural when writing. Write as if the person you were writing for was standing in front of you. That way, the reader does not feel tired midway.
Also, make sure you keep paragraphs as short as possible. Ideally, for your blog post, no paragraph should have more than three sentences.
One of the most important aspects of organizing your content includes as many visuals (pictures, videos, infographics) as possible. And don’t forget to organise categories and tags too.
Organising your content will make your readers stay longer on your page, and you will have a higher chance of converting your users.
Be consistent
It is imperative to be consistent in your blogging. If you write one article a day, try to maintain that standard. It is better to post once a day every day for one week than to post seven articles in one day.
Consistency signals to your readers and search engines that your blog is active, well updated and continuously has fresh content.
In order words, once you start your blog, keep going.
Market your blog’s content
The next thing after writing content is to get it to the eyes of readers.
If you followed this article carefully, all we have been doing is making sure that the content we put up is meaningful. That way, it is easier to market it.
For instance, if you chose topics that are beneficial for your niche audience and your article provides a certain degree of help, they will be more than willing to click and read more.
Marketing your content means pushing your articles so people can read, find them helpful and reshare.
The most important of this cycle is resharing, because, well, referrals are powerful! People believe and trust information that has been shared by someone they know.
Let’s look at the various ways you can market your blog posts.
Social Media
This is an obvious one. Treat your blog like a person. Set up social media accounts for the blog and invite your family and friends to like and follow the pages.
Every blog should have a presence on at least 3 of the following social media channels:
Facebook
Twitter
Instagram
Pinterest
Telegram
Anytime you publish a new post, make sure you share it on the social media pages. A plugin like Jetpack for WordPress can automate this for you.
Also, make sure you invite your blog readers to follow you on social media so you can still reach them when they are on their favourite social media channels.
With social media, you can make sure your readers won’t forget about you.
WhatsApp
WhatsApp has a different space since it is so popular and not considered traditional social media.
With WhatsApp, you can take advantage of groups, broadcast lists and status to reach more individuals.
Make sure you are not spamming them with unnecessary information, and that’s why you have to join those in line with your niche with the groups.
A post a day for your various WhatsApp groups is enough. Sending more will only reduce the attention that future posts will be receiving.
Family and Friends
In my experience, the support from family and friends when you start blogging is priceless.
You can get a few family and friends also to do all of the sharing you do on WhatsApp and social media to complement your efforts.
Just ask them politely and maybe guide them on how to share and they most probably will do for you.
Don’t forget to appreciate their deeds by saying thank you every time you can,
Start making money
Once you have passed the blog writing phase and have achieved a certain level of the audience, you are not opened to monetising your blog.
A lot of people have asked how to make money blogging in Ghana. The truth is, there are a lot of ways you can make money with your blog, and the options available depend on your niche and the work you are willing to put into it.
Let’s look at some of the ways you can make money with your blog in Ghana.
Providing a service
This is one of the easiest ways to make money from your blog.
For instance, if you write about personal development, you can encourage your readers to book you to talk at their school, church, or personal development themed event.
Tech bloggers who talk about web development can offer to build websites for their readers at a fee.
By providing a service through your blog, you are more likely to be hired because already, there is a connection between you and the reader via the article that brought them to you.
Adsense
Google Adsense helps publishers make money by showing ads on their website. You can apply for Google Adsense, and once you are approved, you can start showing ads on your website.
Google Adsense might sound simple, but it involves a lot of work.
Research has shown that websites that get a fair amount of search traffic are more likely to accept Google’s Adsense programme.
With Adsense, the more traffic you get, the more money you will make. However, do not expect to make a lot from Adsense in Ghana if you do not have more than 5000 pageviews a day due to the low CPC.
Ghanaian advertisers don’t bid high amounts, so the cost of clicking ads is not high.
However, Adsense is an assured revenue stream with traffic and you should highly consider it.
Direct Placements
This is one of my favourite ways of making money.
Direct ad placements just mean companies and small businesses are contacting you to advertise their business on their website.
This works very well for niched blogging. A health blog might receive offers from a dental clinic to put their hospital on the blog for more visibility.
When it comes to direct ad placements, you charge the business or individual that contacts you based on your charges.
Mostly, you take part payment before starting to show the ad.
Top 10 Bloggers in Ghana
According to Avance Media, here are the top 10 bloggers in Ghana as at 2021:
Rashad Kojo Emmanuel – ghpage.com
Chris Handler – ghbase.com
Felix Adomako Mensah – zionfelix.net
Dennis Dwomoh – thedistin.com
Shepherd Yaw Morttey – mfidie.com
Shadrach J. Annang – eventlabgh.com
Ameyaw Debrah – ameyawdebrah.com
Jonathan Appiah-Adu – nanansem.com
Cobby Collins – bestshowbiz.com
Isaac Yawson-Brown – browngh.com
Bonus: Free WordPress blog set up for all Ghanaians by Mfidie.com and Plugnom.com
As part of the activities involved in celebrating our 3rd Anniversary at Mfidie.com, we have collaborated with the bespoke hosting provider, Plugnom, to offer free domain and blog setup once you buy hosting.
You can buy your hosting by checking out the Plugnom Blogger Pack.
https://plugnom.com/blogger-pack/
We believe everyone deserves to let the world see their works and maybe make some money along the way.
What does our free WordPress blog setup offer contain?
Check out the table below:
WordPress Installation
We guide you to install the latest version of WordPress on your server. We make sure the installation meets all the right standards to avoid the most common WordPress Installation problems.
Theme and Design
We help you choose from the wide range of available themes and designs to style your blog. This would give you the freedom to let your blog
Blog Structure
We help you choose a clean blog structure so that readers can easily find their way around your blog.
Search Engine Optimisation
We make your blog friendly to search crawlers so search engines like Google Can easily crawl your website.
Caching
We install plugins that help to make your blog load faster.
Security
We install security plugins to bring the risk that your blog will be hacked to a minimum.
Why do we provide all this for free?
We believe blogging should not be complicated and difficult. Everyone should have a voice online, the way they want it.
Get a good hosting and domain and we will help you set up your blog for free. Yes, Free! Interested? Send an email to [email protected] or Call/WhatsApp Alfred on +233200809182
Are you a resident of Ghana wanting a verified PayPal account for free? Look no further! This article will guide you step by step.
PayPal is crucial for online payments, especially for freelancers and internet workers. Despite the PayPal ban in Ghana, there’s a way to create a verified account and enjoy its benefits. Freelancers, especially those in Ghana and African countries have relied heavily on PayPal (even though there are some PayPal alternatives) to receive payment for services they have rendered as a way to make money.
With PayPal, securely transact online without compromising your credit card details. Buy products from global stores and flexibly choose payment methods. It’s simple, fast, and accessible from anywhere.
Get ready for convenient online transactions in Ghana!
What is PayPal?
PayPal is the largest internet wallet service, serving a global marketplace and offering secure and convenient online payment options. It’s an American financial institution registered in the United States and several other countries.
PayPal is widely trusted and accepted worldwide, making it a popular choice for online transactions. In the past, Ghana and some other African countries were blacklisted by PayPal due to credit card fraud. Although the ban may be lifted in Ghana in 2019, it remains uncertain.
Despite this, there are benefits to having a PayPal account in Ghana. PayPal provides security by encrypting and securing your credit card details, allowing you to make transactions without fear of compromising your information. Additionally, PayPal offers flexibility, allowing you to use various types of cards and make purchases from mobile sites and apps. It’s a simple and fast way to send and receive money, making it a valuable tool for online transactions.
Benefits of having a PayPal Account in Ghana
Having a PayPal account in Ghana offers several benefits.
Firstly, it provides security for your transactions as your card details are encrypted and secured, reducing the risk of compromise or theft.
Secondly, it allows you to easily purchase items online from thousands of vendors who accept PayPal, regardless of their location.
Lastly, PayPal offers flexibility with multiple payment options and is simple and fast to use, making it convenient for sending and receiving money.
Security of transactions
Ensure the security of your online transactions by using PayPal, a reliable and trusted platform for payment in Ghana.
When it comes to disclosing your card details during financial transactions online, there are significant risks involved. However, with PayPal, you can trade online without fear of compromising or having your credit card details stolen.
PayPal collects your credit card details only once, during the sign-up process, and encrypts and secures them. This means that when making transactions, online merchants don’t see or ask for your credit card details.
Additionally, having a PayPal account gives you access to thousands of online stores, as most vendors accept PayPal as a method of payment.
With PayPal, you can enjoy the benefits of security, convenience, and flexibility in your online transactions.
Buying Online
When you have a verified PayPal account in Ghana, you can enjoy the convenience of buying online with ease and flexibility. Having a PayPal account gives you access to thousands of online stores with just your email address and password. Most online vendors accept PayPal as a method of payment, allowing you to easily purchase whatever you need regardless of the location.
PayPal offers security in transactions as it doesn’t require you to disclose your card details to online merchants. With PayPal, your card details are encrypted and secured, protecting you from the risk of having your credit card information compromised or stolen. Additionally, PayPal is flexible, supporting various types of cards and being accepted on mobile sites and apps.
It also offers a simple and fast way to send payments and transfer funds, allowing you to make transactions anywhere, anytime.
Flexible with more options and costs less
With a verified PayPal account in Ghana, you can enjoy the flexibility of more options and lower costs.
PayPal offers various types of cards that you can add and verify to your account, including Mastercard, Visa, debit cards, and credit cards. You can also add multiple cards to your PayPal account, giving you more flexibility in managing your payments.
Additionally, PayPal is accepted on mobile sites and apps, allowing you to make payments with just a few clicks on your smartphone or tablet. This convenience eliminates the need for a token and makes transactions fast and simple.
Simple and Fast
To experience the simplicity and speed of having a PayPal account in Ghana, you can easily send payments, transfer funds, and pay bills with just a few clicks on your computer or mobile device. Here are the benefits you can enjoy:
Security of transactions: PayPal encrypts and secures your card details, allowing you to trade online without fear of compromising your financial information.
Buying Online: With a PayPal account, you can easily purchase products from thousands of online stores around the world using just your email address and password.
Flexible with more options: PayPal supports various types of cards and allows you to add and verify multiple cards to your account, giving you more flexibility in payment options.
Cost-effective: PayPal is accepted on mobile sites and apps, allowing you to make payments with just a few clicks on your smartphone or tablet, eliminating the need for a token and saving you time.
What do you need to create a verified PayPal Account in Ghana?
To create a verified PayPal account in Ghana, you’ll need three essential things.
First, you need an active phone number, preferably from MTN or Vodafone, as they’re more reliable for receiving OTP from PayPal.
Second, you need your full name as it appears on a recognized National ID. Make sure to use the official name on your ID card for added security.
Lastly, you need a working email address that hasn’t been used to register a PayPal account before.
Once you have these three things, you can begin the registration process on your computer, using Google Chrome or Yandex browser for the best experience. If you choose to use a mobile phone, remember to select ‘desktop mode’ on your browser.
Steps to create a Verified PayPal account in Ghana
To create a verified PayPal account in Ghana, you need to follow these steps:
Visit the PayPal website using your Google Chrome browser.
Choose to sign up for a PayPal business account.
Enter your valid personal and business details.
Confirm your PayPal account from the email sent to you.
Sign in to your new PayPal account.
Visit the PayPal website from your Google Chrome browser
Open your Google Chrome browser and navigate to the PayPal website to begin the process of creating a verified PayPal account in Ghana. Here are the steps to follow:
Visit the PayPal website from your Google Chrome browser.
Choose to sign up for a PayPal business account.
Enter your valid personal and business details.
Confirm your PayPal account from your email.
Once you have completed these steps, you can sign in to your new PayPal account and provide any additional information required. This will enable you to start using your PayPal account in Ghana for receiving funds and making payments.
Remember to confirm your additional details to secure your account and prevent any issues with PayPal. With a fully functioning PayPal account, you’ll have the convenience and security of online transactions at your fingertips.
Choose to sign up for a PayPal business account
Now that you have visited the PayPal website and entered your valid personal and business details, it’s time to take the next step. Choose to sign up for a PayPal business account.
By selecting the business account option, you’ll have more access and the opportunity to receive funds as well as send them hassle-free.
On the signup screen, click on ‘Sign Up’ at the top right. Then, choose the ‘Business Account’ option. After that, enter your valid email address and continue to fill in all the necessary details, such as your name, business name, phone number, postcode, business address, and currency.
Once you have submitted the form, wait for an email from PayPal to confirm that your details have been received. After receiving the email, you can log in to your new PayPal account and complete the remaining steps on the dashboard.
Enter your valid personal and business details
Once you have visited the PayPal website and chosen to sign up for a PayPal business account, it’s time to enter your valid personal and business details. To successfully create a verified PayPal account in Ghana, follow these steps:
Visit the PayPal website from your Google Chrome browser.
Choose to sign up for a PayPal business account.
Enter your valid personal and business details, including your name, business name (if applicable), phone number, postcode, and business address.
Confirm your PayPal account from the email sent by PayPal.
By entering accurate and valid personal and business details, you ensure the smooth creation of your PayPal account and increase its credibility. Remember to use your official name and a valid Ghana phone number.
Once you have completed these steps, you can proceed to sign in to your new PayPal account and start using it for online transactions.
Confirm your PayPal account from your email
To confirm your PayPal account, follow these steps:
Enter your valid personal and business details.
Check your email for a message from PayPal.
Open the email and click on the confirmation link provided.
This will verify your email address and complete the process of creating a verified PayPal account in Ghana.
Remember to check your spam or junk folder if you don’t see the email in your inbox.
After confirming your email, you can proceed to sign in to your new PayPal account. Make sure to provide accurate and complete information to avoid any issues with PayPal in the future.
Sign in to your new PayPal account
After confirming your email, you can proceed to sign in to your new PayPal account and access all the features and functions available to you.
Here are the steps to sign in to your new PayPal account:
Go to the PayPal website using your Google Chrome browser.
Click on the ‘Log In’ button at the top right corner of the page.
Enter the email address and password you used during the registration process.
Click on the ‘Log In’ button to access your PayPal account.
Once you have successfully signed in, you’ll be able to manage your account, send and receive payments, and enjoy all the benefits of having a verified PayPal account in Ghana.
Make sure to keep your login credentials secure and remember to log out after each session for added security.
Confirm your additional details and start using your PayPal account
Now that you have successfully signed in to your new PayPal account, you can proceed to confirm your additional details and start using your PayPal account in Ghana.
To confirm your additional details, log in to your PayPal account and navigate to the dashboard. There, you’ll find options to verify your email address, add a bank account or credit card, and complete the Customer Identification Process.
Verifying your email address is important to ensure the security of your account and to receive important notifications from PayPal. Adding a bank account or credit card will allow you to send and receive funds, make online purchases, and withdraw money from your PayPal account. Completing the Customer Identification Process will provide additional security and prevent any issues with PayPal.
Once you have confirmed your additional details, you can start using your PayPal account for various transactions, such as sending and receiving payments, making online purchases, and managing your funds securely.
Enjoy the convenience and flexibility that PayPal offers in Ghana.
How to fund your PayPal account in Ghana
To fund your PayPal account in Ghana, you have a few options.
First, you can transfer money from friends or family who’ve PayPal accounts.
Second, you can fund your account using a debit card linked to your bank account.
Lastly, you can buy funds from online exchanges that offer PayPal top-ups.
Transfer from friends
To fund your PayPal account in Ghana through transfers from friends, follow these steps:
Communicate with your friend: Reach out to your friend who also has a PayPal account and let them know that you need to transfer funds to your PayPal account. Make sure they’re willing to help you with this process.
Calculate the amount: Determine the exact amount in Ghana Cedis that you want to be sent to your PayPal account. Ensure that you calculate the correct exchange rate to avoid any discrepancies.
Send the money: Transfer the Ghana Cedis equivalent to your friend’s bank account or mobile money wallet. Provide them with your PayPal email address so that they can send you the funds.
Receive the funds: Once your friend has received the money, they can proceed to send the funds to your PayPal account. Confirm with them that the transfer has been completed successfully.
Fund from Debit Card
To fund your PayPal account in Ghana using a debit card, you can follow these steps.
First, contact your bank to obtain a debit card. Make sure you have enough funds on the card to load onto your PayPal account.
Next, add the debit card to your PayPal account. Once the card is added, you can proceed to fund your PayPal account.
It’s recommended to use a bank that has a mobile app or a good USSD platform so that you can easily send money from your Mobile Money account directly to the bank. This will make the funding process more convenient for you.
Buy from Online Exchanges
You can fund your PayPal account in Ghana by buying from online exchanges. Here are the steps to follow:
Research: Do a thorough background check on online exchanges in Ghana and read reviews to ensure their legitimacy.
Compare Rates: Look for online exchanges that offer competitive rates for buying PayPal funds.
Verify Reputation: Check the reputation of the online exchanges by looking for feedback from previous customers.
Proceed with Caution: Make sure to exercise caution when dealing with online exchanges and only buy from trusted sources.
How to withdraw money from your PayPal in Ghana
To withdraw money from your PayPal account in Ghana, follow these simple steps:
Sign in to your PayPal account by visiting the PayPal Dashboard at https://www.paypal.com/ls.
Once you’re signed in, click on ‘Withdraw Funds’ on the dashboard.
On the next screen, select ‘From’ and choose your PayPal Balance.
Then, click on ‘To’ and choose your linked Visa Card, such as the UBA AfriCard, FAB Prepaid Card, or Access Bank Prepaid Card.
Enter the amount you want to withdraw and click on ‘Continue’.
Review the transaction details on the next screen.
Click on ‘Transfer’ to instantly send the money to your linked card.
Please note that although it may say 5 to 7 business days, the transfer is usually instant and you can check your balance at any ATM.
More Tips about Creating a PayPal account in Ghana
When creating a PayPal account in Ghana, it’s important to be aware of a few more tips to ensure a successful and hassle-free process. Here are some additional tips to keep in mind:
Use a valid and active email address: Make sure the email address you provide during registration is valid and active. This is where PayPal will send important notifications and account updates.
Provide accurate personal and business information: It’s crucial to provide accurate information when filling out the registration form. This includes your full name, business name (if applicable), phone number, and address. Providing false information may result in account suspension.
Choose the right currency: Select the currency that most of your transactions will be in. This will help you avoid additional conversion fees when making payments or receiving funds.
Protect your account: Set up strong passwords and enable two-factor authentication for added security. Regularly monitor your account activity and report any suspicious or unauthorized transactions to PayPal.
Conclusion
In conclusion, creating a verified PayPal account in Ghana is a valuable tool for online transactions and provides numerous benefits. By following the step-by-step instructions outlined in this article, residents of Ghana can easily and securely access the convenience and flexibility that PayPal offers.
With a verified account, individuals can confidently carry out online purchases, receive payments, and withdraw funds, enhancing their online financial experiences.
Don’t miss out on the opportunity to join the global PayPal community and enjoy hassle-free online transactions.
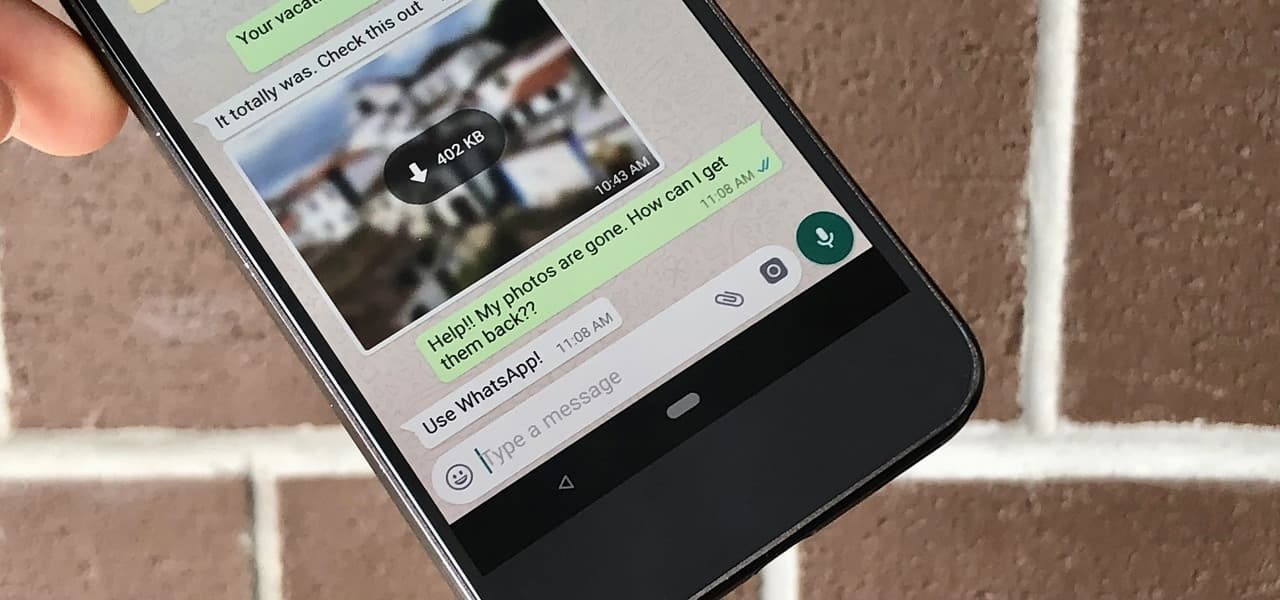
Are you tired of losing important messages on Whatsapp? Well, you’re in luck! We’ll show you how to view deleted Whatsapp messages using a simple method.
With billions of users worldwide, Whatsapp has become the go-to instant messaging app. However, the ‘delete for everyone’ feature has caused frustration. But don’t worry, there’s a solution.
By using the Notification History app on your Android device, you can retrieve and view deleted messages. Follow the steps in this article to take control of your deleted Whatsapp messages.
Using Notification Log on Android Devices
To access the Notification Log on your Android device and easily view deleted WhatsApp messages, follow these steps:
Go to your PlayStore and download the ‘Notification History’ app.
Once installed, open the app and allow it to access notifications on various apps, including WhatsApp.
Make sure you grant the app administrator access to your apps.
From the time of installation, the app will record your notifications. After a WhatsApp message has been deleted by the sender, follow these steps:
Open the ‘Notification History’ app.
Click on WhatsApp from the list to see all WhatsApp notifications.
You’ll be able to view all messages you’ve received on WhatsApp over the past few hours.
Keep in mind that the app only stores notifications for about four hours, and you can only see up to 100 characters per notification. Unfortunately, this method can’t retrieve messages sent to an already open chat or show images and videos.
Reading Deleted Messages With Notification History Log App
To read deleted WhatsApp messages, you can use the Notification History Log app on your Android device. This app allows you to access the notification log and retrieve deleted messages easily.
Here are some key points to note:
The Notification History Log app is available for free on the Google Play Store.
After installing the app, you need to grant it permission to access your notifications.
The app records all your notifications, including those from WhatsApp.
When a message is deleted, you can open the app and find the deleted WhatsApp notification.
You can then view the deleted message, copy it to your clipboard, or take a screenshot.
It’s important to note that the app only stores notifications for about four hours, so older messages can’t be retrieved.
Additionally, the app can only display up to 100 characters per notification, so images and videos can’t be viewed using this method.
Accessing Deleted Messages With Notisave App
To access deleted messages with the Notisave app, you can easily retrieve and view WhatsApp notifications that have been deleted from your Android device. Notisave is a useful app that allows you to keep track of all your notifications, including WhatsApp messages. Although this app isn’t available for iPhone users, it’s compatible with Android devices.
By installing Notisave and granting it the necessary permissions, you can ensure that all your incoming messages, including deleted ones, are stored and accessible through the app. This means that even if a sender deletes a message, you can still view it in the Notisave app.
It’s a convenient way to keep track of your WhatsApp messages and ensure that you don’t miss any important information.
Recovering Deleted Messages With Backup
To recover deleted WhatsApp messages with a backup, you need to follow these steps:
Ensure that you have a backup of your WhatsApp messages. This can be done by enabling the backup feature in your WhatsApp settings or using a third-party backup app.
Uninstall WhatsApp from your device.
Reinstall WhatsApp and verify your phone number.
During the verification process, WhatsApp will detect the backup and ask if you want to restore your messages. Select the option to restore.
Wait for the restore process to complete. This may take some time depending on the size of your backup.
Once the restore is finished, you’ll be able to view all your deleted WhatsApp messages.
It is important to note that this method will only work if you have a backup of your messages. If you don’t have a backup, it may not be possible to recover deleted messages.
Limitations and Considerations
Now let’s delve into the limitations and considerations when it comes to viewing deleted WhatsApp messages.
While we’ve discussed various methods to retrieve deleted messages, it’s important to understand that these methods have their limitations.
First, the method we discussed earlier using the Notification Log is only applicable to Android devices. Unfortunately, there’s no similar app available on the Apple App Store, so iPhone users can’t use this method.
Additionally, the Notification Log can only store notifications for up to four hours, so any deleted messages beyond that time frame can’t be retrieved. Furthermore, this method can only retrieve text messages and doesn’t support the retrieval of images or videos.
It’s important to keep these limitations in mind when attempting to view deleted WhatsApp messages.
Conclusion
In conclusion, with the help of apps like Notification History and Notisave, you can easily view and retrieve deleted Whatsapp messages on your Android device. This eliminates the frustration of losing important information or evidence.
By following the steps outlined in this article, you can take control of your messaging experience and never have to worry about missing out on deleted messages again.
Stay informed and keep your conversations secure with these simple solutions.
Are you worried about your privacy during phone calls? Wondering if someone might be secretly recording your conversations?
In today’s digital age, it’s crucial to be aware of potential privacy breaches. In this article, we’ll explore how you can determine if someone is recording you on a phone call.
We’ll discuss indicators to watch out for, like beeping tones or a loud beep at the start of the conversation.
Stay informed and take control of your privacy during phone calls.
Beeping Tone During Call
To determine if someone is recording you on a phone call, listen for a frequent beeping tone during the call. In most countries, it’s illegal to record a call without the other person’s permission.
Mobile phone manufacturers, like iPhone, often include a beeping tone in the call recording function to indicate when a call is being recorded. When the record button is pressed, the other person on the call will hear a mid-volume beep sound that occurs regularly, usually every few seconds. However, this sound may not always indicate recording, especially if the person is in a noisy environment.
Additionally, this feature may not be available on all mobile phones, especially those using third-party applications for recording calls. Pay close attention to the sound, as it may not be loud, and always remember to ask the other person if you suspect they’re recording the call.
Loud Beep at Beginning of Call
You can easily identify if someone is recording you on a phone call by listening for a loud beep at the beginning of the call. This loud beep is typically heard right after the recording feature is activated on the other person’s phone.
Here are a few things to keep in mind about this beep:
Distinct sound: The loud beep is often distinct and can be differentiated from any other background noise.
Applicability: This method may not work in all situations, as someone may accidentally press a key while talking to you, creating a similar sound.
Feature phones: The loud beep is more commonly associated with feature phones or basic phones, rather than smartphones that use third-party applications for recording calls.
Recording Indicator on Phone
As you continue exploring ways to detect if someone is recording you on a phone call, it’s important to consider the presence of a recording indicator on your phone. Some mobile phones, such as iPhones, have a built-in recording indicator that alerts you when a call is being recorded. This indicator can be a small icon or symbol that appears on the screen during a call.
It serves as a visual cue to let you know that the call is being recorded. However, it’s worth noting that not all phones have this feature, and some third-party applications may not display a recording indicator.
Therefore, it’s always a good idea to be cautious and ask the person on the other end if they’re recording the call, especially if you suspect that your conversation may be recorded without your consent.
Suspicious Behavior During Call
During a phone call, if you notice unusual or deceptive behavior from the person on the other end, it could be a sign that they’re recording the call without your knowledge or consent. Here are some suspicious behaviors to look out for:
Background noise: If you hear strange noises or voices in the background, it could indicate that the person isn’t alone and might be recording the call for someone else to listen to.
Unusually vague or evasive answers: If the person on the call seems hesitant to answer specific questions or avoids giving direct responses, it could be a red flag that they’re trying to hide something.
Constant interruptions or distractions: If the person frequently interrupts the conversation or seems distracted by other things, it could be a tactic to divert your attention while they record the call.
Remember to be cautious and aware of these behaviors when having important conversations over the phone, especially if you suspect that your call might be recorded without your permission.
Background Noise or Distortion
To identify if someone is recording you on a phone call, pay attention to any background noise or distortion that may indicate the presence of a recording device. If you notice any unusual sounds or interference during the call, it could be a sign that the other person is using a recording device.
Background noise or distortion can be caused by various factors, such as the use of a hidden microphone or the recording device itself. It’s important to listen carefully and trust your instincts. If you suspect that you’re being recorded, you may want to express your concerns to the other person or end the call.
Unusual Call Quality or Delays
If you experience unusual call quality or delays, it may indicate that someone is recording you on a phone call. Here are a few signs to look out for:
Static or background noise: If you hear static or unusual background noise during the call, it could be a sign that the call is being recorded. Recording devices can sometimes interfere with the call quality and cause these disturbances.
Echo or feedback: If you hear your own voice echoing or feedback during the call, it could be a sign that the call is being recorded. Recording devices can sometimes cause these audio issues.
Voice distortion or robotic sound: If the person on the other end of the call sounds distorted or robotic, it could be a sign that the call is being recorded. Recording devices can sometimes alter the voice quality.
Trust Your Instincts
Pay attention to your gut feelings. When it comes to knowing if someone is recording you on a phone call, trust your instincts. Your intuition can often pick up on subtle cues and signals that something isn’t right.
If you have a feeling that the other person may be recording your call, don’t ignore it. Trust yourself and take it seriously. Look out for any suspicious behavior or signs mentioned in this article, such as frequent beeping tones or a single loud beep at the beginning of the call.
If something feels off, trust your instincts and consider addressing your concerns with the other person. Ultimately, your gut feelings can be a valuable guide in protecting your privacy during phone conversations.
Conclusion
In most countries, it is illegal for anyone to record another person on a call or track phone calls and texts without seeking the permission of the other person. Being aware of potential privacy breaches during phone calls is crucial in today’s digital age.
By understanding the indicators of someone recording your call, such as beeping tones or suspicious behavior, you can take steps to protect your privacy.
Trusting your instincts and being proactive in safeguarding your information is key.
Stay informed and empowered to ensure your privacy during phone conversations.
Are you a satellite TV viewer in Ghana? Looking to scan for satellite channels? Well, you’re in luck!
In this article, we’ll guide you through the process of scanning for satellite channels in Ghana using MultiTV. Whether you have a MultiTV decoder or need to get one, we’ll provide step-by-step instructions using different types of decoders.
By following our instructions, you’ll be able to enjoy a wide range of entertainment, news, and sports channels.
So, let’s get started and explore the world of satellite television in Ghana!
Determine Satellite Dish Position
To determine the position of your satellite dish, follow these steps.
First, make sure that your satellite dish is facing the east. This is because the signal for satellite channels usually comes from that direction.
Next, ensure that the dish is installed correctly, following the instructions provided with the dish manual. Once the dish is securely mounted, connect the coaxial cable from the dish to the receiver, making sure it’s connected to the LNB input.
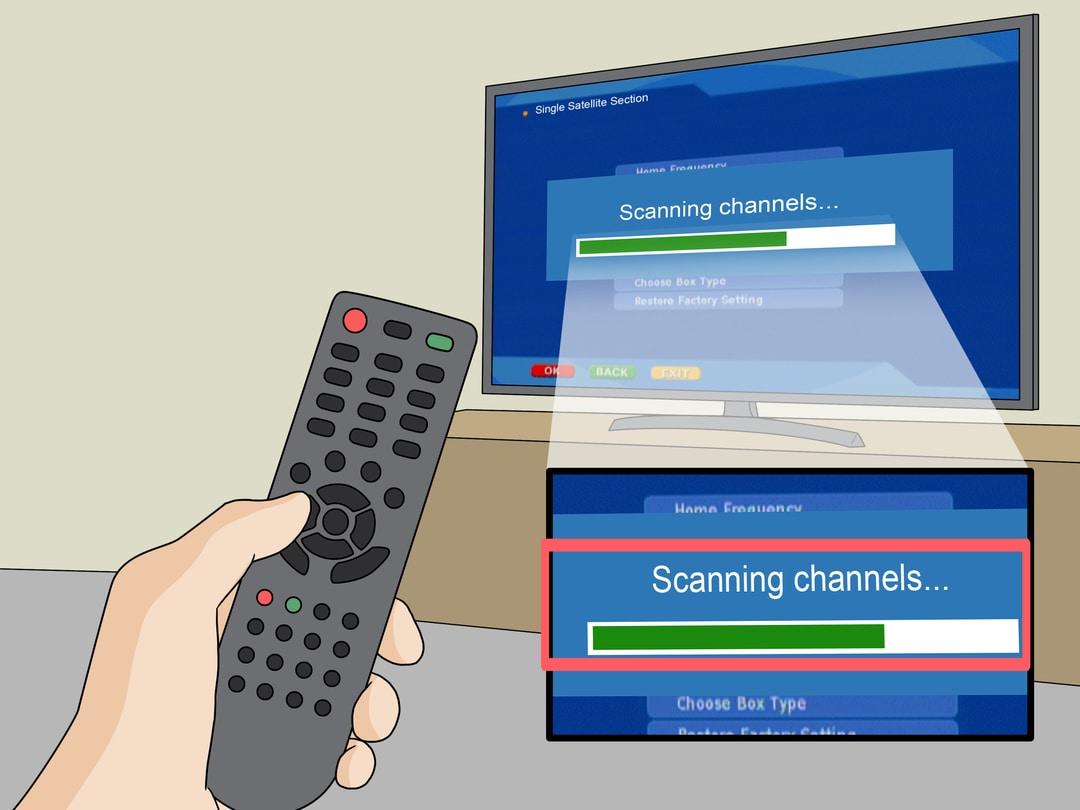
Power on the receiver and proceed with the digital box installation. Different decoders may have slightly different instructions, but generally, you’ll need to access the installation menu, select manual search, input the frequency (such as 12522), adjust the polarization, and start scanning for satellite channels.
Install the Satellite Dish
Now let’s move on to installing the satellite dish. Here is a step-by-step guide to help you with the TV installation process:
Steps
Instructions
1
Install the dish using the dish manual. Assemble the dish and fix the LNB in its holder.
2
Mount the stand on a wall, ensuring it is well fixed and facing the east direction.
3
Choose a location for the dish where there are no obstructions blocking the signal.
4
Partially tighten the dish to allow for adjustments. Turn the dish vertically and horizontally until the signal shoots or flashes.
5
Connect the coaxial cable from the dish to the receiver’s LNB input.
6
Power on the receiver.
Connect Dish to Receiver
To connect the dish to your receiver, you’ll need to follow these simple steps:
Connect the coaxial cable from your dish to the satellite receiver using the appropriate connectors.
Make sure to connect it to the LNB input on the receiver.
Power on the receiver and wait for it to boot up.
Check the signal strength and quality on your receiver’s display.
Adjust the dish position if necessary to optimize the signal.
By following these steps, you’ll ensure that your satellite receiver is properly connected to the dish, allowing you to receive and enjoy the Multi TV channels.
It’s important to ensure a secure and proper connection to guarantee optimal signal reception and uninterrupted viewing experience.
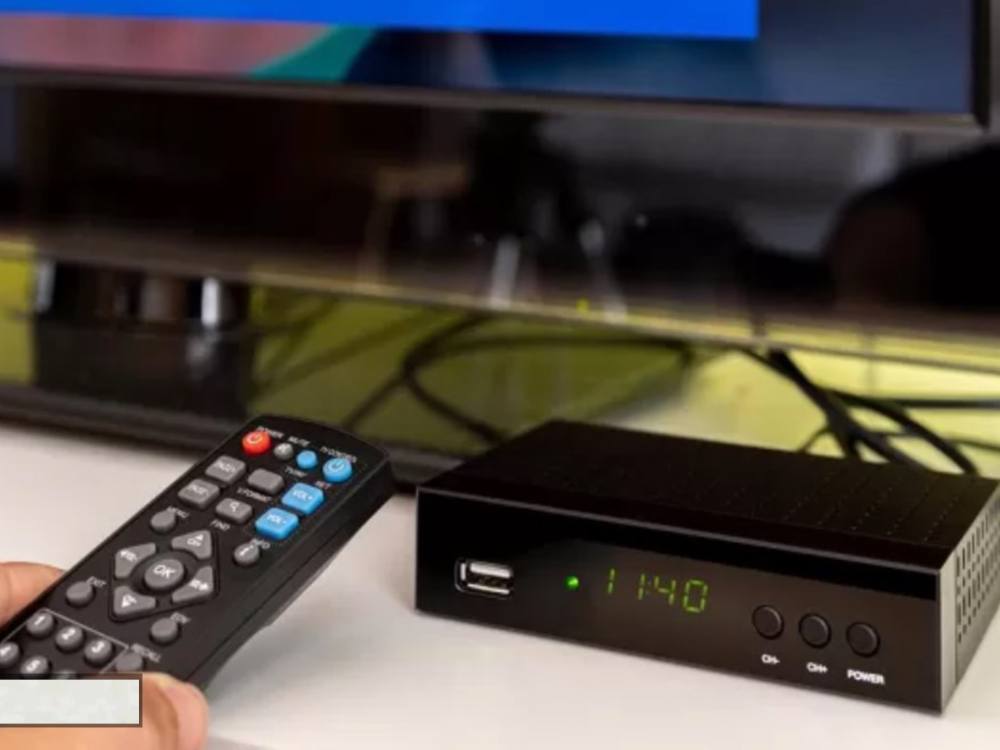
Power On the Receiver
Once you have completed connecting the dish to your receiver, the next step is to power on the receiver. Make sure the receiver is plugged into a power source and press the power button to turn it on. Wait for the receiver to boot up and display the home screen or menu. This is where you can access different settings and functions of the receiver.
To help you understand the process better, here is a table outlining the steps to power on the receiver for different decoder types:
Decoder Type
Power On Steps
Syndicated Box
Press MENU, select INSTALLATION, and press OK
Strong Box
Press MENU, press RIGHT volume button, input 0000
Somotex Ash Box
Press MENU, select INSTALLATION, press the red button
Quality Box
Press MENU, scroll down to DVB-S, click OK
Scan for Satellite Channels – Syndicated Box Decoder
To scan for satellite channels on a Syndicated Box Decoder, you’ll frequently need to follow these steps:
Press MENU on the remote.
Select INSTALLATION and press OK.
Choose MANUAL SEARCH and press OK.
Press the green button on the remote to edit the frequency.
Select MODIFY and press OK.
Input the symbol rate as 27000.
Select POLARIZATION and press the RIGHT button to change to vertical.
Press OK to save and exit.
Start the scanning process by moving the channel down knob.
Press OK to start scanning.
Press exit to finish.
These steps will help you efficiently scan for satellite channels on a Syndicated Box Decoder. Remember to use the appropriate decoder, such as a master decoder or a strong decoder, and set the symbol rate correctly for optimal results.
Scan for Satellite Channels – Strong Box Decoder
Continuing from the previous subtopic on scanning for satellite channels, let’s now focus on the Strong Box Decoder.
If you own a Strong Box Decoder and want to scan for satellite channels in Ghana, here’s what you need to do.
First, press the MENU button on your remote.
Then, press the RIGHT volume button and enter 0000 as the password.
Select MANUAL SCAN and press OK.
Use the RED BUTTON to select transponder ASTRA 3A/3B and press the GREEN BUTTON to add it to the TP list.
Enter the frequency 12522 and the symbol rate 27000.
Change the polarization to either V or H to make the bars change to green color.
Finally, press OK to start scanning and exit when finished.
With these steps, you’ll be able to successfully scan for satellite channels on your Strong Box Decoder.
Scan for Satellite Channels – Somotex Ash Box Decoder
If you have a Somotex Ash Box Decoder and want to scan for satellite channels in Ghana, you can follow these simple steps:
Press MENU on your remote.
Select INSTALLATION.
Press the red button to EDIT.
Input 12522 on the FREQUENCY.
Press OK.
Input 27000 on the SYMBOL RATE.
Select POLARITY and press RIGHT button to select either Vertical or Horizontal.
Select SAVE and press OK.
Press on the BLUE button and OK to scan.
Press OK on YES.
Press EXIT to begin viewing channels.
By following these steps, you’ll be able to scan for satellite channels using your Somotex Ash Box Decoder in Ghana. Make sure to input the correct yayi tv frequency and adjust the settings accordingly.
Happy scanning!
Scan for Satellite Channels – Quality Box Decoder
Now let’s move on to the next step in scanning for satellite channels in Ghana using a Quality Box Decoder.
To begin, press the MENU button on your remote.
Scroll down and select DVB-S, then click OK.
When prompted for a code, input 0000 and press OK.
Next, choose DISH SETTINGS and click the YELLOW BUTTON on your remote to edit TP.
Scroll down to SYMBOL RATE and enter 27000.
Scroll to YES and click OK.
Then, select SERVICE SEARCH, followed by START SCAN and click OK.
Now, you just need to wait a few minutes for the satellite channels to be successfully scanned.
With these instructions, you’ll be able to easily scan for satellite channels using a Quality Box Decoder.
Differences Between Satellite and Cable TV
To understand the differences between satellite and cable TV, let’s explore their key distinctions:
Signal Transmission: Satellite TV broadcasts signals through a satellite dish, while cable TV transmits signals via a cable.
Coverage: Satellite TV can be received anywhere with a satellite dish, while cable TV is limited to areas where the cable infrastructure is available.
Channel Options: Satellite TV offers a wide range of channels, including international and niche channels, while cable TV may have limited channel options.
Picture Quality: Satellite TV generally provides better picture quality, including high-definition and 4K options, while cable TV may have lower picture quality.
Reliability: Satellite TV can be affected by weather conditions, such as heavy rain or storms, while cable TV is more reliable in terms of signal stability.
Understanding these differences will help you make an informed decision when choosing between satellite and cable TV services.
Wrapping Up
In conclusion, scanning for satellite channels in Ghana using MultiTV is a simple process that can enhance your television viewing experience. Whether you have a MultiTV decoder or need to obtain one, following the step-by-step instructions provided will allow you to access a wide range of entertainment, news, and sports channels.
Enjoy the world of satellite television in Ghana and explore the various shows and programs offered by MultiTV.
Are you tired of not finding any channels on your TV? Do you keep encountering the frustrating ‘no signal’ screen? Well, you’re not alone. Many Ghanaians face this issue, but don’t worry, we’ve got you covered.
In this article, we’ll guide you through the process of scanning your TV for digital channels in Ghana. We’ll provide step-by-step instructions on accessing the settings menu, choosing the right scanning option, and getting your channels back.
So, keep reading and get ready to enjoy a wide range of digital channels on your TV.
Benefits of Scanning for Digital Channels
Scanning for digital channels on your TV in Ghana offers several benefits.
Firstly, it allows you to access a wider variety of TV channels, including both local and international options. This means you can enjoy a diverse range of content, from news and sports to movies and documentaries.
Additionally, scanning for digital channels ensures that you have access to high-quality, clear reception, resulting in a better viewing experience. You can say goodbye to fuzzy or pixelated images and enjoy your favorite shows in crystal clear resolution.
Furthermore, scanning for channels allows you to stay up-to-date with any new channels that may become available in your area. This means you won’t miss out on any exciting programming or entertainment options.
When to Scan for Channels
To determine the optimal timing for scanning your TV for digital channels in Ghana, consider factors such as the availability of new channels, any changes in channel frequencies, and the need to restore previously working channels.
Scanning for channels should not be an everyday thing. However, if there are new TV channels and you want to get them, you will have to scan for them. Also, if you had some channels that were working before but have suddenly stopped working, then rescanning would be the right thing to do to get them back. Some TV channels also change/migrate to other frequencies and it would be necessary to scan your channels to get them back working when these migrations happen.
It is also good practice to scan your Digital TV channels at least once a month.
Factors to Consider before scanning your TV:
Availability of new channels
Changes in channel frequencies
Need to restore previously working channels
Good practice (scan at least once a month)
Automatic addition of new channels (may not require regular scanning)
Scanning for digital channels is crucial to ensure that you are able to access all the available channels on your TV. By considering the factors mentioned above and scanning your TV at the right time, you can enjoy a wide range of channels and stay up-to-date with the latest content.
Steps to Scan Your TV for Digital Channels
Once you have determined the optimal timing for scanning your TV for digital channels in Ghana, follow these steps to quickly and easily scan your channels and start enjoying your favorite free-to-air TV shows.
Using your TV or Digibox remote control, press the ‘Menu’ button and go to the ‘Settings’ menu.
Scroll through the options until you find ‘Channel Scan’ or a similar option like ‘Rescan’ or ‘Auto-tune.’
Select the ‘Auto Tuning’ option and choose your country as Ghana.
Then, choose either ‘DVB-T’ or ‘DVB-T2’ and select ‘Start Scan’ to initiate the process.
Wait for the scan to finish, which can take between 5 to 15 minutes, and then you can start enjoying your newly scanned channels.
Choosing the Right Settings for Channel Scanning
To ensure a successful channel scan, you need to carefully choose the right settings for scanning your TV for digital channels in Ghana. Here are three key settings to consider:
Satellite Settings: If you’re using a satellite dish to receive digital channels, make sure to select the correct satellite settings on your TV or digibox. This will ensure that your device is tuned to the right satellite and can receive the channels you want.
GOTV Settings: If you’re using a GOTV decoder, check the settings menu for any specific options related to channel scanning. GOTV may have its own unique settings that need to be configured correctly for a successful scan.
Channel Settings: Within the channel scanning menu, you may have options to customize the scan process. For example, you can choose whether to scan for digital channels only or include analog channels as well. Adjust these settings based on your preferences and the type of channels you want to receive.
Understanding Digital TV Frequencies in Ghana
To understand digital TV frequencies in Ghana, you need to familiarize yourself with the concept of frequency bands.
Digital TV signals in Ghana are transmitted using two main frequency bands: UHF (Ultra High Frequency) and VHF (Very High Frequency).
UHF frequencies range from 470 to 890 MHz, while VHF frequencies range from 54 to 216 MHz.
Different channels are assigned to different frequencies within these bands.
When scanning for digital channels on your TV or decoder (such as Multi TV, Strong TV, or Nasco), the device will search for available channels within these frequency ranges.
It’s important to ensure that your antenna is properly connected and positioned to receive the signals.
Troubleshooting Common Scanning Issues
If you encounter any common scanning issues while trying to scan your TV for digital channels in Ghana, there are troubleshooting steps you can take to resolve them:
Check the connection: Ensure that your TV is properly connected to the antenna and that the antenna is placed in a good position, preferably outdoors.
Check the antenna: Make sure that your antenna is compatible with your TV. Different TVs may require different types of antennas, such as a smart TV antenna, for optimal performance.
Check the signal strength: Use the signal strength indicator on your TV to determine if the signal is strong enough. If the signal is weak, you may need to reposition the antenna or invest in a signal booster.
Additional Tips for Getting More Channels on Your Digital TV
To maximize the number of channels on your digital TV, follow these additional tips.
First, make sure your antenna is properly positioned and connected to your TV. A good outdoor placement is recommended.
Next, check for any software updates for your TV or digital decoder, as these updates can sometimes improve channel reception.
Additionally, try adjusting the antenna’s direction to optimize signal strength.
If you have a my gotv decoder, nasco TV, Kennedy digital, Amacon, refer to the manufacturer’s instructions for specific tips on getting more channels.
Finally, consider investing in a signal booster or amplifier to enhance the strength of your TV signal.
Wrapping Up
In conclusion, scanning your TV for digital channels in Ghana is a simple process that can greatly enhance your viewing experience. By following the step-by-step instructions provided in this article, you can easily access a wide range of channels and avoid the frustration of encountering the ‘no signal’ screen.
Don’t miss out on new channels or restore the ones that have stopped working, start scanning your TV today and enjoy a variety of digital channels at your fingertips.
Looking for a quick loan in Ghana? Look no further than MTN QwikLoan. With this fast and convenient lending service, you can get up to GHS 1000 in under 1 minute using your MTN Mobile Money platform.
No collateral or lengthy approval processes required. Simply dial *170# on your MTN handset, follow a few simple steps, and you’re on your way to accessing the cash you need.
Get the financial assistance you need with MTN QwikLoan today.
What Is MTN Qwikloan
MTN Qwikloan is a convenient lending service that allows you, as an MTN Ghana customer, to access loans up to GHS 1000 in under 1 minute using your MTN mobile money platform.
It’s an instant way to get a cash loan, anytime and for any purpose, right from your mobile phone. With Qwikloan, you don’t need to provide collateral or go through the hassle of extensive paperwork.
To qualify for a Qwikloan, you need to be 18 years and above, an MTN Ghana subscriber for more than 90 days, and actively use the MTN Mobile Money Service. If you have previously taken a loan with Qwikloan, you must have repaid it on time to be eligible for another loan.
Requirements for MTN QwikLoan
To qualify for an MTN QwikLoan, you need to meet certain requirements:
Be 18 years and above.
Be an MTN Ghana Subscriber for more than 90 days.
Be registered on the MTN Mobile Money Service and actively use the Wallet for transactions, including sending and receiving money, purchasing airtime, paying bills, among others.
Have repaid any previous loans taken with the feature on time.
Have sufficient activity in your MTN Mobile Money wallet.
Avoid being a defaulter.
By meeting these requirements, you can borrow money through MTN QwikLoan and enjoy the convenience of accessing cash loans up to GHS 1,000 from your mobile phone.
It’s important to adhere to the terms and conditions of the loan offer to ensure a smooth borrowing experience.
Steps to Apply for MTN Qwikloan
To apply for MTN Qwikloan, simply dial the short code *170# on your MTN Handset. Once you’ve dialed the code, follow these steps to complete your application:
Choose option 5 for Financial Services.
Select option 3 for loans.
Choose option 1 for Qwikloan.
Select option 1 to request a loan.
Choose your desired loan amount.
Confirm your repayment plan, specifying the number of days to pay back.
Enter your secret Mobile Money Pin to finalize the process.
If your application is approved, you’ll receive an SMS confirming the loan amount, repayment amount, interest rate of 6.9%, and due date for repayment.
To repay your MTN Qwikloan, deposit the repayable amount or more into your MTN Mobile Money wallet before the due date. Alternatively, you can repay your loan manually by selecting the Repay loan option on the Qwikloan menu by following *170#.
How to Repay Your MTN Qwikloan
You can easily repay your MTN Qwikloan by depositing the repayable amount or more into your MTN Mobile Money wallet before the due date. Here’s how to repay your MTN Qwikloan:
Deposit the amount repayable or more into your MTN Mobile Money wallet before the due date to repay the loan.
The loan amount would automatically be deducted from your wallet on the due date.
Alternatively, you can repay your loan manually at any time by following these steps:
Select the Repay loan option on the Qwikloan menu by dialing *170#.
Follow the prompts to repay your loan.
Can You Apply for MTN Qwikloan on the Same Day You Repaid the One You Borrowed Before
Yes, you can apply for another MTN Qwikloan on the same day you repay the one you borrowed before. Once you have successfully repaid your previous loan, you have the option to apply for a new loan immediately. This means that you can access the funds you need without any waiting period.
To apply for another loan, simply follow the steps outlined in the previous section. Dial the short code *170# on your MTN Handset, choose the option for loans, select Qwikloan, and then request a new loan. Make sure to choose your desired loan amount and confirm your repayment plan. Once your application is approved, you’ll receive an SMS confirming the loan details and the due date for repayment.
How Can I Check My MTN Qwikloan Limit
One way to determine your MTN Qwikloan limit is by checking your repayment history. This will give you an idea of how much you have borrowed in the past and how promptly you have repaid your loans.
To check your MTN Qwikloan limit, follow these steps:
Dial the short code *170# on your MTN handset.
Choose option 5 for Financial Services.
Choose option 3 for loans.
Choose option 2 for Qwikloan.
Choose option 3 for Check Limit.
By following these steps, you’ll be able to check your current MTN Qwikloan limit.
It’s important to note that your limit may vary depending on factors such as your repayment history and your usage of the MTN Mobile Money service. Make sure to check your limit regularly to stay informed about your borrowing capacity.
How Can I Increase My Loan Limit on the MTN Qwikloan
To increase your loan limit on the MTN Qwikloan, follow these steps and effectively manage your borrowing capacity.
Firstly, ensure that you have a good repayment history by repaying your previous loans on time. This demonstrates your reliability as a borrower.
Secondly, actively use your MTN Mobile Money wallet for transactions such as sending and receiving money, purchasing airtime, and paying bills. This will show your engagement with the platform and increase your chances of qualifying for a higher loan limit.
Lastly, maintain a healthy level of activity in your Mobile Money wallet to demonstrate your financial stability.
MTN Qwikloan Interest Rates
To understand the interest rates associated with MTN Qwikloan, you need to familiarize yourself with the terms and conditions of the loan offer. Here are the key points to know about the interest rates:
The interest rate for MTN Qwikloan is 6.9%.
The interest is calculated on the loan amount and is payable along with the loan repayment.
The interest rate remains fixed throughout the loan tenure.
Failure to repay the loan on time may result in additional charges and penalties.
It is important to carefully consider the interest rates and repayment terms before applying for an MTN Qwikloan. Make sure you understand the total cost of the loan and have a clear plan for repayment to avoid any financial difficulties.
Wrapping up
In just a few simple steps, you can access up to GHS 1000 in under 1 minute with MTN QwikLoan.
No need for collateral or lengthy approval processes. Simply dial *170# on your MTN handset, meet the requirements, and get the financial assistance you need.
Whether it’s for emergencies or bills, QwikLoan has got you covered.
Don’t wait, apply for MTN QwikLoan today and get the cash you need quickly and conveniently.
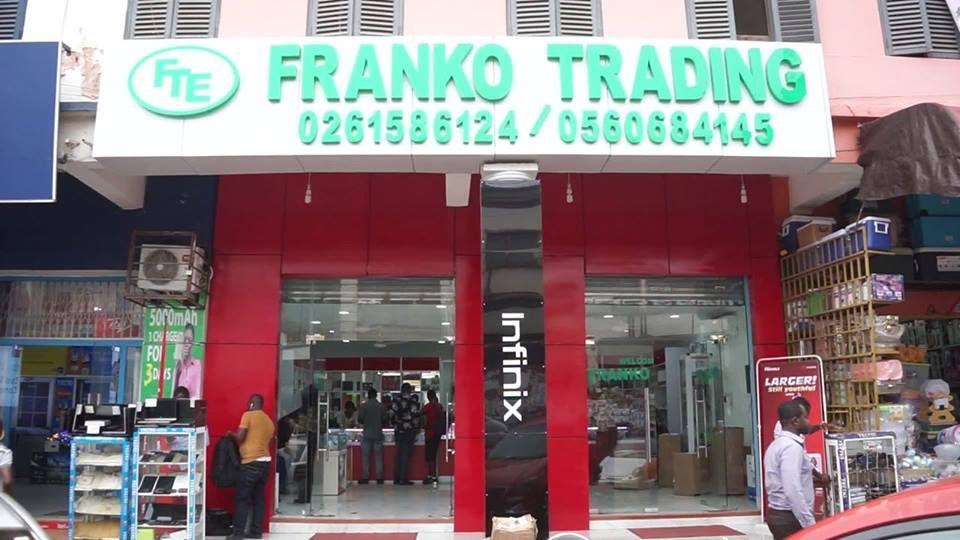

![How to apply & Renew Ghana Passport Online; [Full 2024 Guide]](https://cms.mfidie.com/wp-content/uploads/2017/04/ghana-passport-online.jpg)