Author: Shepherd Yaw Morttey

  • How To Silence Apple Watch

    How To Silence Apple Watch

    Do you ever feel like your Apple Watch is too loud and annoying? Have you searched for ways to silence it but can’t seem to find the right solution? Don’t worry, we’ve got you covered. In this article, we’ll be walking you through how to silence your Apple Watch quickly and easily! You won’t need any technical knowledge or expensive tools – just a few simple steps and you’re all set. So let’s get started and help make sure that pesky watch stays silent when it needs to be.

    The first step in silencing your Apple Watch is making sure Do Not Disturb mode is enabled. This will prevent notifications from buzzing or lighting up the screen, allowing you to enjoy peace and quiet without interruption. To enable Do Not Disturb mode on your watch, simply open the settings app and select “Do Not Disturb”. Once activated, all incoming notifications will be silenced until manually deactivated.

    Finally, if even after enabling Do Not Disturb Mode you still find yourself dealing with an overly noisy watch, there are additional settings available which allow users to further reduce sound levels. From the same menu as before, select “Sounds & Haptics” and then adjust the slider bar so that it sits at its lowest possible setting. With these two adjustments combined, your Apple Watch should now remain completely silent throughout use!

    Overview Of Apple Watch Features

    You would think with all its features, the Apple Watch is one of those devices that can’t be silenced. After all, it has functions and capabilities to help you stay connected and informed throughout your day. But what if you want to keep things quiet? You’d be surprised at how easy it is to silence your Apple Watch!

    The first step in understanding how to mute your Apple Watch is getting an overview of its features. The Apple Watch comes with a range of specs designed for convenience and connectivity. It allows users access to their music library, text messages, notifications from apps, as well as fitness tracking capabilities. In addition, its water resistant design provides protection against splashes or spills when out and about.

    When it comes to sound control on the Apple Watch, there are multiple ways to customize settings so that it meets your specific needs – whether you’re looking for complete silencing or just reducing volume levels. With this knowledge in hand, let’s move onto understanding the different sounds available on the device so we can start adjusting our preferences accordingly.

    Understanding The Different Sounds

    When it comes to sound control on the Apple Watch, understanding the different sounds available is key. There are three main types of alerts and notifications that will emit from your device: watch alerts, audible notifications, and sound effects.

    Watch alerts are those specific to the watch itself — things like alarms or timers you have set. Audible notifications include emails, text messages, or any other type of message received through an app on your phone that sends a notification to your wrist (e.g., social media apps). Finally, sound effects refer to any alert tones associated with certain tasks such as unlocking your watch face or completing a fitness goal.

    The good news is that all these sounds can be managed in terms of volume levels and frequency – giving users complete control over how their Apple Watch operates at any given time. With this knowledge in hand, let’s move onto setting up Do Not Disturb mode so we can further customize our preferences for silence when desired.

    Setting Up Do Not Disturb Mode

    With the power of Do Not Disturb mode, we can take our Apple Watch sound preferences to the next level. Setting up Do Not Disturb is easy and allows us to adjust settings for when exactly we want silence on our device. To get started, simply open Control Center – either by swiping down from the top of your watch face or tapping on Settings > Control Center. From here you’ll see a moon icon; tap on it to enable Do Not Disturb mode.

    You can also customize this setting beyond its default ‘on’ state if desired. If you go into Settings > General > Do Not Disturb, you will be able to further adjust the hours during which your device remains silent as well as specify who should still be able to reach you even while in DND (e.g., favorites). Once enabled, all other sounds associated with alerts, notifications, and effects are silenced – freeing up users from having to manually turn off each type of alert individually.

    One additional feature worth noting: You may have noticed that there’s an auto-reply message option available when enabling Do Not Disturb mode. This allows users to set a custom text message sent back automatically if someone attempts to contact them directly via their Apple Watch while in DND mode — very handy! Now let’s move onto how we can further mute calls and messages without having to resorting to full-time DND mode usage.

    How To Mute Calls And Messages

    Just like silencing a phone call or text message, we can also mute calls and messages on our Apple Watch. This is especially useful for those times when you want to be aware of incoming communications but don’t necessarily need to hear the sound associated with them. Muting calls and messages on your Apple Watch is as simple as flipping a switch – here’s how to do it:

    First off, open Control Center by swiping down from the top of your watch face or tapping on Settings > Control Center. You will see an icon labeled ‘Mute’ – tap this icon once to silence all incoming notifications, messages, and alerts until you decide otherwise. It’s almost like flipping a light switch; one tap turns the sounds off while another brings them back into play. Additionally, if you’d like separate control over whether your Apple Watch should remain silent during calls versus other types of notifications (e.g., emails), then simply go into Settings > Sounds & Haptics where you’ll find two toggle switches – one for muting calls and one for muting other notifications such as texts and email updates.

    Overall, taking just a few moments to adjust these settings beforehand can make life much easier in the long run — no more fumbling around trying to turn off multiple types of alert noise at once! Now let’s look at what else can be done beyond DND mode and manually muting individual elements…

    Adjusting Notification Volume

    Adjusting the volume of notifications on our Apple Watch is an important feature that can help us stay aware without being overwhelmed by sound. We can easily adjust the sound of incoming notifications from within the Audio settings section in our watch’s Settings menu. Here, we’ll find a “Notification Volume” slider which allows us to customize how loud or soft those alerts will be heard. Additionally, if you’d like to take your sound customization even further, then head over to the Sounds & Haptics section where you can also choose different alert sounds for specific types of notifications and apps (e.g., Mail vs Messages).

    Finally, it’s worth noting that these audio settings are also accessible from Control Center itself — simply long-press on the Mute button until a small popup appears with options to adjust both notification volume as well as ringer volume levels. This way, we don’t have to dive deeper into menus in order to get quick access to adjusting these settings; they’re just a few taps away! With this newfound knowledge under our belts, let’s now talk about what else we can do beyond muting calls and adjusting notification volumes…

    Customizing Airplane Mode Settings

    Beyond just adjusting the volume of our notifications, we can also customize other settings related to Airplane Mode. If you’re looking for a way to silence your Apple Watch completely, then this is an important feature that’s worth exploring. To access it, simply head into the watch’s Settings app — here we’ll find the “Airplane Mode” toggle which allows us to turn off all radios and disable any incoming calls or messages from coming through. This will effectively silence your Apple Watch until you decide to re-enable those features again.

    Additionally, if you’d like even more control over what types of notifications are silenced when enabling Airplane Mode, then take advantage of the “Customize” button located within this same menu in Settings. Here, we can select specific apps or services (e.g., Mail or Messages) whose notifications shouldn’t be allowed while in Airplane Mode — allowing us to maintain some level of awareness without having everything turned on at once.

    With these options available for customizing how our Apple Watch behaves based on our needs and preferences, now let’s talk about what else we can do beyond silencing things temporarily: blocking all notifications completely!

    Blocking All Notifications Completely

    We often find ourselves in situations where the sound of alerts and notifications can be disruptive or distracting. Whether it’s at a meeting, while studying, or during any other activity that requires silence – we may consider blocking all notifications completely to avoid getting sidetracked. With this goal in mind, let’s take a look at how we can stop notifications from appearing on our Apple Watch:

    1. Head into the Notifications menu located within Settings. Here we’ll find a toggle switch for “Do Not Disturb” mode which allows us to turn off most incoming alert sounds and vibrations coming through regardless of whether we’re using Airplane Mode or not.
    2. We can also choose to disable specific apps from sending us notifications as well — simply locate its entry under the “Notification Center” section and then use the provided switches to customize what types (if any) are allowed through.
    3. Finally, if you’d like to block all alerts entirely, there is an option available called “Block All Alerts” which will automatically silence everything until you manually re-enable them again later. Once enabled, no messages or calls will come through even when Do Not Disturb mode isn’t active so make sure to only use this feature when absolutely necessary!

    Having now covered some ways around silencing our Apple Watch along with options for blocking all notifications completely, it’s time to discuss disabling microphone and camera access altogether…

    Disabling Microphone And Camera Access

    Aside from blocking notifications, we may also consider disabling microphone and camera access on our Apple Watch to ensure privacy. Disabling these features can be done in a few simple steps:

    First, open the Settings app on your watch and navigate to Privacy. Here you’ll find an option for “Microphone & Camera Access” which will allow you to disable both of these services individually if desired. Simply toggle the switches next to each corresponding setting and then confirm your selection by tapping Done when finished.

    It’s important to note that some apps may require microphone or camera access before they’ll function properly – so if you’re planning on using them, make sure not to disable these settings completely! However, as long as no other apps are affected, this should effectively stop any unwanted audio/visual recordings from being taken without your knowledge or permission.

    Now that we’ve discussed how to disable microphone and camera access on our Apple Watch, let’s move onto enabling Theater Mode…

    Enabling Theater Mode

    With a single swoop, we can now silence our Apple Watch and enter Theater Mode. This remarkable feature is designed to make sure that your watch won’t disturb anyone in the theater – or anywhere else for that matter!

    Enabling Theater Mode on your Apple Watch is incredibly simple; all it takes is a few taps of the screen. First, open the Settings app on your device and navigate to Control Center & Notifications. Here you’ll find an option for “Enable Theater Mode” which will allow you to turn it on with just one tap. Once enabled, your watch’s display will be dimmed and vibrations silenced until you manually disable this mode again. It’s worth noting that while in Theater Mode, notifications will still appear but they won’t make any sound or vibrate – so no need to worry about disturbing those around you!

    In addition to keeping your watch quiet in theaters, enabling Theater Mode also allows us to enjoy some quieter moments without having our wrist buzzing constantly. Whether it’s during work meetings or family dinners, activating this setting helps keep distractions at bay and makes sure that only important notifications are allowed through. So why not enable Apple’s silent theater today?

    Utilizing Silent Mode

    In addition to Theater Mode, we can also utilize the Apple Watch’s Silent Mode feature. As its name implies, this enables us to quickly and easily turn off all sounds and vibrations on our device for a set amount of time. This is perfect for those times when we want some extra peace and quiet without having to worry about potentially disturbing others around us!

    Here are 4 simple steps to activate silent mode on your Apple Watch:
    1) Open the Settings app and navigate to Sounds & Haptics.
    2) Tap on “Vibrate” which will bring up two options – Vibrate On or Set Silent. Selecting “Set Silent” will enable silent mode until you manually disable it again.
    3) You’ll then be able to choose how long you’d like silent mode enabled; you can select anywhere from one hour up to 24 hours depending on your needs!
    4) Once done, tap Done in the top right corner of your screen and that’s it – your watch is now in silent mode until you decide otherwise!

    With these few swift taps, we’re now able to customize our Apple Watch experience more than ever before. Whether it’s introducing some temporary peace with silent mode or just preventing potential disruptions with theater mode, these features make sure that we never miss out on important notifications while still maintaining a respectful environment at all times.

    Conclusion

    In conclusion, silencing the Apple Watch is a great way to give yourself some peace and quiet. It can also be beneficial if you need to take an important call or have a meeting in public. With Do Not Disturb mode and Silent Mode, users can customize their experience to fit their needs. All of these features represent different aspects of control — the ability to silence your device when necessary, while still being able to receive notifications at other times. By managing sound settings on our Apple Watches we are symbolically showing that we are in charge of our lives and taking responsibility for how much information we want coming into our day-to-day lives. In this way, it’s not just about turning down the volume but rather taking back control over what comes into our life each day.

  • How To Stop Siri From Reading Messages On Airpods

    How To Stop Siri From Reading Messages On Airpods

    Are you tired of Siri reading your messages out loud every time you take off your AirPods? It can be really annoying, especially if you’re in a public space and don’t want everyone to hear what’s being said. Fortunately, it is possible to stop Siri from automatically reading text messages on your AirPods. In this article, we’ll show you how easy it is to turn off the feature so that Siri won’t read aloud any incoming notifications or messages. We will also provide tips for ensuring maximum privacy when using your AirPods. So if you’re looking for an effective way to keep conversations private while still enjoying the convenience of wireless audio device technology, then this article is just what you need!

    Overview

    Have you ever been in a crowded public space, like an airport or train station, and heard someone’s Airpods reading their messages out loud? It’s not only embarrassing but can be intrusive and uncomfortable for those around them.

    Fortunately, there are steps we can take to stop Siri from doing this on our own devices. Through the privacy settings of your device, you can control when audio notifications are enabled. This includes disabling audio alerts when messages arrive so that they won’t play through your Airpods. Additionally, troubleshooting any issues with your Airpods’ connection may also help prevent unwanted audio notifications from playing.

    With these simple tips it’s easy to enjoy all the benefits of Apple Airpods without compromising your privacy or making others feel awkward. Now let’s explore how to set up your airpods for maximum security and peace of mind.

    Setting Up Your Airpods For Privacy

    To ensure maximum privacy when using your Airpods, it’s important to adjust the settings on your device. This will secure the connection between your phone and your earbuds so that audio notifications don’t play in public places. To do this, go into the ‘Settings’ menu of your device and select ‘AirPods’. From here you can customize various preferences such as turning off Siri or adjusting sound levels for specific apps. You can also toggle whether audio alerts are enabled for incoming messages, calls, and other notifications.

    If you’re having trouble with any part of the setup process, double check that the devices are properly connected by going into Bluetooth settings on both devices. Make sure all connections have been established correctly before proceeding with adjustments to audio preferences. Additionally, be sure to keep software up-to-date in order to maintain a strong connection between your Airpods and your device.

    Once everything is set up correctly, you’ll be able to enjoy listening without worrying about interruptions from unwanted audio notifications playing through your Airpods in public spaces. Now we’ll explore how to turn off Siri completely on our Apple Airpods so that no matter where we are, there’s no chance of embarrassing ‘read aloud’ moments.

    Turning Off Siri On Your Airpods

    We all know the feeling of dread when Siri starts reading aloud a message in public. To avoid any potential embarrassment and ensure your Airpods remain private, it’s important to disable Siri completely. Here are four easy steps to take:

    1. Go into the ‘Settings’ menu on your device.
    2. Select ‘AirPods’ from the list of options available.
    3. Toggle off the switch that says ‘Siri’ or ‘Allow Siri While Wearing This Device’.
    4. You can also adjust sound levels for specific apps if desired.

    After completing these steps, you’re ready to enjoy listening without worrying about audio notifications playing through your Airpods in public spaces. With just a few adjustments to settings, you can be sure that conversations are kept between you and those closest to you — no matter where you go! Now we’ll look at how to disable voice feedback so that Siri remains silent even during accidental activation.

    Disabling Voice Feedback

    In addition to turning off Siri completely, you can also disable voice feedback so that no audio notifications are played even if the Airpods accidentally activate. To do this, follow a few simple steps:

    First, open up the ‘Settings’ menu on your device and select ‘AirPods’. From there, find the option labelled ‘Siri Voice Feedback’ or something similar. Toggle off the switch next to it in order to stop any sound from playing when Siri is activated by mistake. This will ensure that only your own voice is heard through the earbuds while they remain connected to your device.

    It’s important to note that disabling voice feedback does not turn off all sounds associated with Siri — just those related specifically to voice recognition technology. You’ll still be able to hear audio cues like chimes whenever an action has been successfully completed. However, these alerts are much less intrusive than full-blown conversations being read out loud!

    Now that we’ve covered how to disable both Siri and its accompanying voice feedback settings, let’s look at how to adjust listening levels for specific apps on Airpods.

    Adjusting Listening Levels

    Now that we’ve tackled how to turn off Siri and its voice feedback, it’s time to look at how to adjust sound levels for specific apps on your Airpods. Adjusting the listening levels is a great way to customize your audio experience so you can easily control what kind of sounds are being heard through the earbuds.

    To begin adjusting the volume settings, open up the ‘Settings’ menu again and select ‘AirPods’. From there, find the option labelled ‘Volume Control’, or something similar. You’ll then be able to make adjustments to individual app’s sound levels using a simple slider system. This will allow you to quickly increase or decrease audio levels depending on what type of content you’re currently consuming.

    It’s also possible to make more fine-tuned adjustments by tapping into each app’s own native sound settings, allowing for greater customization when it comes to controlling audio notifications. Whether you want louder music streaming from Apple Music or softer alerts coming from Messages — with just a few taps, you’ll be able to achieve exactly what you need in terms of sound level management with ease!

    From here, let’s move onto discussing further ways in which you can control audio notifications while using Airpods.

    Controlling Audio Notifications

    It’s like having an orchestra conductor in your ears, carefully crafting the perfect symphony of sound. With audio notifications from apps and services, you can customize the sounds that reach your earbuds so that only what matters most to you is heard. Whether it be a gentle reminder for something or an urgent alert — controlling audio alerts on Airpods allows users to craft their own unique auditory experience with ease.

    The first step towards managing these settings is understanding how they work. Audio prompts will usually come as either audible tones or spoken messages depending on the app or service being used at any given time. These are all designed to serve different purposes but ultimately provide information pertaining to whatever task may be occurring within the app itself. By adjusting audio levels across individual apps individually, users can ensure that important notifications stand out while more mundane ones remain muted.

    When it comes to those who prefer a quieter listening experience, there are still ways to receive pertinent information without necessarily needing to turn up the volume too much. Utilizing visual cues such as flashing lights or vibrations could help indicate when certain audio alerts should be addressed by allowing users to better control which type of notification they want coming through their Airpods at any given moment. This way, no matter what kind of environment one finds themselves in — whether it’s loud or quiet — everyone can keep track of incoming audio notifications with relative ease!

    With this newfound knowledge about managing audio notifications, let’s now look into further steps we can take in order to block unwanted messages sent directly through our Airpods.

    Blocking Unwanted Messages

    In order to stop unwanted messages from coming through our Airpods, there are a few steps we can take. The first is to go into the settings for our device and disable Siri’s ability to read incoming notifications aloud. This will prevent any alerts or messages sent directly by apps or services from being heard in our ears. We can also check what kind of audio notifications are enabled on each app so that only those that matter most come through without unnecessary noise.

    If desired, users can even choose to block certain contacts outright if they want complete control over who gets access to their ears! This way, specific people can be prevented from sending voice messages which could otherwise be intrusive when received while out in public or just not wanted at all. To make this happen, simply head over to the contact list associated with your device and either delete them entirely or mark them as blocked — both options help ensure that no further communication attempts occur between you two.

    Having taken these precautions, users now have full command over their auditory experience via Airpods! No longer do worrying about loud interruptions or receiving unexpected messages need to concern us since we’ve already set up measures that guarantee a peaceful listening environment. With this newfound freedom comes greater opportunities for personalization; allowing everyone to craft their own unique soundtrack tailored just how they like it!

    Deleting Or Blocking Contacts

    With our newfound control over incoming notifications and audio, it’s time to take a look at how we can manage the contacts on our device. After all, if we want to block out any unwanted messages or calls from certain people, then having an organized list of contacts is essential. Luckily, there are several options available for deleting, blocking, removing and excluding contacts as well as unsubscribing them altogether!

    First up is the delete contact option which allows users to quickly remove someone they don’t wish to communicate with anymore. This will also prevent them from being able to send future messages or attempt to call us via Airpods. There’s also the blocked contact feature that prevents selected persons from calling or messaging in the first place; perfect for those who’d prefer not to receive any communication whatsoever from specific individuals.

    For those who simply want more control over their contact list rather than completely cutting ties with someone forever, there’s always the option of removing or excluding them instead — this way no further attempts of communication occur but without actually disappearing from one’s list entirely. Additionally, users can even choose to unsubscribe particular contacts too so that new alerts won’t be sent but past ones still remain accessible should they ever need reviewing again.

    Having explored different ways of managing our contact lists accordingly, let’s now turn our attention towards choosing the right settings so that only desired audio notifications come through when needed most!

    Choosing The Right Settings

    Now that we’ve taken a look at how to manage our contact list, it’s time to ensure the right audio settings are in place so that only desired notifications come through on Airpods. To do this, users will need to adjust their device’s privacy and Siri settings as well as select the correct listening levels for incoming notifications.

    First off, let’s take a closer look at Airpod settings. This is where you can choose what types of alerts appear when connected via bluetooth such as incoming calls or messages from selected contacts — all of which can be customized according to user preferences. Additionally, if your current setup includes voice-activated assistants like Siri then additional adjustments may also be necessary; here one can decide whether incoming audio notifications should override existing noise cancellation features or not depending on personal preference.

    Finally, don’t forget about adjusting the listening level too! It’s important to make sure these settings aren’t set too high otherwise unwanted background noises might still creep into conversations without permission — something that no one wants! The good news is though that this feature can easily be adjusted via any number of compatible devices making customization quick and straightforward.

    Having covered everything there is to know about setting up preferred audio notifications on Airpods, let’s now turn our attention towards troubleshooting tips for addressing any potential issues going forward!

    Troubleshooting Tips

    When it comes to troubleshooting issues with Airpods, the first step is to check for any connection problems. This can be done by verifying that bluetooth is enabled on both your AirPods and device as well as ensuring that they are properly paired. If there’s still an issue then try resetting your AirPods or reconnecting them manually if necessary.

    In addition to looking into connection issues, users should also double-check their Siri settings in case of voice recognition difficulty or accidental audio feedback when receiving notifications. To prevent this from happening make sure you have the right privacy settings turned on so only approved contacts will be able to access information like messages over your headphones — a great way of avoiding unwanted interruptions!

    Finally, some other helpful tips include regularly updating your firmware which can help address minor bugs or glitches as well as keeping ear wax at bay since even small amounts can affect sound quality. Doing these things can go a long way towards making sure your Airpod experience stays top notch!

    Conclusion

    The bottom line is that you have the power to control how and when Siri reads your messages through your Airpods. With some simple steps, you can create a secure environment and enjoy the convenience of hands-free communication without worrying about privacy concerns.

    By adjusting listening levels, blocking unwanted contacts and disabling voice feedback, I can ensure that my conversations remain confidential while using my Airpods. Once these settings are in place, I’m confident knowing that Siri won’t be reading out all of my incoming messages on public transport or at work!

    Overall, having control over who hears what I say is an important factor for me when it comes to using technology like Airpods. With just a few tweaks here and there, I can protect myself from any potential breaches of privacy so that I can enjoy the benefits of hands-free communication with peace of mind.

  • How To Change Airpod Name

    How To Change Airpod Name

    Are you looking to change the name of your AirPods? Did you know that changing the name of your AirPods is easy and only takes a few steps? If so, then this article is perfect for you! In it, we’ll provide a step-by-step guide on how to change the name of your AirPods. Whether you want to give them an original moniker or just make them easier to identify among other devices, our guide will show you exactly what to do. So let’s get started!

    Do you own an Apple device like an iPhone or iPad? Then follow these simple instructions and you’ll be able to rename your AirPods in no time. First, open up your Settings app and then select Bluetooth from the list. From there, tap on the information icon next to the entry for ‘Airpods’ and then type in whatever new name you’d like for them. Once done, hit ‘Done’ and voila – your AirPod’s have been renamed!

    Finally, if none of that worked out for some reason, fear not – all hope isn’t lost yet. You can also use your Mac computer (running macOS 10.14 Mojave or higher) to quickly rename your AirPods too. To do this, simply open System Preferences > Bluetooth > Select Your AirPods > Click Rename > Type in a New Name. And with that, you’re ready to go!
    So don’t wait any longer – start renaming those AirPods now!

    Overview Of Airpods

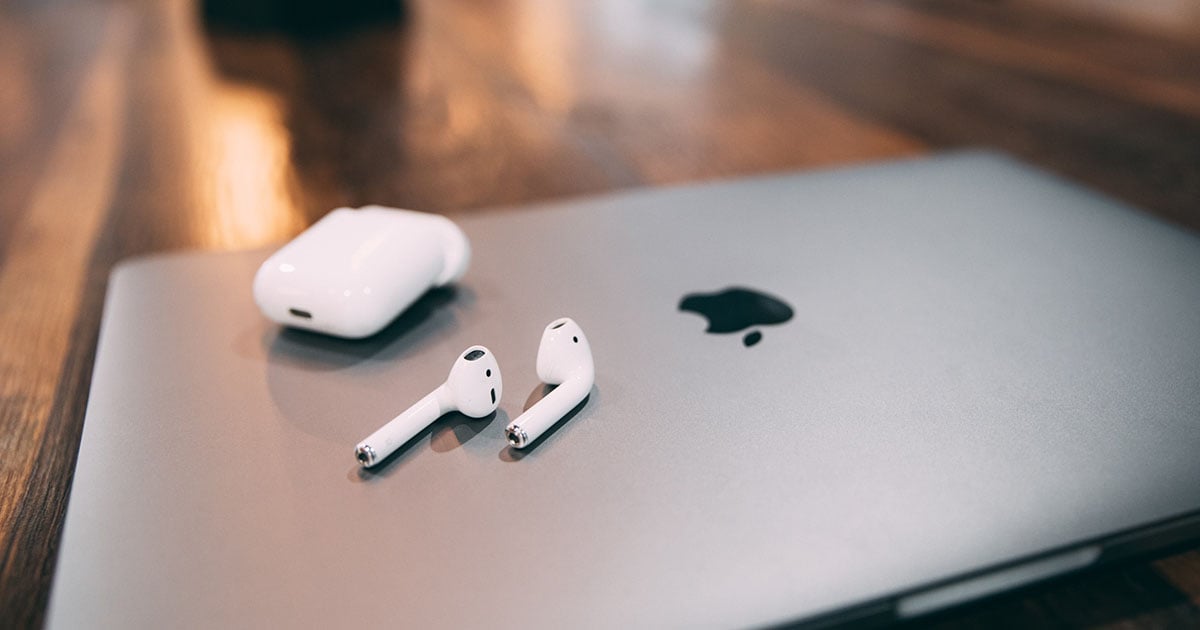
    An overview of AirPods provides a look at Apple’s revolutionary wireless headphones. Equipped with powerful features, innovative design and superior functionalities, these earbuds have quickly become the go-to choice for many users. The sleek and compact design makes them portable and comfortable to wear, while their wide compatibility range means they can be used with most devices.

    When it comes to features, AirPods offer an impressive array of options such as voice recognition technology for Siri support, advanced noise cancellation capabilities, long battery life and much more. Additionally, their special charging case lets you recharge both buds simultaneously in just 15 minutes.

    The overall design of the AirPods is also noteworthy thanks to its lightweight construction combined with seamless integration into iOS devices with no additional setup required. It’s easy to see why AirPods are rapidly becoming one of the top choices among music lovers everywhere. With so many great features packed into such a small package, it’s clear that this product has revolutionized the way we listen to audio on the go. Taking all this into consideration, let’s move onto connecting your airpods to a device…

    Connecting Airpods To A Device

    Connecting your AirPods to a device is surprisingly easy. With the simple pairing process, you can have them set up in just a few minutes. To begin, open the settings menu on your device and select “Bluetooth” from the list of options. This will activate Bluetooth and give it permission to search for nearby devices. Once you see your AirPods appear under available devices, simply tap them to start the connection process.

    The next step involves confirming that you are attempting to pair with your own AirPods by entering an authentication code which should be provided with your purchase or found printed on the back of their case. After entering this code, the two devices will connect almost instantly and audio playback should begin shortly afterward.

    Now that we’ve gone over how to easily connect your AirPods to any compatible device, let’s move onto discussing how to customize their name for improved recognition among other bluetooth-enabled gadgets.

    Opening The Settings Menu

    To get the ball rolling, you’ll need to open up your AirPods’ settings menu. This is where any customization and preferences can be adjusted so you can make sure that your device works just for you. To do this, simply go back into the Bluetooth settings on your device and select your AirPods from the list of connected devices. Once selected, a new window will appear which contains all available options related to those specific earphones.

    It should now become easy to spot the ‘Name’ option in the main menu as it stands out among other choices like equalizer or noise cancellation. Depending on what type of device you are using, getting access to this menu may require a few additional steps but nothing too complicated. For example, some users may have to scroll down until they see an icon labeled ‘AirPod Settings’ before being able to locate the right command.

    Once inside the appropriate location, all that remains is selecting ‘Name’, typing in whatever moniker suits you best and confirming with a tap – after that; recognition between other gadgets should begin almost immediately with no further intervention required! Moving forward then let’s take a look at how we can easily find this particular setting within our AirPod’s extensive sub-menu.

    Finding The ‘Name’ Option

    Now that we know how to access the settings menu, it’s time to find the option to rename our AirPods. The ‘Name’ command should be relatively easy to spot as it stands out among other choices like equalizer or noise cancellation. Depending on what type of device you’re using, getting access to this menu may require a few additional steps but nothing too complicated.

    For instance, some users may have to scroll down until they see an icon labeled ‘AirPod Settings’ before being able to locate the right command. Once inside the appropriate location all that remains is selecting ‘Name’, typing in whatever moniker suits you best and confirming with a tap – after which recognition between other gadgets should begin almost immediately without further intervention required!

    With this knowledge, altering your wireless earphones’ naming conventions has never been easier; no more hassle when connecting them to another device or having multiple pairs registered under different titles. Now let’s move onto entering a new name for your AirPods – surefire way of avoiding any confusion going forward!

    Entering A New Name

    Unveiling a new identity for your AirPods can be almost as exciting as buying them in the first place. Like opening up a secret box of possibilities, entering the desired name and setting it in stone brings forth an entire realm of options.

    To begin with, utilizing this newfound freedom to rename our wireless earphones is akin to painting on a blank canvas – what better way to fully customize one’s listening experience? With that said, let’s dive into how we go about making sure those changes are not only successful but also long-lasting:

    • Entering the Name: First off, after selecting ‘Name’ from within the settings menu you’ll want to make sure that whatever moniker you pick doesn’t exceed 10 characters. This is important since anything beyond this limit will cause issues when attempting recognition between other devices. Furthermore, try picking something memorable like your favorite animal or color – this should help avoid any confusion down the line!
    • Special Characters: In addition to length restrictions, special characters (like numbers or symbols) may not be supported depending on which gadget you’re connecting with so double check before finalizing your selection.

    With all these considerations taken care of and the perfect name chosen accordingly now comes the time to save it and put it into action; no more need for extra steps everytime wanting to link up different gadgets!

    Saving The New Name

    Now that the perfect name has been chosen, we can move on to saving and applying it. This process is quite straightforward but there are a few steps one must take in order to confirm what they’ve entered.

    First off, once you’ve double-checked your entry click ‘Rename’ at the bottom of the screen – this will cause any changes made to be saved automatically. However, before moving onto another device or disconnecting altogether make sure ‘Save’ appears beside your new moniker – if not then try entering it again as something may have gone wrong with recognition.

    Lastly, after checking everything looks correct go ahead and hit ‘Apply’ – this should signify that all settings were successfully updated and ready for use! With that out of the way let’s now look into making sure these modifications hold up over time by verifying our change…

    Verifying The Change

    Having applied the name change, it’s now time to confirm that our modifications are accurate and up-to-date. To make sure everything is in order, we can take a few simple steps to verify our airpod name alteration.

    Firstly, when you’re done with the renaming process double check your new moniker appears on both devices by reconnecting them back together – this should ensure they’ve been updated correctly and any changes made have stuck around. Secondly, if necessary undertake a quick ‘name check’ of your own through searching for either device individually or both at once – this will help troubleshoot any issues and make sure no unexpected discrepancies appear between what’s saved locally versus stored online.

    Lastly, after ensuring all settings look correct try disconnecting then reconnecting again to see whether the update has taken effect – if not then repeat the previous step as something may have gone wrong during recognition earlier on. Now that these basics have been covered let’s move onto advanced renaming options…

    Advanced Renaming Options

    It’s possible to customize your airpod renaming beyond the basics we’ve just discussed. If you’re looking for some more unique name changing options, there are quite a few creative customization tips that can help bring out the best in your wireless earbuds. From funny nicknames to puns, there’s no shortage of ways to make your listening experience all the more personalised and enjoyable.

    For starters, try thinking of ideas based on music or movies – this is an easy way to come up with fun names that reflect what you like and enjoy most. Secondly, if you own multiple sets consider naming them after family members or close friends – this adds another layer of sentimentality when it comes to connecting with others over audio. Lastly, why not get inspiration from characters in books or online sources? Whether it be alliterations or acronyms they offer plenty of scope for inventiveness when crafting those special airpod customizations.

    With these helpful hints in mind, let’s now take a look at troubleshooting tips…

    Troubleshooting Tips

    If your airpods aren’t working as expected, there are several troubleshooting tips to help you out. The first step is to reset them and try pairing again – just press and hold the setup button on the back of each airpod for at least 15 seconds until the LED light flashes white. This will disconnect them from any other devices they’re connected too, allowing you to start fresh with a new connection.

    You might also need to check if your device settings are up-to-date; ensure that Bluetooth is enabled and make sure there’s no interference in the area by moving away from any electronics or metal objects nearby. If none of these steps work, consider performing a complete restore via iTunes or iCloud – this should clear all existing connections and allow you to rename your airpods without any glitches.

    Lastly, it’s worth noting that some users have reported having trouble connecting their AirPods after renaming them – so be sure to test out the new name before making it permanent! With all these helpful hints in mind, let’s take a look at best practices for naming your AirPods…

    Best Practices For Naming Airpods

    When it comes to naming your AirPods, there are a few best practices you should keep in mind. First and foremost, make sure the name is unique so that it doesn’t conflict with any of your other devices or those of someone nearby. Additionally, try to avoid using special characters or spaces when creating the new title – this can cause confusion for some systems. Here’s a list of tips for airpod renaming:

    • Choose something memorable: Names like “My Left Earbud” and “Righty McRightface” might be funny but they won’t help you differentiate between multiple pairs of AirPods. Try to find a name that stands out but also describes the device accurately (e.g., “Rose Gold Earpods”).

    • Personalize it: If you own more than one pair of AirPods, give each set its own distinct name (e.g., “Mom’s Airpods” & “Dad’s Airpods”) so that you don’t get them mixed up down the line.

    • Keep it short: Long names will likely cause issues when trying to connect, so aim for something concise yet descriptive (e.g., “Work Earphones”).

    By following these guidelines and double-checking before making any changes permanent, you’ll have no trouble coming up with an appropriate title for your beloved earbuds!

    Conclusion

    In conclusion, AirPods have become a must-have accessory for anyone who loves to listen to music or take calls while on the go. Renaming your AirPods is an easy way to personalize and identify them from other sets of headphones. With just a few clicks, users can quickly change their AirPod’s name with no hassle at all.

    The fact that Apple has sold over 500 million pairs of AirPods should be enough evidence of how popular these wireless earbuds are today. This statistic alone shows how many people enjoy the convenience and comfort of having high-quality earphones without any wires getting in their way.

    Renaming your AirPods doesn’t just make them easier to find – it also helps you show off your style and express yourself through the names you choose. Whether you want to stick with something simple like “Lefty” and “Righty” or get creative by giving them unique nicknames, renaming your AirPods is sure to put a smile on my face every time I reach for them!

  • How To Cancel Youtube TV

    How To Cancel Youtube TV

    Are you trying to cancel your YouTube TV subscription? Canceling a streaming service can be tricky, especially if you’re not familiar with the process. Don’t worry – we’ll help walk you through it! In this article, we’ll explain step-by-step how to cancel your YouTube TV subscription quickly and easily. We’ll also provide answers to some of the most common questions about cancelling YouTube TV subscriptions so that you know exactly what to expect. Ready for a stress-free way to end your subscription? Let’s get started!

    Overview Of Youtube Tv

    Are you looking for a streaming service that allows you to enjoy the best of cable TV without the hassle? YouTube TV may be just what you need. With this revolutionary television experience, you can access your favorite shows and channels from anywhere in the world. In this overview of YouTube TV, we will discuss its features, benefits, cost and packages.

    One of the main advantages of YouTube TV is its selection of content. You’ll have access to over 85+ channels ranging from popular networks like ABC and CBS to niche services like NFL RedZone or NBA League Pass. Plus, with Cloud DVR storage space included, there’s no limit to how many programs you can watch at any given time.

    Another benefit of YouTube TV is that it comes with an affordable monthly subscription rate. The basic package costs only $64.99 per month which gives you access to all available channels as well as unlimited recording capabilities. If you want more options than what’s offered by the standard plan, there are several other packages available including sports and movie add-ons so that you can customize your viewing experience even further.

    With all these great features and benefits, YouTube TV is an excellent choice for those who want to cut the cord and get away from traditional cable subscriptions but still enjoy their favorite shows and movies on demand. Now let’s take a look at how easy it is to navigate the YouTube TV site!

    Navigating The Youtube Tv Site

    Navigating the YouTube TV site is easy and intuitive. The interface is designed to be user-friendly so that you can find what you’re looking for quickly and easily. Here are three tips on how to make the most of the YouTube TV navigation experience:

    1. Familiarize yourself with the layout – Take some time to explore different sections of the homepage and get used to where everything is located. This will help you find your way around more easily in the future.
    2. Utilize search options – If you know what show or movie you’d like to watch, simply type it into the search bar at the top of each page and start browsing through results right away!
    3. Make use of recommendations – YouTube TV also provides personalized content recommendations based on your viewing habits which makes discovering new shows even simpler.

    Overall, navigating YouTube TV can be a breeze once you become familiar with its features and usage patterns. With these tips in mind, exploring all that this streaming service has to offer should be an enjoyable experience!

    Cancelling Through Your Account Settings

    Cancelling a YouTube TV account is straightforward and can be done in just a few clicks. According to the company, nearly 40 million people across the United States use YouTube TV every day, making it one of the most popular streaming services available. If you’re looking to cancel your subscription for any reason, here’s what you need to do:

    • Log into your account on the official website or app
    • Go to ‘Account Settings’
    • Click ‘Cancel Subscription’
    • Confirm that you would like to end your membership with YouTube TV
    • Your cancellation will take effect at the end of your current billing cycle

    It’s important to note that cancelling your subscription does not delete your account – all of your data and records are still intact if you ever decide to reactivate it. To do this, simply log back into your account settings and click ‘Reactivate Subscription’. Once confirmed, you’ll have access again right away!

    If you’d prefer an alternative option, pausing or temporarily suspending your membership might be more suitable. This allows users to enjoy all the benefits of a subscription without having to commit long-term. We’ll explore how this works in more detail in our next section.

    How To Pause Or Cancel A Subscription

    Pausing or cancelling a YouTube TV subscription can be a great option for those who don’t feel ready to commit long-term. It allows users to take advantage of the service while still having the flexibility to come back whenever they want. Here’s how it works:

    First, log into your account on the official website or app and navigate to ‘Account Settings’. Then click ‘Pause Subscription’ – this will temporarily suspend your membership until you’re ready to reactivate it again. You’ll have access to all of its features but won’t be charged anymore in the meantime. Alternatively, if you’d like to cancel entirely, just select ‘Cancel Subscription’. This will end your current billing cycle right away.

    The cancellation policy for YouTube TV is pretty simple – there are no refunds for cancelled subscriptions regardless of when it was paused or ended. However, any unused portion from prior payments will still remain active until their expiration date determined by the company.

    TIP: Remember that pausing or cancelling your subscription does not delete your profile information – so you can always come back later without losing any data!

    Refund Policy For Cancelled Subscriptions

    When it comes to cancelling a YouTube TV subscription, there is no formal refund policy in place. That said, any unused portion from prior payments will still remain active until their expiration date determined by the company. For example, if you cancelled your subscription halfway through a month and had already paid for that period in advance, then you would be able to continue using the service until the end of that billing cycle without being charged again.

    It’s important to note that refunds are not typically given when cancelling a subscription because companies have limited control over past payments – they cannot directly reverse those charges on behalf of consumers. However, certain exceptions may apply depending on individual circumstances so don’t hesitate to reach out to customer support if necessary. They might be able to provide additional assistance or insight into potential options available!

    In spite of this lack of refunds for cancelled subscriptions, customers should keep in mind that pausing or canceling does not delete their profile information – meaning they can always come back later without losing anything saved before. This provides an additional layer of flexibility for those who want try something different or take a break but aren’t ready to commit long-term yet. With all these considerations taken into account, it’s easy to see why YouTube TV remains one of the most popular streaming services today. Moving forward, let’s explore some alternatives to YouTube TV as well.

    Alternatives To Youtube Tv

    If you’re looking for an alternative to YouTube TV, there are plenty of other online streaming services out there. From Netflix and Hulu to SlingTV and fuboTV, these platforms offer different features and plans that could better suit your needs. Here’s a quick look at some of the most popular streaming services available:

    1. Netflix: This is one of the oldest streaming services on the web with thousands of movies and shows ready to watch at any time. It also has a wide selection of original programming exclusive to the platform.
    2. Hulu: Another classic service, offering over 50 channels plus access to its library of hit series like The Handmaid’s Tale or Castle Rock. With this subscription, users can even download select content onto their device for offline viewing!
    3. SlingTV: A great option if you want live TV without having to pay hefty cable fees – they offer packages starting from $25/mo with up to 40+ channels included in each plan.
    4. FuboTV: For those who love sports but don’t want cable bills piling up – this streaming service offers over 100+ channels dedicated entirely towards sporting events worldwide!

    With so many options available nowadays, it’s never been easier (or cheaper) to find a custom-tailored streaming solution best suited for individual preferences or budget constraints. No matter what kind of video entertainment someone may be seeking – whether it’s movies, shows, sports or anything else – chances are high that there is a suitable tv streaming device or service out there which meets their needs perfectly! Having explored alternatives to YouTube TV, let’s now talk about contacting customer support should any issues arise along the way during setup or use…

    Contacting Customer Support

    When it comes to canceling YouTube TV, the process can be a bit tricky. Thankfully, there are customer support options available for those who need help with their account cancellation or refunds. If you’re looking to cancel your subscription, contact YouTube TV’s customer service team first and they’ll guide you through the steps needed. From there, they may also provide you with information on their refund policy should that be applicable in your case as well.

    The best way to get in touch with YouTube TV’s customer support is either through email or live chat – both of which have proven effective when dealing with any issues related to subscriptions or cancellations. Additionally, customers might find useful answers by browsing the company’s FAQ page online where many common questions are answered in detail. Lastly, if all else fails then calling into their helpline directly could prove helpful too!

    No matter what route one takes to communicate with YouTube TV customer service personnel, chances are high that most queries will eventually be addressed adequately and efficiently. With this knowledge in hand, let’s turn our attention towards how deleting one’s YouTube TV account works…

    How To Delete Your Youtube Tv Account

    Parting ways with YouTube TV doesn’t have to be a complicated process. If you’ve had enough of the streaming service, deleting your account is as easy as pie! All that’s needed is a few clicks and you’ll be on your way. To begin the process, open up the YouTube app or website and log in using your credentials. From there, select ‘Settings’ from the menu options available at the bottom right-hand corner of the page. This will bring up an array of different tabs – click on ‘Subscriptions’ for further instructions regarding cancellation.

    Once inside this tab, simply click on ‘Cancel Subscription.’ You’ll then be presented with several confirmation windows before finally reaching one which reads “You’ve successfully cancelled your subscription.” That’s it! Your account has now been deleted and all associated payment methods removed – no need to worry about being billed again in future months either. As an added bonus, if you ever wish to reactivate your subscription later down the line, doing so is equally simple too!

    Now that we know how to delete our accounts, let’s look at some tips that can make canceling and reactivating even easier…

    Tips For Cancelling And Reactivating Your Account

    When it comes to managing your YouTube TV subscription, there are a few things you should keep in mind. First and foremost is the ability to pause or cancel your subscription at any time. To do this, simply go into the ‘Subscription’ section of the app and select either ‘Pause Subscription’ or ‘Cancel Subscription.’ If you opt for pausing, make sure you understand the terms that apply before taking action – some subscriptions may not be eligible for pause-and-play options.

    Reactivating an account can also be done with ease. Once again, head over to the same page as before and click on ‘Manage Your Subscriptions.’ Here, you’ll find all available subscription options which allow customers to reactivate their accounts whenever they want. For those who are unsure about canceling completely just yet, take advantage of these opportunities! Finally, remember to read through any cancellation policies prior to making changes – understanding what’s included in each plan beforehand will help avoid any confusion down the line.

    Summary

    In short, YouTube TV offers a variety of subscription options for customers to choose from. These include the ability to pause and reactivate accounts at any time, as well an option to cancel subscriptions completely if desired. It’s important to read through all policies before making changes, though – understanding what each plan entails beforehand will help avoid confusion down the road.

    Ultimately, it’s easy to manage your YouTube TV subscription in whichever way you prefer. Whether that means pausing or canceling your account altogether is up to you; just make sure that you understand the terms associated with each decision prior to taking action. With this knowledge in hand, managing your YouTube TV subscription can be quick and hassle-free!

    Conclusion

    In conclusion, cancelling YouTube TV is a straightforward process that can be completed in just a few steps. By navigating the YouTube TV site and accessing your account settings, you’ll easily be able to pause or cancel a subscription if needed. For those who are unsatisfied with their service, it’s important to note that there is a refund policy for cancelled services. Additionally, customers have the option of deleting their entire account if they see fit.

    For example, Amy found her monthly subscription costs were not worth what she was receiving through the streaming service so she decided to cancel her account. She went onto YouTube TV and accessed her Account Settings before confirming the cancellation of her subscription. After doing this, she received an email from customer support verifying that her request had been processed and that she would receive any applicable refunds soon after.

    Overall, cancelling your YouTube TV account doesn’t have to be difficult or time-consuming as long as you know where to look and how to access your account settings. It is also helpful to keep in mind any relevant policies about refunds when dealing with cancellations or reactivating accounts in order to ensure a smooth transition out of – or back into – using YouTube TV’s services.

  • Own Your Look with oraimo’s Shaving Products for the Perfect Shave

    With the continuing rise of shaving as a popular and effective method of grooming, numerous brands are popping up on the market. With so many options, it can be challenging to decide or to identify companies who manufacture high-quality products.

    Well, we went ahead and did that survey for you and after speaking to experts we put together everything you need for a proper shave. Read on for the best trimmers, clippers and shavers.

    A well-loved and talked about brand, oraimo has recently introduced new lines featuring trimmers, clippers and shavers respectively. Highly recommended for the beginner and experienced alike, their products are made with high performance motor and a dedication to quality and excellence. Their green and white with black packaging is easily recognizable and the staple of their products. By briefly thinking about each of your preferences, you should easily be able to land on a quality product that fits with your needs and requirements for the perfect shave. Without further I do, here are the best shaving products for everybody:

    oraimo Smart Clipper 2

    The oraimo Smart Clipper 2 comes with a super powerful motor. Equipped with a strong vibrating electromagnetic motor, this clipper has an extra powerful blade speed. Also, this motor is energy efficient which is an added advantage. With a 2000mAh battery and a 150 mins runtime. You don’t ever have to worry about running out of battery. It has a long-lasting battery which lasts up to 2.5hrs.

    With its high precision blades and different guided combs, this clipper is the ideal choice and works great on all hair types. The taper lever on the clipper allows you to change the closeness of your cut between the guide comb lengths. This is particularly useful for fading and blending as you can be more precise with your cutting lengths. The oraimo Smart Clipper 2 also comes with an LED indicator to indicate power charge which allows you to know your battery level immediately.

    Shop your oraimo Smart Clipper 2 with coupon code: ‘OPC10’ via oraimo SmartClipper2 Super Powerful Professional Cordless Hair Clipper 150-min Working Time

    oraimo Smart Clipper

    With sharp blades driven by an extra performance motor, the oraimo Smart Clipper with guaranteed long-lasting sharpness is suitable for all family members. Designed to be gentle, this clipper does not produce noise when using it, you can enjoy a carefree haircut easily.

    New-user friendly, convenient and comfortable. The all-inclusive kit has everything you need for a proper hair cutting at home or at the barber shop. With the ergonomic handle and the adjustable comb design, it makes you feel comfortable wherever you are.

    It is convenient as you can carry it on your trips. It comes with a Type-C charging port which allows charging anywhere at any time. You can easily charge by a power bank or a laptop.

    Order your oraimo Smart Clipper with the coupon code: ‘OPC10’ via oraimo SmartClipper Cordless Hair Clipper With 4 Guided Combs

    oraimo Smart Trimmer 2

    150-mins working per charge with a long-lasting battery performance; charge your trimmer for 2 hours to get 150 minutes of cordless use or use it plugged in while charging.

    Multi-functional Usage – The all-in-1 trimmer for your choice of beard, hair, body, face hair styling and other trimming needs. For the perfect trim, every single time.

    Get a perfect yet protective trim, time after time. The trimmer’s steel blades lightly brush against one another, sharpening themselves as they trim so they stay extra sharp and effective as from day one.

    It is easy to adjust the speed of the trimmer with just one button. And with the special travel lock feature, it prevents the trimmer from accidentally turning on while in a luggage or a bag when travelling.

    You press the power button for 4seconds while the trimmer is off to activate the travel lock feature and to turn the travel lock feature off, you press the power button for 4 seconds.

    Grab an oraimo Smart Trimmer 2 with a coupon code: ‘OPC10’ viaoraimo SmartTrimmer2 150-min Working Time Adjustable Speed Multi-functional Trimmer

    oraimo Smart Shaver

    The oraimo Smart Shaver Rotary Electric Shaver with Pop-up Trimmer has a high-performance motor which gets the job done quickly. With sharp blades driven by extra performance motor, the oraimo Smart Shaver will give you an efficient and comfortable shave.

    The 3D Rotary Razor-Smooth Shave follows your face’s contours with flex and floating movements. The head of the shaver reaches your face at the ideal angle and adjusts to the curves of your face and neck, creating smooth contact with your skin. You enjoy a clean and smooth shave.

    Up to 90-mins working time – Charge it once, and just chill. The oraimo Smart Shaver with a long battery life enables you to use the device for multiple shaves without the need to run to charge it every other day.

    Shop your oraimo Smart Shaver with coupon code ‘OPC10’ via oraimo SmartShaver Rotary Electric Shaver With Pop-up Trimmer

    oraimo Smart Trimmer

    Powerful & Durable Motor with Long-lasting Sharpness; To deliver maximum power, the oraimo Smart Trimmer has a full metal motor that’s been reinforced with tempered steel. Fitting in with stainless blades, the oraimo Smart Trimmer creates a clean and smooth trim. It also comes with replaceable stainless blades for every trimming need, your choice of beard, hair, body, face and hair styling.

    The LED Display indicates the battery power and prompts you to charge. It’s built-in rechargeable Lithium-ion battery delivers up to 90 minutes of power time per charge by only about 1.5 hours charging. The new Ultra Quiet Design minimizes noise during usage for a quieter work environment. This product is suitable for all skin types, and it primes every face for a close and even shave.

    Grab yourself an oraimo Smart Trimmer with a coupon code: ‘OPC10’ via oraimo SmartTrimmer Multi-functional Trimmer With 4 Guided Combs

    Shaving products can be a valuable item to integrate into your hygiene routine. It is a specialized product for easy hair removal, even in sensitive places. For a clean, easy, quick and close shave, you will want to choose a shaving product that works for you. There are products for every skin type and preference. It seems that everyone has something to say when it comes to their opinion on the top shaving brand.

    The buying guide above to the best shaving products should help you address some of your concerns, and you will feel confident in selecting a shaving product for your needs.

    oraimo prides themselves on their excellent customer service with all orders being dispatched within two working days. They offer free delivery on all orders over GHC90. Register an account with them today on their website via oraimo Ghana Official Online Store You will also receive regular emails with exclusive discounts on your favorite products.

  • Ghana Zip Code – What are the Zip and Postal Codes for Ghana?

    Ghana Zip Code – What are the Zip and Postal Codes for Ghana?

    Are you confused about the correct zip code to use when filling out online forms in Ghana? Whether you’re in Accra, Takoradi, Kumasi, or Tamale, it can be tricky to find the right code for delivery confirmation.

    This article will clarify the difference between zip codes and postal codes and provide a solution.

    To determine the correct code, use the GhanaPostGPS App, which offers a 5 x 5 addressing system for all locations in Ghana.

    Understanding Zip Codes and Postal Codes

    To understand Zip Codes and Postal Codes, let’s start with their definition and purpose.

    Zip codes are strings of numbers (and sometimes letters) that help postal services determine where a piece of mail is being sent to. The term ‘ZIP’ stands for Zone Improvement Plan and can vary between five or nine digits, or a combination of numbers and letters.

    Postal codes are a set of codes used to send letters, posts, and deliveries to other locations. It’s important to note that Zip Codes and Postal Codes are issued by the country’s government mailing service, such as Ghana Post.

    In Ghana, the GhanaPostGPS App provides a 5 x 5 addressing system for everywhere in Ghana, allowing you to determine your Ghana Zip Code or Postal Code accurately. When filling a form for a Ghanaian online shop, it’s recommended to use the postcode provided in the GhanaPostGPS App.

    The Difference Between Zip Codes and Postal Codes

    The difference between zip codes and postal codes lies in their usage and origin.

    Zip codes are used primarily in the United States, while postal codes are used in other countries.

    Zip codes are a set of numbers (and sometimes letters) that help postal services determine the destination of a piece of mail.

    On the other hand, postal codes are used for sending letters, posts, and deliveries to various locations.

    In Ghana, the postal code is issued by Ghana Post, the country’s government mailing service.

    It’s important to note that zip codes and postal codes aren’t the same as an area code or a residential address.

    To determine your Ghana postal code or zip code, you can use the GhanaPostGPS App, which provides a digital address for every location in Ghana.

    The Debate: Zip Code or Postal Code for Ghana

    If you’re wondering about the ongoing debate regarding whether to use a zip code or postal code for Ghana, let’s delve deeper into the issue. Here are some key points to consider:

    • Ghana Zip Code vs. Postal Code: The terms zip code and postal code are often used interchangeably, but they’ve different origins and applications. Zip code is primarily used by websites based in the United States, while postal code is used by websites outside the U.S.
    • Zip Codes for Subdivisions: Zip codes are designed for subdivisions within a country or larger area. Therefore, it doesn’t make sense to talk about a single ‘Ghana Zip Code’ that applies to the entire country.
    • Government Issued Codes: Zip codes and postal codes are issued by the country’s government mailing service. In Ghana, the postal codes are issued by Ghana Post.
    • GhanaPostGPS App: GhanaPost recently launched the GhanaPostGPS App, which provides a 5 x 5 addressing system for all locations in Ghana. It’s recommended to use the postal code provided by the app when filling out forms for Ghanaian online shops.
    • Specificity is Key: When providing your shipping or delivery address, it’s important to be specific and include your area name and notable landmarks if necessary. The postal code alone isn’t enough to ensure accurate delivery.

    To summarize, while there’s an ongoing debate about whether to use a zip code or postal code for Ghana, it’s recommended to use the postal code provided by the GhanaPostGPS App for accurate and reliable addressing.

    Using the GhanaPostGPS App to Determine Codes

    Continue the discussion from the previous subtopic into the current subtopic by using an article determiner.

    Using the GhanaPostGPS App, you can easily determine the codes for your location in Ghana. The GhanaPostGPS App is a GPS digital application launched by GhanaPost that provides a 5 x 5 addressing system for every location in Ghana.

    Using the GhanaPostGPS App, you can correctly determine your Ghana Zip Code or Ghana Postal Code.
    Using the GhanaPostGPS App, you can correctly determine your Ghana Zip Code or Ghana Postal Code.

    By using this app, you can accurately determine your Ghana Zip Code or Postal Code. Simply download the app or use the browser version to check your precise code. To give you an idea of how the app works, here is a table showcasing some Zip and Postal Codes for popular areas in the Greater Accra Region:

    AreaZip Code
    North RidgeGA015-GA017, GA028-GA031, GA052-GA054, GA076, GA080
    West RidgeGA050, GA051, GA077, GA107
    Gold Coast CityGA078, GA079, GA110, GA111
    OsuGA032, GA035, GA055, GA056, GA081, GA082, GA112-GA115, GA146-GA148
    VictoriaborgGA143-GA145, GA184-GA186
    Asylum DownGA027, GA028, GA048, GA049, GA073
    AdabrakaGA050, GA074-GA076, GA100-GA103
    TuduGA105, GA106, GA141, GA142

    Using the GhanaPostGPS App is a reliable and convenient way to determine the correct codes for your location in Ghana.

    The GhanaPostGPS App provides accurate and up-to-date information for these areas. Make sure to include the correct Zip or Postal Code when filling out forms or providing your address for delivery.

    Download Zip Codes for Towns and Cities in Ghana

    You can download this PDF to view the zip and postal codes for various areas in Ghana.

    Tips for Providing Accurate Address Information

    Make sure to provide accurate address information to ensure the delivery of your package. When filling out a form for a Ghanaian online shop, it’s essential to be specific and detailed in your address.

    In addition to the Ghana Postal Code provided by the GhanaPostGPS App, include your area name and a notable landmark if you’re unsure about your house number. This will help the delivery service locate your address more easily.

    It’s recommended to use the addresses provided by the GhanaPostGPS App, as it offers a 5 x 5 addressing system for every location in Ghana.

    If you encounter any difficulties or need assistance in finding the Zip Code for your area, feel free to ask for help.

    Wrapping up

    In conclusion, when it comes to determining the correct zip code or postal code for Ghana, it’s recommended to use the GhanaPostGPS App.

    This app provides a 5 x 5 addressing system for all locations in Ghana, ensuring accurate delivery confirmation for online shopping platforms.

    Whether you’re in Accra, Takoradi, Kumasi, or Tamale, the GhanaPostGPS App will help you find the correct code for your specific location.

    Ensure to provide accurate address information to ensure smooth delivery.

  • Here is how to get your Hostel Fees paid for next Semester

    Here is how to get your Hostel Fees paid for next Semester

    A necessity for any University student is to live in a hostel on or around the University campus. Hostel fees have been on the rise each year and this year is most likely going to be the same story or a more aggressive form of it.

    GetRooms understands the needs of students and as such, has launched the GetRooms Hostel Giveaway Promo. This promo is designed to pay a part of the hostel fees of students who sign up and use GetRooms to search for a hostel.

    Making hostel search easy

    Getrooms is an online platform that connects students to hostels. Hostel managers can list their hostels on our website and students can search for hostels via the University, City or Room Type. Getrooms has helped tens of thousands of students in Ghana to secure a hostel room with ease over the years.

    The GetRooms Hostel Giveaway Promo is open to all tertiary students. All you have to do is to follow the steps below.

    1. Subscribe to GetRooms.
    2. Use the GetRooms App to find and secure a hostel.
    3. Share GetRooms on any social media platform and tag us.

    We will select winners in January and help pay a part of their hostel fees as a reward for using GetRooms. Don’t be left out, subscribe to GetRooms today and have access to over 500 hostels instantly.

  • Nigeria’s Leading Identity Verification Startup, Verified.Africa Launches in Ghana, South Africa, and Kenya

    Nigeria’s Leading Identity Verification Startup, Verified.Africa Launches in Ghana, South Africa, and Kenya

    Verified.africa’s users can confirm the identity of one or thousands of customers in seconds, to enable speedy customer onboarding and digital security. 

    When one of Nigeria’s foremost financial institutions, First Bank, wanted to meet up with regulatory requirements for KYC (Know your customer), they leveraged an onboarding service to verify the identities of every customer, reducing turnaround time by over 50%. 

    For another tech investment startup, Bamboo, they utilised the same platform to validate and verify the national identity of their customers, enabling over 50,000 people to trade in local and international stocks safely. 

    That onboarding platform is Verified.africa, a leading provider of ID verification, document verification, and digital KYC compliance solutions in Nigeria. 

    Now, Verified.africa, has expanded its offerings to three more countries across Africa including Ghana, South Africa and Kenya. 

    This brings their total coverage to four countries with its initial inception in Nigeria, where they carried out over one million customer verifications for one thousand businesses. 

    Debo Musa, Settlement Manager at Bamboo, says “Verified.africa helps to reduce our risk exposure and obtain accurate data. We can also do analytics on the customers that we are verifying. We can see where they are coming from and we use that knowledge to project where we should target more customers”. 

    He added that “Verified.africa gives us that level of confidence, especially with regulatory bodies and agencies. With Verified.africa, we can identify our customers and be sure that they are who they say they are. That’s the best part for us”. 

    Ghana, South Africa and Kenya represent key markets for Verified’s roadmap into continental dominance and with this launch, more organisations in these countries can access the best of digital verification for business growth. 

    What do you get with Verified.Africa in Ghana, South Africa and Kenya? 

    • Real-time verification on anyone in minutes with a digital identity record ● Simplified, easy-to-integrate API documentation 
    • Powerful dashboard to track and view customer insights in one place ● Developer resources, SDKs, and Plug-ins 
    • Clear and affordable pricing to match your business needs

    “As champions of growth and inclusivity, we’re excited at the opportunity for every single business currently using our services to also target new customers in these regions” Frank Atube, Chief Operating Officer at Verified.africa adds. 

    “Digital Identity verification enables security and access for everyone and with this expansion, we’re on our way to achieving digital inclusion for Africa’s one billion market as we add more countries like Uganda in the coming months”

    From now, all users of Verified.africa will be able to onboard new customers in Ghana, SA and Kenya using their National ID and Drivers’ license as available. 

    This opens up new opportunities for every business domiciled or looking to expand in these countries. 

    Click here to Join Africa’s best companies in using Verified.africa for speedy customer verification.

  • How to Get Everyone on Board With the Company’s Mission?

    How to Get Everyone on Board With the Company’s Mission?

    As a company founder, one of your most important responsibilities is to bring your team together, explain the purpose to them, get their support and be on board with the mission. If there is no shared objective, people will leave at the first indication of difficulty.

    Employees should be encouraged by the company’s vision from their leaders. Employees must undertake concrete actions to empower the workforce to advance as a unit and feel a part of this unified mission and vision. There is nothing theoretical about this procedure. Communication is critical to determining what each team member feels is necessary and sharing the goals that the business strives toward.

    To get this covered, an effective method would be to organize a yearly retreat for the entire team and discuss the state of the company and how it is performing with the help of a presentation. This presentation will detail the brand’s progress, workforce expansion, and financial position. Now, making this presentation requires many intricate details about the company to be presented on screen, which is a cumbersome job. Hence, your job can be easier with professionally designed PowerPoint templates and Google Slides Themes from SlideUpLift! A pre-made design that you choose from our vast array of premium templates will make your presentation visually attractive and appealing while reducing your workload to a great extent.

    Additionally, this is the moment when you discuss the objectives for the future year and remind everyone of the company’s mission, values, and the reasons behind those objectives. This will assist your employees in refocusing their attention for the following year and usually adds a little pep to everyone’s step.

    Maintaining your team’s attention on the mission depends on carrying out this retreat at least once per year. This article will describe how to make those presentations because it will be genuinely helpful for your squad. Here are six ways to get all of your team on board with the company’s mission.

    6 things to include in your yearly retreat presentation

    ● The Review of Your Products

    You can utilize the first part of the presentation to review your products since they are the most important aspect of your company. 

    A concrete way to gauge progress is to look at how the product has evolved and developed during the past year.

    It’s basic human nature to change and adapt very quickly and frequently, but it’s simple to forget how things were one year ago. This is our chance to highlight your company’s finest moments, applaud the staff, and acknowledge their efforts, successes, and potential blunders. However, it need not be a detailed review, which might exhaust the audience. For instance, a list of the main items you shipped and the dates they were shipped is sufficient.

    ● Look For Any Issues Related to Your Company

    It’s time to reflect on everything else that transpired in one year. Talk about if you made any new hires. Discuss the recent investments that you tend to make. Discuss if you plan to move to a new workplace or get a company pet.

    Again, there’s no need to explain why you changed your accountant or coffee supplier. Keep it general and discuss how changes have affected the company. Once more, it is the moment to demonstrate your progress and growth and appreciate them.

    ● Analyse the Company’s Growth with the Help of Metrics

    Assuming you and your team track some key metrics to understand your company’s growth now is the time to review them and demonstrate how they have improved.

    Creating short slides with large numbers is the key here. There is no need to scatter numerous tiny data points across the screen. Just emphasize how your team’s efforts are causing the company to change and walk on the right track toward progress.

    There are six high-level metrics that you consider for yourselves: MRR, ARPU, LTV, User Churn, and Revenue Churn. Make sure to link every number and other metrics you track and highlight the details of why those metrics matter. This point of the presentation will be the most crucial part and will point out how well your company performed for the past year. Also, it will help you to determine your goals for the year ahead.

    ● Focus on Future Goals

    It’s time to return your attention to the future now that you have looked through your past.

    Keep in mind that this is advanced. Focus on your one overarching goal for the upcoming year rather than getting bogged down in the particulars. Discuss the importance of achieving that aim and the effects achieving that objective will have on the group and the business. But most essential, describe your plan for getting there.

    Just so your team feels confident and capable of achieving the goal, clearly define your strategy for accomplishing it. This is an incredible moment to get everyone pumped up about the work ahead and align their goals.

    ● Stress on the Company’s Mission

    It’s time to make a point: finish your presentation by emphasizing the company’s objective. Your team’s decision-making is influenced by the mission, which serves as its sole point of agreement. The mission makes the goals worthwhile, and the goals help accomplish the mission.

    It’s crucial that your purpose and the values and ideals it inspires infiltrate every aspect of the company. Your job is done when you can truly make it sink in for everyone. Remember that everything your team does, including what you as the founder do, should be related to the purpose.

    ● Lastly, Have a Doubt-Clearing Session

    Have a doubt clearance or a friendly interactive session after your presentation. Discuss any issues or queries your team may have. Utilize it as a chance to develop particular ideas and assist your team in verbally processing all the data and information you have bombarded them with. Anything and everything is fair game. This is quite significant. You’ve blown it if your team leaves the presentation uncertain or perplexed. Hence, ensure they leave with a clear mind and focus on a common goal.

    Conclusion

    And that’s how you can recruit your company to be on board with the company’s mission. Your presentation can work wonders in making your employees feel a part of the company’s shared objective, which is crucial for a brand’s success. 

  • Top 10 of the most popular trading platforms you should try

    Top 10 of the most popular trading platforms you should try

    The top amateur trading platforms often provide three core benefits. First of all, the platform design ought to be user-friendly and inviting to newcomers. Next is the arrangement of diverse learning initiatives to give new financial investors a powerful breakthrough. Thirdly, the best platforms give lots of high financial exchange research.

    Many financial investors are transitioning from standard purchase and hodl to trading as they get more experience. Other than the fact that you can get stronger with patience and experience, like all the other things in everyday living, it’s anything but a trading method for everyone. We’ve put together this list of the top 10 popular trading platforms to help you find the ideal one for your needs.

    Best Crypto Platforms in the Market

    Gemini

    Gemini is a well-known platform for crypto trading because it was possibly the first significant trade and is currently one of the biggest by resources. Gemini supports the majority of key digital currencies, provides fair assistance and dedication, and pays considerable interest costs on resources provided you are eligible. Additionally, after trading $100 in digital currencies when opening a Gemini account, you can get a reward of $10 in Bitcoin.

    Immediate Edge

    The Immediate Edge is not exactly the same as these several platforms listed in this article. This crypto platform is known for its broker connection feature, which you can access immediately after making an initial deposit. This platform is highly secure and easy to use, attracting rookie traders and investors.

    Choosing a linking platform that offers their broker connection feature is one of the important factors to look at when selecting one.This platform assigns a trustworthy broker to each client for intensive guidance, especially when the trader is a newbie. They make sure that you trade with proper knowledge and caution to take advantage of the market volatility.

    Uphold

    Uphold platform provides a reasonable approach for trading numerous resources. If you have ever exchanged cryptocurrency, you are aware that many currencies and tokens only support specific crypto pairings, which is why you are constantly returning to Bitcoin or Ethereum. Through Uphold, however, you can directly trade a wide range of assets. Additionally, Uphold is one of a select group of extraordinary platforms that enables you to exchange Ripple and Dogecoin.

    Coinbase

    Since you can make a direct USD contribution, Coinbase is undoubtedly the most well-known and outstanding digital currency platform. On the platform, you may buy BTC, ETH, LTC, and several other coins and tokens. Additionally, you can make a profit with your USDT and win token prizes by completing certain tasks.

    Not only choosing the finest trading platform for you is important, but it’s also crucial to consider your identity as a current financial investor and what kind of financial investment you hope to be in the long term.

    Maybe you want a stronger platform with more resources and trades, or maybe you want to work on things and take a more detached attitude. The abundance of brokers with alternatives to fit your requirements, regardless of how they shift over time, is the finest thing about the intense level of competition within the industry.

    Binance

    Binance is a remarkable entry point into particular digital currencies like Cardano or Neo. It is also one of the most well-known crypto trading platforms in the market. Although they may not be as user-friendly as other of the finest platforms on this list, they do feature one of the most active trading platforms available. They really do have a strong portable program available on smartphones, but it’s again not as user-friendly, so many users might have been dissatisfied.

    Kraken

    Kraken offers a respectable collection of cryptocurrencies and tokens to buy and exchange, one of the earliest platforms for crypto exchanges. They also enable margin trading. However, it is a legitimate trade, and like Binance, it is not as user-friendly as some of the top performing on this list. One of the select platforms on this list that allow you to exchange Dogecoin and other more volatile digital currencies is Kraken. However, US consumers expect a smaller selection of cryptocurrencies from Kraken than foreign clients.

    Bitstamp

    One of the longest-established digital currency platforms is Bitstamp. It has been operating since 2011, which is more than ten years. There are almost 70 exchangeable tokens available in their collection. With Bitstamp, you can buy cryptocurrency directly with your credit/debit card, and it includes a sophisticated mobile application.

    eToro

    Although eToro has been operational for a while throughout Europe, they are currently accepting traders in the US. They have a huge selection of digital resources available for purchase on their platform, and they have a demo trading feature that allows you to test it out before using actual money. For the time being, eToro is also giving a $10 incentive if you store and exchange $100 in cryptocurrency. But, only consumers from the United States can take advantage of this offer.

    Crypto.com

    One of the most significant and rapidly expanding cryptocurrency platforms is Crypto.com. Despite being based in Hong Kong, it provides a lot of assistance for users in the US. Currently, you can find roughly 90 cryptocurrencies everywhere. Additionally, they provide competitive rates on their cryptocurrency storage accounts. The primary issue is that there isn’t software available for desktop users yet; it is currently application-based and available to smartphones.

    BlockFi

    BlockFi is a trading platform for digital currencies that enables you to loan money and gain interest from your assets. You can also borrow funds against your assets rather than trying to sell your assets. You can even allow your tokens to generate a profit for you if you want to just hodl them in storage. Additionally, if you deposit a $25 instalment and stick with it for a particular amount of time, you might receive up to $250 in rewards.

    Final Thoughts

    Identifying the best trading platform for your personal requirements is vital if you want to get things started with digital money trading or successful financial planning. There is a great alternative for you whether you like the best portable trading experience, the most minimal costs, or an enormous amount of digital resources to exchange.