Ghana’s Registrar General Department (RGD), the body responsible for registering businesses, has successfully implemented an online registration of businesses, issuance of certificates to commence business and the registration of marriages.
Vice President Dr Mahamudu Bawumia, on Thursday, launched the automated and online portal of the Registrar General’s Department to enhance business registration processes. He said the e-Certificate and e-Payment system would facilitate the online registration of businesses and prevent the long delays associated with business registration.
He, therefore, urged the Management and Staff of the Department to adopt innovative approaches, in order to maximise revenue for the government and ensure customer satisfaction. At the launch of the e-Registration System at the Banquet Hall, State House, in Accra, Vice President Bawumia described the system as the “starting point to make Ghana the most business-friendly nation in Africa.”
Vice President Bawumia said information and communication technology (ICT) is critical in the 21st Century and gave the assurance that Ghana would leverage on technology to effect digital transformation.
“The Nana Addo Dankwa Akufo-Addo’s administration has embraced this digital transformation and will lend his support to ensure the smooth operation of this process for improved customer satisfaction.
“The importance of ICT cannot be overemphasised in this 21st Century and Ghana will leapfrog other countries and catch up with the rest of the world,” he said.
How to Register your Business in Ghana
The Registrar General’s Department Portal offers all users the ability to submit online requests for Business / Company Registration.
To register for a business online in Ghana:
First, search on the Name Search platform to check if the business name you want to use is available.
Then sign up and log in on the RGD Portal and start filling the online form.
Fill the form, including a valid National ID, a Tax Identification Number (TIN) and the details of the business (Nature and the core activities)
After the form is completed, go to a nearby office and make a payment of GHS 60 to complete the process.
You will have your completed business registration in 14 to 28 working days.
Using the online services provided by the Registrar General’s Department Online Portal, you can do the following services too:
Rapid advancement in Financial Technology has led to the creation of digital currencies, the most popular being Bitcoins. From its inception, the world of cryptocurrencies is known for its extreme volatility and its attractiveness to speculators. However, Stablecoins are a newer breed of crypto coins that are gaining popularity as they aim to tackle the problem of cryptocurrency volatility.
What are Stablecoins?
Stablecoins are a type of cryptocurrency linked to an asset like the U.S. dollar that doesn’t change much in value. It was introduced in 2014 with Tether and presently, the list of Stablecoins is wide and varied, amongst which we have the DAI, USD Coin, True USD, Digix Gold, Havven’s Nomin, Paxos Standard, and Binance USD.
The majority of stablecoins that currently exist use the dollar as their benchmark asset, but many are also pegged to other fiat currencies issued by governments like the Euro and Yen.
As a result, the price of stablecoins fluctuates very little, unlike high-profile cryptocurrencies like Bitcoin and Ethereum that are prone to sudden ups and downs. Originally, stablecoins were primarily used to buy other cryptocurrencies, like bitcoin, because many cryptocurrency exchanges didn’t allow fiat funding.
What is Tether (USDT)?
Tether is a blockchain-based cryptocurrency whose crypto coins in circulation are backed by an equivalent amount of traditional fiat currencies, like the Dollar, the Euro, or the Japanese Yen, which are held in a designated bank account.
Tether trade under the USDT symbol. It was specifically designed to build the necessary bridge between fiat currencies and cryptocurrencies and offer stability, transparency, and minimal transaction charges to users. It is pegged against the U.S. dollar and maintains a 1:1 ratio with the U.S. dollar in terms of value
Key Notes about Tether
Tether (USDT) is a stablecoin, a type of cryptocurrency which aims to keep cryptocurrency valuations stable.
USDT is used by crypto investors who want to avoid the extreme volatility of other cryptocurrencies while keeping value within the crypto market.
USDT remains a major source of liquidity for the cryptocurrency market.
USDT offers minimal transaction charges to users.
Why is USDT useful?
Tether is useful for crypto investors because it offers a way to avoid the extreme volatility of other cryptocurrencies.
Transaction cost: Having USDT (as opposed to the U.S. dollar, Euro or Yen) removes transaction costs and delays that impair trade execution within the crypto market.
Safe Haven Asset: Stablecoins have a value that is designed to be stable over any period. This feature makes stablecoins an ideal safe haven asset because, unlike cryptocurrencies like Bitcoin that can fluctuate dramatically in price every day, an individual using stablecoins to store value see no risk of loss, especially because they have full custody of their asset.
Remittance: Cross-border payments and remittances are very real problems that overseas workers face when trying to send money home. Sending money internationally comes with high fees. For example, most migrant workers in Asia send home approximately $200 monthly, but they must pay $12 in international transfer fees–half a day’s wages gone for many.
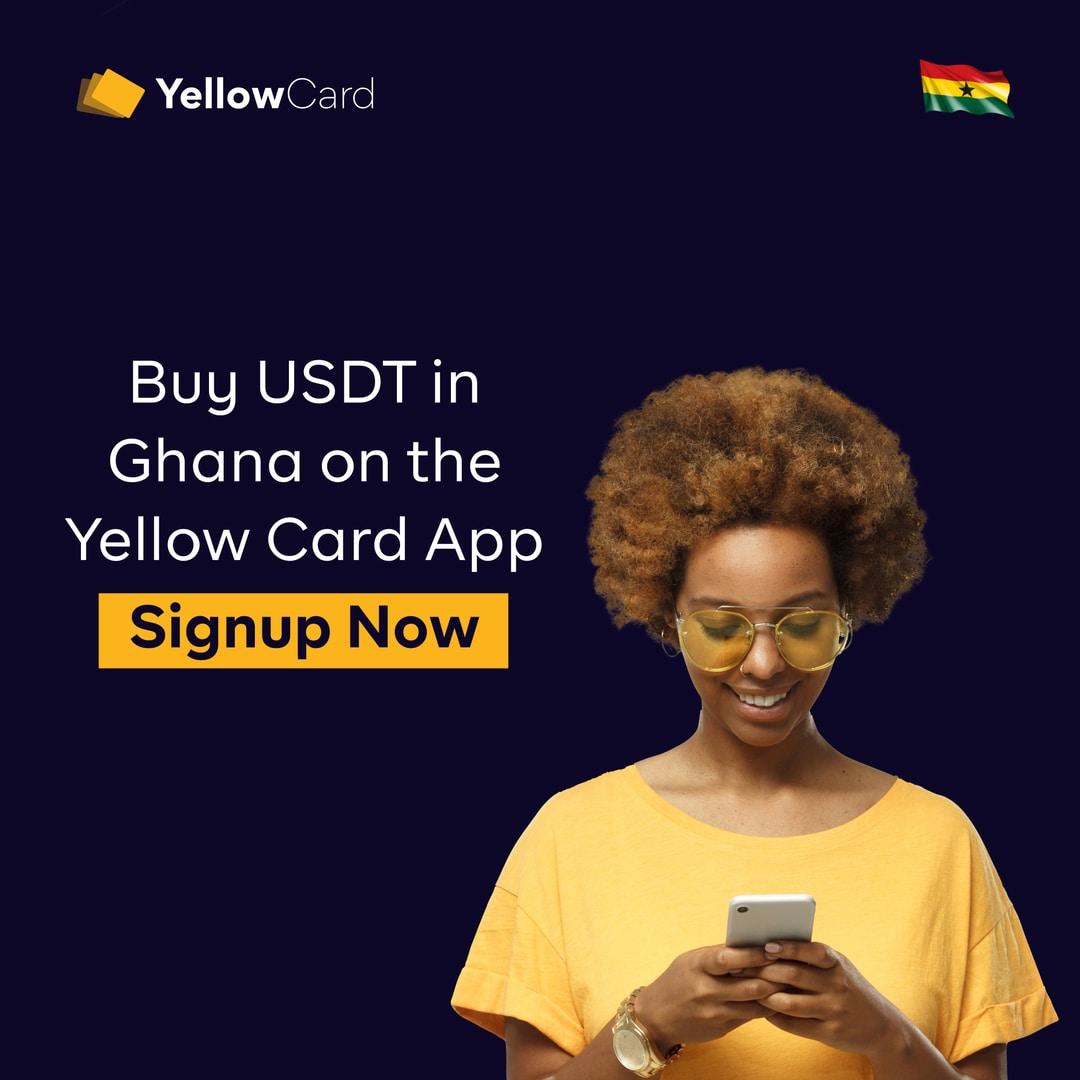
Thankfully, Yellow Card offers Ghanaians a safe platform to trade USDT with GHS at the best rates. Even better, USDT on Yellow Card is available on the Tron network (TRC-20) which offers cheaper network fees to transfer your USDT between wallets.
You can also sell USDT on Yellow Card. Log in to your account and follow these steps:
Tap on USDT
Tap on Trade
Tap on sell
Enter your desired amount
Tap continue
Tap confirm
Once you have sold your USDT, you can easily withdraw to your Momo.
Conclusion
It is safe to say that Ghanaians and foreigners residing in Ghana can stay in the cryptocurrency space by using USDT. It is now possible to escape the volatility of other cryptocurrencies and protect your finances against inflation resulting from the ravages of the health crisis.
Itel mobile has been in the Ghanaian market for some years now, offering great features at affordable prices.
With the likes of Tecno, Infinix and Huawei, itel has been able to gain the love of many Ghanaians. New models of itel smartphones are being introduced in the market every year.
As a lover of this mobile brand, it is good you know what’s new in the company. You should be able to tell the current itel phones in the market. Before you step out to buy your itel device, you should know the model, its features and the price is sold on the market.
This is what today’s post is going to be based on. In this post, we are going to look at some of the latest itel phones that can be found on the Ghanaian market, specifications, prices and where to buy.
itel S16
When it comes to smartphones in Africa, itel is gradually gaining grounds although their spec sheet is mostly not appealing to those who seek good performance.
The new itel S16 looks to be an upgrade over the earlier released A56, although they are not in the same series in the itel product line.
Key Specs of the itel S16
OS: Android 10 (Go Edition)
Display: 6.5“ HD Waterdrop FullScreen (1600 x 720 pixels)
Processor: SC7731E Quad-core 1.3GHz
Memory: 1GB RAM + 16GB ROM (Up to 32GB)
Battery: Non-removable Li-ion 4,000mAh
Connectivity: 2G/3G
Front camera: 8MP with Flash
Rear cameras: 8MP Main Camera + 2MP Macro Camera + Depth Sensing
Colours: Ice Crystal Blue, Cosmic Shine, Dazzle Black
itel A56
The itel A56 is the successor to the very popular A55. The A56 comes with improved battery performance and an updated Operating System (Android 9 Pie, Go Edition).
As like previous A-series from itel Mobile, the A56 comes with just decent specs and is targeted at entry-level smartphone users, a reason why the price in Ghana is GHS 338.
Key Specs of the itel A56
OS: Android 9 Pie (Go Edition)
Display: 6.0″ FW+ IPS FullScreen (480 x 960 pixels)
Processor: SC7731E Quad-core 1.3GHz
Memory: 1GB of RAM with 12GB of expandable internal memory
Battery: Non-removable Li-ion 4,000mAh
Connectivity: 2G/3G
Front camera: 5.0MP with Flash
Rear cameras: 8.0MP AF + VGA
Colors: Gradation Blue, Black, Gold
Itel S15 /S15Pro
Itel S15 as it stands is the current itel mobile in Ghana. It is believed to have come to replace the itel S13 since they all fall under one category (S series).
The itel S15 comes with great features including the 16MP FF Selfie Camera with 4 in 1 Big Pixel 8.0MP AF + VGA Dual Rear Camera with Flashlight.
The S15 comes with Google Gallery Go which helps to get the best selfie experience to its users. It runs Android 9 Pie (Go Edition) as its operating system. See the full specifications below:
Key Specs of the itel S15
Display: 6.1″ HD+IPS Waterdrop FullScreen
Camera: 16MP FF Selfie Camera with 4 in 1 Big Pixel 8.0MP AF + VGA Dual Rear Camera with Flashlight
Processor: SC7731E Quad-Core 1.3GHz
Memory: 1GB RAM + 16GB ROM, up to 32GB
Battery: 3000mAh
System: Android 9 Pie (Go Edition)
Network: 2G/3G GSM/WCDMA 900/18000/2100
Others: Face Unlock + Fingerprint Sensor
Accessories: Charger, Battery, USB Cable, Earphone
The itel S15 cost GH¢ 375.00 and can be purchased from frankotrading.com or any of the banana shops across the country.
The best phone to start a bright day with is the P32. It has enough battery capacity to last for days with uninterrupted usage. With the latest full-screen technology, Itel P32 displays rich colours and provides a broad screen view on an IPS display.
Key Specs of the itel P32
Display: 5.5″ IPS FullScreen Display
Memory: 8GB HDD, 1GB RAM
Camera: Dual 5MP Rear, 5MP Front
OS: Android™ 8.1 (Go edition)
Processor: Quad-Core 1.3GHz
Battery Capacity: 4000mAh with slim design
The Itel P32 can be bought from three stores on the Jumia Ghana website at the below prices:
Itel A33 Dual SIM – 16GB HDD – 1GB RAM
A33 has a 5.0 Screen display offering a comfortable grip with great visual experience when watching a video or playing games. Designed to run Android 8.1 operating system which gives a smoother experience with more storage. The A33 comes with a comprehensive range of built-in camera functions and filters that help you take beautiful panoramic and clear night shots effortlessly.
Key Specs of the itel A33
Display: 5.0″ IPS LCD capacitive touchscreen, 640 x 480 pixels
Memory: 16GB HDD. 1GB RAM
Camera: 5MP Rear, 2MP Front
OS: Android 8.1 Oreo (Go Edition)
Processor: 1.3GHz Quad-core
Battery: 2200mAh Li-Ion Battery (Removable)
USB Port: MicroUSB 2.0
Fingerprint Scanner: Yes (Rear)
Network Support: 2G GSM/3G WCDMA
Other Features: Video Streaming, Active Noise Cancellation, Image Editor, Video Editor & Document Viewer.
Itel A33 can be purchased at a price of GH₵ 265
Itel S13 Dual SIM 8GB HDD – 1GB RAM
itel S13 is part of the itel’ S series flagship device which has a 5″ IPS LCD Display flaunts with 5 MP + 5MP rear camera and a 13MP Front Camera. It runs an Android operating system v7.0 (Nougat).
The device enjoys a battery saver feature and has the ability to split-screen which comes with the OS version. See the key features below.
Battery Capacity: non-removable 2400 mAh Li-Ion battery.
The itel S13 sells for GHS 350.
Itel A32F Dual SIM 8GB HDD
Itel A32F comes with a fingerprint and a premium look of 5.0 inch IPS HD display. The phone is packed with a quad-core MediaTek processor, 1GB RAM, 2050mah battery and runs Android 8.1 Oreo GO OS that delivers superior performance.
For selfie fans, the Itel A32F offers you a 2MP sensor. There’s soft LED flash to help bring your selfies to life and for better video chat in a dark environment.
Key Specs of the itel A32F
Display: 5.0″ IPS LCD capacitive touchscreen, 640 x 480 pixels
Memory: 8GB HDD. 1GB RAM
Camera: 5MP Rear, 2MP Front
OS: Android 8.1 Oreo
Processor: 1.3GHz Quad-core
Battery: 2050 mAh Li-Ion Battery (Non-Removable)
The splendid itel A32F retails at GHS 310.
Alright friends, the above are some of the latest itel phones you can find in the Ghanaian market.
There are others that you can still go for. But for the sake of this post, the above are what we can talk of for now. If you know any of the itel latest phones found in the Ghana market you that you think is worth mentioning, you can let us know in the comment below.
The Government of Ghana has made a new directive regarding taxpayers and as it is, we must follow it.
This is because, it will become increasingly difficult to get some services and cards – like the Ghana Card without a Tax Identification Number (TIN Number).
The government has directed that every Ghanaian who is required to pay tax, or could be paying tax in the near future, must get their own Tax Identification Number (TIN).
Ghana Online Tax Identification Number (TIN) Updates
01-Jan-2020: The online process for applying for the Ghana TIN is back active and all Ghanaians can now use it to get their temporary credentials and the TIN in a week.
What is Tax Identification Number?
The Tax Identification Number (TIN or “TIN Number”) is a unique Identification Number issued to taxpayers for official transactions. In Ghana, apart from Paying taxes, TIN is used for other services like importing goods into the country and registering a business or land.
A Tax Identification Number (TIN) is required for official transactions with the following public institutions:
The Domestic Tax Revenue Division of the Ghana Revenue Authority
The Customs Division of the Ghana Revenue Authority
The Controller and Accountant General’s Department
The Registrar General’s Department
District Assemblies and
Any Public Institution which the Minister may by legislative Instrument prescribe.
Who can apply for a Tax Identification Number in Ghana?
According to the GRA, the following people are required to register for a Tax Identification Number:
Earns taxable income in Ghana
Wishes to clear goods in commercial quantities from any port or factory
Wishes to register a title or other documentation relating to land
Requires a Tax Clearance Certificate
Wishes to register a business/company at the Registrar-Generals Department
Requires a Permit from a District Assembly
Intends to receive a payment from the Controller and Accountant-Generals Department
Uses of Tax Identification Number (TIN) in Ghana
Here in Ghana, the Tax Identification Number is becoming increasingly important due to the numerous services it is required for, with new ones being added regularly. Here are some of the services you would need to use your TIN for in Ghana
to clear any goods in commercial quantities from any port or factory
to register any title to land, interest in land or any document affecting land
to obtain any Tax Clearance Certificate from the Internal Revenue Service, Customs Excise and Preventive Service or the Value Added Tax Service.
to obtain a Certificate to commence business or a business permit issued by the Registrar-General or a District Assembly
to receive payment from the Controller and Accountant General or a District Assembly in respect of a contract for the supply of any goods or provision of any services
to register for the Ghana Card with the National Identification Authority
What you need to apply for your Tax Identification Number (TIN) online in Ghana
First Name
Last Name
Working Email Address (not to be shared)
Scanned colour copy of identity document (pdf, jpg, jpeg, gif and not more than 1mb in size) for verification. Valid IDs for on-line Registration are your Ghana Driving License, your Voters Card or your National Identity Card (All Ids must be valid, expired IDs will be rejected).
It’s interesting how a Ghanaian Passport is not part of the accepted documents for a TIN.
Steps to Register for Tax Identification Number (TIN) in Ghana
This Process covers Stage 1 of the TIN online application process.
Here is how to get TIN Number in Ghana:
Visit the Ghana Revenue Authority portal by clicking here.
Fill in your basic details and choose a password
Click the “add” button to attach your ID (It should be a good quality, colour scanned copy of the above identity card (pdf, gif, jpeg format)
After adding, click on upload
Click register on the same page.
Wait while the Request is submitted
Check your email for confirmation to continue the process.
Once the name, email and ID have been validated you will receive a Success Message. If you wish you may click on the button to view or print a copy of the submitted details
Wait for the system generated email; this will provide information on the registration process. The email will include a link to follow to continue your TIN Registration
Follow the URL contained in the email received
Fill in the Email and Password (please note that these must be the ones that were registered earlier.
Click Register to continue
You will proceed to the TIN Registration Details Pages. Fill out the various Tabs, at the end of each Tab click on “Save and Proceed”. The tabs include:
Individual Summary
Personal Details
Tax information
Identification Information
Address Details
Employment Details
Contact Details
After providing all the above, click SUBMIT.
You will receive a success message like in the photograph below. Sit tight and wait for your TIN. It should take a day or two but not more than 14 days.
Note: If you have used an NIA Card (Ghana Card) then TIN registration is automatic and you will receive an email notification within a minute or so.
Other types of card require a GRA officer to vet your documentation before a TIN is issued. In all cases, your TIN Certificate must be picked up from your nearest GRA Office.
Alternatively, you can download a TIN form and either email your completed form to [email protected] or take it to your local Domestic Tax Revenue Division office in Ghana
Contact GRA
You can call the GRA on +233- (0) 302 904545 OR +233- (0) 302 904546 or send an email to [email protected]
Smartphones are the new norm and it is now almost impossible to imagine our lives without these gadgets. However, in as much as we like to use the latest trending phones, our pockets may disagree.
It is therefore imperative that we look for smartphone options that are low quality; yet can guarantee some level of satisfaction.
If you are looking for cheap or affordable phones in Ghana, we have compiled a list of good phones that are below GHS 600 which you can use.
Here is the list of the most affordable phones in Ghana right now:
Phone
Price
Infinix Hot 8 Lite
GHS 499
Infinix Hot 8
GHS 599
Infinix Smart 4
GHS 450
Tecno Spark 4
GHS 580
Huawei Y6
GHS 520
Tecno Pop 3 Plus
GHS 475
Now let’s look at the specifications of each of the phones mentioned below:
Infinix Hot 8
The Infinix Hot 8 is a small budget phone with triple camera and a massive battery, released by Infinix Mobility around the same time they unveiled Shatta Wale as a brand ambassador.
If you are looking for a decent phone, want to stay in style and are very interested in 4G, the Hot 8 is a good buy for you. Don’t also forget the huge 5000 MaH battery as well as the possibilities that a triple rear camera offers you.
Infinix Hot 8 Specs Highlight
Display: IPS LCD 6.6″HD+ Waterdrop Display
Front Camera: 8MP FF with Flash Light
Rear Camera: 13MP AF + 2MP FF + QVGA FF with Quad Flash Light
Other Features: Compass, Fingerprint Sensor, GPS, Proximity, Touchscreen, WiFi, Face Unlock
Colours: Quetzal Cyan, Cosmic Purple, Shark Grey and Hour Black
Infinix Smart 4
The Infinix Smart 4 was launched in 2019. The device has been marketed by Infinix as a battery and screen device and with a 6.6 inches screen, this is largely the case.
Infinix Smart 4 Specs Highlight
Network: 2G, 3G, 4G
Screen Size: 6.6″HD+ waterdrop display
SIM: Dual Nano SIM
OS: Android™ 9 Pie
Security: Fingerprint, Face Unlock
Processor: 2.0 GHz octa-core chipset
Storage: 32GB
RAM: 2GB
Front Camera: 5MP
Rear Camera: Dual 8M + QVGA
Battery: 4000mAh
Tecno Spark 4
Equipped with 13MP Triple Rear Camera and 8MP Front Camera, SPARK 4 does well in clear photography, bokeh effect and AI portrait mode.
One noticeable upgrade from the Spark 3 will be in the area of the battery; with an additional 500 mAH, the total battery capacity of the Spark 4 is 4000 mAH.
Other Features: Compass, Fingerprint Sensor, GPS, Proximity, Touchscreen, WiFi, Face Unlock 2.0
Colours: Royal Purple, Vacation Blue, Misty Grey, Energetic Orange
Tecno Pop 3 Plus
The Tecno Pop 3 Plus continues the trend that other Tecno POP phones have followed It is a low-end features deprived smartphone designed for mostly first time smart phone users in search of low budget devices they can use for the basics.
Tecno Pop 3 Plus Specs Highlight
6.52 inch IPS LCD Display, 960 X 480 pixels (269 ppi)
Android 9.0 Pie; HIOS 5.5
Quad-Core MediaTek Helio A22 Processor
1GB RAM
16GB built-in storage, with support for MicroSD
8MP Rear Camera
8MP Front Camera
4G LTE
4000 mAh Non-Removable Li-Po Battery
Conclusion
If you are interested in any of these phones or want any phone at all in Ghana, contact the Mfidie shop on 0546090871 to make an order and have it delivered to you anywhere in Ghana.
Many Ghanaians are regularly looking for the best gadgets (especially mobile phones) to buy. Most often than not, we are looking for specific shops to buy these phones for.
One of such trusted phone shops where warranty guaranteed phones can be bought from is Freddies Corner.
The Freddies Corner brand has been around for a long time and in this article, we will update you with the prices of their phones as well as where to find their shops and to directly contact them.
Take note that Freddies corner does not only deal in the sale of smartphones but also deals with other electronic devices like TVs and Laptops.
When it comes to mobile phones you can get at Freddies corner, these brands come up on top: Tecno, Infinix, Samsung, Huawei, Apple (iPhone) and Nokia.
Beware of fraudulent websites that appear like they are from Freddies corner but are in no way affiliated to them. Freddies Corner does not have a website of their own and we will share their direct contact numbers at the end of this article.
Here at Mfidie.com, we delight in bringing you only the right information so keep reading.
Phones Price List at Freddies Corner
It is sometimes very difficult to get all the prices of smartphones you want to buy and make a purchasing decision. We have therefore put this together for you in an easy to compare table.
Here are the current prices of Mobile Phones in Ghana as sold at Freddies Corner:
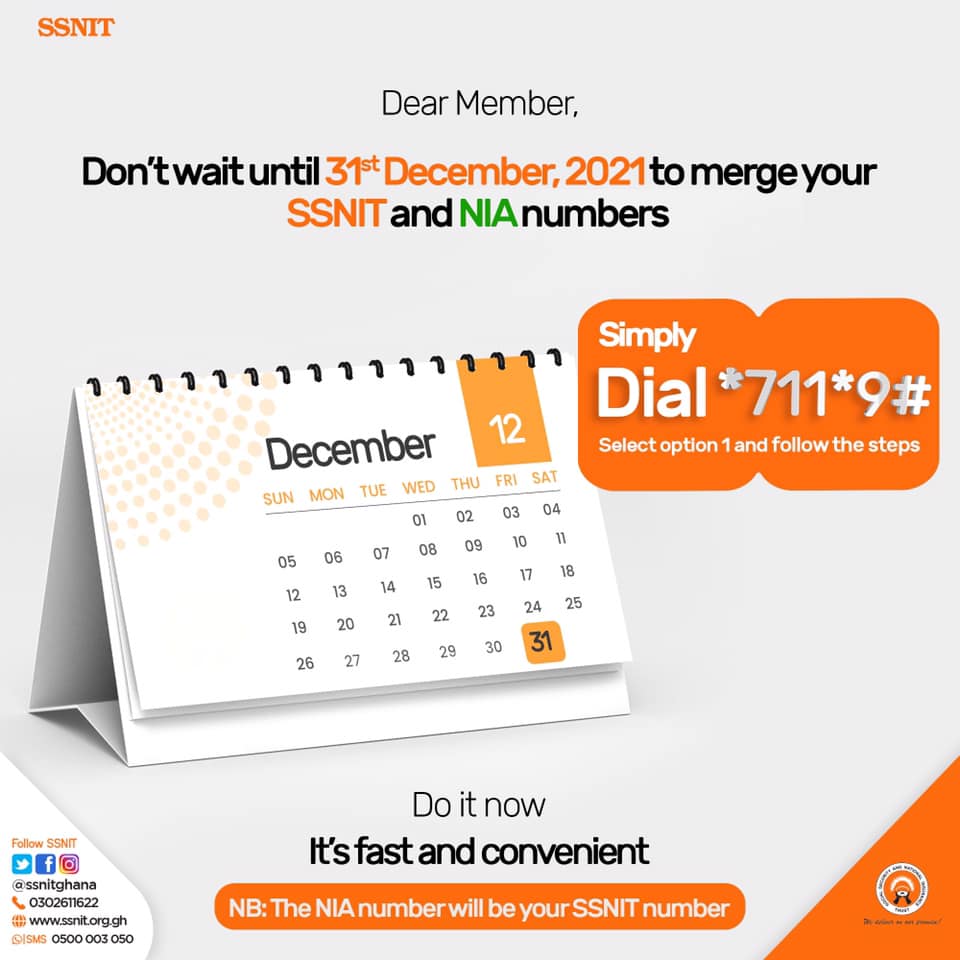
As the year draws to a close, it has become important for all of us to make sure we have done all the necessary things we can, especially those with a deadline. The SSNIt and Ghana Card link is one of such necessities.
The SSNIT offices across the country have been open since yesterday to aid all those who want to link their SSNIT and NIA (Ghana Card) numbers. The SSNIT offices will continue to work till the last day of this year, 31st December 2021 at 4:30 p.m.
However, if you do not want to step foot in the office, there are various other means to do the linkage, even if you are outside Ghana.
In this article, I look at all the 3 possible ways that every Ghanaian with an old SSNIT number can link it with their Ghana Card numbers before the deadline reaches.
Why you should merge/link your SSNIT and NIA (Ghana Card) Numbers
You only have to carry your Ghana Card for all transactions
Easy identification of nominated dependants
You save money because you don’t need to pay for a SSNIT card
It’s a legal requirement
What you need to merge your SSNIT and Ghana Card Numbers
To link your SSNIT and Ghana Card Number, you need to have the following:
Your NIA number
SSNIT number
Mobile phone number
Active email address
How to find your NIA/Ghana Card Number
To find your NIA or Ghana Card number, all you need is your Ghana Card. Once you have the Ghana Card, look at the section that says “Personal ID Number”. You will find an alphanumeric code in the format “GNXXXXXXXXXX”.
The alphanumeric code is your NIA Number or your Ghana Card number. It is this code that you will use to merge your SSNIT and NIA Numbers.
These are the 3 approved ways you can do the SSNIT & Ghana Card merger:
By walking into any SSNIT office near you
By using the shortcode – *711*9#
by using the SSNIT website
Now let’s explain each method.
Method 1: Merge your SSNIT and Ghana Card on your Phone
Dial *711*9# on your mobile phone
Select option 1
Enter your SSNIT Number
Enter your email address (if the phone number you are using is different from your phone number registered in our database)
Enter the Personal ID Number on your Ghana Card
Select option 1 to complete the merging of your SSNIT and the NIA numbers (Personal ID Number on your Ghana Card)
Wait for the confirmation message
Method 2: Merge your SSNIT and NIA (Ghana Card) Number online
Follow these steps to merge your SSNIT and NIA Number very fast:
Log in with your current SSNIT number and Password
Request for a new Password here if you don’t have one and use it to log in
At the top bar, click on the “Merge My NIA” button
Read the terms and conditions and check the box to continue
Enter your NIA Number to continue
Confirm your email and phone number
Click submit to successfully link your SSNIT Number and NIA Number.
Method 3: Visit a local SSNIT Office
This method is best for those who could not merge via the 1st and 2nd methods. You can do a Google Map Search for a SSNIT office near you, and then visit them to have the merger done.
Please note that you will have to go with your Ghana Card in order to complete this method successfully. The process itself is less than 5 minutes but you might meet a queue or there would be network issues. Just be patient and the SSNIT representative will help you merge your SSNIT and Ghana card numbers.
Conclusion
Thank you for reading and we hope the methods described here will be of help to you. A happy new year in advance to you and share this with your friends.
If you have not already linked your SSNIT and Ghana Card, you can do so via the online process now before the deadline hits. For those who have issues linking it via the mobile shortcode, they can visit the SSNIT office to have it done.
Work will resume at all SSNIT offices starting today Wednesday, 29th to Friday, 31st December 2021 between 8:00 a.m. to 4:30 p.m. each day.
The merger is in compliance with Regulation 7 (1) of the National Identity Register Regulations, 2012, LI 2111, and a directive from the National Pensions Regulatory Authority (NPRA).
Sample confirmation message after linking SSNIT and NIA/Ghana Card Numbers
Also, starting next month, new subscribers to the national pension scheme (SSNIT) would be required to have Ghana cards before they would be taken on board.
There are three ways you can do the merger. These are:
By walking into any SSNIT office near you
By using the shortcode – *711*9#
by using the SSNIT website
Why you should merge/link your SSNIT and NIA (Ghana Card) Numbers
You only have to carry your Ghana Card for all transactions
Easy identification of nominated dependants
You save money because you don’t need to pay for a SSNIT card
It’s a legal requirement
What you need to merge your SSNIT and Ghana Card Numbers
To link your SSNIT and Ghana Card Number, you need to have the following:
Your NIA number
SSNIT number
Mobile phone number
Active email address
How to find your NIA/Ghana Card Number
To find your NIA or Ghana Card number, all you need is your Ghana Card. Once you have the Ghana Card, look at the section that says “Personal ID Number”. You will find an alphanumeric code in the format “GNXXXXXXXXXX”.
The alphanumeric code is your NIA Number or your Ghana Card number. It is this code that you will use to merge your SSNIT and NIA Numbers.
How to merge your SSNIT and Ghana Card on your Phone
Dial *711*9# on your mobile phone
Select option 1
Enter your SSNIT Number
Enter your email address (if the phone number you are using is different from your phone number registered in our database)
Enter the Personal ID Number on your Ghana Card
Select option 1 to complete the merging of your SSNIT and the NIA numbers (Personal ID Number on your Ghana Card)
Wait for the confirmation message
How to merge your SSNIT and NIA (Ghana Card) Number online
Follow these steps to merge your SSNIT and NIA Number very fast:
TECNO’s latest device on the Ghanaian market is the TECNO SPARK 8 Series, a budget-friendly device that combines exciting features with enhanced performance. Its impressive features and advanced camera, embedded with AI technology make it a must-have.
For the very first time, the SPARK 8P comes with a noteworthy and advanced camera system, a 50MP main and an 8MP rear camera revamped to bring you features such as Smile Shot, Time-LapsePhotography, Super Night Mode, Bokeh Effects, Beauty Mode, Slow Motion, and so much more.
The TECNO SPARK 8P houses a large memory and storage capacity of 4GB RAM + 128GB ROM and is powered by a speedy octa-core processor leaving no room for worry. With a Super Boost System in place, it optimizes the device for efficiency and is the perfect combination for a lag-free experience and smooth multitasking.
The SPARK 8P features a 6.6″1080P IPS display that provides true to life visual experience and a DTS Stereo Sound that keeps you immersed in the cinematic world of clear sound and entertainment.
It also comes with great security and privacy features such as TheftAlert, PeekProof, Vault2.0, and a PrivacyDashboard, you are well assured of a secure device to protect your data and information at all times.
The glossy design of the TECNO SPARK 8P camera bump provides a shiny appeal while the matte finish provides a good grip with the side-mounted fingerprint scanner adding a level of beauty with a faster response time when unlocking the device.
It’s almost Christmas and TECNO Mobile has already delivered the perfect gift in the form of the TECNO Spark 8p.
The very colourful and vibrant device comes as part of the affordable Spark Series, with decent enough performance specifications, a good screen, and tough battery life.
A lot of consumers, who fit in the mid-income level will find the Spark 8p among the best mid-rangers available in the country.
In this article, we have recently unboxed the TECNO Spark 8p and are going to share with you pictures from the unboxing. Don’t forget to comment on what you think about the device.
TECNO Spark 8p Specs
Before we get started, let’s look at the specs of the new TECNO Spark 8p:
Display: 6.6″ Dot Notch Screen
Front Camera: 8MP Front Camera with Dual Flash
Rear Camera: 3 Camera Setup – 50MP + 2MP + AI lens
Other Features: Compass, Fingerprint Sensor, GPS, Proximity, Touchscreen, WiFi, Face Unlock 2.0
Colours: Turquoise Cyan, Atlantic Blue, Iris Purple and Cocoa Gold
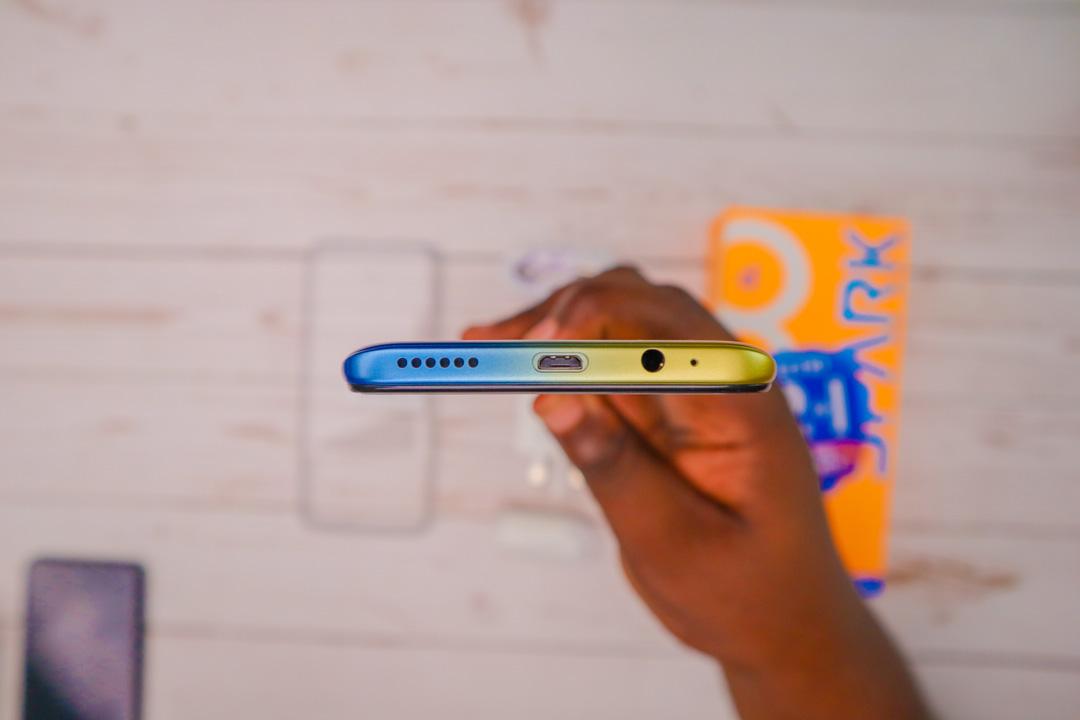
TECNO Spark 8p Unboxing
Inside the box of the TECNO Spark 8p, you get:
The TECNO Spark 8p Phone
A 13-month warranty Card
A transparent Silicon case
A sim ejector
A 10 Watts Power Adapter
A micro USB cable and
A 3.5mm earpiece
My TECNO Spark 8p was presented in the orange-like exciting case synonymous with the Spark series. The packaging lifts you in high spirit and directs you to what you should expect.
When you open the box, you get the device itself. Next, you find the silicone case that fits perfectly fine with the device when I tested it.
You are also greeted with the 12 plus 1-month warranty card. Other things you find are a 10 watts charger, a micro USB charging cable an earpiece, and a SIM eject tool.
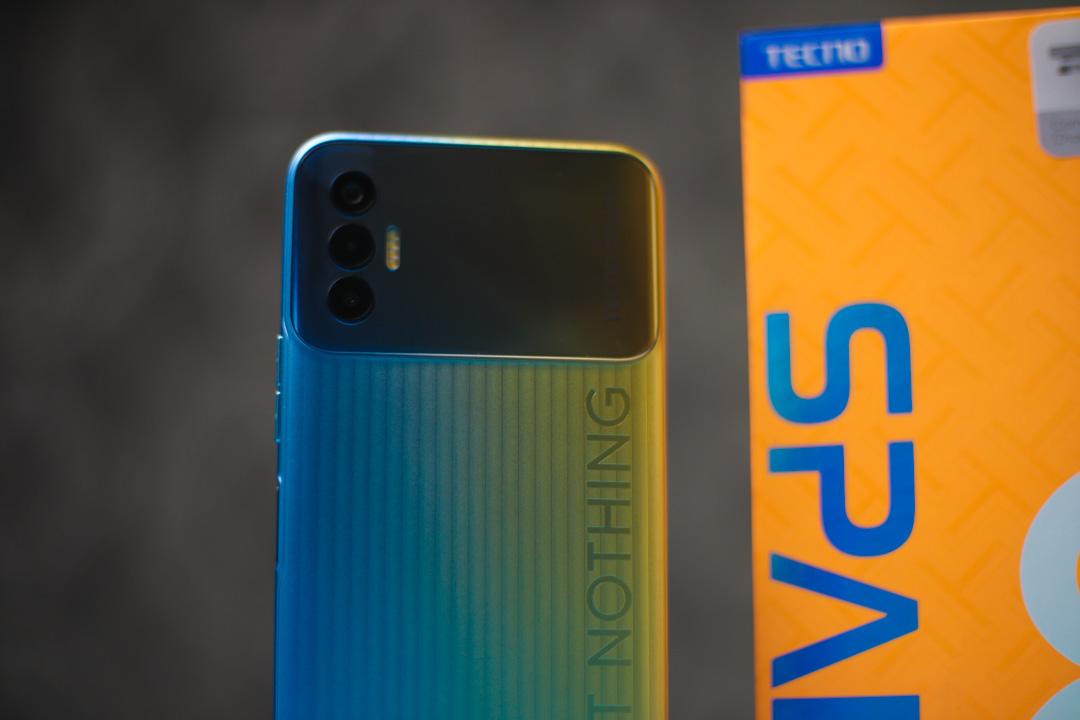
At the back of the TECNO Spark 8p itself, there is a very new and welcomed shiny design. You can also see in the photos that there is a super shiny camera cut out made of plastic.
TECNO also seized the opportunity to put in a lot of branding as the TECNO Spark logo is very visible.
While holding it, the device felt good in the hands and looks beautiful; something I would want to “flex” with given the transparent case.
The power button, this time, also acts as the fingerprint sensor; and using it feels so fast and responsive.
The other sides of the device have the volume buttons, charging port, and sim area.
Price & Where to buy the TECNO Spark 8p in Ghana
You can pre-order the TECNO Spark 8 series from today, in all accredited TECNO shops nationwide with a minimum deposit of just GHS 200 to receive amazing gifts.
By pre-ordering the device right now, you stand the chance of winning amazing gifts. Click on this link for a list of TECNO accredited shops: https://www.tecno-mobile.com/gh/stores/#/
After pre-order, the retail prices of the device are as follows:
![How to Register a Business in Ghana online [2022 Working Tutorial]](https://cms.mfidie.com/wp-content/uploads/2017/10/ghana-online-business-registration.jpg)
![Latest itel Phones and Prices In Ghana [2022 Guide]](https://cms.mfidie.com/wp-content/uploads/2019/08/latest-itel-phones-ghana-min.png)


![The Best Smartphones in Ghana below GHS 600 [2022 Guide]](https://cms.mfidie.com/wp-content/uploads/2020/05/TECNO-Spark-5-experience-09.jpg)