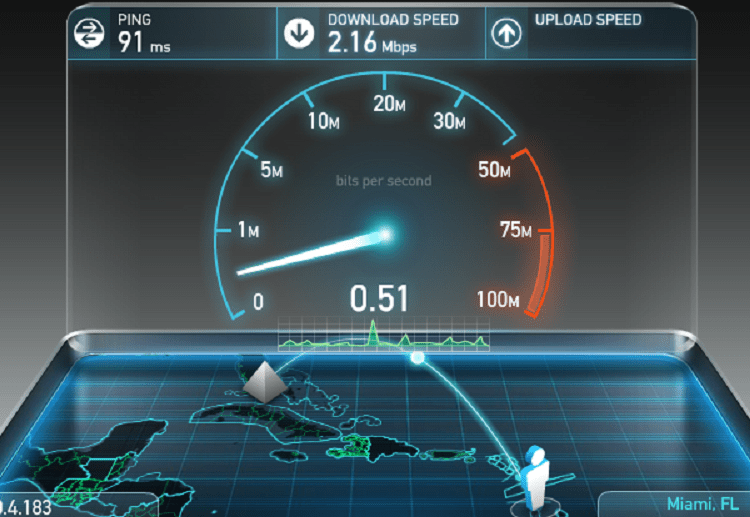
Category: Guides

  • How To Borrow Airtime On Mtn, Vodafone, Glo and AirtelTigo In Ghana

    How To Borrow Airtime On Mtn, Vodafone, Glo and AirtelTigo In Ghana

    Once upon a time, we are all caught in the net of having limited airtime or no airtime at all. You either want to make a call or text someone only to realise that you’re lacking on airtime.

    In most instances, when this happens, you hardly have the time to go out in search of call cards to buy. The best you can do is to borrow SOS credit from your network service provider.

    In this article, I’ll take you through the various steps involved in borrowing airtime from the four major network service providers in Ghana namely MTN Ghana, Vodafone Ghana, Glo and AirtelTigo.

    MTN Ghana

    You can borrow airtime on your Mtn line from between 50 pesewas to 15 cedis depending on how much credit you buy, how long you’ve been using your sim card and how soon you repaid your previous borrowed airtime.

    To borrow airtime on MTN, follow the following:

    1. Dial *506#
    2. Select “borrow credit”
    3. Choose the amount you wish to borrow from the list
    4. Select 1 to confirm.

    Or

    1. Text “Start” to 1506
    2. Select the amount you wish to borrow
    3. Text 1 to confirm

    To check your loan status,

    1. Dial *506#
    2. Select 1 for status

    Note: MTN charges 10% on all borrowed airtime as repayment charge. Also, for you to be able to access this service, you must be an active MTN user for 3 months and you must have airtime balance less than 4 cedis.

    Vodafone Ghana

    Vodafone Ghana also gives SOS credit to their users who have run out of airtime. To qualify for this though, an individual must be an active Vodafone user for at least the past 15 days. A service charge of 10% of the credit requested is charged as a commission on the airtime. You must have airtime of less than 1 cedi to be able to go for this.

    How to borrow data on Vodafone:

    1. Dial *505#
    2. Select the amount you wish to borrow
    3. Select 1 to confirm the transaction

    This borrowed airtime can be used for nothin browsing and calls.

    Glo Ghana

    Glo Ghana is arguably one of Ghana’s fastest internet service providers with commendable internet speed and good data packages.

    Well, they also have the “Borrow me credit” service which enables customers to get some airtime loans when they run out in the middle of something.

    To qualify for this service though, the customer must be using a registered sim card, you must be an active Glo user for the past 3 months.

    To borrow airtime, follow these steps:

    1. Dial *5321#
    2. Select 1 to borrow credit
    3. Select the amount you wish to borrow
    4. Select one to confirm.

    The repayment of this airtime loan can be in bits or in full depending how much airtime you recharge on your next top-up.

    It also attracts a 15% commission.

    AirtelTigo

    Currently, Airtel tigo is the second biggest network company in Ghana following the merger of the erstwhile Tigo and Airtel companies.

    To borrow airtime from AirtelTigo, follow the following steps:

    1. Dial *588#
    2. Select the amount you wish to borrow
    3. Confirm the transaction.

    You can check your airtime usage by dialling *130*10#

    Conclusion

    The various network service providers have various criteria for borrowing airtime to their customers. So don’t beat yourself if you have several SIM cards and you are able to borrow on some yet you’re not able to borrow on others.

    For more enquiry on qualification, you can call your network provider’s customer care.

  • How To Know If Someone Has Blocked You On Instagram

    How To Know If Someone Has Blocked You On Instagram

    There might be a misunderstanding between you and your partner, friend or family member. This can make one don’t want to hear or see anything about the other again.

    So after a quarrel, you went to Instagram to watch the persons status or posts but you are not seeing any of them.

    This may lead you to wonder if that person has blocked you on Instagram or something like because you just had a little misunderstanding. Maybe you are not that kind of person that will want to block someone just because of a little misunderstanding, but what if the other person is that type of person?

    Instagram, on the other hand, does not notify you when someone blocks you as we all know it will be awkward to get a notification that “ABC has blocked you”, so how do you find out if someone has blocked you?.

    Here Are The Steps To Find Out If Someone Has Blocked You

    Following Their Account Again

    If you are suspecting someone has blocked you on Instagram then go to the search tab then search for the person again, you cant see the person’s page on the search results if you are blocked.

    Your Chat Thread Will Disappear

    When someone blocks you, the chat thread between you and that person will disappear, so when you go to your DM and find out a chat between you and that person is not there anymore, then definitely you’ve been blocked, but if you find out the messages are still showing then it means that person has not blocked you.

    Checking Through Their Profile Picture

    When someone blocks you, their tags and comments don’t disappear so if you can’t find their account when searching for them then visit any of your picture or friends pictures that has their name or tags under it, tap on it to go to their page, try following their account again, you will see the follow button not working.

    Also, take note that all these steps given above can also happen when someone deactivates their account so be sure not to conclude that someone has blocked you not knowing they might have deactivated their account.

    So How Do You Know If Someone Has Deactivated Their Account?

    You can get to know by visiting www.instagram.com/username if they have deactivated their account you will see Instagram saying “sorry, this page isn’t available”.

    But if the person hasn’t deactivated his or her account, then you can see all the posts made by that person and when the account is private, you will see Instagram saying “this account is private”.

    Conclusion

    You can find out if someone has blocked you on Instagram by searching for their username again, if you are blocked their page won’t appear in the search results, also the chat thread will disappear.


  • How to back up your photos to Google Photos

    How to back up your photos to Google Photos

    If your phone storage is running out and you want to free up some space but don’t want to delete your important pictures and videos then one of the best ways is to upload them to Google Photos via the mobile app or PC.

    Maybe you are looking for a place to store all your photos and videos that can be accessed anytime you want, then this is when Google Photos is needed.

    Google Photos gives you a free cloud storage space to keep your important pictures and videos.

    How To Back Up Your Photos And Videos To Google Photos

    1. Download the photos app from Google play store or Apple store.
    2. Open the app and tap on the three horizontal lines to open the menu.
    3. Go to settings and select back up and sync.
    4. Turn ON the backup & sync switch.

    But wait! Do you know you can back up your files from your pc to your Google Photos?

    Maybe one day might be a bad day for you and your hard disk might crash due to some reasons or your PC will be at fault and can’t boot and you needed some files on it badly.

    It has happened to me before, my hard disk crashed whiles I was using this PC and there was nothing I could recover from it because it was not spinning and not showing on any pc again, it was indeed dead.

    All I had to do was to get a new one and move on (that was a long time ago, not now haha).

    Have you asked yourself, what will you do in case you find yourself in such an incident?

    What if you have all your working files and important pictures and all of a sudden your PC is not responding or can’t boot for you to access these files and there is absolutely no way to recover these important files?

    That why it is important to back up your photos and videos to Google Photos so that you can access them anytime, anywhere and on any device as long as you have your Gmail and password.

    How To Back up Your Files From Your PC To Google Photos

    1. If You want to use the Google Photos software then download it here or you can use your browser by visiting photos.google.com, then log in with your Google account.
    2. To upload your important pictures and videos tap on upload on the top right then select upload from computer.
    3. You will see a pop up asking you to choose whether to upload it in High Quality or Original. Select your choice and click on continue to start the backup process.

    What Does Upload In High-Quality Mean?

    When you are uploading a photo to Google photos and you choose “upload in High Quality”, then you will get unlimited storage as the upload don’t count on your free 15GB storage.

    But when you are uploading a photo and its size is above 16MP then it will automatically be compressed.

    What Does Upload In Original Mean?

    Selecting “upload in original” does not compress any image but you have a 15GB limit space unless you are paying for more storage space.

    Conclusion

    If you want a place to store your pictures so that you can access them anytime, anywhere and on any device then the best option is to upload them to Google Photos.

    Google Photos gives you 15GB storage space if you want to upload your pictures using a “High Quality”.

    And you will get unlimited space storage if you upload them using “Original” which will compress any photo you will upload when the size is above 16MP.

  • How To Register For Online DVLA Portal In Ghana

    How To Register For Online DVLA Portal In Ghana

    In an attempt to cut-out the activities of Guru boys, the Driver and Vehicle Licensing Authority of Ghana launched an online platform in 2019.

    This platform is to enhance the speed of processing number plate acquisition throughout the country and also to propel the government’s agenda of digitising the economy.

    Like any other novelty, using this online system becomes a bit difficult for first-time users.

    In this article, we shall take you through the process of registering for the online portal.

    How To Register On the DVLA Portal

    1. To register on the portal, visit online.dvla.gov.gh/sign_in
    2. Click “signup free” at the bottom of the Sign-in page.
    3. Select Individual in the Popup menu.
    4. When the new applicant registration form opens, fill in the following under the Basic Information tab:
      1. Your title (Mr./Mrs)
      2. Select Your Gender (Male or female)
      3. Enter your accurate date of birth. (Day, Month and Year)
      4. Where you were born (Place of birth)
      5. Your surname, your first name,
      6. Your employer’s name (Example GES, Self-employee)
      7. Select your nationality and enter your middle name (If any)
      8. Enter your previous name (Any other name you’ve had before a name change )
      9. Select the type of ID Card you want to use for identity (Voters ID, National ID, Health Insurance, SSNIT or Passport).
    5. Enter the ID card number in the ID No. column
    6. Click on Next
    7. Under the Contact Information Tab, Enter the following information:
      1. Enter your postal address in the boat box column (P.O. Box 23)
      2. Enter the town of the postal address in the city column (Example, Kaneshie – Accra)
      3. Select your region from the drop-down list. (The list still contains only 10 regions so choose the original region from which your new region was created if this applies to you)
      4. Enter your email address in the email address column
      5. Enter the name of your area in the “suburb” column (Example: Otamens-Kasoa)
      6. Enter your street address in the “street address” column.
      7. Enter your house number
      8. Enter your full mobile phone number in mobile no. Column.
      9. In case of any other number, enter it into the second mobile number column.
    8. Click on next to move to the next step.
    9. Under the Account Credentials Tab, enter the following information:
    10. In the user name column, enter a name you can easily recollect.
    11. Enter a preferred password in the password column.
    12. Repeat the password in the “confirm password” column.
    13. Click next to move on

    On the next page, you’ll view all the details you had entered in the previous three pages. Check to be sure that everything is in place and click on next. If you have any wrongly entered data, you can click on the edit button at the top of each table to edit before moving on.

    You’ll see your portal open after the previous step and then you can access all your services.

    Conclusion

    I believe this article was helpful to you in your quest to register for an online portal for DVLA in Ghana. In subsequent posts, we shall write about how to book specific services from your portal. Kindly share your comments in the comment box below.

  • How To Set Emergency Contacts On Your Phone

    How To Set Emergency Contacts On Your Phone

    Ever wonder what will happen when you are unconscious, maybe in a car accident or unable to respond?

    Assuming you might be that lucky type that will get a rescuer to help you when one of these happen to you.

    But what if the person was able to find your phone on your pocket, then he decided to look through your phone to see if he will know your blood type or go through your contacts and call your family members only to find out your phone is locked?

    Well, I am not saying you should not password-protect your phone, of course, you should, Locking your phone help you in a way that nobody can use your phone without your concern.

    You might say there is an emergency tab on every phone when its locked and that person who will come to your rescue can use that to call for help, you are right but this only allows the person to call the Ghana emergency response centre number (112).

    The good news is that you can add your family and friends contacts under the emergency section so that when you are in a catastrophe and the rescuer wants to contact your relatives it will be easy for him or her.

    How to Set Up Emergency Contacts On Your Phone

    1. Make sure your phone is locked, under your lock screen, you will see an emergency, tap on it.
    2. You will be presented with emergency dial keypad, double-tap on emergency information.
    3. You will see a pen at the top right, tap on it to edit your emergency information, most phones will ask you to unlock your phone before you can edit it.
    4. When you finally unlock your phone, under the “emergency contacts” select +Add contact, add your family and friends contacts and make sure to add active numbers as you never know when you might be in such situations.

    You can also add your medical information such as your name, blood type, address, medications and medical notes so that in case you are unconscious or in need of blood, then the person near you at that time can see all those information without unlocking your phone.

    Conclusion

    You can add your family and friends contacts on the emergency information section so that when you are unconscious or in need of blood the rescuer can get the contacts information of your family and friends easily and call them.

    Also, you can add your medical information such as blood type, medical notes, allergies and many more in case you are rushed to the hospital and you are unable to respond.

  • How to Recover Deleted Files from your PC or Android Device

    How to Recover Deleted Files from your PC or Android Device

    “Ohh I am doomed!” may be your first words, after you realise you’ve deleted an important document from your Recycle Bin.

    Recycle Bin is a household name when it comes to recovery of files. It makes file recovery possible. Sometimes, the situation may even be worse. That awkward moment when you have sensitive documents from;

    • Academics- Lecture notes, Journals, past questions, E-books, slides etc.
    • Business Deals – Bank Reconciliations, minutes, E- books.
    • Religious – Sermons (videos/ MP3), E-books etc.
    • Sports – Videos, letters etc.
    • Legal – E-constitutions, affidavits.

    These deletions can happen on both your PC and Android Device. Today, we walk you through how to recover these deleted files from your Windows Pc or Android Phone or Tablet.

    Recover deleted files from your PC

    On your computer, when you are about to engage in a business transaction and your hard disk crashes.

    It’s interesting to know that some of the crashes may be beyond your remit to solve because they can be through, manufacturer’s fault, accumulated heat, Electronic failure, mechanical failure, corrupted files.

    There is nothing more unfortunate than realising that you’ve deleted important information from your Recycle Bin, or your hard disk crashes when you are in the dying middle to accomplish an assignment or a business transaction.

    Hope cometh, because you can recover that lost file, after being deleted from your Recycle Bin. You can use the Kvisoft Undelete Recycle Bin method or the Recuva. We will look into the Recuva method.

    1. Download Recuva to a different drive, not on the one you lost the files on. If not, the lost files may be overwritten and you may end up losing your information entirely. Recuva is a free software.
    2. Right-click Restoration and Click ‘’Run as Administrator’’ if using windows 7 through to 10. Then a list will appear.
    3. Scan through the list to find the file you will like to restore.
    4. Save your file on different storage, either pen drive or hard disk.
    5. Cross-check from the storage to make sure information is well saved now.

    Android is the most popular operating system on earth right now.
    Android is the most popular operating system on earth right now.

    Recover deleted Files from your Android

    To do this, we will need MobiKin Doctor for Android

    Download MobiKin Doctor for Android: (Windows version) or (Mac version)

    1. After you install the program on your PC or Mac you need to connect your phone to your computer. MobiKin then will need access to your phone.
    2. Once you plug in your phone, this screen will automatically start.
    3. Seconds later, MobiKin will have recognized your device. You then decide what type of data you want to recover.
    4. After just 18 seconds (this may vary slightly), your lost or deleted data will appear.
    5. And the recovery takes next to no time. Press the button, and the data you have chosen can be saved on your PC.

    Conclusion

    Panic no more because you can retrieve your deleted stuff on your PC or Android with the use of Recuva and MobiKin.

    Facing any problems? Leave a comment below and we will assist you. Don’t forget to share this with your friends.

  • How To Seek And Gain Employment On Facebook

    How To Seek And Gain Employment On Facebook


    Majority of us know Facebook as a platform for reading timeline posts, liking and commenting on photos as well as chatting with friends.

    Well, this is not entirely false. But, Mark Zuckerberg’s Facebook, with over 2 billion users worldwide is far more than just a fun and chatting app.

    Facebook has other functions such as a marketplace for selling, digital stores for advertising and selling, business accounts for creating employment and organizing business at no cost.

    One of the functions of the business aspect of the Facebook society is job seeking.

    In this article, we shall take you through how to seek jobs on Facebook. Both local or international job opportunities can be searched for on Facebook.

    In order to be able to do this, you must first of all have an existing account with Facebook.

    How To Find Jobs On Facebook

    1. Scroll through your newsfeed, you should see a row of jobs with the caption “jobs nearby”

    2. In case you don’t see this, type “Jobs” in the search bar

    3. Select “See all” under the “jobs nearby” tab

    4. Enter the kind of job you want in the “title” search bar

    5. select your preferred job offer from the list.

    6. Read through the job description and salary.

    7. Click on “Apply now” if you are okay with the details.

    8. Edit your details to suite the position you’re interested in. You can also add new job experiences here.

    9. Once done, answer the compulsory question at the bottom of the page (if any) in clear terms which explains how best you understand.

    10. Click on send.

    11. Check your inbox for any feedback from the company seeking employees.

    Conclusion: With the Facebook jobs option, you get to choose the locations from which you want to be shown job offers. Also, you can be interviewed right on Facebook via the messenger app. Your prospective employer can use the schedule interview option in their Facebook business window to plan an online interview with you in real-time.

    With this service, you can acquire international jobs. Both part-time and full-time jobs are available.

    Do not be convinced by any employer on Facebook to make payments for anything before you gain employment with them. For as much as Facebook jobs are an easy way to seek job online, it could be an avenue for some unscrupulous people to try defrauding unsuspecting job seekers. So be extra careful when dealing with them.

  • How To Transfer Money From MTN Mobile Money To Bank Account In Ghana

    How To Transfer Money From MTN Mobile Money To Bank Account In Ghana

    Thanks to technology, today, we don’t have to walk anywhere just to pay bills. You can do that from the comfort of your home.

    With MTN Mobile Money, you can pay bills, send money to family and friends, buy airtime and pay for data packages from your home.

    What most people don’t know is that you can actually pay money into bank accounts in Ghana through your mobile money. It’s very simple.

    There are two ways of doing this. I’ll take you through the steps involved in both ways.

    Transferring Money To A Linked Bank Account

    A linked bank account is an account which has been connected to your mobile money account for mobile banking.

    Most banks in Ghana today have mobile banking services to enable their customers to perform transactions in their homes without necessarily coming to the banking halls.

    If you’ve registered for this service with your bank, then this method will work for you.

    1. Dial *170#
    2. Enter 5 for financial services
    3. Enter 1 for banking services
    4. Enter 1 to transfer to your bank
    5. Select your bank from the list
    6. Press 1 to select your account
    7. Enter the amount to transfer
    8. Press 1 to confirm
    9. Enter pin code to approve the transaction.

    Note: You can only transfer to your own account using this method.

    Transferring To An Unlinked Account

    With this method, you can transfer money from your mobile money number to over 20 banks in Ghana. The bank account doesn’t have to be your personal account for you to send money to it, using this method. Once the bank is listed, you can send money to any account number associated with that number.

    1. Dial *170#
    2. Press 1 to transfer money
    3. Select 6 to send to the bank account
    4. Press 1 to send from wallet to bank account
    5. Select your bank from the list
    6. You can press * and # to go to the previous or next page respectively
    7. Enter the account number you wish to send the money to
    8. Enter the amount you wish to transfer
    9. The account holder name will come up. Confirm and enter your password to forward transaction.

    Conclusion

    With this method, it is easy for you to make payment to any bank in Ghana that is on the list of mobile banking companies.

    Some of the banks listed include GCB Bank, ADB Bank, Access Bank, GT Bank, UMB, UBA Bank, Stanchart, Absa, NIB, Zenith, Cal, Ecobank, Stanbic, FBN, Fidelity, CBG, First National, ARB Apex Bank, BSIC, Services Integrity Among others.

    However, if your bank is not listed in the list above, you may have to fall on other payment applications which create options for you to make payment to other banks at very fair rates.

    Look out for our next post about one of the newest and best payment apps in Ghana presently.

  • How to stop Snapchat and Instagram from using all your data bundle

    How to stop Snapchat and Instagram from using all your data bundle

    Let’s stop Snapchat and Instagram from using all of our mobile data.
    Snapchat and Instagram are among the most used apps on most people’s phone.

    On the Play Store alone, there have been at least one billion and one hundred million (1,100,000,000) downloads among these apps. Not to talk about ioS and Windows (Snapchat is still not on the Windows OS).

    We use these apps every day to tell stories in various forms. I am not a big fan of Snapchat, but I do love to watch great stuff on Instagram.

    I have realised a lot of people complain these apps take a lot of their data plan, especially if you are on VodafoneX (and feel you can explore with your “free data”). These two apps are constantly updating their content in the background — whether you are using them or not. You just have to tell them to only be active when you open them up.

    Last time I met my friend Obed, I realised why Snapchat was taking up all of his data. I shared the trick with him and he was highly elated. I thought to share it with all of my readers here too.

    Snapchat

    1. Open Snapchat and tap on your Snapchat profile icon in the middle top of the screen, or swipe down
    2. Tap on the Settings cog in the upper right corner. Under Additional Services, tap on Manage Preferences
    3. Change the Travel Mode to On by making sure it is checked green

    What this does is that it prevents snaps from automatically loading, saving your data.

    If you want to view a friends’ story, you would first need to click on their name to get the snap to load. Some people have also claimed this trick helps to save battery life. I am yet to confirm that though.

    Check images below if you are confused.


    Instagram

    1. Open Instagram and go to your profile by tapping your profile photo on the lower right of the screen
    2. Tap the options in the upper right of your screen to go to the options screen
    3. Scroll down, under settings, tap Cellular Data Use
    4. Choose Use Less Data.

    Check images below if you are getting lost


    Well, let me know in the comments which apps have been using up your data and whether you plan on using these methods. I always love to hear from you.

  • Jumia Ghana Pickup Stores, Locations And Contact Numbers

    Jumia Ghana Pickup Stores, Locations And Contact Numbers

    Items purchased from Jumia Ghana can be delivered via two alternative means. They can either be delivered via home/office address or picked up by the customers at any Jumia pickup store or shops close to them.

    In this article, we shall take you through a list of jumia pickup stores across the nation, their locations and contact numbers.

    Check the list below for the one closest to you, for your next jumia order.

    ACCRA

    There are for now at least 6 pickup stations in Accra and its vicinity.

    Spintex Pickup Station

    Location: 127b Baatsona Spintex Road, Motorway Industrial Area bear Herbalife building.

    Contact number: 055 011 4523

    Roman Ridge Pickup stations

    Lovation: Roman Ridge, The Blueberries Commons (Ground Floor), #4 Ameda Street, besides old Shaka Zulu.

    Contact numbers: 055 770 4510 / 024 141 5658

    Makola Pick-Up Station

    Location: Accra Central. First floor, SIC Life Mall, adjacent Barclays Bank

    Contact number: 024 312 7430

    Tema Pick-Up Station

    Location: Tema. 1st floor, Old Ecobank building, behind omni bank, Meridian community 1.

    Contact Number: 055 104 8120

    Legon Pick-Up Station

    Location: Legon, University of Ghana Post Office, EMS office, near Dean of Students Affairs Office.

    Contact Number: 055 869 1922

    Zenith College Pick-Up Station

    Location: La,Zenith College Campus -Trade Fair Labadi, Trade Fair Centre

    Phone number: 3 3124

    Kumasi Pickup Station

    Location: Asafo, Plot No. 43 off Starlets Avenue Asafo.

    Phone number: 054 576 9110 / 026 422 6711

    Bomso Pick-Up Station

    Location: BOMSO, 710 N6, Kumasi, Ghana (710 N6, Kumasi, Ghana), Adjacent KNUST GBC gate, CCML,Bomso.

    Phone number: 024 176 0671

    Tamale

    UDS Tamale Pick-Up Station

    Location : Tamale, Yapei Road, Opposite Admin Block UDS

    Phone number : 024 771 9127

    Takoradi Main Pickup Station

    Location: Sekondi-Takoradi, Harbour Post Office

    Phone number: 024 178 1043

    Cape coast, UCC Pick-Up Station

    Location : Cape Coast, Pioneer Road, University of Cape Coast Ghana Post office

    Phone number: 055 009 1035

    Sunyani

    Sunyani Main Pick-Up Station

    Location: Sunyani, Adjacent Ghana Revenue Authority, Post office Road

    Phone number: 030 274 0630

    Volta Region Pickup Station

    Aflao – Happy Enterprise, near Vodafone Ghana office.

    Contact information: 0554400005

    Note: Each Jumia Pickup station comes with a specific price tag. So, the delivery price to Kumasi May be different from the price of delivery to Aflao. Your delivery cost would however be listed and displayed to you long before you make payment. So you’d be aware of what to pay. I hope this article was helpful to you.