Author: Gabriel Agbobli

  • How To Transform Your Childhood Photos To Videos With MyHeritage App

    How To Transform Your Childhood Photos To Videos With MyHeritage App

    There is nothing more interesting than viewing your childhood photos and reminiscing on the memories that you had when you were a child. Unlike everyone, some of us have little or no memory of what happened on certain occasions when we were little.

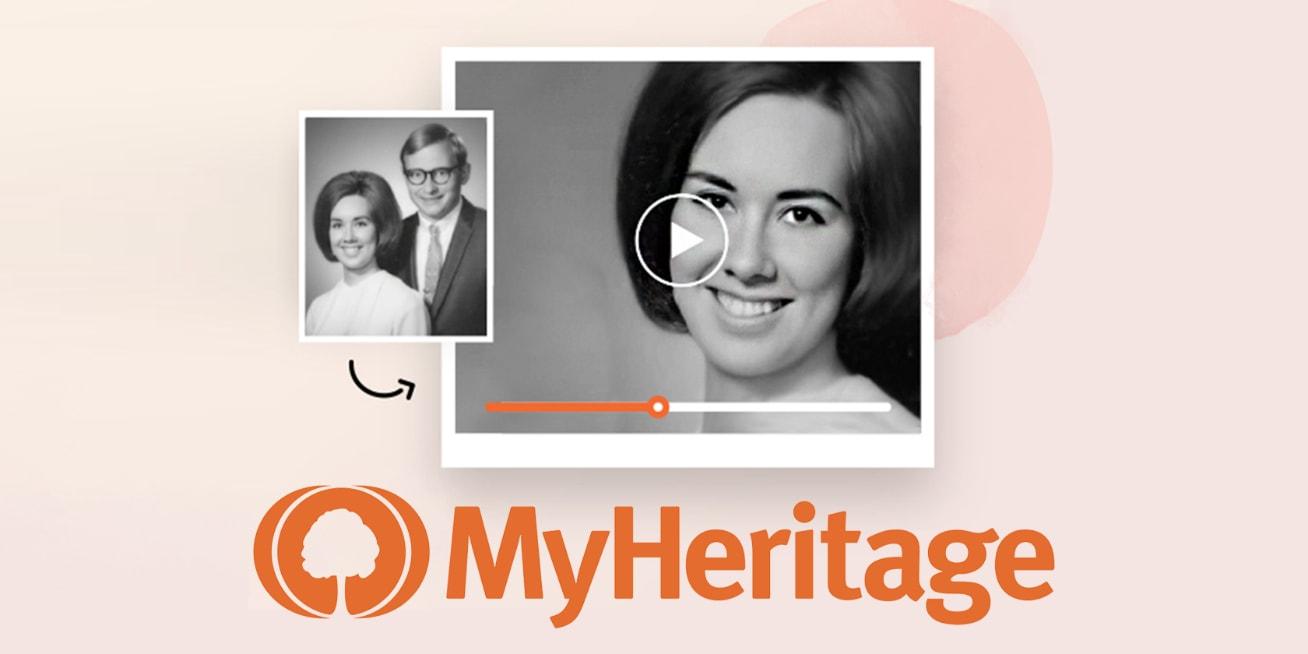
    Although we love to imagine what happened back then, with the MyHeritage app you can bring your childhood photos to life. The MyHeritage app brings old photos to life once you upload the photo to the app.

    If you ask someone whose house is burning what they will take, apart from money and a few valuables, the other thing he/she might say is old photos. This is because they are very special and they were taken on a very occasion.

    In the olden days, photos were taken on special occasions only, unlike recently where we have cloud storage and digital cameras on our smartphones. This means that, once you take a photo you take very good care of it as it could not be reprinted.

    These past few days, social media has been exploding with short videos of people sharing their childhood photos where their faces and eyes are moving. The first time I saw this animated video, I didn’t realize it was a photo; it looked so real.

    In this article, I am going to show your how to bring your childhood photos to life with the MyHeritage app.

    How To Bring Your Childhood Photos To Life With MyHeritage App

    The MyHeritage app uses a feature called Deep Nostalgia to turn headshots into short, animated clips that look so real. In the short video, the eye of the person in the photo will be blinking and their heads moving as if it is a real video that was recorded.

    To bring your childhood photos to life with the MyHeritage app, follow the steps below:

    1. Download the MyHeritage app for free from the Google Play Store or the Apple App Store
    2. After the installation, open the app and sign up for free with your Facebook account, Google account, or Apple account
    3. On the landing page, click on Photos at the bottom of the screen
    4. Tap on the plus (+) icon on the lower right corner of the screen and then select Add photos
    5. Choose the childhood photo you wish to bring to life. Afterward, Click on Next or the checkmark at the upper right corner.
    6. A preview of the photo will be displayed. Tap on Upload at the upper right corner of the screen
    7. The uploaded photo will be displayed in the Photos Tab. Click on the photo you want to bring to life
    8. Click on the little circle with three lines under it. Wait for a few seconds for MyHeritage to bring your photo to life
    9. That’s it, MyHeritage has literally brought life back into your photo. Click on the Download icon to save it to your device or click the Share icon to share with your friends and loved ones on social media.

    Conclusion

    Isn’t this interesting? It is, right. The MyHeritage app has finally been able to add some life to your old childhood photo. You can now look at yourself when you were a little boy or girl and how handsome or beautiful you were.

    The developers of the MyHeritage app have done a very good job and this is going to help some of us remember how we looked when we were young. What are you waiting for, go and try it now?

    After trying it, feel free to share your experience with us in the comments section below. Or you can tag us on social media when you share it on your social media platforms.

  • Why you should avoid Modded Apps like GBWhatsApp & FMWhatsApp

    Why you should avoid Modded Apps like GBWhatsApp & FMWhatsApp

    With over 2 billion global users, there is no argument that WhatsApp is the most popular and most used social media platform in the world. It is used by both the young, middle-aged, and old.

    As a result of its popularity and recognition, there are a lot of software developers who have taken it upon themselves to try and make an earning through creating apps that resemble the official WhatsApp app by Facebook.

    Some of the most popular names among them are the GBWhatsApp, FMWhatsApp, WhatsApp Gold, etc. These are all third-party apps created to mimic the original WhatsApp app.

    These apps come with some very cool and amazing features; most of which cannot be found in the original WhatsApp app. But, as humans as we are, we often overlook the dangers that are hidden under these features.

    In the field of health for example, before you will go into surgery, the doctor will have to tell you all the risks associated with the surgery as well as the positives. But, in technology, most of the apps we have installed on our devices do not give us a fair idea of some of their disadvantages, and the modded WhatsApp apps are one of them.

    In this regard, I have taken my time writing this article and explain to you some of the disadvantages associated with using modded WhatsApp apps.

    Some Features Offered By Modded WhatsApp Apps

    Although the main goal of this article is to talk about the disadvantages, I think just like surgery, it will be good to give some of the positives as well. Some of the cool and amazing features some of these modded apps offer us include:

    • Some of these modded apps support different languages. This means that no matter the language you speak, you can use the modded WhatsApp to chat with your friends and loved ones.
    • You can lock private chats with a password.
    • Themes can be selected according to the preference of the user. Afterward, that particular theme can be shared with the developer for them to add to their theme database.
    • Most of these modded apps allow you to share videos up to 16GB.
    • You can post as many WhatsApp statuses as you wish without any limitation.
    • You can download the media on someone’s status without using a status saver.
    • Last but not least, you are allowed to hide blue tick, double tick, and your online status.

    Some Disadvantages Of Using Modded WhatsApp Apps

    As you can see from some of the features that the modded WhatsApp apps offer, it appears to be the same as that of the original apps. As a result, we do not give attention to some of the risks and the disadvantages involved in these apps.

    Below are some of the disadvantages associated with the use of modded WhatsApp apps on your device.

    The messages you send are not safe

    Whenever you send a message through any of these modded WhatsApp apps, there is no guarantee that your messages are taken through the necessary encryption and servers. There might be instances where your messages are not passing through third-party servers.

    In such cases, your messages could end up in the hands of people who might use this information against you.

    For example, when you send your financial details or other confidential information through these apps you are risking it. Unlike the original WhatsApp where all the messages are taken through the right WhatsApp servers.

    These modded WhatsApp apps are unofficial

    As you might have realized, the WhatsApp mods are neither available on the Google Play Store, nor the Apple App Store. The reason is that these apps are not illegal to use but they are not official and as such, cannot be found on either store.

    But for Android users, can download the app from the web. This is because no license is needed to put your apps on the web. So, whenever you open these WhatsApp mods, you have to know that they are unofficial.

    There is a higher chance of attracting viruses or malware to your device

    Whenever you are using the modded version of WhatsApp, you have a higher chance of attracting viruses and malware. This is because these apps have less secured hosted servers that would have ensured nothing like this happens to you.

    Some of the viruses can damage the data on your device, and all this will be a result of your own fault. The original WhatsApp has enough secured hosted servers to avoid such instances.

    Conclusion

    WhatsApp mods are very useful in some instances but just like every other thing, it has its own disadvantages. Some of which could cause you to lose your device completely.

    In this article, I have explained some of the main disadvantages to you. Make sure to read them carefully before you choose to continue using the apps or not.

    Either way, if you have any questions about this particular article, feel free to write it down in the comments section below and I will be glad to help.

  • 3 Things Not To Do If You Want To Get Big Loans On MTN Mobile Money

    3 Things Not To Do If You Want To Get Big Loans On MTN Mobile Money

    Do you want to get big loans on MTN Mobile Money? Have you never qualified for a big loan on MTN before? Are you wondering what you are doing wrong for MTN to give just some small loan?

    If you have any of these questions, then you are in the right place and at the right time. Because after reading this article, you should be getting big loans on your MTN Mobile Money account in just a few weeks.

    MTN Mobile Money is one of the most (if not the most) used mobile money platform in Ghana. Also, they were the first-ever mobile money platform in Ghana to introduce loans in Ghana.

    Getting a loan on MTN Mobile Money is not that difficult but qualifying for a big loan is one of the things that most mobile money users don’t know what to and what not to do.

    3 Things Not To Do If You Want To Get Big Loans On MTN Mobile Money

    If you are not getting a big loan on MTN then it must you are doing some things wrongs. Below are three (3) of such things you must not do if you want to get big loans on MTN Mobile Money.

    Paying Your Loan After The Deadline

    One of the mistakes most people make is that they don’t pay their loans on time. This usually happens when you don’t have enough money in your wallet on the deadline.

    Whether it is intentional or not, MTN checks whether you are committed to your promise by paying your loan on time. Therefore, if you are not able to pay your loan on time, it is assumed that you won’t be able to pay big loans in the future.

    As a result, you will always be given small loans that they think you will be able to pay on time. So, if you want to qualify for big loans on MTN Mobile Money, you always have to pay your loan at least a day before the deadline.

    Not Making Transactions on Your Account

    Secondly, as soon as you take a loan from MTN, you need to make transactions throughout the period of your loan. For example, if you take a loan on 1st January 2021, you must continue to make transactions in your account from the 1st, you took the loan through to the 30th you will pay your loan.

    If you don’t have any transaction to perform, just buy airtime on your account to show that you are still active on the mobile money platform. Once you do this, MTN will recognize your seriousness and will always give you big loans.

    Having Multiple MTN SIM Cards Registered To Your Name

    Another thing you should never do if you want to get big loans on MTN Mobile Money is buying multiple MTN SIM cards all registered to your name. You can have more than one MTN SIM but it shouldn’t be more than three (3).

    Also, you need to make sure that you are not owing on any of the two (2) other SIMs you have. If you are owing, then you will never be able to qualify for a big loan.

    This is because MTN Ghana assumes that you only take the loan and afterward you throw the SIM away. Therefore, if you have more than one SIM card, check whether you are owing MTN or not.

    If you are, then you need to pay the loan in full before you can qualify for a big loan on the other SIMs.

    Conclusion

    In this article, I have recommended some of the things you don’t have to do it if you want to get big loans on MTN Mobile Money.

    Although this tip given in this article is not 100%, once you practice them, you stand a high chance of qualifying for big loans on your MTN Mobile Money account.

    As time goes on, we will be updating you on some of the best tips to secure big loans on MTN MoMo. Also, you can share your suggestions with us in the comments section below.

  • Some Hidden Tips Inside The Safari Browser

    Some Hidden Tips Inside The Safari Browser

    The Safari browser is one of the most popular web browsers in the world. This browser was developed by Apple Inc. mainly for their Apple devices; iPhones, iPads, and Mac.

    This browser contains a wide range of features, tools, and settings that help users to surf the internet like no other browser. Personally, Safari is not the best browser in the world but some Apple users might debate that.

    By default, the Safari browser is the default browser on all Apple devices; from iPhones to iPads, and Mac. But most Apple users just use it for the mere fact that, it is the default browser that has been provided to them by Apple.

    As a result, I have written this article to give you some of the important and hidden tips inside the Safari browser. After reading this article, you will enjoy using your Safari browser in a different way than what you used to.

    Some Hidden Tips Inside The Safari Browser

    Some of the tips that will I will discuss in this article applies to only devices that have the latest versions of iOS, iPadOS, and macOS, i.e. iOS 14 , iPadOS 14, and macOS 11 Big Sur.

    Translate A Foreign Language Website into Your Preferred Language

    With the latest OS versions, Safari users can now translate foreign language websites into their language of proficiency. The supported languages are English, Spanish, German, Brazilian Portuguese, French, Chinese, and Russian.

    All you need to do is to visit a website that appears in any of the languages above and then you will see a translate icon appear briefly near the Address bar. Also, you can tap on the aA icon and select Translate to [your preferred language].

    If you want to send it back to the original language, all you need to do is to click on the Translate icon or the aA icon on Mac and iPhones respectively.

    View Compromised or Reused Passwords

    Also, you can see any password that has been saved in iCloud Keychain and has been leaked in a data breach or is being reused for multiple logins. Also, passwords that are regarded as weak can be viewed.

    This works for only iPhone and iPad users. To view these, go to Settings >> Passwords >> Security Recommendations. If you want to delete or change the password, you tap on a specific entry.

    Watch Picture-in-Picture Videos

    You can also watch videos using the Picture-in-Picture whenever you are using the Safari browser. A detailed article can be found here.

    Auto Close Tabs

    This works for all the users with devices that have iPadOS/iOS 13 and above. With this feature, you can set a time for the tabs in the Safari browser to automatically close after some period of not using it.

    Visit Settings >> Safari >> Close Tabs and then choose your preferred frequency. You can choose between manually close, automatically close after one week, one month, or one day.

    Save Open Tabs As Bookmarks

    This feature also works for devices that have iPadOS/iOS 13 and above. Unlike previously where you had to save all tabs as bookmarks one by one, you can save all the opened tabs as a bookmark.

    Simply tab the Bookmark icon at the upper or bottom of your screen (depending on the device you are using). Go to the menu tab and then tap Add Bookmarks for [X] tabs and the tabbed pages will all be saved as a bookmark.

    Read Offline

    You can also read a web page offline. All you have to do is to tap the Share icon at the bottom of the screen and then tap Add to Reading List.

    After the page, it will automatically delete by default. But you can tap the Show All icon at the bottom of the menu >> Show Unread and all the pages you’ve read already will be shown.

    View Two Webpages At The Same Time

    For iPad users with devices that have iPadOS 13.1 and above, you can view two pages at the same time.

    To do this, just open two pages and then drag one to the right and the other to the left until it opens in Slide Over view. Afterward, you can position them in such a way that the screens will be equally split.

  • How To Disable Siri Suggestions On iPhone, iPad, and Mac

    How To Disable Siri Suggestions On iPhone, iPad, and Mac

    Siri, a service by Apple Inc. is one of the best voice assistants in the world. For several years, people have been comparing Google Voice Assistant with Siri but Siri always seems to be on top.

    The main reason for which Siri was developed was to help make every Apple device user’s life easier. For example, with Siri, you can make calls or send text messages to any contact on your list without moving a single finger; all you need to do is to talk and Siri will do the rest for you.

    Just like your personal assistant, Siri studies how you use your Apple device and then make suggestions when the need arises. This is very interesting, right?

    But that is not always the case, Siri suggestions can become frustrating and annoying. This especially happens when you use different applications almost every day. This way, Siri finds it difficult to make the right suggestions for you in your time of need.

    Each day, Siri makes suggestions in places like Search and the Lock Screen based on what the AI thinks you need. Not always is this a good thing because the suggestions can sometimes be way out of the line.

    If you have been frustrated with Siri’s suggestions, then all you need to do is to disable it or customize which apps on the device can take advantage of Siri’s suggestions.

    Since Siri is a machine, it keeps on learning as the days go by. According to Apple, you can teach Siri how to spell unusual words to help them recognize it in the future.

    Therefore, in this article, I am going to show you how to disable Siri suggestions on iPhone, iPad, and Mac.

    How To Disable Siri Suggestions on iPhone

    1. Open the Settings app on your iPhone
    2. Scroll down and click on Siri & Search just below Wallpaper
    3. Under SIRI SUGGESTIONS, toggle off the Siri suggestion you want to disable. There are three (3) main Siri suggestions, i.e. Suggestions in Search, Suggestions in Look Up, and Suggestions on Lock Screen.

    How To Turn Off Siri Suggestions for Specific Apps

    If you would love to keep on Siri suggestions turned on but just tweak how some apps react with Siri, then follow the steps below:

    1. Open the Settings app on your iPhone
    2. Scroll down and click on Siri & Search just below Wallpaper
    3. Scroll through the apps and modify how Siri will interact with these particular apps

    How To Disable Siri Suggestions on iPad

    1. Open the Settings app on your iPad
    2. Scroll down and click on Siri & Search just below Wallpaper
    3. Under SIRI SUGGESTIONS, toggle off the Siri suggestion you want to disable. There are three (3) main Siri suggestions, i.e. Suggestions in Search, Suggestions in Look Up, and Suggestions on Lock Screen.

    How To Disable Siri Suggestions on Mac

    1. Choose System Preference from the Apple menu
    2. Select Siri from the list of options available
    3. Choose Siri Suggestions & Privacy or About Siri & Privacy
    4. From the apps installed on the device, select which apps Siri can learn from
    5. Once you are done, click on Done

    Conclusion

    Siri as a voice assistant was designed to protect your information; this means that your personal information will not be shared with any third-party.

    It monitors how you use your device and the apps on it, this is how it can provide your suggestions based on how you often use your app. All the suggestions made by Siri may be used to personalize some Apple services, but these are not stored on any Apple servers.

    If you use more than one (1) Apple deviceSiri’sri suggestions will be synced on iCloud to all the other devices. Therefore, if you disable the Siri suggestions on your iPhone the suggestions will be limited on your iPad, Mac, or vice versa.

    In this article, I have included everything you need to know about how to disable Siri suggestions on iPhone, iPad, or Mac. Take your time, read and practice and you will be able to do it.

    In case you face any difficulty or challenge, feel free to write it in the comments section below and I will attend to you as soon as possible.

  • How To Buy Any Product in the US And Get It shipped To You in Ghana

    How To Buy Any Product in the US And Get It shipped To You in Ghana

    Do want to know how to buy any product in the USA and get it delivered to you in Ghana in less than a week?

    Have you ever bought any product from Walmart or Amazon and the next thing you find out is that the product cannot be shipped to your location? Yeah, I know how that feels; it sucks.

    This is very painful especially when you can only get the intended product in the U.S.A. But I have done a research and I have found a recommended solution to this problem.

    With what I am coming to show you, you can buy any product online (whether it ships to Ghana or not) and you will get that product delivered to you in less than a week. Yes, you read it right less than a week.

    The question you will be asking is; do I need an American address? Yes, you need an American address. But I don’t have any American address and I also don’t have a relative in America.

    Hmmm, well you don’t need to have an American address or a relative in America. The service you are going to use will provide you with exactly that; and the name of the service is MyUS.

    What is MyUS?

    MyUS is a freight forwarder company based in the U.S.A. Freight forwarders are companies based in the US offering US addresses to customers that they can use and will also help with international shipping.

    When you create an account with MyUS, you will automatically be given an American address that you can use to buy any product online. After the product is delivered to that address, MyUS will then deliver it to you here in Ghana for a very small fee.

    Before you can do this, you first of all need to create a MyUS account.

    How To Create A MyUS Account

    How To Buy Any Product in U.S.A And Get It Delivered To You in Ghana
    Inside MyUS
    • On your web browser visit myus.com
    • On the upper part of the screen, click on SIGN UP.
    • Select your preferred package (Single Package, Premium, or Business). After that click on Sign Up below the package.
    • Fill in the required spaces with your first name, last name, email address, password, and password confirmation.
    • Click on Next.
    • Add your credit/debit card details (name on card, card number, security code, and expiration date)
    • NOTE: If you did not select the Premium or Business package, you are not going to be charged for anything. You just need to add the card.
    • Once you are done, review your order summary and click on Submit.
    • Wait for it to load and after that, you will be notified that your transaction has been successful.

    How To Buy Any Product in U.S.A And Get It Delivered To You in Ghana

    How To Buy Any Product in U.S.A And Get It Delivered To You in Ghana

    Now that you have your MyUS account, you should have been given your physical United States address by now. If you have it, follow the steps below:

    • Visit the online shop you want to purchase the product.
    • Scroll through the products and add the products you want to your cart.
    • Once you are done shopping, click on checkout to check your cart.
    • Add your payment details and your MyUS address as the shipping details.
    • Wait for the transaction to be successful and wait for the product to be delivered to the address.
    • Once the product is received at MyUS, it will take a maximum of five (5) to get your product shipped to Ghana.
    • The MyUS representative will then deliver the product to the address you used when signing up on MyUS.
    • That’s it, you now have your American product delivered to you right here in Ghana.

    Conclusion

    Now that you know how to buy products online in America and get it shipped to you right here in Ghana, feel free to buy all your products you need online and MyUS will do the delivery for you.

    This guide is self-explanatory but if you find any difficulties, make sure to write it down in the comments section below and I would attend to every single one of them.

  • How To Check If The Book You Are Buying Is Approved By NaCCA

    How To Check If The Book You Are Buying Is Approved By NaCCA

    Do you know whether the book you’re buying is approved by the NaCCA (National Council for Curriculum Assessment) or not? What can you do to make sure that the book you are buying on the market is approved?

    If you have been wondering about either of the questions above, this article is going to be very helpful. This is because, in this article, I am going to show you how to check if the book you are buying is approved by the NaCCA.

    Education they say, is the key to success; but what will formal education be without textbooks? Since the inception of formal education, textbooks have served as the main reference for both the teachers and the students.

    Due to the high demand for textbooks by students in Ghana, several fake publications also write their own books and sell them on the market. Most of these books are not approved by the NaCCA (National Council for Curriculum Assessment).

    As a result, if you buy any of these books you do so at your own risk. This is because the content of the book hasn’t been inspected to see whether they correspond with the curriculum or otherwise.

    As we can all recall, somewhere around 2019, the Ghana Education Service, the Ministry of Education, and the National Council for Curriculum Assessment decided to revise the curriculum at the time.

    This was what led to the introduction of new subjects for primary schools. Some of the newly introduced subjects include Our World Our People, History, Computing (formerly I.C.T), etc.

    After the introduction of these new subjects, the NaCCA allowed publishers to submit their books for review and approval. Among the several books that submitted their drafts, only a few got approval from the Ghana Education Service and the National Council for Curriculum Assessment.

    All these books have been placed on a database where you can check to see if the book you are buying is among the list of approved books. The process of checking the book is very quick, free of charge and can be done at any time and anywhere.

    How To Check If The Book You Are Buying Is Approved By NaCCA

    There two (2) main options available if you want to check whether the book you are buying is approved by the NaCCA. The first option is available for the general public and the second option is available for book publishers who want to check whether their books have been approved or not.

    How To Check If The Book You Are Buying Is Approved By NaCCA (General Public)

    1. Dial *920*65# on your phone
    2. Select option 1 (the general public)
    3. Enter the ISBN of the book (with or without separators)
    4. Wait for feedback via SMS (this usually takes a few seconds)
    5. This is available for free on all networks and all types of mobile phones.

    How To Check If The Book You Are Buying Is Approved By NaCCA (Publishers)

    1. Dial *920*65# on your phone
    2. Select option 1 (a publisher)
    3. Enter the ISBN of the book (with or without separators)
    4. Wait for feedback via SMS (this usually takes a few seconds)
    5. This is available for free on all networks and all types of mobile phones.

    Conclusion

    The NaCCA (National Council for Curriculum Assessment) and the Ghana Education Service developed this platform to ensure that the entire Ghanaian citizenry buy only approved textbooks. This way, all the fake books that have not been approved by the NaCCA will be kicked out of the market.

    For every Ghanaian to be able to use this platform, it is free of charge and is available on all networks. Therefore, I urge everyone to make good use of this platform to kick out all fake and unapproved books from the market.

    Make sure to share this article with all your friends and loved ones and make sure to follow us on all our social media platforms to get first-hand tech stories.

  • How To Tell If An Image Has Been Manipulated or Photoshopped

    How To Tell If An Image Has Been Manipulated or Photoshopped

    Have you ever seen a picture that seems surreal or does not make sense to you? If you have, then the question you probably asked yourself was, has this image been photoshopped?

    Well, telling whether an image has been manipulated or photoshopped is not as difficult as we all think. Naturally, we all have an instinct that tells us not to believe what our eyes are seeing at a particular period.

    It is this same instinct that tells us to challenge the authenticity of an image we see with our eyes. But as we all know, telling whether an image has been manipulated or photoshopped is not that easy.

    In this digital age we are living in now, manipulated and photoshopped images are circulated throughout the internet every day. The majority of these images are circulated on various social media platforms.

    Because of the COVID-19 pandemic, the number of social media users has increased and this has led to an increase in the spread of the photoshopped images. Some of these images are used to lure people especially to scam them.

    Because of the difficulty in determining whether an image has been manipulated or photoshopped, I decided to write this article. In this article, I am going to show you how to tell if an image has been manipulated or photoshopped.

    Check For Signs of Warping

    In photography, warping is the process of manipulating an image digitally in such a way that any shape portrayed in the image has been significantly distorted. At times, all you need to do is to look beyond the subject of the photo.

    To check for signs of warping, look for straight lines in the background and see if they conform to the laws of science. The same thing is used to exaggerate weight loss or some of the effects of clothes that help you to slim down.

    Look For The Shadow

    Although this is not always the best way to detect whether an image has been manipulated or not, it is sometimes helpful. This is because not all the objects in the world will cast a shadow where a photo is taken.

    But mostly, objects will cast a shadow when a photo is taken. For example, if you take a photo at night in a room, your body has to cast a shadow on the wall in the room.

    When an image is manipulated or photoshopped, it is very difficult to make this happen. Even if you see a shadow in a picture taken in the sun, be very careful to check the angle of the sun too if it is natural.

    In some images where there is a textured object, the shadow should look similar to that textured object. For example, if there is a rock behind a human being, the shadow should look similar to the texture of the rock and not like the normal shadow.

    Use Image Edited

    Apart from using your eyes and your photography skills to tell whether an image is manipulated or not, some tools are also available for you to use. These tools have been created purposely for checking the authenticity of an image.

    One of the most popular tools available is Image Edited. Image Edited uses some of the technical photographic methods to check the image. It looks at the EXIF data to check for inconsistencies in some specific areas.

    When you test for images on Image Edited, they match the details to see if it matches that of a camera or that of a photo editing software. You can check Google Image Edited and then follow the on-screen instructions to continue.

    Apart from these ways of telling if an image has been manipulated or not, below are some of the other ways you can equally do that.

    • Perform reverse image search on the image
    • Check if the image has been airbrushed
    • Look for patterns and repeated images
    • Look for blurry areas.

    Conclusion

    in this guide, I have shown you some of the best and trusted ways of telling if an image has been manipulated or photoshopped or not. Although we have compiled a lot of them in this article, we do not know it all.

    So, if you know of any other ways we can do this, feel free to write it in the comments section below and I will make sure to add it to the list.

  • How To Find A Song Without Knowing The Name Or Lyrics

    How To Find A Song Without Knowing The Name Or Lyrics

    Are you looking to find a song without knowing the name or lyrics of the song? Read on to find out how to do that.

    Music is one of the best ways to enjoy your quiet time alone. But the annoying thing is that there are many songs in the world and keeping the lyrics of every song in your head can be very difficult.

    What’s even worse is when you don’t even know the title of the song, the artist, or even the producer of the song you are looking for. But how will you stop singing “thrash” instead of the original lyrics if you can find the song?

    Well, several apps and tools can help you find a solution to this nightmare. With these tools and apps, you’ll be able to find a song without knowing any detail about the song.

    In this article, I am going to show you how to find a song without knowing the title or the lyrics.

    How to Find A Song Without Knowing the Name or Lyrics

    Finding a song without knowing the name or lyrics is very easier than you thought. There are several methods you can use to do that, but, in this article, I only used only some of the top methods.

    How to Find A Song Without Knowing the Name or Lyrics Using Shazam

    In my opinion, Shazam is the most popular song identification app in the world. Over the years, Shazam has been used by over a million people all over the world to identify songs they have no idea about.

    Initially, Shazam started only as a music-identification app but over the years, it has now turned into a platform for both musicians and their listeners. The Shazam app is available for free download from the Google Play Store and the Apple App Store.

    To use the Shazam app to find a song, all you have to do is to get a pre-recorded version of the song on another mobile phone or computer. Afterward, follow the steps below;

    1. Download the Shazam app from the Google Play Store or the Apple App Store
    2. Open the app and turn the microphone of your phone towards the other device with the pre-recorded song
    3. Play the pre-recorded version of the song
    4. Wait for Shazam to work its algorithm and in a few minutes, the title of the song will be displayed on the screen

    This method will work for only pre-recorded songs or the original song. It doesn’t work when you sing or hum the song into the microphone. Also, Shazam can identify almost every song in the world.

    How to Find A Song Without Knowing the Name or Lyrics Using Midomi (A Music Search Engine)

    Unlike the Shazam where you have to get the recorded song before you will be able to identify the song, Midomi doesn’t work that way.

    It is worth noting that, it is not always that you will be able to find the recorded song and in such situations, your best chance is to sing or hum. That is the reason why you have Midomi.

    Midomi is a music search engine that allows you to search for a song using sound input. Currently, Midomi can only be used on the web and is FREE of charge.

    To use Midomi, all you need to do is to visit the official Midomi website and follow the simple on-screen steps. You should sing the song or hum the tune for at least 10 seconds (this will increase the accuracy).

    Afterward, Midomi will compare the hum or the song with its large music database. After a few seconds, all the music that matches your song will be listed for you.

    The steps to follow are pretty simple and straightforward. No matter your computer literacy level, you will be able to do it.

    Apart from Shazam and Midomi, there are some other tools you can use to find a song without knowing the name or lyrics. You can try the following:

    • MusicID (a free music-finding app)
    • Musicpedia (an open music encyclopedia)
    • WhatZatSong.com (a community website for identifying music)

    Conclusion

    The five (5) tools/apps provided to you in this article are supposed to help you find any song without knowing the name or the lyrics. Interestingly, apart from Shazam, all the other tools/apps given to you can be used at no cost.

    If you try one tool and it doesn’t work for you, you can try the other tool. Besides, it is free of charge; all you need is an internet connection and you are good to go.

  • How To Register Your MTN SIM Card In Ghana

    How To Register Your MTN SIM Card In Ghana

    Whenever you purchase a new MTN SIM card from the trusted dealers in Ghana, your SIM will be registered for you. But on certain occasions, you might not be able to register your SIM at that particular moment.

    If such a thing happens, then you have to go home and register the new MTN SIM yourself. In view of that, I have written this article to show you how to register your MTN SIM card in Ghana.

    MTN Ghana is known to be one of (if not) the biggest and most used telecommunication platform in Ghana. MTN (formerly Areeba) has been in the telecommunication business in Ghana for more than two (2).

    After they rebranded from Areeba to MTN, most Ghanaians were of the view that this business was going to collapse soon. Over two (2) decades on, Ghanaians have now realized that MTN Ghana has gained market in Ghana and has indeed come to stay for good.

    Almost every village in Ghana has now been connected to the MTN Ghana network. Thus, it is no news that MTN is the biggest telecommunication platform in Ghana.

    In terms of mobile money, even uneducated Ghanaians from both the rural and urban areas are now active on MTN Mobile Money. In my village alone, somewhere in the Eastern Region of Ghana, there are more than ten (10) MTN Mobile Money (MoMo) operators.

    Now enough of the plenty talk, let’s now jump into the main reason for this article and is how to register your MTN SIM in Ghana.

    How to Register Your MTN SIM Card in Ghana

    In Ghana, before you can use a SIM card, you first need to get it registered with its respective network provider. For instance, you cannot register your MTN SIM card with Vodafone or vice versa. Otherwise, the SIM card is not going to function until you have done due diligence.

    1. Visit any MTN authorized vendor or office in the country
    2. Give your SIM card to the merchant
    3. Provide the merchant with your ID document
    4. In a few minutes, the merchant will register your SIM card for and get you registered on the MTN Ghana subscriber’s database
    5. Upon successful completion, the merchant will hand over your registered SIM and ID document to you
    6. Afterward, insert the SIM card into your mobile phone and enjoy all the MTN Ghana services

    Requirements For Registering Your MTN SIM Card in Ghana

    Before you can register your MTN SIM card in Ghana, there are some requirements you need to meet. If you fail to meet any of these requirements, your SIM cannot be registered for you.

    Below are some of the requirements when registering your MTN SIM card in Ghana:

    • National Photo Identification Card (Ghana Card, Voter’s ID, Driver’s License, or Ghana Passport)
    • A new MTN SIM card
    • Your address of residence (you can include the Ghana Post GPS code (GE-XXX-XXXX))

    How To Check Your MTN SIM Card Details in Ghana

    After registering your MTN SIM card at the vendor or the office, you can check to see if the details used matches the correct info.

    This is very important because if not taken note of, it could affect you whenever you visit any of the MTN offices to require some information about your account. For instance, if your mobile money account is locked, MTN cannot be able to unlock it for you,

    To do so, all you need to do is to dial *400# on any mobile device, be it Android, iPhone, or Yam.

    You will then see your FULLNAME (FIRST NAME, LAST NAME), ID TYPE, Last four digits of your ID, and your Day and the month of birth.

    Additionally, a message with the same information above will be sent to you via SMS.

    If the information provided is incorrect, you can update it online here or you can visit any MTN Ghana office nationwide with the ID you used to register the SIM card.

    Conclusion

    The entire process of registering an MTN SIM card in Ghana is very simple, and quick.

    Currently, there is no way you can register your MTN SIM card yourself. You can only do so by visiting any of the MTN vendors or offices nationwide.

    The cost of MTN SIM cards in Ghana is GHS 3.00 and if a vendor tries to sell it to you at a cost more than that, you can visit any other vendor.

    Also, the cost of registering your SIM in Ghana is free and as such, you shouldn’t pay any amount when registering your account.