Author: Gabriel Agbobli

  • How To Delete Read-Only Contacts on Your Infinix & Tecno Phones

    How To Delete Read-Only Contacts on Your Infinix & Tecno Phones

    Do you know how to delete read-only contacts on your phone? That’s just a rhetorical question because I know the answer you have to this question is NO; otherwise, you wouldn’t have been here.

    Deleting read-only contacts has been found out to be very difficult. In that regard, I have decided to show you how to delete read-only contacts on your phone.

    A read-only contact is an in-app contact that is added through an external Android app like Facebook, Viber, WhatsApp, or Facebook Messenger. These secondary apps store the contacts temporarily on the phone’s storage by connecting the contacts from the phone’s contact list.

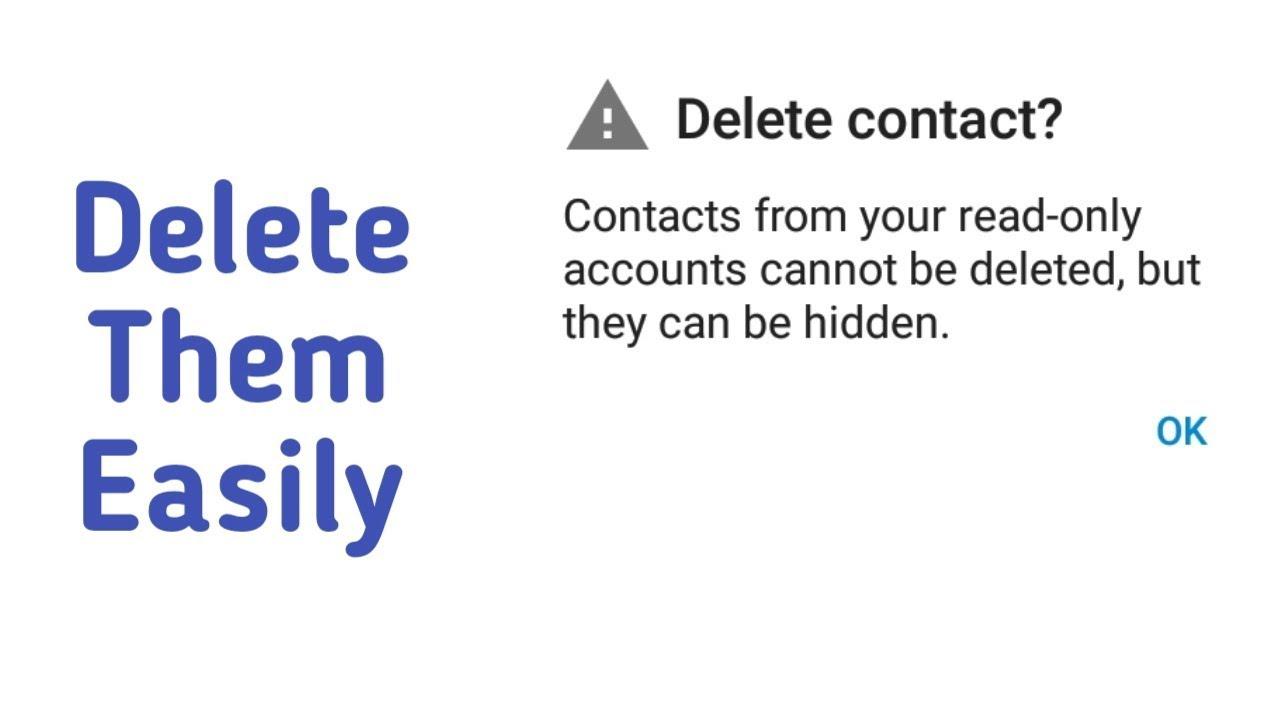
    One main problem with read-only contacts is that they can’t be deleted from your Android device. As soon as you try to delete the read-only contact, an error message will be displayed, i.e. Contacts from your read-only accounts cannot be deleted.

    Unfortunately, these contacts will always appear in your Address book but you can’t delete them. As a result, I am going to show you a way around how to delete a read-only contact on your phone.

    How To Delete Read-Only Contacts on Your Phone Online

    1. Go to contacts.google.com on your web browser
    2. Log in with your Google account email and password (this is because all contacts on your Android device is saved to Google by default)
    3. A complete list of all your last saved contacts will be displayed here
    4. Locate that particular read-only contact you wish to delete from your phone
    5. Mark it to select it and then click the More tab and then click on Delete
    6. After you have successfully deleted it, go to Settings >> Account >> Google
    7. Enable sync, and wait for the read-only contact to be deleted

    How To Delete Read-Only Contacts From WhatsApp

    1. Go to contacts.google.com on your web browser
    2. Log in with your Google account email and password (this is because all contacts on your Android device is saved to Google by default)
    3. A complete list of all your last saved contacts will be displayed here
    4. Locate that particular read-only contact you wish to delete from your phone
    5. Mark it to select it and then click the More tab and then click on Delete
    6. After you have successfully deleted it, go to Settings >> Account >> Google
    7. Enable sync, and wait for the read-only contact to be deleted
    8. If you have a WhatsApp tab opened, close it and open it again
    9. If it doesn’t work, restart your phone, and then the read-only contact will be deleted from your WhatsApp contact list.

    How To Delete Read-Only Contacts On Android 9 “Pie” and Android 8 “Oreo”

    1. Open the Contacts app on your device
    2. Choose the read-only contact you wish to delete from your phone
    3. Open the menu
    4. Tap on View Linked contacts
    5. Tap on Unlink and then confirm your decision by a tap on Unlink
    6. Tap on the contacts you wish to delete
    7. Open the menu and then tap Delete >> Delete

    Conclusion

    Deleting a read-only contact on your Android device is one of the trickiest things to do. If you don’t have the required skill, you will never be able to do it.

    Many people have tried it for a long time now and have never been able to do it. People even have to pay techies and other IT geeks to get these contacts deleted for them.

    Because of that, I have explained two (2) steps you can choose from if you want to delete a read-only contact on your phone. You have to read both of the methods and choose the one that works best for you.

    I hope this article was helpful, leave behind all comments concerning this article in the comments section below and I will attend to you within the shortest possible time.

    Finally, I would like you to share this article with all your friends and loved ones, and then subscribe to our newsletters to get all our latest articles right in your email inbox.

  • How To Download a Movie Using Torrent

    How To Download a Movie Using Torrent

    Are you a movie freak looking for places to download a movie on your laptop or PC? Read on to find out one of the ways to download a movie on your laptop or PC.

    Downloading a movie on your laptop or PC can be very difficult if you are not able to find the right website.

    If you don’t take care, you will end up downloading the movie together with a virus which will end up compromising your device either partly or completely.

    In order not to download a virus on your device as a movie, one of the best and safest ways to download a movie on your laptop is by using a torrent.

    What is a Torrent?

    Before we jump into the main reason for this article, let us briefly look at what at all a torrent is. You might have heard of the word torrent somewhere but did not understand what it meant.

    Whenever you hear of the word torrent in any tech article or world, it simply refers to a computer file containing metadata that holds various information. Usually, files that have the torrent format has the extension .torrent

    Although a torrent file is a file holding various information, it does not contain the final or actual contents to be distributed. For example, a torrent movie file will not have the video and the sound that you need to be able to watch the movie.

    As such, the information will be used by a BitTorrent client or software for the final distribution. The software will allow you to easily download the file to your laptop or PC.

    Some of the most popular BitTorrent software include uTorrent, qBittorrent, Vuze, Deluge, BitTorrent, Transmission (ideal for Mac and Linux), BiglyBT, etc.

    How To Download A Movie Using Torrent

    1. Download and Install torrent software on your PC or laptop
    2. Visit a torrent movie site
    3. Search for the movie you want to download
    4. Download the torrent file. Usually, it will be Download or Get this torrent or something similar
    5. Drag and drop the torrent file into the BitTorrent software
    6. Click on Add or OK, or something similar
    7. Wait for the torrent file (s) to begin the download
    8. After the download, let the torrent seed completely
    9. Open the file on your media player and enjoy your movie

    How Does A Torrent Work?

    As stated earlier, a torrent file is an initiator to the downloading of the actual movie. So, before you can get the actual movie, you need to, first of all, get the corresponding file (.torrent).

    Once you get the link, you will need a BitTorrent software to open the file. Once the BitTorrent client scans the file, it will then locate the seeders sharing the corresponding file.

    It does so by connecting to a list of defined trackers and attempt a direct connection. Upon successful connection, the final/actual content will then begin to transfer.

    The downloads are done in fragments or pieces of the actual content. After the download, the pieces will be reassembled to form one actual file.

    Top Movie Torrent Sites

    There are many torrent sites available on the internet for you. But below is a list of some of the best movie torrent sites

    • The Pirate Bay
    • Kickass
    • Rarbg
    • YIFY
    • EzTV
    • Zoogle
    • Lime Torrents
    • Torlock

    Conclusion

    Downloading a movie using torrent as stated in the introduction is one of the safest and best ways to download movies on your laptop or PC. Some of the torrent sites are not secured and some of them also has copyrighted files.

    Therefore, I urge you to make sure that the torrent site you are visiting is very secured. You can do so, by reading reviews from people who have used the site before.

    Also, you need to be aware that most of these torrent sites show pornographic ads so you might want to view them in a safe environment, away from children. Or you can turn on ads blocking on your browser.

  • Windows 10 Sound Equalizers You Can Use Today

    Windows 10 Sound Equalizers You Can Use Today

    One of the best ways to relax and have your alone time is by listening to some cool music. To make the most out of your music listening experience, you need to enhance the audio to suit your preference.

    Some people like their music to have more bass than the treble and vice versa. To be able to do this, you need to have a sound equalizer installed on your PC or any device at all.

    There are over a thousand Windows 10 sound equalizers available on the internet. But not all these sound equalizers can perform their functions.

    Some of these equalizers will up ruining your music listening experience worsen than what you had before installing them.

    As a result, I have written this article to show you some of the best Windows 10 sound equalizers you can use today.

    Windows 10 Sound Equalizers You Can Use Today

    Windows 10 has several sound equalizers that are available to be downloaded. But as I stated earlier, some of these equalizers will end up messing up your music.

    Hence the need for us to look for some of the best Windows 10 sound equalizers for you. So after doing my research, in no particular order, here are the top Windows 10 sound equalizers you can use today.

    Equalizer APO

    The first Windows 10 sound equalizer on the list is Equalizer APO. It is one of the best, customizable, and completely free-featured sound equalizers in the world.

    Unlike other sound equalizers, Equalizer APO operates ONLY as an Audio Processing Object (APO). And because of that, if you use audios with APIs like WASAPI or ASIO, it is not going to work.

    Featured in the Equalizer APO software are unlimited filters, 3D sound support, multi-channel use, and interestingly, very low CPU usage. You can tweak the settings to improve your audio quality.

    FXSound

    The FXSound software is a 2-in-1 equalizer software. The software has two (2) main tools, i.e. the equalizer, and the real-time audio processing.

    The equalizer has 10 bands that can go from 110Hz to 15KHz. Some of the other features of the equalizer include ambiance, surround sound, dynamic boost, customizable sliders for fidelity, and bass boost.

    All these features have specific roles they take. For example, the main role of the dynamic boost is to increase the loudness by increasing the dynamic range. Also, the ambiance is to add extra stereo depth to the sound, and so on.

    On the other side, the real-time processing feature is used when you are streaming or listening to an audio file on the web. Unlike the others, FXSound comes with a 7-day free trial, after which you be asked to pay a one-time fee of $49.99.

    Due to the cost involved, this sound equalizer is ideal for persons who often use equalizers in their line of work. For example, DJs, presenters, music producers, musicians, vloggers, etc.

    DFX Audio Enhancer

    Not everyone is a pro when it comes to tweaking sound settings on your computers. Therefore, for those of us who have little idea of equalizing, the best software to use is the DFX Audio Enhancer.

    The DFX Audio Enhancer has 10 band equalizers with a ton of featured presets. Also, DFX Audio Enhancer has the dynamic boosts whose main role is to increase the loudness of the sound by increasing the dynamic range

    Voicemeeter Banana

    Voicemeeter Banana is the best equalizer for persons who work a lot with microphones, hence the name voicemeeter. If you are a YouTuber or podcaster, then the best sound equalizer on the internet for you is voicemeeter.

    Voicemeeter Banana has an advanced audio mixer that gives you the authority to control all your computer’s audio for all kinds of recording or streaming. If you record with your PC, you can use the voicemeeter banana software to tweak the audio settings.

    You can equalize both the input and the output sound levels of your audio. Whether you are recording or speaking with people over the internet, you can make the necessary equalizing.

    With Voicemeeter Banana, you can choose to donate an amount to them to promote the app or you can go ahead and download the app for free.

  • Vodafone Cash Pay Small Small: How To Buy A Mobile Device And Pay in Installments

    Vodafone Cash Pay Small Small: How To Buy A Mobile Device And Pay in Installments

    In Ghana, buying a new mobile device from the top shops is very expensive. As a result, most Ghanaians chose to buy the home used edition from the street hawkers.

    One of the main reasons why this happens in Ghana is the lack of a credit system for people to buy products and pay later. Sadly, even acquiring a loan in Ghana for non-public sector workers is very difficult and even if possible demands a lot of going back and forth to the bank.

    As a way of reducing the burden on their customers, Vodafone Cash has a system called Vodafone Cash Pay Small Small. This way launched to help their users to acquire their dream mobile device by paying in monthly installments.

    What is Vodafone Cash Pay Small Small?

    Vodafone Cash Pay Small Small is a convenient payment from Vodafone Cash that allows subscribed customers to acquire products and services from registered partners by paying in agreed installments (monthly).

    In simple terms, once you register for Vodafone Cash Pay Small Small, you will be able to acquire products (mobile phone, tablet, laptop) from their registered shops and pay in monthly installments.

    How Does Vodafone Cash Pay Small Small Work?

    First of all, you will visit the Vodafone Cash website to see the product ID and prices for each shop. Afterward, you will make the first payment on the day you decide to register for the Vodafone Cash Pay Small Small service.

    Once the payment is successful, you will be given a unique reference code that you will use to check how much you have paid so far and also use it when making payments. After that, you will be required to pay the agreed monthly charge the next month.

    For example, if you made your first payment on 1st December, you will be required to make the next payment on the 1st of January. The subscriber will be responsible for making the agreed payments from their Vodafone Cash wallet for their monthly payments to the partner.

    On the last day, you make your payment based on the agreed monthly installment, a pick-up code will be sent to you by Vodafone Cash. You will then present the code together with a National ID for your product.

    You will only be given the device after you have made the full payment. In case you chose to cancel the purchase, 10% of the amount you have made so far will be deducted and the remaining 90% will be made available to your Vodafone Cash wallet in five (5) working days.

    Finally, the tenor of each item is determined by the partner shop on the signup platform. Therefore, once the tenor is chosen it can never be changed.

    How To Register For Vodafone Cash Pay Small Small

    1. Dial *110#
    2. Select option 4 (Make Payments)
    3. Choose option 6 (Pay Small Small (PaySS))
    4. Select option 1 (Subscribe)
    5. Enter the PaySS code of the item from the vendor’s shop
    6. Choose the period you wish to use to pay the full amount (3 months, 6 months, 9 months, or 12 months)
    7. A brief of the product will be given with the agreed monthly installment fee, press 1 to confirm
    8. Press 1 to pay your first monthly charge
    9. Enter your Vodafone Cash PIN to confirm the payment
    10. Upon successful completion, the product brief and reference code will be sent to you via SMS

    How To Pay Off Your Installment Before The Agreed Last Day

    1. Dial *110#
    2. Select option 4 (Make Payments)
    3. Choose option 6 (Pay Small Small (PaySS))
    4. Select option 2 (Check Subscription and Payoff)
    5. Enter the payment reference code
    6. A piece of detailed information will be given and then you will be given the option to pay off the remaining amount.

    Who Are The Partner Shops?

    • Electroland
    • iPlace
    • Novotech
    • Sunseekers Tour
    • Appliance Republic

    Conclusion

    With the introduction of this amazing feature by Vodafone Cash, subscribed users can be able to get their dream device in just a few months. Although you can only receive the device after the agreed period, it is worth trying.

    The only thing you need to do is to be committed and pay the money in the exact agreed period and then you will get your brand new device in no time. Make sure to share this with all the Vodafone numbers on your contact list now.

  • How To Insert A Word Document Into Another Word Document

    How To Insert A Word Document Into Another Word Document

    Do you want to insert a word document into another word document? Do you need the content of a word file in another word document?

    Is this even possible? The answer is a big YES, it is possible and it has been done severally. And in this article, I am going to show you how to insert a word document into another word document.

    For several years now, Microsoft Word has been the most used word processing software in the world. Even though there are several other alternatives to MS Word, people continue to use it.

    One of the main reasons why people love using it has an easy User Interface (UI) and can be used by everyone; techies and non-techies alike.

    Aside from the fact that it is used by most people, most people are also not aware of some of the basic tips of MS Word. One of such easy to do tips is how to insert a word document into another document.

    By default, you can easily insert the content of a previously created word document into a new or different Word document. All you have to do is to go click on someone or two (2) tabs and you are good to go.

    Because this is very simple and quick, this is article is going to be short and straight to the point. I am going to hit the nail on the head with the hammer without beating around the bush.

    How To Insert A Word Document Into Another Word Document

    1. Open the Word document you wish to insert the other Word document into.
    2. Click on where you wish to insert the content of the first document.
    3. Click on the Insert tab and then select the arrow next to Object.
    4. Choose Text from File.
    5. Next, locate the file you wish to insert and then double click on it.

    Conclusion

    That’s all that is required to insert a word document into another word document. You can do this at any time and at anywhere you are.

    NOTE: If you want to also insert the header and the footer, make sure you insert the text from the file in a new section so that the header and the footer are applied to only those pages.

    I hope this article was helpful? Feel free to write down all your comments in the comment section below and I will attend to them as soon as possible.

  • The Best Places You Can Buy MTN Turbonet From Right Now

    The Best Places You Can Buy MTN Turbonet From Right Now

    Do you want to buy an MTN Turbonet in Ghana? Are you looking for a place to buy an MTN Turbonet in Ghana?

    If you want to buy an MTN Turbonet in Ghana, then this article is going to be very helpful. This is because, in this article, I am going to show you some of the best places you can buy MTN Turbonet from.

    MTN Ghana’s Turbonet was introduced a few years ago to solve some of the internet challenges facing many Ghanaians. Especially, those in the corporate sector, and small startup businesses.

    After its release, the demand for the Turbonet was very high but after some months, the demand began to decline.

    In this COVID-19 era where most businesses are now working remotely and teaching is now being done online, the demand for the MTN Turbonet has begun to increase again. As such, I decided to write this article to guide you on some places where you can buy the MTN Turbonet.

    Best Places You Can Buy MTN Turbonet From

    There are many places you can buy the MTN Turbonet from in Ghana. Though the places to get the device are many, the authentic places to get the device are few.

    Some of the shops and retailer sells fake Turbonets instead of the original. Below are some of the best places you can get the MTN Turbonet from.

    All MTN Service Centers Nationwide

    The first place to get the MTN Turbonet on our list today is all MTN Service Centers nationwide. MTN is known to be one of (if not) the biggest telecommunication company in Ghana.

    As such, there are users of MTN in almost every part of the country. As such, MTN Ghana Limited has service centers and offices in all the 16 regions in Ghana.

    In Accra alone, there are more than 100 MTN service centers and offices spread throughout the city. So, you can locate any of the several MTN service centers in the country to buy your MTN Turbonet.

    Hubtel Ghana

    Hubtel Ghana is one of the biggest E-Commerce company in Ghana is located at 63 Hotel Road, Kokomlemle, Accra. Hubtel has an online e-commerce website where they sell all electronic devices at very cheap and affordable price.

    MTN Turbonet, being one of the most demanded electronic devices in Ghana is also sold by Hubtel Ghana. At Hubtel, they connect you with the shops that sell these products to help you easily purchase your product without any fear.

    All you have to do is to visit their official website and make a purchase for your MTN Turbonet. In case you face any challenges while making your purchase, you can call them toll-free on 0800 222 081 or via WhatsApp on 024 243 8050.

    Jiji Ghana

    Jiji Ghana (formerly Olx Ghana) is one of the best places to buy an MTN Turbonet from. Jiji is a platform that allows people who are selling products to advertise their products either for free or a charge.

    On this platform, you can view several people who are selling the MTN Turbonet and the prices they are selling it for. You can scroll through them and choose the one you want.

    Afterward, you have to schedule a meet with the seller, test the product, and then make your purchase. This platform is very good but can be sometimes used by fraudsters to extort money from people.

    Therefore, you need to schedule a meet with the seller and carefully scrutinize the product before you make payment.

    Conclusion

    Quality access to the internet in Ghana was very difficult in Ghana a few years ago but now, due to devices like the MTN Turbonet, access to the internet is very easy.

    If you are someone who works from home or does virtual learning, then I would recommend that you get yourself an MTN Turbonet.

    This way, you can get a dedicated internet connection for your work or studies without worrying about your phone disruptions, especially when using a personal hotspot on your phone.

    Do you know of any other place you can buy the MTN Turbonet from? If so, then I would like you to write it in the comments section below and I will check it out and add it to this list.

  • How To Track Your Sleep On Apple Watch

    How To Track Your Sleep On Apple Watch

    Are you wondering how your sleep cycle is going? Do you have a hard time sleeping and was wondering about your sleep cycle? If so, then you can do so with your Apple Watch’s built-in sleep tracker.

    In this article, I will be showing you how to track your sleep on your Apple Watch without installing any third-party apps.

    Previously, tracking your sleep and sleep cycle wouldn’t have been possible unless you use a third-party app. But with the release of the Apple watchOS 7, Apple introduced a new built-in sleep tracker.

    Although the Apple Watch’s sleep tracker can get the job done, it doesn’t have all the needed features to track your sleep.

    So, if you really want to know the details of your sleep then you can go ahead and download a third-party app. But basically, the Apple Watch can perform this task very well.

    All you have to do is to wear your watch when you are going to sleep and it will go ahead and monitor your sleep, the duration of your sleep and how deep you sleep during this period.

    The apps will automatically transfer the chart to your iPhone that you have connected to your Apple Watch. This way, you can view your sleeping cycle and pattern the next morning and then make your own analysis of it.

    How To Track Your Sleep On Apple Watch

    Before you can track your sleep on Apple Watch, you need to make sure that your Watch has watchOS 7. Also, your connected iPhone must be an iPhone 6s or later and running iOS14. You can update your iOS if it doesn’t meet the requirements.

    Also, you need to power your battery before you go to bed. (You don’t want your watch to go off in the middle of the night). Afterward, you can follow the steps below to track your sleep on your Apple Watch.

    1. On your iPhone, open the Watch app.
    2. Scroll through and then tap on Sleep.
    3. Toggle the switch next to Track Sleep with Apple Watch to start monitoring your sleep.

    How To Set Up Sleep On Your iPhone

    After turning on the Track Sleep with Apple Watch, you need to set up the sleep and sleep goals on your iPhone. Follow the steps below to do that:

    1. Open the Health app on your iPhone.
    2. Under Set Up Sleep, tap on Get Started >> Next.
    3. Follow the prompts to establish your sleep goals, bedtime and wake-up times, sleep mode, track sleep with Apple Watch.

    Conclusion

    Because the Apple Watch has a tracker, you need to make sure that your Apple Watch is worn comfortably. If you choose to wear it loose, it will track more movements than normal in your sleep.

    Also, make sure that you have turned on charging reminders so that you will not forget to charge your watch before bedtime.

    The sleep chart is a complete one and it tracks the times you wake up during your sleep. You can even set up a reminder for your Watch to wake you up whenever it’s time to wake up.

  • How To Turn Off Read Receipts On Microsoft Teams

    How To Turn Off Read Receipts On Microsoft Teams

    Do you want to turn off read receipts on Microsoft Teams? Do you want to read messages on Microsoft Teams without being seen?

    Most people like it when they are seen to have read a chat and others don’t like it. If you are like the former then this article is not meant for you, but if you are like the latter then this is the right article for you.

    This reason is that; I am going to show you how you can easily turn off read receipts on Microsoft Teams.

    Microsoft Teams has become one of the most used productivity apps in just a year. This is mainly as a result of the coronavirus pandemic and the effects it has brought on businesses and companies.

    Businesses, who used to have their meetings and discussions in-person have now adapted to the virtual way of doing it. Although several apps are available, Microsoft Teams is one of the most used in the world.

    As a result, most people are now learning their way out of the Microsoft Teams app and this is one of the tips to add to your Microsoft Teams skills. With this setting, persons like myself who don’t like to be seen can do exactly that.

    By default, Read Receipts is turned on in Microsoft Teams but it can always be turned off at any time by the user. Also, it can be turned on again by the administrator.

    How To Turn Off Read Receipts On Microsoft Teams

    1. Open the Microsoft Teams app on your device.
    2. Click on your profile picture on the upper right corner of the window.
    3. Click on Settings from the options provided.
    4. Choose Privacy from the Settings menu.
    5. Toggle of Read Receipts.
    6. Close all opened chats and then re-open them again for the changes to take effect. If you don’t have any open chats, the changes will take effect immediately.

    Conclusion

    If your administrator is very stubborn and he turns the Read Receipts on again, then you need to enable notifications so that you can also preview chats.

    You need to go to the Settings menu and then make sure that @mentions and Replies are all set to Banner. This way, anytime you are mentioned in a chat, you can preview and then reply to the chat without opening the actual message.

    In case you encounter any challenges while doing this, feel free to drop it in the comments section below and I will help you out as soon as possible.

  • How To Use AirtelTigo Money To Buy Apps On Google Play Store

    How To Use AirtelTigo Money To Buy Apps On Google Play Store

    The fintech industry in the world continues to grow as the days pass by. Through this time and the various advancements, Ghana has not been left out of this.

    From the 20th century where even receiving money from your relative outside was difficult fast forward to the 21st where you can receive money from your relative abroad in less than 1 minute. You can agree with me that the fintech industry has grown very well.

    One of the most used mobile money platforms in Ghana is the AirtelTigo Money (ATM). Previously known as Airtel Money and Tigo Cash.

    These mobile money operators have not only helped grow the local economy, but have also contributed to the digital economy.

    For some years now, Ghanaians can buy apps and make in-app purchases on Google Play Store using their AirtelTigo Money wallet. This was possible after Google Payments integrated with Google Payments to make the lives of Ghanaians easy.

    Unlike other foreign countries where credit and debit cards are easy to come by, Ghana has a very low number of such things. Instead, most people are on mobile money services and this addition has really helped Ghanaians.

    The only thing required of you is to have the AirtelTigo Money SIM in your Android phone or tablet and then use your original Google account.

    How To Use AirtelTigo Money To Buy Apps On Google Play Store

    1. Open the Google Play Store app on your Android device
    2. Tap on the menu icon to the left and select Accounts
    3. Tap Payment Methods
    4. Choose AirtelTigo Money Billing from the list of payments options provided
    5. Fill in your billing details
    6. When filling in the Billing details, fill it in with your Name, Street Address and City
    7. Click Save to complete the entire process

    After successful completion, you can now use your AirtelTigo Money account to buy apps on the Google Play Store.

    Once you enable this payment option, that is automatically going to be your default payment option in Google Play. But, whenever you are making a purchase, a prompt will be sent to your phone for approval.

    The only thing is that the money in your wallet is enough to pay for the app you are buying from the Google Play Store. As long as your Android device has a Google Play Store, app this will work perfectly.

    Conclusion

    Now, you can easily buy that game that you’ve always wanted on Google Play Store without looking for a debit/credit card. At the moment, only Android users with Google Play Store can use this feature.

    If you use an app and there is an in-app purchase, you can also use your AirtelTigo Money account to pay for that service also. All you need to do is to tap on it and then confirm the transaction.

    If you face any challenges, feel free to write it in the comments section below and you will be attended to.

  • How To Use a VPN on Your iPhone For Free

    How To Use a VPN on Your iPhone For Free

    Are you an iPhone user willing to use a VPN on your iPhone for free? Or have you downloaded a VPN app on your iPhone but don’t know how to configure the VPN?

    If your answer to either of the questions above is true, then this article is the best article for you. This is because, in the article, I am going to show you how to use a VPN on your iPhone for free.

    On the internet, one most important thing you need to be aware of and protect is your privacy and security. Cybercrime has become of the most recorded cases on the internet nowadays.

    But what has cybercrime got to do with VPN? That is the question you are asking yourself right?

    The answer to this question is that VPN has everything to do with the increase in cybercrime. This is mainly because cybercrime mostly has something to do with privacy and security.

    Unlike Android devices where you can easily download a third-party app from the internet, iPhone users have a very tight operating system (OS). As such, they are only permitted to download apps from the Apple App Store alone.

    What is a VPN in the First Place?

    A Virtual Private Network (VPN) is a service that creates a direct connection from your computer to another network. A VPN creates a secure connection by rerouting the connection from your location to another location.

    For those of us who often surf the internet, a Virtual Private Network (VPN) is good for helping you protect your identity, data, and other internet or cyber threats.

    VPN is also one of the best ways to block less useful ads from popping up whenever you are on the internet, especially when using public Wi-Fi.

    If you are undecided as to which VPN to use, we recommend PrivacySharks.

    How To Use a VPN On Your iPhone

    1. Download a VPN from the Apple App Store
    2. Open the app and sign up or log in with your details
    3. After you sign in, you will be prompted to permit the app to add a VPN configuration to your iPhone
    4. Tap Allow to get the VPN configured on your iPhone automatically
    5. A prompt will be sent for you to enter your passcode or Touch ID/Face ID (This will permit the VPN to make changes to your settings)
    6. Enter the passcode or use the Touch ID/Face ID
    7. Once you are done, you can select and connect it any time you want to use the VPN

    How To Turn On A VPN From The Settings Menu on Your iPhone

    1. Open the Settings app on your iPhone
    2. Tap General
    3. Tap VPN and then toggle the switch on. (if you have multiple VPNs, you will have to select the particular VPN client you want to use)
    4. After you finish using the VPN, you can follow the same procedure above. Instead, you will toggle the VPN switch off.

    How To Manually Setup A VPN on Your iPhone

    • Aside from the automatic way of setting up a VPN on your iPhone. You can set up the VPN manually.
    • Open the Settings app on your iPhone
    • Tap General >> VPN
    • Select Add VPN Configuration
    • Tap Type and choose your VPN type (IKEv2, IPSec, or L2TP)
    • Enter the VPN settings information under the various headings
    • Enter the authentication login (username/certificate, and password)
    • Choose when to make your proxy Manual or Auto
    • Tap Done
    • Toggle the status on under the VPN Configurations

    Useful Importance of VPN

    Your data is encrypted and all activities are hidden from your Internet Service Provider (ISP). But, that doesn’t mean that you are anonymous, because your internet activity is viewed by the VPN.

    You escape data throttling. Data throttling occurs when you’ve used a certain amount of your data and as a result, your ISP slows down your internet service.

    You can be able to access region-blocked services like Netflix, and Amazon Prime, etc.

    Conclusion

    Using a Virtual Private Network (VPN) on any device is very useful and beneficial to your cybersecurity. As a result, I would recommend that you get a good VPN for your iPhone.

    But although VPNs are useful, if you don’t choose the right VPN, you may end up compromising your security; instead of protecting it.

    Therefore, I would ask you to perform good research on the VPN clients available and choose the ones that have been generally tried and tested.