Author: Godwin Gabla

  • How To Protect Your MTN Mobile Money Against Fraudsters

    How To Protect Your MTN Mobile Money Against Fraudsters

    Since the introduction of mobile money in Ghana, some ten years ago, payments and other financial transactions have become faster and easier.

    Today, we can make and receive all forms of payments from the comfort of our homes without any trouble.

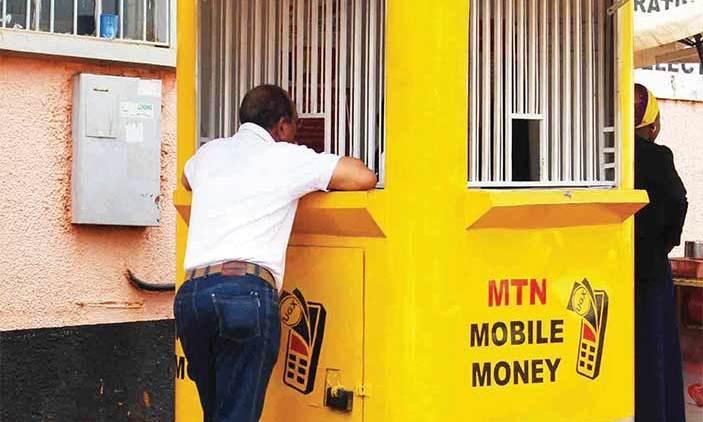
    Indeed, mobile money and most especially MTN Mobile money has been a lifesaver for the majority of us.

    However, the major challenge that comes with using mobile money in Ghana is the daily increase in mobile money frauds.

    The activities of fraudsters have not just made mobile money difficult to use but also it has put lots of people in miserable situations and has also caused the loss of some lives.

    In this article, we focus on some of the precautionary measures you should take in protecting your MTN Mobile money from these scavenging fraudsters.

    Change Your PIN CODE As Regularly As Possible

    Whereas the mobile money platform itself is highly secured and requires some difficult levels of hacking to break through – thanks to MTN’s security systems, one of the main things an individual can do to protect his or her mobile money wallet is changing PIN CODE from time to time.

    Your Pincode is the key to your mobile money wallet. If someone has access to your PINCODE, they may be able to withdraw money from your account. It is, therefore, necessary that from time to time you change your PINCODE. Especially when you suspect that someone might have seen your PIN. It is also advisable for you to change your PIN CODE every 3 months.

    Do Not Approve Transactions You Are Not Aware Of

    One way people can play on your intelligence and steal money from your mobile money account is when they send a withdrawal request to your mobile device. Once you approve such transactions, the money is automatically deducted from your account and sent to the one who requested the payment.

    The only things someone needs for them to be able to send such requests are your number and a merchant Simcard. You can imagine how easy it is for them to get these so you do not need to take a chance at all.

    When you get notification for any transaction you did not initiate, kindly cancel it and report to your service provider.

    Avoid Filling Forms Online For Free Data And Airtime

    One way people get access to your phone number is true such fake links usually on WhatsApp requiring that you fill some forms so you get some amount of data or airtime in exchange.

    Most times, such links request that you input your phone number and other personal details.

    These pieces of information are stored on such websites and retrieved by the owners who may then use your number to defraud you.

    Always Check Your Balance To Confirm Any Mobile Money Transaction

    One thing that remains for sure is that apart from you or anyone else who uses your phone, nobody knows the amount of money you have in your mobile money wallet.

    With that said, it’ll be difficult for fraudsters to realise the exact amount of money you have in your account and frame a fake Mobile Money message to reflect that amount.

    Therefore, it is important for you to always check your balance whenever you receive any new message regarding cash received. If the amount stated in the message is different from the amount in your account, know that you’ve just been saved from a possible scam.

    Conclusion

    The points listed and discussed above are just some ways through which you can protect your wallet from fraudsters.

    There may be a hundred other ways to do so but based on our experiences with MTN Mobile money and fraudulent activities associated with it, these are our top ways of protecting an MTN Mobile money account. If you have any reservations, enquiries or comments regarding this post, kindly leave it in the comment box below.

  • Jumia Pay: How It Works, Payment Methods & Services that accept it

    Jumia Pay: How It Works, Payment Methods & Services that accept it

    Jumia has generally changed the business landscape in Ghana, Nigeria, Kenya and some other African Markets since its arrival some few years back.

    In fact, Jumia has brought a lot of improvements into sales and delivery in Ghana, Nigeria, Kenya, etc such that many other big and small companies are taking after their lead.

    Aside from Jumia online shopping app, Jumia Foods App, Jumia Travels and many others, Jumia also has a payment application which is gradually becoming a preferred method for online payments, especially on Jumia platforms.

    In this article, we shall focus on what Jumia Pay is about, how it operates and what you can use it for.

    What Is Jumia Pay?

    Jumia Pay is basically an online payment application designed and owned by Jumia to serve as an easy payment method for Africans both on and off Jumia platforms.

    The platform enables users to make payments to many online and offline channels in and outside their country of residence at no extra charge, most of the time.

    How Jumia Pay Works

    Jumia pay is a cross-platform payment app which means it works on several platforms such as the android platform, the IOS platform and also on the web application which is compatible with javascript-enabled browsers.

    So, for anyone to use this app, they must, first of all, have the app installed on their devices then they register for an account and then from there, they can make payments using the platform.

    How To Register For An Account On Jumia Pay

    Registration for a Jumia Pay account comes in two forms. The first way is for individuals who have an existing Jumia Account and the second one is for people who do not have an account with Jumia but are hoping to create an account on Jumia Pay.

    How To Register For Jumia Pay Account If You Already Have A Jumia Account

    If you already have a Jumia account, you probably heard of ‘Jumia One’. With Jumia one, you can use your login details for one Jumia platform to access all other Jumia platforms just like google.

    So, to access the Jumia Pay account with your Jumia account details, follow the steps below:

    1. Click on Sign in when you open your app.
    2. Type the email address associated with your Jumia account.
    3. Click on ‘next’
    4. Enter your Jumia password and select ‘signin’ or ‘next’

    Once you sign in, you’ll see all the details on your Jumia account appear on this app too.

    How To Register For A Jumia Pay Account If You Are Not An Existing Jumia Customer

    For those who do not already have an existing account with Jumia, the process is slightly different from those who already have an account with Jumia.

    Follow the steps below to create your Jumia Pay account:

    1. Click on Sign in when you open the app.
    2. Enter your email address.
    3. Click on ‘Create New Account’.
    4. Enter your preferred password and click ‘Create account’

    Once you do this correctly, you should have access to the Jumia Pay app and the options available in it.

    It takes less than 3 minutes to get this done from scratch.

    What Can Jumia Pay Be Used For?

    Jumia Pay is an all-in-one payment platform and so it covers a wide range of services and products that can be paid for.

    You can buy airtime and data from all telcos in Ghana and Nigeria using the Jumia pay app.

    That’s MTN, Vodafone, AirtelTigo, Glo and Busy Ghana. Airtime and data purchased via this platform do not attract any extra payments or charges. You only pay for the exact amount of data or airtime you are buying.

    You can also use the Jumia Pay app to make payment for utilities, DSTV and GoTV subscriptions.

    For Game lovers, Jumia Pay app gives you the chance to buy gift cards for your favourite video games such as PES, FIFA, Playstation, Xbox Live, Steam, Fortnight and many others.

    Netflix, Google Playstore and Apple AppStore gift cards can also be purchased using the Jumia Pay app.

    Jumia Pay app is also the required app for making payment on all Jumia platforms including the online shopping app, Jumia foods, Jumia Travels and the others.

    Conclusion

    There are many payment applications in Ghana, Nigeria and Kenya providing brilliant services and making payments easier and faster.

    Jumia Pay, however, builds on the trust and authority Jumia has established with the African market to set itself apart, though being a younger brand on the online payment market.

    I hope this article gives you an insight into how Jumia Pay works and what you can use the app for.

    If you have any comments, reservations or questions regarding this article, kindly get in touch with us or leave a comment below.

  • How Do MTN Video Data Packages Work?

    How Do MTN Video Data Packages Work?

    Data is one thing we all cry over. Especially in Ghana. Everyone cries about how expensive data packages are in Ghana and how they are quick to disappear when you finally purchase some.

    What’s worst is that you’ll end up buying a data package with a huge volume but not be able to use it for some purposes. This can be painful and also capital-intensive.

    In this article, we take a look at one of the MTN data packages which are widely misunderstood; The MTN Video Data Pack.

    Ever wondered what this data package is about? Wondered how it’s used and where it can be used? Well, worry and wonder no more. In this article, we take a quick look at what it means, what it’s used for and what it cannot be used for.

    So, stick around and enjoy this all-important piece.

    What’s The MTN Video Data Bundle About?

    Unlike the everyday data bundle which you buy on your phone for the purpose of browsing, texting, WhatsApping, checking Social Media and watching Youtube videos, the Video Data Bundle is more specific.

    The Video Data Bundle is specifically made for people who enjoy streaming videos on Youtube, Kwese Iflix and DST App.

    The bundle works only on the three platforms listed above and strictly on their mobile applications too.

    What You Can’t Use The Video Bundle For

    There is a tall list of things you cannot possibly use the MTN Video Data Bundle for. Some other MTN Data Packages can help with this but not the Video Bundle.

    Some of these things are listed below:

    1. You cannot watch Youtube videos with this bundle when using a web browser. It practically works on the Youtube Mobile application only. If for any reason, you’re still able to access the Youtube platform with a web browser when on this bundle, then be informed that you’re probably using a residual or bonus bundle somewhere else. And once that bundle finishes, you won’t have access to the Youtube platform anymore.
    2. Also, you cannot watch Netflix with this bundle. Yes, I know this sounds shocking. But even though Netflix is a video streaming platform, MTN Ghana didn’t consider them when coining the ‘Video Data Bundle’ term. It’s simply just about Youtube, Iflix and My DSTV App.
    3. You cannot download a movie or watch any other movie on any other video platform with this data bundle.
    4. Never can you browse social media with this data bundle. If you don’t have any normal data package or social media package, just forget it. The Video data bundle won’t cater for your social media charges.
    5. Finally, anything that has to do with using your web browser cannot be catered for by the video bundle. Even if you have 500GB worth of Video Data bundle, your browser won’t work until you have the normal data package.

    How To Buy The MTN Video Data Bundle

    If you are a fan of Youtube videos, then you have definitely been searching around for a bundle that makes life a little bit easier for you.

    The MTN Video Bundle is a perfect way to set the mood for your Youtube streaming sessions without having to worry about the cost of data.

    So the big question is; How Do You Buy The MTN Video Data Bundle?

    And the answer is very simple. Just follow the steps listed below:

    1. Dial *138# on your MTN line.
    2. Select Option 1 to buy data bundle
    3. Select option 1 to buy for yourself
    4. Select Option 6 to select video bundles
    5. Select the amount you want
    6. Dial Option 1 to confirm

    Note: The Video Data Bundle has no expiry so you can use it for as long as it can last you.

    Conclusion

    Without an Internet Bundle, you’ll remain locked out of the numerous possibilities which the internet presents. The pain is however different when you have a data package that you cannot use to do the very things you love doing online.

    In this article, we took a look at the MTN Video Data Bundle, how it works, what people mistake it for and how to buy it.

    If you found this article helpful and you’ll love to share the knowledge with your friends and relatives, kindly do well to share the article.

    Please leave your comments, questions and reservations in the comment box below. We shall respond to each of them. You can also get in touch with us.

  • How To Return An Item Purchased On Jumia Ghana

    How To Return An Item Purchased On Jumia Ghana

    After clicking the pay now button and completing your payment to secure your Jumia order, the next few days or weeks come with a long wait.

    However, your wait even gets more annoying when you finally receive your products only to realise they aren’t exactly what you thought they are.

    If you ordered for a shoe, it’s not out of place to realise they’re smaller or bigger than you thought.

    At this point, the last thing you want to do is smile. Obviously, you want to smack someone’s head. But, that shouldn’t be the case.

    For this and many other reasons, Jumia has a return policy.

    Here, in this article, we take you through the processes involved in returning a product you bought from Jumia Ghana.

    Steps to return an item on Jumia Ghana Online Shop

    Returning an item you bought from Jumia Ghana is easy. Open your item right after receiving it and if it is not what you ordered for, you can return it.

    Follow the following instructions to return an item you bought from Jumia online shop in Ghana:

    1. Inform Jumia Customer care about your intended item return
    2. Indicate you are returning the order on your Jumia account
    3. Fill the “order return form” that came with your item
    4. Pack Your Product For Return
    5. Return Your Product To Jumia via dropoff or pickup

    Now, let’s break down the process of returning a product you bought from Jumia.

    1. Inform Jumia Customer care about your intended item return

    Call Jumia customer care line on 0302740630 or send an email to [email protected] to place an order for your return.

    You will need to input your order number, the problems associated with the product you wish to return and when you received the order.

    2. Indicate you are returning the order on your Jumia account

    The next step is to inform Jumia about your intended return. You can do this by logging in to your Jumia account. Go to your orders and click the “Return Product” button on that page.

    That will send notice that you are returning the product.

    3. Fill the “order return form” that came with your item

    This paper leaflet comes with all Jumia purchases. Quickly fill the form indicating the reason and conditions for your return.

    Remember to fill all the details and proceed to pack your item with the form.

    4. Pack Your Product For Return

    To be able to return a product bought from Jumia, you need to pack the product in the exact box it was originally packaged and it must also be packed in the same way as the original.

    There must be no physical harm caused to the product itself. Everything must be intact. Include all tags, accessories or free gifts you received

    5. Return Your Product To Jumia via dropoff or pickup

    Usually, Jumia Ghana provides two options for returning products. The first one is a pickup from the Jumia team and the second is a drop-off at any Jumia pickup store agreed upon by yourself and the team.

    If you requested a pickup, Jumia will contact you to arrange a pickup time.

    For the drop-off option, Please drop your package at the chosen place, following the given instructions. There shall be no shipping charges.

    What are the conditions for returning an order to Jumia Ghana?

    Products can be returned only during the 7 days following the delivery, with the below conditions:

    Condition A:

    If the product is not as you expected or not as advertised. or if you don’t want the product anymore. Then the product must be returned unused, in its original packaging and with all seals & tags intact

    Condition B:

    If the product is damaged at arrival, defective at arrival or counterfeit; or

    If your fashion product is of the wrong size. Then the product must be returned in its original packaging. All accessories, tags and free gifts must also be returned.

    Conclusion

    You should only attempt to return a product to Jumia Ghana within 7 days of receiving your product. After 7 days, you may have a problem returning the product.

    Also, you may only have the option of re-ordering or choosing another product, if your original product is out of stock. Getting the actual money/cash from Jumia is very unlikely.

  • Transferwise: How To Receive Money From Outside To Ghana

    Transferwise: How To Receive Money From Outside To Ghana

    Getting money transferred to you from Outside Ghana to Ghana is one of the most difficult things for most people to do.

    Transferring money from Europe, America or any other part of the world straight to Ghana has not been easy. Most of the services available take a lot of time to reflect the money in the accounts of owners.

    Some also require lots of third parties and may end up reducing the volume of money that arrives in the receiver’s account at the end of the day.

    In this article, We’ll take a look at an app which ensures easy and reliable transfer of money from any foreign country to Ghana.

    What Is Transfer Wise?

    Transferwise is a global financial technology (fin tech) company which provides people the opportunity to send money outside their jurisdiction while maintaining the real exchange rate at the time of sending and also with a very minimal cost.

    How To Send Money Using Transferwise

    1. Register for a free account. To register for a free account, follow the steps below:

    a. Enter transfer wise website and click “register”

    b. Select “Personal” for a personal account or “Business” for a business account. For the sake of this tutorials, select “personal”.

    c. Enter your email address in the space provided for that.

    d. Create a password

    e. Select the country you reside in currently from the list of countries under the “Country of residence” tab.

    f. Click on “sign up”

    g. Your account should be opened in a few seconds.

    2. Click on send money on your user dashboard.

    3. Choose the currency and amount which you want to send under the “You send” box.

    4. Select from the list of three transfer fees, the one that best works for you depending on how fast you want the money to be sent and the kind of transfer you wish to make.

    5. Select the currency in which you want the recipient to receive the money. Eg. USD, EUR etc.

    6. You’ll see the date of receiving below the “recipient gets” box.

    7. Click on continue.

    8. Select the mode of transfer. In this case select “Personal”

    9. Enter your full legal first name and middle names in the first box.

    10. Enter your full legal last name in the next box.

    11. Select your date of birth and enter your phone number.

    12. Enter your address and click continue.

    13. Select the person you’re sending the money to. In this case, select “Someone else”

    14. Enter the email address of the receiver

    15. Enter the full account name of the receiver.

    16. If you know the owner’s account number, Tick the box beneath with “I know their bank details” and enter the IBAN account number of the person. If not, just leave the box empty. The company will send an email to the person requesting for their bank details in your name.

    17. Click on confirm.

    18. Upload a proof of your identity (Passport or license)

    19. Click “start” to verify.

    20. Review all your details and click continue.

    21. Select your payment method and confirm.

    22. Your money should be sent.

    With transferwise’ android and iOS applications available on both google playstore and Apple App Store respectively, you can easily manage your money transfers and keep record of all your transactions.

    Conclusion: Despite the huge number of money transfer apps around, transferwise is a perfect solution for all international money transfer situations since it provides the best rates and charges. While sending an amount of 1, 000 British pounds, one gets to pay either 3.95 or 6.5 GBP as the charge and a mid-market exchange rate too. Also, transferwise is trusted by over 6 million customers with over 13 physical offices across the world and over 5 billion euros sent every single month by users. With these, you should definitely use transferwise on your next money transfer. I hope this article was helpful to you. If you know of any other money transfer apps or if you have any comments to

    Share about this write-up, kindly let us know in the comment box below.

  • Jumia Food: How To Order Food Online and Have It Delivered

    Jumia Food: How To Order Food Online and Have It Delivered

    No matter where you are in the world, one thing that keeps us all going about our daily routine easily is food.

    Almost everyone in this world eats at least once a day. And that only consolidates how important food is to our very existence.

    Not everyone likes to cook at home all the time. Once a while, people tend to purchase food from restaurants and bars outside.

    The problem, however, is in moving to and fro town to get food especially for people who are very busy all the time.

    So, earlier we introduced you to 5 applications for food delivery in Ghana.

    Jumia Foods is one of those applications which we disccused in the article.

    Today, we shall look at how to order and receive food through the Jumia Foods app.

    How To Order And Receive Food Via Jumia Foods App

    To purchase food on Jumia food app, follow the main steps below:

    1. Register for a user account if you are a new user or login if you already have a jumia account.
    2. Select your location.
    3. Select the type of service you want
    4. Choose your preferred shop
    5. Add the foods to your cart
    6. Go to checkout
    7. Enter your phone number
    8. Review your order
    9. Select your delivery date and time
    10. Enter your delivery address information
    11. Choose your preferred payment method and complete your order.

    You would receive a confirmation message and mail from Jumia Ghana, indicating that you have placed an order on the app.

    How To Register For an Account On Jumia Food

    If you don’t have an account with Jumia already, it is important for you to get an account before you could place an order on the Jumia Food app.

    The following steps would help you create an account on the app:

    1. Click on Login/ register
    2. Click on create account
    3. Enter your first and last name
    4. Enter your phone number
    5. Enter your email address
    6. Type your preferred password
    7. Re-enter your password to confirm
    8. Click on ‘create an account’

    Your account would be created once you finish the last step.

    How To Make Payment On Jumia Foods App

    Once you’ve finished adding your food to the basket and you’ve finished reviewing your order, the final step available is making payment.

    Follow these easy steps to make a payment on your Jumia Food app with ease:

    1. Select your payment method from the list; Cash on Delivery, Mobile Money or Payment with cards.
    2. For Mobile money, select mobile money from the list.
    3. Click on Place Order now
    4. Wait for the site to redirect you to Jumia Pay
    5. Add your payment method by selecting your network and inputting your number.
    6. If you are a jumia pay user, you already have your details there so just select the account you want to pay with.
    7. Click on Pay Now.
    8. Approve the transaction on your mobile phone.

    How To Approve Jumia Pay Transaction On MTN Mobile Money

    1. Dial *170# on your phone.
    2. Select option 6 for ‘My account’.
    3. Selection option 3 for ‘My approvals’.
    4. Select 1 to select the Jumiapay transaction.
    5. Select 1 to approve the transaction.
    6. Enter your mobile money pin to confirm.

    Conclusion

    There are many apps available today, thanks to the internet and the numerous app developers, which makes purchasing and delivery of food easier than ever before.

    Today, you can sit in your living room or be in bed and place an order for foods anywhere around your city.

    Within a few minutes or hours depending on your delivery preference, you get your food delivered right to you at home.

    One of those trusted apps for food delivery in Ghana is the Jumia Foods app.

    I hope this article guides you to download and use Jumia Food more efficiently to save you from the hustles and bustles of purchasing food in town.

    If you have any comments, reservations or suggestions, kindly leave them in the comment box below or get in touch with us.

  • Online Lending Companies In Ghana that give Loans to Individuals

    Online Lending Companies In Ghana that give Loans to Individuals

    Loans have become an indispensable part of our daily lives as students, salary workers, business owners and individuals in general.

    In one way or the other, it becomes necessary for you to take some loan to take care of some things.

    Presently, there are many companies in Ghana that offer money lending services.

    However, the need to personalize everything especially using the internet has shifted focus from traditional lending companies to online lending companies.

    With the online lending companies, your privacy is assured as you do not have to join any long queues or walk into any brick and mortar building to get your loan. You can do everything virtually on your phone and from the comfort of your home too!

    In this article, we shall look at some leading online lending companies that work in Ghana, where you can apply for loans.

    Fido Loans

    Fido Loans is a Ghanaian money lending company mainly focussed on giving short term loans to individuals.

    Fido loans is licensed to give loans to Ghanaian locals who are in need of their service.

    The company has an app through which individuals can apply for loans. The app also assesses an individual’s loan application and selects those who qualify for the various loan types.

    For starters, first-timers can only receive up to 200 cedis as a loan from Fido. But as they continue to pay their loans with interest, they may become eligible to receive up-to 600 cedis.

    You can locate their office at 48 Blohum Road, Accra.

    Give them a call via 0302208060.

    Carbon (Formerly Paylater Ghana)

    Paylater or Carbon is another Ghanaian lending platform which operates online and is for all calibre of people.

    The company believes in giving out financial assistance to deserving individuals without the need for collateral or any physical contacts.

    All payments and application are done solely via Paylater’s mobile application which is currently available on Google Playstore.

    With Paylater, you can borrow money from 5 cedis and above depending on how you have been able to pay the previous loan you took and the availability of funds at the time.

    Also, there are no late payment fees with Pay later or Carbon. It’s just your loan amount plus interest.

    You can download the paylater app via this link: https://play.google.com/store/apps/details?id=com.lenddo.mobile.paylater

    You may call their customer care line via 0202228080 or 0501282043.

    For those who want to have physical interactions with them, you can visit their office at House Number 601 Newtown Road, Kokomlemle, Accra – Ghana.

    Express Loan

    Express loans Service is one of the widely used loan services in Ghana for its convenience.

    The Express loans lending service operates on MTN Ghana’s mobile money platform and so it makes it easy for Mobile Money account holders to borrow money once they qualify.

    This company gives individuals short-term loans with a fixed duration of 30 days and an interest rate of 12%.

    Users can take loans up to 1,000 cedis at a time from this company and payback in 30 days.

    To access the Express Loan facilities, follow the steps below:

    1. Dial *170# on your MTN Mobile Money Simcard
    2. Select option 5 for Financial Services
    3. Select Option 3 for loans
    4. Select Option 2 for ExpressLoan

    MTN Qwikloans

    Similar to Expressloan Service, the MTN Qwikloans is an online loan facility made possible by a collaboration between AFB Bank and MTN Ghana.

    With the MTN Qwikloan service, individuals can get loans up to 1,000 cedis at once and repay the amount within one month at an interest rate of 12%.

    Individuals who wish to access the Qwikloan service must readily have MTN Mobile Money active on their sim card.

    Follow the steps below to access Qwikloans:

    1. Dial *170# on your Mobile Phone using your MTN Mobile money sim card.
    2. Select Option 5 for Financial Services.
    3. Select Option 3 for loans.
    4. Selection Option 1 for Qwikloan

    You can locate AFB Bank, the mother institution responsible for the Qwikloan service at 4th Floor, Cocoshe House, off, 1328. A Agostinho Neto Road, Accra.

    You can give them a call via: 0302208343 or call 100 on your MTN Sim card.

    Conclusion

    Everyone gets in a situation where they need to access some loans to pay for some emergencies. If you don’t need any huge amounts of money exceeding 1,000 cedis and you need it urgently, then the companies discussed in this article should be able to help you get the loan you desire.

    If you know of any other online lending companies in Ghana which we should look at, kindly list them in the comment box below.

    Meanwhile, do not forget to share this post with friends and family.

  • Zidisha Online Loan: How To Get Up To GHS 10,000 Through Mobile Money

    Zidisha Online Loan: How To Get Up To GHS 10,000 Through Mobile Money

    Businesses and individuals are compelled at one point or the other to go in for loans to either solve emergencies or see to some necessities.

    In fact, the demand for loans has actually increased over time, therefore leading to an increase in financial institutions across the globe.

    The story has mot been any different in Ghana. Currently, there are hundreds of small and large companies giving out loans here and there.

    However, most of these loan companies which give out loans through online systems often give amounts from GHS 1,000 and below.

    In this article, we shall discuss an online loan company which offers you up to 10,000 Ghana Cedis via your mobile money wallet. Interesting right?

    About Zidisha Online Loan

    Zidisha is the peer to peer version of loan companies available on the internet today.

    Meaning, this company allows individuals to raise money on its online platform from other individuals across the globe who may be interested in funding projects listed on the site by borrowers.

    With Zidisha, you are offered up to GHS 10,000 based on how much you need for your project, how convincing your project is, how well and early you have paid your previous loans and how many people are interested in your project.

    Interestingly, there is nothing like interest when you borrow from Zidisha online loans.

    You only have to pay a 10% service fee which is used to process your loan and take care of transaction fees as the amount is mostly paid via e-wallets.

    It’s getting more interesting, right?

    How To Get Loans On Zidisha

    As indicated in the introduction, Zidisha loans operates 100 percent online.

    Meaning, loan applications, processing and transfer are all done online without any physical contact.

    To apply and get a loan on the platform, follow the steps listed below:

    1. Register for an account
    2. Put in a request for a loan
    3. Lenders see your application and contribute towards your project
    4. You get paid when you think you have enough money or when your duration is up.
    5. You repay the loan in weekly instalments till you pay all.

    How To Register For An Account On Zidisha

    The requirements for opening an account on Zidisha are; a phone number which is registered in your name, a National ID card and at least five minutes worth of internet data and time.

    The steps explained below help you to get register for an account on Zidisha:

    1. Click on signup on the homepage of Zidisha.org
    2. Enter a mobile number registered in your name
    3. Enter your full name, in the order; first name and last name.
    4. Enter your new password.
    5. Enter the mobile number you entered earlier.
    6. Enter another phone number in the text box, if available.
    7. Input your email address.
    8. Select an accurate date of birth.
    9. Enter your Ghana card or Ecowas card Identity Number. Make sure you begin this with GHA and without dashes. Example: GHA123810BA
    10. Enter the name of your town where you currently reside.
    11. Input your street name or street address.
    12. Explain in details how to locate your home from a major street or road in your town. Make it very precise and accurate.
    13. You may choose to enter the referral code of the one who referred you or write about how you heard of Zidisha.
    14. Click on ‘Next’ at the top to proceed.
    15. Read the terms of use and about Zidisha and agree to them.

    Voila! You are in now. You can start applying for your loan.

    Application For Loan

    Before one can apply for a loan on Zidashi after registration, you need to first off identify yourself by uploading a proof of identity. Follow the steps below to identify yourself and apply for the loan.

    1. Take a clear and readable photo of the front view of your Ghana Card or Ecowas card and upload on the ID verification page.
    2. Add a clear photo of the back view of your ID card on the next page.
    3. If you wish to receive big loans at once, you can upload your statement of account for the past 30 days from your Mobile Money operator or bank account. If not, skip the next step.
    4. Write a short note about yourself, including your childhood, your struggles, how you overcame them, your business and what you intend to do to help society.
    5. Write about your sources of income.
    6. Answer questions regarding your weekly earning pre-expenses and post-expenses.
    7. Enter the amount of loan you want and how much you can pay weekly. Make sure they are in line with your earnings.
    8. Pay your one-time membership fee of 40 Cedis.
    9. Review your loan amount and repayment plan.
    10. Explain how intend to use the loan.
    11. Review your application and publish it.

    Who Qualifies For A Loan?

    To be able to qualify for a loan from Zidisha, you must satisfy certain conditions which act as security measures put up by the organization against unscrupulous people.

    1. You must be at least 18 years old by the time of applying.
    2. You must be a citizen of Ghana, Nigeria, Indonesia, Zambia or Kenya.
    3. You must have a good reputation and must be supported by a family member or community leader.
    4. You must not have any currently overdue loans with any other institutions.
    5. You must have a business or employment that pays you enough to be able to refund your loan.
    6. You must have access to the internet or have the Zidisha app installed on your phone.

    Conclusion

    Zidisha is the future of loans especially because it does not offer any interest rate of any sort, therefore making it easy for borrowers to repay their loans within the stated time with ease.

    This platform is more of a philanthropic movement rather than a loan or finance company, as indicated on their website.

    As such, it is important that as you apply for loans on this platform, you do so with a clean heart and the intention of also supporting other people on the platform when you can.

    While this organization is not a financial institution, please be informed that failure to pay your loan and deliberate attempts to avoid contact with the organization may lead to legal actions against you.

    I hope this article was helpful to you in your quest to get loans online for your business or project, right here in Ghana.

    Kindly share your views, comments and reservations with us in the comment box below.

    Please do not forget to share this with your friends and family.

  • How To Print Multiple Emails in Gmail

    How To Print Multiple Emails in Gmail

    E-mails (Electronic mails) are a great way to send and receive information – especially official and confidential information.

    Since the inception of Email technology some decades back, the sending and receiving of information has generally seen a facelift.

    Lawyers, business people, students, educators and even friends tend to use emails every now and then.

    In some serious situations, there’s a need for us to print out email messages – especially for official purposes.

    Unfortunately, Gmail – the most popular mailing service – only allows you to print one email message at a time.

    Therefore, it becomes increasingly difficult for anyone hoping to print out a pile of email messages at the same time, especially if the person uses Gmail.

    But, this shouldn’t deter you from being able to print out your emails or resorting to printing them one after the other.

    That’ll be so much stress for you!

    Don’t worry. We have some work around for this situation. Just stick and stay to the end of this article.

    How To Print Multiple Emails With Print All Chrome Add-on

    The Print All Chrome Add-on is an extension which allows you to print as many Gmail messages as you want at a time.

    Now, even though this is an extension, it requires some few steps of setting up to get your printing started.

    But don’t worry, we will take you through everything you need to know in order to actually get your emails printed – in bulk too!

    First Things First

    The very first thing you need to do in order to start printing your bulk emails is for you to acquire the Add-on and install it on your browser.

    Note that this extension works with Google Chrome browser only.

    And for this process to work better, it’s best to do it on a laptop or desktop computer. A smartphone may not be convenient for this.

    So, here’s how to access the add-on on your computer:

    1. Visit Chrome’s webstore here
    2. Search for ‘Save Emails to Google Drive by CloudHQ
    3. Click on ‘Add to chrome’ to install it on your browser.
    4. After the extension is installed, you’ll be required to give it access to your email account. Kindly confirm it.

    Saving Your Emails as PDF Files

    After finally installing the extension on your chrome browser and giving it access to your account, it’s now time to move to the real deal.

    It’s now time to download the various emails you want to print out.

    Follow the steps below to download them as PDF files:

    1. Select the emails you want to print out from your Gmail account
    2. Look at the immediate top row of your email messages and click on the ‘Google drive’ button
    3. Select ‘Save selected conversations to Google drive’
    4. Click on ‘Create account’
    5. Select your email account from the next window
    6. Click on ‘Allow’ on the next page. Scroll down to see the ‘Allow’ button
    7. You can now repeat step 1 to 3 again
    8. Then select the folder you want to save the files in
    9. Check the settings to tweak things to your favour.
    10. Finally, click on save

    You’ll get notified when the files start downloading and you’ll also be notified once everything is finished. You can then click on the link to the folder where the files are kept for easy access.

    Now, after successfully saving all the selected emails as PDF files, you’re ready for the final phase.

    In the final face,

    1. Open the folder where the files are stored in your Google drive
    2. Download them on your PC
    3. Now, you can print from your PC or send it to a printing firm for print out.

    Finally, you have downloaded and printed your emails now. Though it’s a bit of a technical process, I believe this guide is enough to guide you through successfully.

    Conclusion

    Emails are a great way to send both official and unofficial messages. Interestingly, Google mail (Gmail) – the biggest email service provider – doesn’t allow users to print multiple emails at a time.

    So, when users need to print out a bulky list of emails at a time, they have to go through the tiring process of printing the emails individually.

    In this article, we looked at one of the best ways to download and print bulk email messages at a time. We hope that you find this article very helpful.

    In case you have any questions, comments or reservations regarding this article, kindly let us know in the comment box below. You can also contact us.

    Kindly share the article with your friends and family.

  • How To Download Subtitles From YouTube Videos

    How To Download Subtitles From YouTube Videos

    Youtube is undoubtedly the world’s leading video content platform. From music videos through movies to tutorials and game reviews, Youtube is a big source of content.

    For most people who can’t afford the monthly subscription fee for streaming platforms such as Netflix, Youtube always comes in handy and effective too.

    But, there’s always the issue of not being able to download the videos or their subtitles when there is a dire need.

    However, this should never be a barricading factor in your quest to enjoy some tutorials, some music video or movie offline.

    There are very simple and some complex ways to download your favourite Youtube video and also to download video subtitles.

    In this article, we take you through some of the tried and tested ways of downloading video subtitles on Youtube.

    First Things First

    Before you think of downloading subtitles for a Youtube video, there is somthing important you need to know first.

    The video you’re seeking to download the subtitle for; must already have a subtitle attached to it on the Youtube platform.

    It’s probably getting confusing for you at this point. Right?

    Take a breather. So, here is it. When people upload videos to Youtube, they have the option to add subtitles to their videos.

    So, if someone adds a subtitle to his video, then you can actually download that subtitle, using the methods listed in this article below.

    Conversely, if the person hasn’t added any subtitles to their video, then there’s nothing for you to download…Aside from the video itself.

    So, the first thing for you to check, is to see if the video has a subtitle or a list of subtitles attached to it.

    Here’s how to find that:

    1. Open the video on the youtube channel
    2. Look at the options under the video. On the same link where you have settings, play, next and volume. If you see the “CC” button there, then the video has a subtitle. If there’s no “CC” button, then there’s no subtitle.

    Now, after confirming that your video has a subtitle, it’s time to start the main process of downloading it now. So, follow the remainder of this article keenly to see how it’s done.

    Using Subtitle Downloader To Download Youtube Video Subtitles

    There are some web applications that help in downloading Youtube subtitles, just as there are web applications for downloading Youtube videos.

    Follow the steps below to use this trusted web application to download your Youtube video subtitles.

    1. Open the video from the channel.
    2. Copy the video URL from the address bar.
    3. Open the website ‘savesubs.com’ in another tab of your browser
    4. Paste the video URL in the box provided on the ‘Savesub’ homepage
    5. Click on ‘Extract & Download’
    6. Scroll down to select the type of file you want to download. Select TXT for a text file and select SRT for a Subrip subtitle.

    Downloading Youtube Video Subtitles Manually

    No, it’s not so technical. So don’t just freak out yet. In fact, it’s best to download Youtube Subtitles manually. Because this gives you so much power to control how your downloaded subtitle should appear.

    Follow the steps listed below to get started now:

    1. Open Youtube
    2. Search for and open the video you want to work with.
    3. Scroll down to the bottom of the video. Where the video description is normally written. You’ll see three dots on the right side.
    4. Click on the ‘three dots’
    5. Select ‘Open transcripts’. You should see a new window popping up on the right side with the full transcript of the video
    6. Copy the whole text by either highlighting and copying with the mouse or using the keyboard shortcuts.
    7. Open a new and empty text document on your machine
    8. Paste the transcript in the document and save it.

    Optional

    If you want to do away with the timestamps attached to each line of the transcript, then after step 5, click on the 3 dots on top of the transcript window. Then, select ‘Toggle timestamps’ to turn it off.

    If you’re okay with it however, then leave it as it is.

    Conclusion

    Youtube is a great source of entertainment and education for Billions of people all over the world. It’s great for you to be able to download videos uploaded on the platform so you could actually watch them offline.

    But, it becomes difficult to watch and understand these videos if you can’t access a transcript to understand what’s being said in the videos.

    In this article, we set out to resolve this problem.

    So, we proferred and discussed two ways to download video subtitles from Youtube.

    We hope you found this article very helpful and that you’ll share it with your friends and relatives.

    We write because you read, kindly help us share this article with your network.

    Do well to share your comments, reservations and questions about this article in the comment box below.

    You can also get in touch with us.