Author: Emmanuel Boakye Yiadom

  • 7 Reasons Why iPhone And iOS sucks

    7 Reasons Why iPhone And iOS sucks

    Before you jump into and join the Apple world and get yourself a new apply iPhone, consider the information in this post. Even if you are tired of Android or Windows phone, below is the reason why the iPhone sucks.

    File Transfer And Mass Storage

    Other smartphones in the market make file transfer very easy with just drag and drop function from the device to the computer and vice-versa; you just connect the phone to the computer and its internal memory will show up as well as external storage if available, but with iPhone, the case is different.

    Every little thing has to be done through iTunes and even with that, using your phone as mass storage is still a pain in the butt. You may have iTunes installed on your PC but what if you find yourself at another place and there is no iTunes available on the machine for transferring files?

    Another annoying thing is with the Bluetooth transfer. Since Apple has not approved nor introduced any app to the App store, I doubt if they will release any app to perform the Bluetooth transfer function any time soon.

    Expensive And Over-Priced

    We all know and come to an agreement that an iPhone isn’t cheap. Sometimes, I even feel it’s over-priced. Despite the fast-growing competition between mobile companies at this fast tech decade, Apple still remains adamant to reduce the prices of their product.

    A couple of months after most smartphone companies launch a new device or product, the price is likely to drop but with Apple, this is never the case.

    External Memory

    Its clear Apple is trying so hard to be different and not to follow their competitors but all we see it’s their setbacks. Why won’t the iPhone use an external memory? Sony managed to build a water resistance phone, Samsung on the other hand did something great with that eye scrolling thing.

    Just a few to mention, they did all these without leaving the most basic things that still make phone usage easy for their consumers.

    In recent years, Apple lacks the innovation it used to enjoy and known for, and even if they want to create something unique and different, they should find other ways of doing this without depriving its users of what others have been enjoying for years.
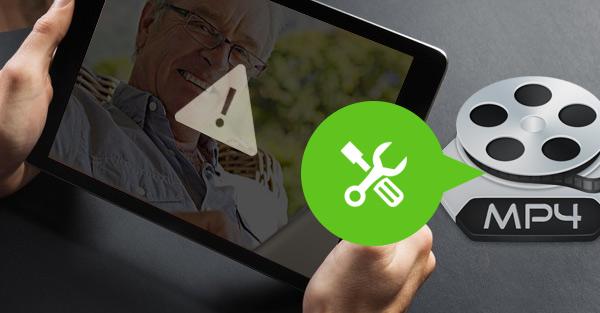
    Media Support

    With the audio output of the iPhone acceptable to a reasonable degree, media support for different video format is impossible. With its default player, only mp4 video file format is accepted.

    You can’t just download a video in any format from the internet and watch on your device without going the extra mile to covert the video to the accepted format (mp4) on your PC before transferring back to your device using iTunes.

    Definitely, there are some apps that can play other video formats but this should be possible in the default app without any third app.

    Customization

    App iDevices run on Apple Operating System which is iOS, this is very clean and simple but very restricted. It’s impossible to modify or customize your device in any way unless you jailbreak it.

    Jailbreaking gives some people a bit of freedom to customize their device but I must tell you, Apple is doing everything possible in their might to make the jailbreaking process impossible for everyone.

    Limited Devices

    Its the iPhone so, you have no choice but to either go for iPhone 5, 5s, 6, 6s, 7 and others. Variety, they say, is the spice of life but this is not the case with Apple products.

    There are limited devices to choose from and even worse, iOS is getting weary; its the same old boring look since 2007 that’s just being re-polished. If you look at the industry players, there are so many types of Samsung Galaxy, Nokia Lumia, Sony Xperia and others to choose from ranging from low-end smartphones to high-end devices. Apple leaves you no choice.

    Battery Cannot Be User Replaced

    Everyone has a limited life-cycle of your phone. Smartphones in its own way have a poor battery life throughout the day. But to add to the problem, iPhone battery will slowly degrade over months.

    In 1-2 years of usage, expect your battery to have reduced capacity. The only thing you would have to do easily is to buy a new iPhone. That is, if you don’t bother going to a special repair where you would be charged for both battery replacement and new battery.

    Conclusion

    No doubt, iPhone tops it all when it comes to security but when it comes to customization and basic features that’s available for their competitor’s devices, iPhone sucks.

    In this post, I have listed seven (7) reasons why, in my own opinion, iPhone sucks.

  • Privacy Settings To Restrict Your Facebook Profile To Only Your Friends

    Privacy Settings To Restrict Your Facebook Profile To Only Your Friends

    Privacy is one of the important things people consider much. There are some who would always want to hide their privacy from the public and restrict themselves to only their friends. I mean who would want to share his age and personal stuff to the public on social media?

    Facebook in default keeps your profile set to the public. This means information like your age range, language and country will always be seen by people who are not even your friends.

    If you are the type that takes privacy seriously as I do, you would want to change your privacy settings to reflect only your friends. In this article, I will show you the steps to restrict your Facebook profile to only your friends.

    Before we kick the ball rolling, some important things about Privacy you need to know.

    Whats Privacy Checkup And How You Can Find It On Facebook

    Privacy checkup takes you through some of your Privacy and Security Settings, to help you make changes to your Privacy in your own accord. To go to Privacy checkup,

    • Click on the down arrow on the far left of the top menu
    • Click Settings and Privacy > Privacy Checkup

    Things You Can Review In Privacy Checkup

    • Who can see what you share. This option guides you through things like, Choosing who can see certain information on your profile. For example, phone number, email, birthday, and relationship status. Updating who can see your future and past post and also reviewing who you have blocked on Facebook.
    • How to keep your Account Secure. This will take you through options like Updating your account password and Turning on alerts to help you know if someone logs into your account from places Facebook don’t recognize.
    • How people can find you on Facebook. Here you can configure who can send you a friend request and also how people look you up on Facebook by your phone number or email address.

    Steps To Restrict Your Privacy To Only Friends

    To restrict your privacy to only your friends, follow below steps,

    1. Sign in to your Facebook account. Click on Account then select Privacy Settings.
    2. Click on Edit your Settings next to How you Connect. Select Friends next to all the fields. Under Who Can Send You Friend Request field, select Friends Of Friends and click done.
    3. Click on the Friends selection box beneath Control Your Default Privacy. Click on Manage Past Post Visibility. Select Limit Old Posts to limit your archived posts to friends only.
    4. Click on Profile and choose Edit Profile. Click on the Basic Information tab then click on the globe next to each individual entry. Select Friends.
    5. Click on the Friends and Family tab, and then click on the globe icon next to each individual item. Choose Friends.
    6. Click on the Education and Work field, and then click on the globe next to each item. Change the settings to Friends. Repeat the process for all the remaining tabs changing the fields to Friends.

    Conclusion

    When it comes to privacy, people are very concerned about it. Not everyone loves to share information about themselves publicly. In this article, we looked at the steps to keep your profile away from strangers.

  • 10 Troubleshooting Tips If Your Internet Is Connected But Not Working

    10 Troubleshooting Tips If Your Internet Is Connected But Not Working

    The internet is the World’s most popular network. It’s a global network of billions of computers and other electronic devices connected to share information. The internet uses the Internet Protocol Suite (IP) to communicate between networks and devices.

    While a lot of people think of the internet as a ‘Wi-Fi’, it’s actually a bridge between your device and the actual internet connection you are using. For example, if you are using a DSL, fiber, or smoked signals, it’s entirely possible for the connection between your computer and the WiFi router to be connected but the internet connection itself may be down.

    There can be different but few reasons why this happens and in this article, we are going to look at the various reasons why your internet connection is not working even though your WiFi is connected. Follow below troubleshooting tips to work around this problem.

    Narrow Down The Offender

    There are a lot of things in the connection between you and the internet as a whole. If any of them malfunctions, then you are likely to be cut off from the internet. So it’s very important to work out where the issue originates.

    This will help you know where exactly to fix on your own or if the problem is within your capabilities to solve. Try to analyze the below factors,

    • Is it a specific website that does not work?
    • Is it only one device on your network that can’t use the internet?
    • Does the router or your modem show the indicator light of a successful connection?

    By analyzing all these, you can cut out a lot of troubleshooting work wasted on matters of the connection that does not even concern the problem of the network you are facing at the moment.

    Restart Your Device

    This is something you should always try out if your internet just stops working but you have enough Data. Whether you are on a computer, tablet, or mobile and others just try restarting your device.

    If you realize you always need to restart your device before re-connecting to the internet, you may have to look into your operating system or firmware updates, since it could be a systematic issue.

    Switch Between WiFi And Ethernet

    Sometimes if WiFi does not work for you, direct Ethernet may work. Switch between them. The same goes for Ethernet over WiFi, switch them, and see what works best for you.

    If both options do not work, look for the general WiFi problems and reset your router.

    DNS Cache Problems

    One quick fix if your internet stops working is to flush the DNS cache. Every time you search for a website in your address bar, your computer sends a request to a Domain Name Server (DNS) to have it translated into the IP (Internet Protocol) address of a specific server.

    Your device’s DNS cache stores the information of every site you have visited before to speed up your internet experience. The issue is that, if something goes wrong with the cache, you will lose access to the site.

    To Flush DNS Cache

    • Open the Start Menu
    • Type CMD and open the command prompt in administrative mode.
    • Type ipconfig/flushdns and hit enter

    This will flush your DNS cache and if that was causing the problem, it will fix it.

    These are but the few network problems you should consider looking at before anything else.

    Conclusion

    There are a lot of things that go on before you are connected to the internet. Once in a while, you will encounter your internet not working whiles your WiFi is successfully connected.

    Check the troubleshooting tips talked about in this article and you might be lucky to have it fixed if the problem falls in the laid out problems.

  • How To Automatically Update Device Drivers In Windows 10

    How To Automatically Update Device Drivers In Windows 10

    Drivers are an essential part of computers as they tell your software how to work with a piece of hardware. With its importance, you need to make sure your drivers are up to date. There are apps to automatically update your device drivers if you don’t to manually pass through the complicated way.

    These apps have the capabilities to identify your machine and what drivers it needs. They then fetch the required drivers and install them on your machine. The software also creates a backup of your existing drivers in case something goes wrong with the drivers you can rollback.

    In this article, we are going to look at the steps to follow to automatically update device drivers in Windows 10 using software.

    DriverPack Solution (Free)

    DriverPack solution is a handy utility that helps you find and install required system drivers automatically on your computer. It has a large database of drivers from around the world and covers almost all computers.

    Even if you are with Lenovo desktop or Asus Laptop, you can use DriverPack solution to find outdated drivers, backup drivers, and then download and install the required drivers for your system.

    DriverPack solution comes in two versions. The first requires you are connected to the internet as it downloads drivers from the internet when required.

    The second version sums up all drivers you need so that you don’t need to have an internet connection while installing them. This one is a large file as it consists of many driver files.

    How To Enable The Driver Backup Option

    1. Launch the app and tick-mark Start In Expert Mode to access the full interface.
    2. Navigate to Settings in the left sidebar
    3. Scroll down the Settings screen and locate the option that says Create Driver Backup. Turn the toggle On.
    4. You can optionally turn on the Create Restore Points option so that a restore option is created when you update the drivers.

    How To Automatically Update Drivers

    1. Each time the app is launched, it auto-scans for outdated drivers on the system and lets you update them.
    2. On the interface panel, just hit on the Install all button to auto-install the updated drivers on your system.

    SlimDrivers (Free)

    SlimDrivers is another free software which helps you find and install updated drivers on your machine. On the software’s interface, there is a big button letting you press and run the driver update check.

    It also scans for improper drivers incase you mistakenly installed one on your system. This software also allows you to backup your drivers so in case something goes wrong, you can rollover your main drivers.

    One interesting feature of this software is, it allows you to create scan schedules. This lets the app auto-scans for outdated drivers on your system in each scheduled time and lets you automatically update them.

    How To Enable The Driver Backup Option

    1. Launch the app and click on options at the top menu bar.
    2. Navigate to Backup to view your Backup settings.
    3. Tick the Automatically Select All Items box. This will select all your system’s drivers when a backup is to be made.

    How To Schedule Driver Update Checks

    1. Select options in the main menu bar
    2. Navigate to the Schedule tab
    3. Enable the Automatically Check For Driver Update option
    4. Specify when you’d like the app to check for driver updates
    5. Select Save to save your options.

    How To Update Drivers

    1. Navigate to the main interface and select Start Scan.
    2. You will then be able to review and install the available driver updates on your system

    DriverHub (Free)

    Another software that helps you find drivers and updated drivers on your system. It comes with a neatly organized interface that makes using the app easier and enjoyable.

    It keeps a history on all your downloaded drivers for easy reference. It also comes with few customizable options like prompting you to choose a directory of where to keep downloaded files and also allowing you to switch between languages.

    How To Update Drivers

    1. Launch the app
    2. Click on Find Now from the interface
    3. Wait some time for the driver installation.

    When you realize your machine misbehaving after a driver update or install, Click on Recovery from the left bar and select the driver you want to revert, click on Restore.

    Conclusion

    There are a lot of free apps on the internet that can offer the services of driver update and install. These are a few of the apps we have tried and tested that seems to work fine and perfectly.

    Leave a comment on how you have been installing driver update on your computer in the comment section.

  • How To Repair And Play Corrupted Or Damaged Video Files

    How To Repair And Play Corrupted Or Damaged Video Files

    In this era of computers, almost all video has moved from analogue storage on tapes to digital storage on computer hard drives. This is a very good thing, as digital media’s can easily be backed up for future reference.

    The unfortunate occurrences of digital video storage are when a file becomes corrupted and can’t open. Even with this, there are ways to repair and play damaged or corrupted files. In this article, I will show you the ways to follow to repair broken or corrupted video files.

    Note that, not all the techniques used to repair video files work at all times. Don’t lose guard if one of the methods here doesn’t work for you, try different ones to know which works best for you. Below are the steps to follow to recover your video files.

    Check Your Drive

    When trying to repair video files, first try confirming if its the file having a problem but not your hardware. This is worth it because sometimes the problem might not be the file but by your hardware, be it external drive or other external media.

    If you are using an external hard drive that requires a separate power source, try changing the power source and see if that fixes the error. Sometimes, it will be worth checking your drive for errors too.

    If you using a USB drive, try connecting it to a powered USB Hub. Under Voltage mostly cause numerous hard drive to debug errors, it’s worth trying this. USB drives are always prone to damage and could be the main cause of your problems.

    The final step is to, try opening your video files in a different program like VLC media player. Sometimes system updates can cause your default media player not to open certain video files. Using a free external media player like VLC is usually better in opening a wider variety of files.

    Online Video Recovery With Fix.Video

    This is one of the easiest ways to recover broken video files. Fix.video take uploaded corrupted video files and fix them for a small fee. This is better if you want an expert to fix your file.

    Free video recovery services are always available but you will be limited to resolution and max file size, and your video will be tagged with the service watermark.

    Recover Corrupted Video With VLC Media Player

    VLC is undoubtedly the best free video player out there. Among its powerful features, it is also known for converting and repairing video files. VLC’s file conversion process has the useful side-effect of fixing damaged video files. Follow below steps to fix your damaged file,

    1. Open the media menu
    2. Select convert/save
    3. Use the add dialogue box to choose your file
    4. Click convert/save
    5. Choose video -H.264 + Mp3 (Mp4) from the drop-down menu
    6. Click Browse to enter a filename for your converted file
    7. Click Start.

    The conversion will take some time, if successful, your video file will be viewable now. If this step does not work for you, try the below alternative step.

    1. First, make a backup of your video file. This can be done by just copying and pasting your video file.
    2. Change the copied file’s extension to .avi
    3. Open VLC and head to Tools > Preferences
    4. Under input/codecs, navigate to the Files section
    5. Under the Damaged or incomplete AVI file dropdown, choose Always Fix.
    6. Open the video file with the .avi extension.

    This method will instruct the VLC media player to attempt to recover any corrupted AVI files it encounters. This will take some time, just sit back and relax.

    Conclusion

    File damage or corrupt is always a threat to digital storage media’s. Five of ten files can get corrupted with a little bit error at the side of your hardware or media player. With the steps provided in this article, you can fix your corrupted or damaged files.

    Note that, some of the methods listed here might not work for every video file. A hard damaged video file might not work.

  • How To Convert Multiple Images Into PDF

    How To Convert Multiple Images Into PDF

    Images on its own can stand alone, but sometimes you need to combine multiple images to PDF file in order to save or share it. For example, you can snap photos of a group of birds in a garden and use one of the tools we are going to talk about to convert these images into one PDF file.

    PDF files are popular and you can use them on any platform. This is the reason why having the skill to convert JPEG and PNG files into a PDF can become handy.

    In this article, we are going to explore some of the ways you can follow to create a PDF file from multiple images.

    Use The PDF File In Windows

    Microsoft Print to PDF is a native tool in windows. It is a virtual printer easily accessible to all apps that use a print function. Let’s experiment this in an image folder,

    1. Select and place all your images in a folder. For easy reference, I recommend you rename your images. Not necessary though.
    2. Select all the images and then select the Share tab on the toolbar and click on Print.
    3. Choose Microsoft Print to PDF from the list of available printers. Use the right and left button from the navigation keys to scroll through the images
    4. Choose the paper size and quality. By default, A4 is selected.
    5. Select from the pre-designed layouts on the right.
    6. Click the Options link in the lower-right corner of the dialogue box for more options to configure the print.
    7. Tick the Only Show Options That Are Compactible With My Printer from the checkbox if you are going to use your own printer.
    8. Click the Printer Properties link and choose between the Landscape or Portrait orientation
    9. Click the Ok button and return to the Print Pictures dialogue box. Keep the Fit Picture To Frame checked. By default, its always checked.
    10. Click Print to create your PDF file. the choose a location to save your PDF file.

    Use Microsoft Word

    PDF is a feature of Microsoft Office. Microsoft Office can help you export files into PDF without hustle. In the same way, it can help you layout your images in creative ways and then export it as a PDF file. Follow the below steps,

    1. Open word and choose a New Blank document
    2. Go to Ribbon > Insert > Insert Pictures from. Use the menu to insert pictures from your directory or any online source. You can adjust the size of the images using the selection handles. The pictures can be arranged in any way you want.
    3. Press Ctrl + S or click File and choose Save. Then go to File > Export > Create PDF/XPS Document to turn the images into PDF file.

    Use An Online Image To PDF Converter

    The PDF file format is a popular and universal format hence many tools are available that support it. Many tools online, free/paid handles PDF. Below are some of the tools that can convert multiple images to a single PDF document.

    JPG To PDF

    This is a free website for PDF conversion that does not add watermarks to its final conversion. You can drag and drop as many images as you want since the website has no limits to the number of images you provide.

    The images you upload are not compressed by the site, this makes the quality of the image unchangeable. Once your images are uploaded and grouped, click on the COMBINED button to get them all in a single PDF document.

    I Love PDF

    This is a website that converts your JPG images into a single PDF document. After converting the images to PDF files, you can download it to your computer or keep it in cloud storage like Dropbox or Google drive.

    PDF Candy

    This site provides a bunch of tools to handle PDF files. It can convert JPG to PDF files. The site is secured and no files are stored on their website. Every tool available on the website is free for use and there are no restrictions, limitations, or hidden obstacles.

    There is a software that can also be downloaded on your PC to use the services provided on the website Offline.

    Conclusion

    As said earlier, images can stand on their own, but sometimes, some images need to be grouped in a single PDF file to save and share it with friends or family.

    In this article, I took you through the steps to convert multiple images into a single PDF document.

  • How To Mass Delete Messages In iPhone’s Mail App

    How To Mass Delete Messages In iPhone’s Mail App

    Critics normally refer to iPhone users as “prisoners in their own land”. This simply is tied to the fact that IOS binds its users in their own way given them less room to operate with their device freely.

    Apple on the other hand has plenty of valid reasons for keeping its mobile OS behind lock and key, this is generally pretty good for introducing new features as they say.

    Many times, they implement steps that leave users dumbfounded. For example, for some time ago, Apple made it unnecessarily difficult to mass delete messages in its mail app. With the introduction of IOS 9, Apple finally saw the need and baked in a “delete all” feature.

    A year later, with the introduction of IOS 10, Apple removed the “delete all” feature. I mean, if you are someone who receives spam messages to your inbox massively daily, not being able to clean out your inbox in a quick way seems inconvenient.

    Fortunately, there is a little effective workaround that will allow you to quickly delete all of the messages in your mailbox all at once again.

    With the mail app opened, navigate to your inbox, tap the edit button at the top right corner and select any message to put a checkmark beside it.

    After this, tap and hold “Move” from the bottom of the screen with a finger then tap on the message you selected to uncheck it then remove your other finger on the ‘Move” button.

    A new screen will show, where you can select “Trash” to move all of the messages from your inbox to the trash. Its a bit clumsy but it sure beats having to manually delete the message one after the other.

    Fortunately, on recent IOS updates, mass deleting emails can be easier. Below are steps to mass delete on recent updates.

    Deleting Multiple Email Messages On Some Latest IOS

    • Open mail and navigate to your inbox
    • Tap Edit in the upper-right corner, then tap “select all”.
    • Tap Trash or Archive. If only Archive shows on your device, touch and hold Archive to see other options like Trash Selected messages.

    This will mass delete your spam messages in your mail box.

    Delete A Single Email

    • Open the mailbox and navigate to your email
    • Tap Edit in the upper-right corner, then select the email you want to delete.
    • Tap trash or archive.

    Alternatively, you can simply swipe left on a single email to delete. If you want to delete a message from within the email, press and hold the Archive button or the Trash button, then tap on the Archive message or Trash message.

    Conclusion

    IOS users are always bound but there is always a way around some things. Bulk deleting emails was not easy to come by, but in this article, I share with you how to mass delete messages in your IOS mail app.

  • 6 Tips For Good Smartphone Photography

    6 Tips For Good Smartphone Photography

    Smartphone photography is the most commonly used system of photography in our time. This is very common because it is compact, most people have one with them at all times and many can take photos at any place at a time.

    To kick the ball rolling, we are going to look at six tips you can follow for good smartphone photography. With this knowledge in hand, you will be able to produce quality and awesome shots from your mobile camera.

    Auto Mode

    Having knowledge on how your smartphone camera auto mode works will greatly help you take good photos. Study the time it uses high ISOs, when it uses long shutter speeds, and adjust how you take photos accordingly.

    This will help you know when the auto mode struggles, and then you can decide to override the default settings where appropriate.

    Override The Defaults

    Smartphone photography is always better than ever when in default settings mode automatically, but this is not always right. Photography indoors and overcast days can still leave us a lot to desire even with the best camera’s in the markets.

    The white balance and exposure is mostly set to automatic by default. Most smartphones can manually adjust these settings to suit your style. The best manual mode also allows you to adjust the white balance of your camera.

    At the same time, manual modes allow you to change ISO and Shutter speed as well, allowing you to set the motion blur to be present in your photos and how much grain will be visible.

    Longer shutter speeds less than 1/30 of seconds will require study hands if possible must be set on a tripod. ISOs above 800 on the smartphone cameras tend to introduce clearer grain but captures adequate lights than lower ISOs.

    Its advisable to play around these settings to find the best combination for the shots you want to have, importantly, most advanced smartphones coming in now have these comprehensive manual modes.

    If you tweak your camera to centre-weighted metering and it doesn’t provide the right results for you, consider switching to spot-metering. Center-weighted sets the camera to capture the entire image and meters according to what it sees, with a preference on the centre of the image.

    If your subject is off-centre, switch to spot-metering so the area around the spot will be exposed perfectly.

    Use Good Posture

    If you want to reduce blur in your images, the best option is to hold a smartphone camera in a stable way. Position your body in a way there would be no distraction or shaky movement.

    If you need a perfectly stable image, I would recommend using tripod for your shots. The tripods are handily very useful as it can be used for still images. We personally used tripods for some shots and trust you me, you would love the outcome of your images.

    Never Digitally Zoom

    The image above depicts a photo taken while digitally zoomed versus a photo taken without digital zoom. You can see that from the one digitally zoomed, the picture has been enlarged and cropped from the sensor before the photo was captured rendering the image to lose some details.

    When this happens, after the image is taken, there is no way the image can be reframed or edited but with the one without zoom, the image can be reframed and edited using any editing software.

    Some advanced phones of late like the iPhone 11 and 11pro, Samsung s20 and others have 2x optical zoom, it’s best to stick with 1x zoom or 2x as this will give you the full quality of the wide-angle and the zoom respectively.

    Take Multiple Shots

    It’s worth it when you take several shots in quick succession. When taking photos of dynamic or fast-moving objects – like people, pets, car, etc. taking multiple photos will allow you to select the best shot later, without stressing yourself to have a perfect image the first shot.

    Some phones have the feature to combine multiple shots and the best part into a single photo. Play along with what your phone’s camera offer and take the best shots ever.

    Edit

    The final touch of photography is to edit. Editing your photos will give you the sharpness and beauty of the photo taken. Adding small adjustments to your photos will give it the professional look you yearn for.

    You can use photo editing software’s like Lightroom or adobe photoshop to edit your pictures to give it the professional look. Better still, there are a lot of android apps on the store that offers editing services to photos. Play around with the images in the software or editing apps to your satisfactory.

    Conclusion

    Smartphone photography has taken over digital photography in recent times due to the advanced camera’s being attached to the mobile innovations of our time.

    It being compact, and always available to us everywhere at anytime, people easily pick their smartphones and take photographs at any type of event or state.

    In this articles, I have provided six tips you can follow to have good smartphone photography.

  • How To Recover Data From A Corrupt Zip File

    How To Recover Data From A Corrupt Zip File

    The ZIP file format is used by essentially everyone online because is the most common and convenient way to store and send multiple files securely.

    Probably, there is a good chance you might come along one that has been corrupted, just a single corrupt bit in one file out of a dozen in the ZIP could prevent your ZIP archiver from opening or extracting its content.

    Different factors can result in corrupt ZIP files including bad drive sectors, malware, incomplete download or transfer, or any other sudden occurrences like power failure or an improper shut down while working with the ZIP file.

    A corrupt ZIP file sometimes may open for you, but some of its original contents might be missing, and attempting to open damaged ZIPs typically causes Windows to prompt you with an error message.

    We made a test by recreating a corrupt ZIP file by archiving an old collection of pictures and deleting parts of the file’s code using a hex editor (Sublimetext).

    In our finding, our total collection dropped from ten photos to two and even the files could not be opened even though it was being displayed in the File Explorer.

    The success rate of you recovering a corrupt ZIP file varies depending on the kind of tool you use, the contents of your ZIP, and the degree to which it has been corrupted.

    The popular software to which you might probably have installed already, WinRAR provides a built-in repair tool for damaged ZIP files.

    Open the ZIP file then go to Tools > Repair archive. When we tested with our re-created corrupt ZIP, WinRAR managed to recover six of the ten files from our damaged file.

    However, WinRAR is only free for a set time (40 days). A license must be purchased for $30 before the continued use of the software.

    Other alternate software is WinZip and 7-Zip. Both software doesn’t seem to have integrated repair features but the companies do offer in-depth information pages about corrupt ZIP files.

    Alternate Tools To Recover Corrupt ZIP Files

    There are a couple of tools that can recover corrupt ZIP files. Below are some of the tools you can use,

    • DiskInternals Zip Repair – This can be downloaded for free. When tested, it managed to recover nine out of the ten photos from our recreated corrupt ZIP. The software is dedicated to recovering partially damaged ZIP files and it launches with a wizard-style prompt.
    • Zip2Fix – Has no complicated interface. Beginner recommendation. The software automatically begins to recover corrupted ZIP files when opened and outputs the recovered files in the source folder without any prompt. When tested, it recovered nine files out of the ten just like the DiskInternals Zip Repair.
    • ObjectFix Zip – This made it to the last of our tool recommendation because, when tested, it couldn’t recover any of our files from the corrupted ZIP. I added it because it might work for you.

    Note that, not all corrupted ZIP files can be recovered. Hard damaged files may not be recovered by all the tools mentioned. All tests carried out were on partially damaged ZIP files.

    Conclusion

    We all have come across damaged ZIP files once or more. Most people delete their corrupted ZIPs thinking it can never be repaired. Partially damaged or corrupted Zip files are easy to repair. Before you hit on the delete button, try reading the full article posted here to fix your ZIP file.

  • How To Change The Wallpaper and Other Personalization Settings On Windows 10 Non-Activated

    How To Change The Wallpaper and Other Personalization Settings On Windows 10 Non-Activated

    Frequently most people want a new desktop background and changing your wallpapers is one of the primary things you will do after installing a new operating system.

    However, applying customization to un-activated windows is not easy to get along since Microsoft blocks access to the software’s personalization settings without a valid product license or activation.

    Not having access to the Personalization becomes annoying since you cannot customize the Operating System to your liking. Though, most of the Operating Systems can be used for free but for Windows you need to activate before use.

    Possibly, applying a new wallpaper is not impossible, despite some of the menu options being blocked. Right-clicking on any image file in a non-activated windows 10 installation will still give you the option to set the said image as a Desktop Background.

    Other settings like custom sounds and colors can be applied in non-activated Windows 10 too. If you already have a Microsoft account with theme settings synced to it from an activated version of Windows 10, then you can apply those to the non-activated version as you log in for the first time.

    By default, sync is enabled and includes theme settings which can still be opened in the non-activated version, but this option may not simply transfer your wallpaper if its the only thing you have customized on the account, and even the theme settings that are synced may not be the most recent.

    Alternatively, you can also download theme pack files that can be opened on Windows 10 un-activated. Opening and applying a theme in the theme pack will apply any settings in the theme file.

    Automatically, you can rotate through the wallpapers in the archive which in the default un-activated windows has been blocked/disabled in the personalization settings.

    There are some limitations to using theme packs. The inability to tweak one color without changing the theme is not possible. You would have to change the theme to settle on the color that interests you.

    For example, if you love black color in your theme, you have to keep switching the theme until you settle on a theme that comes with the black color.

    Another limitation is, you can not apply the same theme pack twice or set it again in the menu after applying a new theme pack. You can create a custom theme pack from an activated Windows 10 by right-clicking on the theme in the personalization menu and choosing “save theme for sharing” to create a theme pack file.

    After creating theme packs on activated windows, you can then extract the contents to your un-activated windows by changing the file extension to .cab

    If you don’t want to stress yourself or pass through all these hectic methods, you would have to activate your version of Windows by purchasing a product key from Microsoft or buy the full Windows 10.

    Conclusion

    The un-activated version of windows limits customizing the windows to our liking. Setting or changing wallpapers don’t work. In this article, I have provided alternate options you can follow to change the wallpaper on your un-activated Windows.