Uber is great at whisking you from place to place, but sometimes you have to make multiple stops along the way or change your destination entirely. After all, the whole point of Uber is getting from point A to point B quickly and easily.
In this post, we’ll go over how to add multiple stops on the Uber app so that you can get around town as quickly and conveniently as possible. All you have to do is follow these instructions, and before you know it, you’ll be at your final destination.
Uber multiple stops
If you need to make a few stops before reaching your final destination, you don’t have a problem. Uber makes it easy to add multiple stops.
How to add multiple stops on the uber app
Start by opening the Uber app and tapping on the menu icon in the top left corner.
Next, select Settings from the menu.
In the Settings menu, tap on Multi-destination trips.
From here, you can toggle multi-destination trips on or off.
If you want to add multiple stops, make sure it is turned on.
When multi-destination trips are enabled, when you’re headed somewhere on your list of destinations, press and hold down anywhere on the map.
After a few seconds, a blue dot will appear. Tap that blue dot to save that as one of your destinations.
You’ll also see an Add Stop button below the map where you selected your destination for that stop.
Conclusion
Adding multiple stops to your Uber ride is a great way to make sure you get where you’re going, even if your plans change. It can save you money by preventing you from having to take multiple Uber rides.
In addition to identifying unknown numbers, truecaller also allows you to report unwanted calls as spam, which you can then choose to block in the future.
There are numerous reasons why you may want to report an unknown number as spam; these include scareware calls and phishing attempts, or simply someone who won’t stop calling you. Here’s how to use truecaller to identify and report scammers
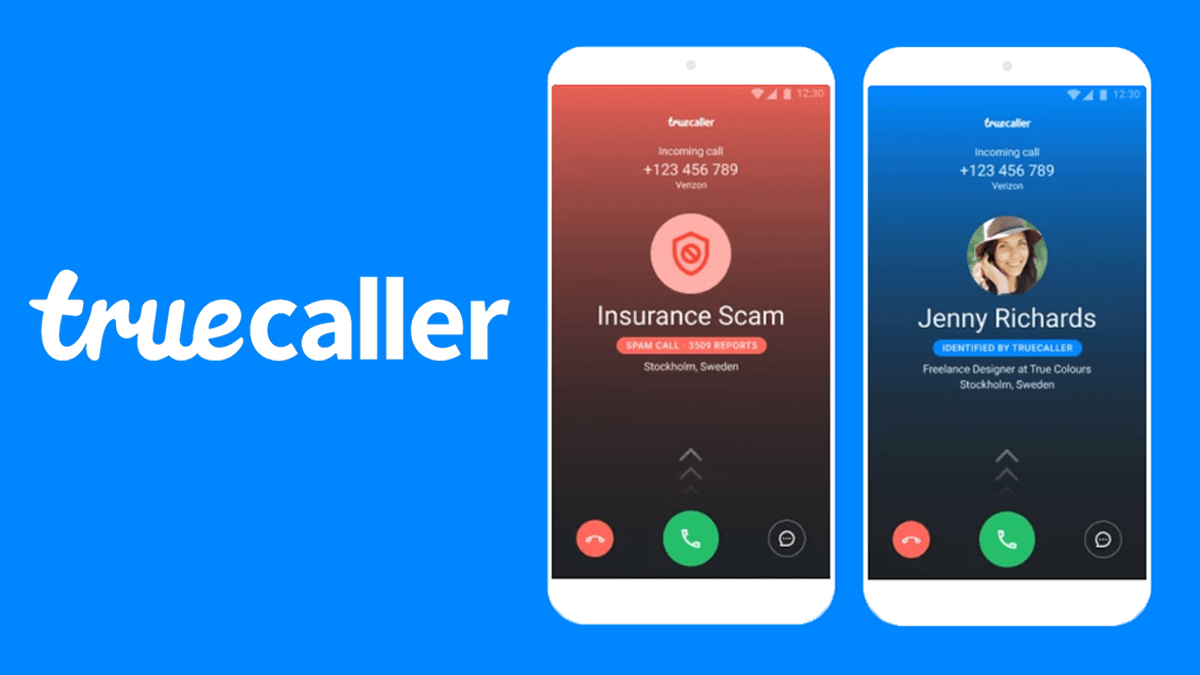
About truecaller
Truecaller is a Swedish company that allows people to identify unknown callers, numbers, or businesses. It also helps with the process of reporting fraud or scams by connecting users with relevant authorities.
When you receive a phone call from someone not in your contacts list, the app will ask you if you want to identify the number. Once identified, it’s up to you whether or not you want to answer their call.
How does truecaller works
Truecaller searches your phone contacts, social media networks, address book, and call logs. If there is a match with the number you are looking up (given access), it will give you their name if they are in your address book.
If they are not in your address book or social media profile but you have their phone number saved as a contact, then it will let you know that this number belongs to someone with this particular phone number who has at least once called you.
How to use truecaller to identify scammers
Download the app for your phone
Register or login with your credentials.
Run the search for the number you want to investigate.
Click on their name and a screen will pop up with all of their info.
If they are identified as a scammer, click on report.
You can also call them from your truecaller app by clicking on their number if you have a premium account and then pressing Call.
Press the Record button before you answer. You’ll be able to talk with them live.
When they hang up, it will automatically save the conversation in your folder.
How to use truecaller to report scammers
Once you’ve identified a number that’s either called you or sent you a message as a scammer, open the Truecaller app on your phone and tap on the Profile icon in the top right corner.
Tap on the Block button under their name to block them so they can’t bother you again.
To report the number, tap on their profile to view all their information.
Tap on Report in red text at bottom of their profile. A popup window will then open, giving you two options: I don’t know or Spam.
If you think it’s a spam number that is not yet blocked by Truecaller, choose I don’t know as your reason for reporting them so we can keep improving our detection mechanisms.
If you’re sure it’s a scammer, choosing Spam will make sure they get banned from using Truecaller.
Once you’ve chosen your reason for reporting, tap on Report, and scammed numbers will be kept away from you.
How to block scammers with truecaller
On the Truecaller app, you can set up phone numbers you want ignored. This can be very helpful if you are dealing with a scammer who keeps calling your phone number and you are unable to get them off of the line. You can block their number on the app so that they cannot contact you at all from that point forward. To do this,
Open and log into the app with your credentials.
Go to My Number in the left-hand menu on the app and click Blocked Numbers in the right-hand menu.
From there, you will see a list of any blocked phone numbers. Find the number that is bothering you by scrolling through or searching for it by name or number.
Click on it to confirm it is blocked, then click Block Contact to finalize the process.
Conclusion
Use Truecaller to find out who’s on the other end of a phone call. If it is a number that you don’t recognize, tap Block on the contact details page.
The person will be prevented from texting or calling you again. You can also tap Report in order to send your complaint about the number directly to Truecaller for further investigation. Remember, it’s always better to be safe than sorry.
Snapchat users love to send and receive Snaps with their friends, but they all want to make sure they keep their streaks going as long as possible. Luckily, it’s not hard to get creative and find new ways to maintain your streaks.
These are some of the hottest tips out there right now that will help you keep those streaks alive.
What is a snapchat streak
A snap streak is when two people send a snap to each other every day for at least three consecutive days.
You and the other person will then have a rainbow-coloured number in between both of your names that indicates how many consecutive days you’ve been sending snaps to each other.
Once you break this streak, it won’t show up anymore unless the other person sends another snap in order to re-add their streak.
Is snapchat streak important
Snapchat streaks may seem insignificant to some, but for other people, keeping up their streak with someone can become a huge point of pride.
If you’re a regular user of the social media app and are aiming to maintain the longest streak possible, there are a few tips and tricks you can use to make it happen. It’s all about what works best for you.
How to set up a snapchat streak
If you’re unfamiliar with what a snap streak is, it’s essentially when two people send consecutive snaps to one another. In other words, if you and a friend send each other snaps on the same day for over three days in a row, then congratulations, you’ve created a streak.
Tips to maintain snapchat streaks
Here are some ideas on how to maintain snap streakstreaks. These tips can also help with creating new streaks and are a good idea to use all the time in general.
1. Include family and friends in your story, no one wants to be left out
Family always want to create memories. You can use such opportunity to always create something wite family online and that can prolong your streaks lifespan.
2. Use polls or questions in the texts you send. Remember those text barcodes
Keep your chat as much active as it should be. You can be adding new formats in your text to make it more lively such as polls for the other partner to answer questions and feel active.
3. Send new content that’s unique and original. People want to see something fresh.
Be an explorer. Surf the Internet as much as you can. Fetch out new trends and find new contents everydays.
4. Schedule your stories so it doesn’t get boring
People have busy lives and they will appreciate that you’ve taken time to schedule things out.
5. Find the right group of people to easily connect to
Some people are boring. No matter how active you will be with them, it still gets boring on their end. Its best you find the right talkative crop of people that won’t just be listeners but will also engage in everything on board.
6. Send something everyday
Even if there is nothing to talk about, just send mething for the sake of your streak. You can even send a blank sheet and thats ok to maintain your score.
Conclusion
Overall, it’s really quite simple to maintain your Snap streaks. Like any new commitment, it may take a while to get used to. But in the end, you’ll find that the effort is worth it and by building deeper connections with others on Snapchat, you’ll be able to expand upon those connections in a way you otherwise would not have been able to.
A permanent account deletion removes your Instagram profile completely and permanently, so it cannot be recovered or restored.
You should only delete your account if you’re sure you never want to access it again, because there’s no way to recover an Instagram account once it’s been deleted permanently. Follow the steps below to learn how to permanently delete your Instagram account
About Instagram
Kevin Systrom and Mike Krieger, in October 2010 launched Instagram. In November 2013, Instagram was acquired by Facebook for approximately US$1 billion in cash and stock.
The app allows users to take a photo, select a filter to apply to the image, and share it on a variety of social networking services. Users can also apply other effects to their photos.
Why do you want to delete your Instagram account?
This is a question I get asked quite often, and I completely understand why. There are lots of reasons why someone might want to delete their Instagram account:
You have an imposter or copycat.
You want to take a break from social media or you just don’t enjoy it anymore.
Your reason might be something different, and its really up to you.
Deactivate vs delete
When someone deactivates their Instagram account, it remains on their device and anyone can reactivate it with their username and password.
When a user deletes their Instagram account, all of the data associated with the account is deleted from their device and from Instagram’s servers.
How to delete your Instagram account
1. On an iPhone
Log into your Instagram account
Tap your profile picture in the bottom right to go to your profile.
Tap in the top right, then tap Settings.
Tap Account, then tap Delete account at the bottom.
Tap Delete account, then tap Continue deleting account.
Select an option from the drop-down menu below Why do you want to delete [account name]? and re-enter your password.
The option to permanently delete your account will only appear after you’ve selected a reason from the menu and entered your password.
Tap Delete [username], then tap OK to confirm.
2. On a computer
Go to the Delete your account page. If you aren’t logged in to Instagram on the web, you’ll be asked to log in first.
Select an option from the drop-down menu below Why do you want to delete [account name]? and re-enter your password.
The option to permanently delete your account will only appear after you’ve selected a reason from the menu and entered your password.
Click Delete [username].
If you’d like to delete a different account, Click the username in the top-right of the Delete your account page.
Click next to Edit profile and select Log out..
3. On an
android
Log into your Instagram app, tap on the profile icon in the bottom right hand corner of the screen and then tap on Settings.
Once you’re in settings, scroll down and select Delete my Account.
A pop-up will appear asking for confirmation that you want to delete your account – confirm it by tapping Yes, Delete My Account.
Another pop-up will then appear asking you to enter your password again – type it in and tap on Log out of Instagram.
How to deactivate your Instagram account
1. On an android
Tap on the profile icon and selecting settings at the bottom of the profile.
Then, you can find and select Deactivate Your Account.
After following these simple steps, your Instagram account will be deactivated for a period of 14 days.
During this time, no one will be able to find or follow you but your posts will remain visible on feeds until they expire.
2. On an iPhone
Tap or your profile picture in the bottom right to go to your profile.
Tap in the top right, then tap Settings.
Tap Account, then tap Delete account at the bottom.
Tap Deactivate account, then select an option from the drop-down menu below Why are you deactivating your account?
Re-enter the password for your account. The option to deactivate your account will only appear after you’ve selected a reason from the menu and entered your password.
Tap Temporarily deactivate account.
3. On a computer
Log in to instagram.com from a computer.
Click your profile picture in the top right and click Profile, then click Edit profile.
Scroll down, then click Temporarily deactivate my account in the bottom right.
Select an option from the drop-down menu next to Why are you deactivating your account? and re-enter your password.
The option to deactivate your account will only appear after you’ve selected a reason from the menu and entered your password.
Click Temporarily deactivate account. Click Yes to confirm or No to cancel.
Conclusion
In conclusion, deleting your Instagram Deleting your instagram account helps you clear out the ones you don’t need which enables you to sign up for a new one probably with the same email incase you want to.
Every month, more than 1.6 billion people use WhatsApp to either communicate with their relatives, friends, or colleagues. In February 2020 alone, WhatsApp was downloaded 96 million times; making it one of the most downloaded apps in 2020.
The WhatsApp group feature is one of the most interesting features that are available on the WhatsApp app. Just like physical groups where you meet together and chat about whatever you want to talk about, WhatsApp groups also allow their members to chat about whatever they want to chat about.
Although WhatsApp groups can be interesting and fun, it can also be unpleasant depending on the members of the group. Also, you might have created the group for a project or event and after the event, the group becomes inactive.
In circumstances like this, the best thing to do is dissolve the group. Please note that, before you can dissolve a WhatsApp group you need to be an admin.
How To Dissolve A WhatsApp Group As An Admin
As the admin of a WhatsApp group, you are authorized to dissolve a WhatsApp group. Simply put, you have the ability to remove a WhatsApp group from existence.
The mistake most people make when they are trying to dissolve a WhatsApp is that they exit and delete the group instead of dissolving it. When you exit a WhatsApp group, you will no longer be able to be a participant but the group will still be in existence.
If the group had more than one Admin before you exited, the rest of the admins will still have administrative rights. Otherwise, WhatsApp will automatically choose someone as the admin of the group.
Therefore, to dissolve a WhatsApp group as an admin, you need to follow the steps listed below:
First of all, you need to open the WhatsApp app and then open the group you wish to dissolve.
Tap on the name of the group at the top of the screen.
Once it opens, you will find a list of all the members of the group. As an admin, you have the administrative right of removing everyone from the group. To do so, all you need to do is to hold the member’s name and hit the Remove button.
Repeat the process until all the members in the group have been removed.
Finally, tap on the Exit group button and then Delete the group.
Conclusion
The reason why you need to remove each member from the group individually is that by default, WhatsApp doesn’t have an option to dissolve a WhatsApp group. Therefore, the method used in this article is the best option available for you.
Although it will be difficult if you have a lot of members in the group, this is the only way that you can go about this for now. If any changes take place in the future, I will make sure to update you on it.
Also, if you have any other method you can use to dissolve a WhatsApp group, make sure to share it in the comments section below and I will add it to this article.
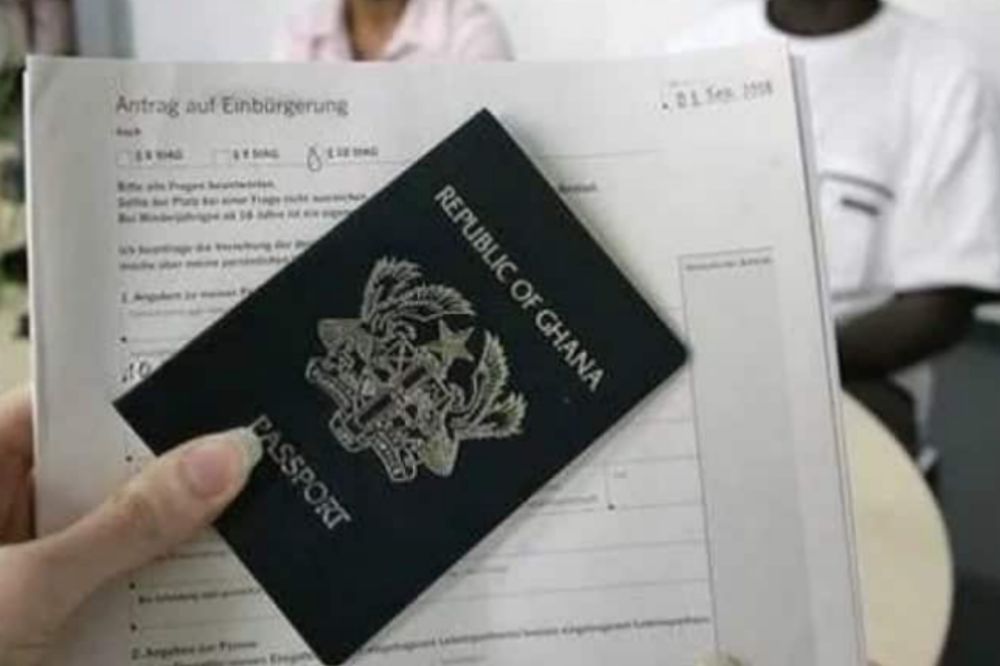
Your Ghanaian passport is your prized possession which signifies to the world that you are a citizen of Ghana, so it is not surprising that you would want to know how to renew your Ghana passport in the UK.
If you have lost your Ghanaian passport or it has been stolen or damaged then knowing how to renew your passport from the UK is important.
This article will provide all the steps to renew your passport and help you overcome any errors or issues you may come across during this process.
Renewing your passport as a Ghanaian whiles in UK
Visit your local passport office
The first step is to locate your nearest passport office. You can find a list of passport offices on the Royal Mail website.
Once you know where your nearest office is, you will need to make an appointment for an interview. Appointments are not necessary for renewals but it does give you a chance to talk with someone about what you need or any questions that may come up.
Fill out application form for renewal of expired passport
Details of application form for renewal of expired passport can be found on the official website of the Ministry of Foreign Affairs, Ghana. You will be provided assistance at the local passport office incase you face any difficulties.
Provide supporting documents
The supporting documents vary depending on your situation. If you are renewing your passport by post, you will need to include two passport photographs and a photocopy of your old passport. The application form must be completed and signed before it is sent back.
Submit documents and application form
You are now done filling your forms and making payment. You will then have to submit your supporting document in addition to the application form to the appropriate sector for processing. It is advisable to make photocopies for future reference.
Pay fees
Payment of fees can be made by cash, cheque or bank transfer. You are can also make enquiries on the available method on how to make payment at your local passport office.
Receive renewed passport
A time and date will be given after submission. When time is due, your renewed passport will be available for pickup.
Conclusion
Expired passport is an invalid one and thats why its important to renew your expired passport wherever you find yourself.
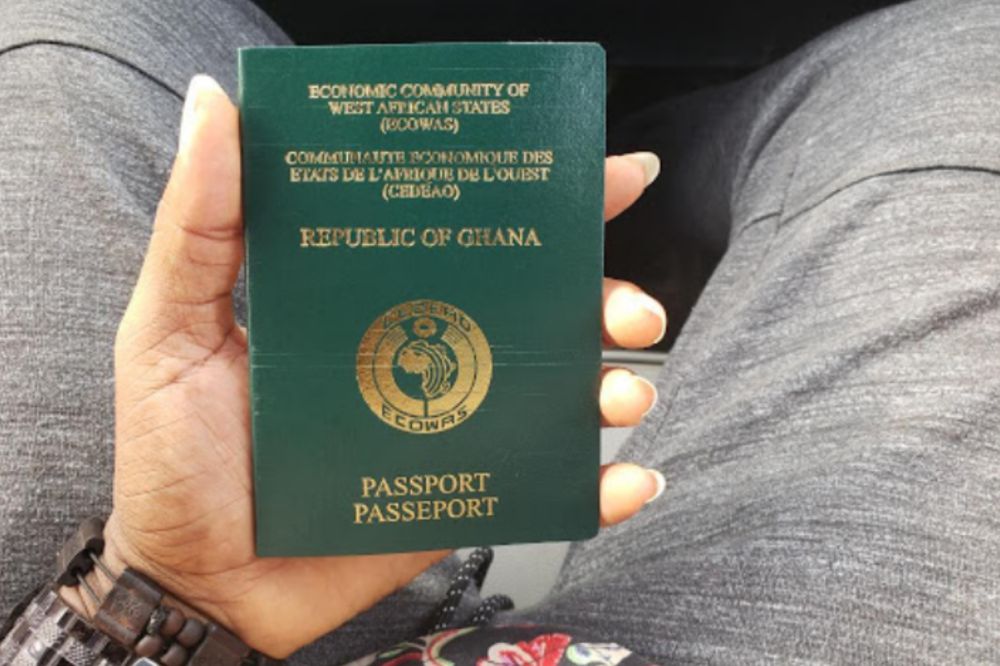
As a Ghanaian citizen in the United States, you’re legally required to have your passport renewed on a regular basis.
As long as you reside in the United States and are not planning to permanently return to Ghana, it’s important to follow these steps to renew your passport in the U.S.
Renewing your passport as a Ghanaian whiles in USA
Visit any Ghana embassy close to you
To renew your passport in the US, you can choose to visit a Ghana embassy in USA physically. However, if you cannot get to the embassy, you can do the whole process online and get it through the mail.
Fill out passport renewal application form
There are various application foam to fill when it comes to passport and since yours is the renewal, you fill out passport renewal forms.
It requires information about your biography and parents. You will also have to give names and contacts of guarantors who can vouch for your identity.
Provide other supporting documents
Attach the necessary documents that will be specified in the form by the Ghana passport office in USA Such as;
Previous Ghanaian passport.
Documents to support identity (originals only) such as School Certificate, Driver’s License, Employment/Student / Other I.D. Cards.
NB: Incase of a change of name, it must be supported by duly authenticated documents such as deed polls or affidavit and statutory declarations and marriage/divorce certificates.
Submit supporting documents and application form
Complete it with all the relevant details and submit completed application form and proof of payment. You could choose to mail it to the embassy by mail or submit in person.
Pay fees
Renewal fee as at the time of writing this is $130 but depending on when you are doing it, it might have changed so check the Ghana embassy to USA website for new prizes. Payment can be made online, through bank or at the passport office in your state.
Receive renewed passport
Processing takes 8 weeks. After it has been successfully processed you will be notified to come pick up your renewed passport.
Conclusion
You dont necessarily have to travel to Ghana before you can renyou your passport in USA. Following the steps above will help you do so whiles you are still in the USA.
How to stop people from tracking or hacking your phone
Your smartphone’s every move can be tracked. But there are plenty of measures you can take to ensure your phone doesn’t get hacked, and that no one knows where you are at any given time.
Check out this handy guide on how to stop people from tracking or hacking your phone.
Phone tracking or hacking
Phone tracking or phone hacking simply means getting a third party into your mobile system and having a view of all you are doing and even knowing your locations and so other activities you do which has a connection with your phone.
Why will someone want to track or hack my phone?
Smartphones store a lot of personal information, but the real treasure trove is location data. For this reason, a lot of people want to track mobile phones so they can find out where we are and use that information for nefarious purposes.
How to stop people from tracking or hacking your phone
1. Activating two-factor authentication.
Unfortunately, most of us are still not protecting our phones with two-factor authentication. If you want to keep prying eyes out of your data, now’s as good a time as any to start.
Make sure that whenever you log into an account from your phone, two-factor authentication is activated. And if you use popular services that don’t have an option for two-factor authentication, change up your passwords.
2. Keep up with software updates
In this day and age, it’s important to make sure your phone is running the latest software, whether you’re using an iPhone or a Samsung. The easiest way is to set up automatic updates so you never have to worry about getting back on track if you get a new phone.
There are many reasons why upgrading is worth the time and effort: phone tracking can be prevented, and features might be added that will benefit you.
3. Avoid auto-login features
It may seem difficult to protect your phone from tracking, but there are many precautions you can take. For example, avoid logging into accounts such as email, social media, and banking apps through the phone.
When you log in automatically on these apps, then people will be able to locate where you are and use it against you. Keeping your information private should be a top priority if you want a personal bubble of security.
4. Use a strong physical password
A strong password will protect you against phone tracking and phone hacking. Any letters, numbers, punctuation marks are ok but the key is to make it long. If a hacker sees that you’re using a strong phone password they’ll probably pass by you.
What to do if you finds out your phone is being tracked or hacked
The best thing you can do if you find out that your phone is being hacked or tracked is to have someone put a protective app on it. You can also disable some of the features in your device settings.
1. Reset your device
Resetting your device whenever you finds out any suspicious act on your phoneus necessary. Resetting clears every necessary information the hacker can lay their hands on making your phone blank and they end up getting disappointed.
Before you reset, don’t forget to backup your important informations and passwords.
2. Run a strong antivirus scan
Running a strong antivirus scan can also be helpfua. Incase there is any pshishing app installed on your phone for tracking, running an antivirus scan can help detect such apps and helps you delete them.
3. Review installed apps and delete untrustworthy ones
Hackers mos at times can badge into your phone through apps. They might trick you into installing an app you think can be harmless but unknown, you are rather helping them tap your useful information.
Anytime you find out you have been hacked, its necessary to stat reviewing your apps and uninstall suspicious ones from your phone.
How to stop someone from tracking your location
Location tracking is a crucial part of many apps, such as Google Maps, Find My, and Uber. However, any application or individual could abuse the feature.
For example, if someone wanted to track your location, they could install a tracking app on your phone and use it to monitor your movements.
On an iPhone
Go to Settings.
Privacy.
Tracking.
Switch off any apps you don’t want tracking you.
You can use these steps to stop someone from tracking you with the Find My application:
Launch Find My on your iOS device
Tap People
Select the person with whom you want to stop location sharing
Tap Stop Sharing My Location
On an Android
Go to Settings
Location
Tap App permissions
Tap the app you want to view and change the setting under Location access for this app
Conclusion
It is very important to be aware of the various ways that hackers and advertisers track and hack phones. To do this, it is essential to understand how these people are able to get access. In order to avoid being hacked, it is important for you to know what apps you have on your phone and remove any suspicious ones.
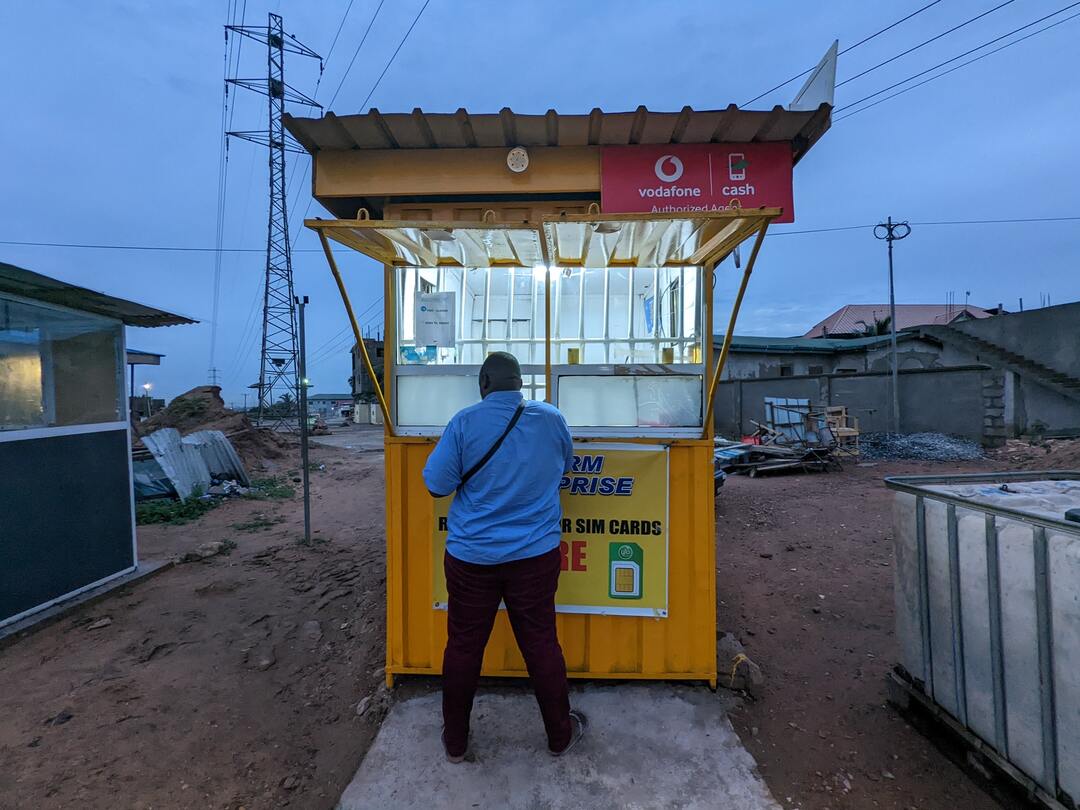
Many Ghanaians have reported that they cannot make phone calls simply because their numbers have been blocked or barred from making calls. We explore the solutions available to enable such people to continue to enjoy call and data services.
If you have no network at all, you can just restart your phone and you should be able to receive phone calls.
First, this has to do with the ongoing SIM Registration exercise and is unrelated to phone settings or network problems.
If you cannot make phone calls because it does not connect or says “call barred,” your Network Provider, e.g., MTN, could have disabled your SIM from making calls. Some people could still receive calls and use data services when this happens.
This morning, 9th September 2022, a lot more people are complaining that their SIM cards are even now unable to connect to the internet. If you are one of such people with a blocked SIM, you most likely can not do the following:
Make and receive phone calls ( Update: Phone calls seem to come through now)
Send and receive SMS
Access Mobile Money and other USSD functions
Use Mobile Data
Use the MTN App (because you can’t receive SMS)
So how can you unblock your SIM Card under this circumstance? Let’s look at some options.
How to unblock MTN, Vodafone or AirtelTigo SIM
There are a few things you can do to unblock your SIM. MTN and the other Telcos will likely restore the SIM Cards and later block them again. But the best thing would be to make sure that it doesn’t happen to you again.
Here are steps you can take to unblock your Ghana SIM Card
Re-register your SIM Card with your Ghana Card
Registering your SIM Card is the most obvious solution. If you have not done the first part of the registration, now that your SIM Card is blocked, you will not be able to do it.
There is some group of people who have successfully gone through the registration process but still have their calls barred. All those who have registered but still had their SIM cards blocked will have to visit their Telco’s office to solve the problem.
Conclusion
The blocking or call barring resulting from telcos blocking can only be solved if the Telcos and the NCA “relax” for those who are yet to register their SIM cards. Some Ghanaians are also planning a class action lawsuit, and if you have been affected and want to join them, you can fill out this form: https://forms.gle/TyMsAGSckcanQzmj8.
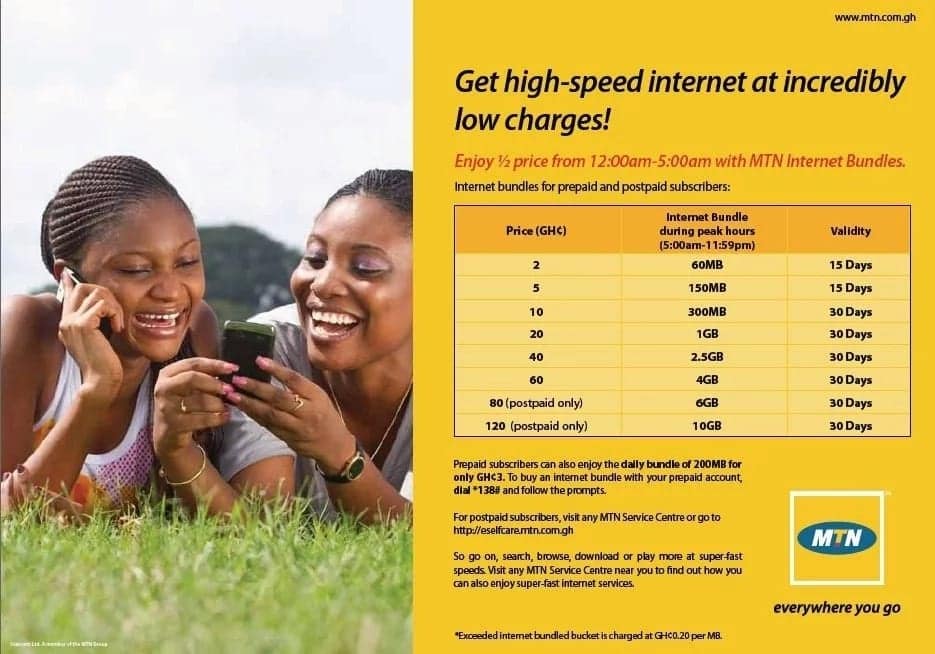
Subscribed to various MTN Ghana call plans and it always ends up being expensive or the plan doesn’t work as expected, there are so many options out there and its hard to know which one to go for.
I have created this guide so you can subscribe to all MTN call plans at once with ease and not worry about anything else because I have done all the hard work for you.
About MTN Ghana Call plans
If you are living in Ghana and have an MTN Sim card, then there is a variety of call plans for you. From affordable options that enable you to call several countries on the continent for a minimal fee, to more expensive packages that offer discounts for international calls as well as unlimited calls to any network operator in Ghana.
Why Should I subscribe to MTN Ghana Call plans?
The best thing about subscribing to MTN Ghana’s call plans is that it gives you more value for your money.
This can be good for those who do not always have time on their hands and need something quick, easy and simple without sacrificing functionality. It has been created with this idea in mind and will give you the best possible way of calling Ghana and other countries without any time wasted.
MTN Ghana call plans and how to subscribe
To subscribe for any MTN call plan, you just need the details of your chosen plan and the number you wish to associate with the plan.
1.Mtn Just4U
MTN customers can now get our entire selection of call plans from the comfort of their mobile phone with just one touch.
With Just4U, you can pick and choose how you want your month’s talk time to be spent. Simply select any combination of voice and data bundles that suits your needs or combine them with global call bundles for increased value.
Dial *141# now send
Select the any of the offers you are willing to purchase (Price of packages ranges from Ghc 1.50p to 20.00
Dial *5050# and send
Once is successful, you will receive an SMS right away like always.
2. MTN akwaaba
Dial *550# and send
Select Option 1
Enter the preferred number you will be using and confirm it once again.
Your application will be receive and you will receive an SMS shortly if its successful
3. MTN Nkomode
Dial *550# and send
Select Option 6 (Free After 1)
Select Option 1 to activate
Confirm activation.
After this process, you will receive an SMS indicating the status of your proposal.
4. MTN Mashup
Dial *567# and send
Select Option 1 (Mashup for self)
Select your preferred amount (from Ghc1.00 to 30.00)
Proceed and complete the payment with Airtime or Momo
5. MTN Pulse
*567# and send
Select Option 4 (Pulse Loyalty)
Select your Preferred offer
You will receive an SMS message that contains your discount voucher as well as days in which it is valid.
6. MTN Jara
MTN Jara is available to only prepaid customers in Volta, Oti, Upper East, Upper West, Bono, Bono East, Ahafo, Northern East and Savannah regions. You cannot access it if you are not in any of the above regions.
Dial *550#
Select option 3 (Jara).
Select your preference and follow the remaining prompts till you are done
7. IDD call bundles
The IDD bundle is a call bundle that allows local MTN subscribers to make calls with individuals outside the country at reasonable and cost-saving prices.
Dial *138#
Select option 1 (Proceed to buy bundle).
Choose option 99 (More)
Select option 6 (IDD Bundles)
Now, choose option 1 (buy for self) or option 2 (buy for other number) depending on you.
In the next popup, choose the type of offer you want and pay with airtime or MoMo.
8. MTN Sunday special
Dial *5050#.
Select your Preferred option.
i. Ghc 1.06p – 20MB,50mins and 10 SMS to all networks
ii. Ghc 0.52p – 25mins & 10 SMS to all networks
iii. Ghc 2.12p – 50MB, 120mins & 10 SMS to all networks
Enter 9 to accept and proceed with payment.
Once it’s successful, you will receive an SMS right away like always.
Conclusion
So there you have it. If you’re looking for cheaper phone plans, or one that fits your lifestyle needs.
Even if you just want something new, MTN has what you need. All of the above options will give you exactly what you’re looking for.


 in the top right, then tap Settings.
 next to Edit profile and select Log out..
 or your profile picture in the bottom right to go to your profile.