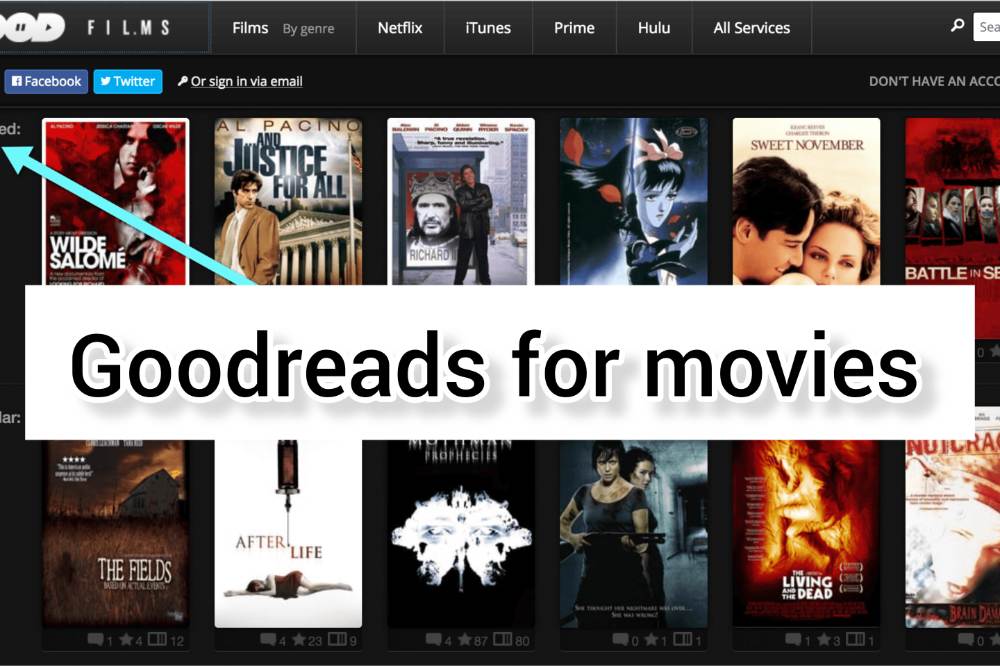
Category: Guides

  • MTN Zone: How to Get Cheap Data + Best Tips & Deals

    MTN Zone: How to Get Cheap Data + Best Tips & Deals

    MTN has taken the continent by storm, with their affordable data and superior network services, it’s no surprise that many people have been inclined to make them their network of choice.

    MTN Zone is here to help you navigate your way through this new world of data, giving you cheap data deals and offers for your Internet connectivity.

    About MTN Zone

    MTN Zone bundle is a data bundle aspect of MTN initiation that looks to reduce data burden on their customers. The zone bundle us specifically made for only MTN users.

    Why do you need the MTN Zone data

    Every customers want comfortable as well as fas t and reliable internet connection. But in all, they also want a data bundle that will be convenient for their pockets. With the data zone offers, it has all this attributes and that is why every customer would want it or be interested in it.

    How to activate MTN Zone

    MTN zone is an offer in their own zone, and to be able to be part of the zone family, you need to activate or subscribe before you can be able to purchase the available offers. To activate or subscribe to MTN zone,

    1. Dial *135#
    2. Choose the option 1 (Activate)
    3. You will receive a welcome message and instructions to subscribe to the offer on your phone.
    4. After dialing the *135# to activate the MTN Zone, you should follow the instruction that says, dial 135*3*3# for information on setting up your handset.

    MTN Zone data packages and prices

    After successful subscription, you can be able to access the data packages below. Note that, the MTN zone data packages varies and can change anytime so you need to keep note of the time you wish to buy so you can be able to buy your favorite offer.

    MTN Zone AmountDurationData Bundle
    GHS 2.09 – GHS 2.99 1 Day1 GB
    GHS 3.09 – GHS 3.99 (1 Day)1 Day2 GB
    GHS 4.09 – GHS 5.99 (1 Day)1 Day5 GB

    How to buy data package on MTN Zone

    Now, you have your subscription successfully and you know how much to posses in order to buy an offer from MTN zone. Below is how to buy a data package on MTN Zone;

    1. Dial *135#
    2. Select the option 2 (Zone bundles)
    3. Choose the option 1 (Data Zone Bundles).
    4. Choose from the data packages available at thay time.
    5. Select Yes, when asked are you sure you want to buy the bundle of which you selected.
    6. Congrats, you now have your prefered data.

    Note that, you can only purchase the MTN zone bundle from your airtime only. You need to purchase airtime if you have your money on MoMo to be able to subscribe to data zone. If you are owing, clear your debt before you can be able to enjoy MTN data zone offers.

    Other MTN Data bundle offers customers can subscribe to

    MTN Data PackageShortcode
    MTN Basic package*138#
    MTN Kokrokoo Bundle*138#
    MTN Midnight Packages*138#
    MTN Social Media Bundles*138#
    MTN Video Bundles*138#
    MTN Turbonet Broadband Bundle*5057#
    MTN Free After 1*550*6#
    MTN Reward*550*7#
    MTN Mashup*567#
    MTN Just4U*141#

    How to manage your mtn data bundle for a longer usage

    1. Switch of your data bar when not in use.
    2. Calculate the amount of data you need at a specific time before purchasing.
    3. Do not go overboard with a plan not part of your existing data.
    4. If you need to download a bigger file, choose a midnignt bundle instead of using your normal data bundle.

    MTN Data bundles: best tips and deals

    With the above said, MTN Zone, MTN free after one, MTN Reward and MTN Midnight will give you the cheapest offer for customers.

    • With MTN free after 1, you get 50MB for your WhatsApp and Facebook messages when you activate and make your first call of the day even when you use your bonus.
    • With MTN Rewards, you get free data bundle or airtime with your points. The more you use data and make calls, the more MTN accumulate points for you. With that point, you can purchase airtime or data bundle when you are down with no money for airtime or bundle.
    • MTN Midnight gives you bigger bundles for cheap amount. The Midnight bundle as the name goes can only be used during Midnight for your bigger files. It last between 12:00am – 4:59am.
    • MTN Zone also gives you cheap offers compared to the regular package prices. If you need to do something within 24 hours and you want to last a bit longer then, you can go for the zone bundle.

    Conclusion

    MTN has the best, the cheap and also the highest fee data bundles. Depending on what you want, you can get them on MTN. However, there are also good alternatives with the other networks which you can also give them a try.

  • How to Access DVLA Online Services and List of Available Services

    How to Access DVLA Online Services and List of Available Services

    The Driver & Vehicle Licensing Authority (DVLA) of Ghana offers online services that can help save you time and make your life easier, including online registration renewal, online tax discs and checking if your vehicle has an MOT (Ministry of Transport) test due date.

    This article will give you instructions on how to access DVLA online services and the list of available services.

    About DVLA

    The Driver and Vehicle Licensing Authority (DVLA) is a public-sector organisation under the Ministry of Transport. It was established in 1999 by an Act of Parliament (Act 569), 1999.

    DVLA replaced the Vehicle Examination and Licensing Division (VELD). By the Act, DVLA is to provide a regulated framework for an enhanced and more effective administration of drivers and vehicles.

    How to access DVLA online services

    You’ll need to sign up and sign in to your dashboard to be able to access DVLA online services before you can use them. The process takes few minutes and is straightforward

    How to register and access DVLA online service

    • To begin the DVLA registration process visit online.dvla.gov.gh/sign_in
    • Under the contact information tab, fill in the neccesary details. (Postal address, town you are in, region, email address, area you are in, street address, house number, mobile number).
    • Click next and move to the next tab to fill your Account Credentials.
    • Under the Account Credentials tab, fill in the necessary details. ( Username, password, repeat password.)
    • On the next page is a preview of all the details you had entered in the previous pages.

    How to Sign In to DVLA portal

    Now, you have created an account and you want to visit your dashboard to get some services rendered. To sign in:

    1. Visit online.dvla.gov.gh/sign_in
    2. You will be signed in your DVLA portal dashboard if your login details are correct.
    3. You can now access all the DVLA online services.

    List of available services that can be accessed on DVLA online portal

    At the comfort of your zone, you can login your DVLA portal and request for a service to be rendered to you. Below are list of services rendered by DVLA Ghana.

    1. Driver Licensing

    • Renewal of Driving License
    • Foreign License Conversion
    • International Driving Permit
    • Replacement of Lost License
    • Replacement of Old License
    • License Upgrade
    • New Drivers License
    • Proficiency Test

    2. Vehicle Licensing

    • Change of use
    • Accident Procedure
    • International Vehicle Permit
    • Physical Conversion
    • Vehicle Registration
    • Road Worthiness
    • Trade Plate
    • Change of Ownership
    • Vehicle Layoff

    DVLA Contact Details

    Address: 1 JAWAHARLAL NEHRU ROAD,CANTOMENT.

    PHONE: (233) 030-2764529

    EMAIL: [email protected]

    Conclusion

    With such a broad range of online services available through DVLA, you’ll be able to do pretty much everything you need without even leaving your home. Simply visit the site and explore the services available.

  • How to Access and Check Your E-payslip Online in Ghana

    How to Access and Check Your E-payslip Online in Ghana

    In Ghana, companies are now required to provide an e-payslip to their employees electronically (in an approved format) instead of issuing the conventional physical payslip, every month or at the end of the financial year. In this article, I’ll give you quick steps to access and check your e-payslip online in Ghana.

    What is e-payslip

    E-Payslip is a document that displays the amount of income tax deducted from an employee’s wages during a given period of time. It also displays deductions made, such as taxes payable, medical insurance premiums, pensions etc. The person responsible for generating an E-Payslip is the employer.

    Is e-payslip important?

    E-payslip is an essential part of a company’s record keeping process. It allows employees to view their pay amounts, withholding allowances, deductions, allowances, etc. With this data at hand, employees are able to better manage their finances which makes an e-payslip important.

    How to register for an e-payslip account

    To be able to have access to your e-payslip, you need to have a registered account which will enable you have access. To register an account;

    1. Visit https://www.gogpayslip.com.
    2. For new users, please register by clicking “Register for E-Payslip.
    3. You will need a registeration code from your Head of Department to register.
    4. After having the code, continue to register.
    5. Enter your employee number.
    6. Confirm your employee number.
    7. Create your password and Confirm.
    8. Now, enter the registration cpde acquired from your HOD.
    9. Enter your phone number and confirm.
    10. You will receive an OTP code to confirm if you are human.
    11. Enter code given
    12. After everything, click on Register to set up your accountfAfter registeration, you can now visit login to access your dashboard.
    13. Enter your login details to log in.

    How to access and check your e-payslip

    Now, we have an account and as a worker under the paid by the Controller General department, you can check your e-payslip online it is very necessary to check your e-payslip on the regular to know how your finances are managed. To do that,

    1. Visit http://wwwgogpayslip.com/ after successfully creating your account.
    2. Enter your employee number and password to login.
    3. You will be granted access to the payslips dashboard.
    4. First, click on My payslip and select the month you want to view, download or print.
    5. Click on generate and scroll through to have a view of your payslip online.

    How to save, download or print your e-payslip

    After scrolling through, you now want to either save it on your phone or laptop. You may also want to download it as a hard copy. To do that,

    1. Log into your dashboard on https://www.gogpayslip.com/
    2. Sign in with your Employee Number and password.
    3. On your dashboard, tap on My Payslip
    4. Select the Month you want to save, or download.
    5. Click on Generate
    6. Scroll down and tap on Print if you want to print it out as hard copy or save it as a PDF on your computer or mobile phone.

    Conclusion

    As a worker recognized by the Accountant General’s Department, you can access your epayslip with either a mobile device or laptop in order to monitor your finances. Having access to your e-payslip is a necessity for all.

  • Best Online Tools or Websites to Find Your Doppelganger

    Best Online Tools or Websites to Find Your Doppelganger

    Are you curious about what your doppelganger looks like? There are several websites and apps that can help you to find people who look exactly like you or are remarkably similar to you in many ways.

    The best part is that these sites are free to use, so it doesn’t cost anything to find out if you have any twin strangers living across the world.

    What Is doppelganger

    A doppelganger is a word derived from German meaning double walker. The term refers to an apparition of a living person, that of a twin. It is also applied to the supernatural appearance of oneself.

    Why you must find your doppelganger

    While the act of finding out who your mirror image is, may seem a little narcissistic, it can also be intriguing. An exploration of yourself can reveal what truths about you are hidden beneath the surface.

    What drives you, frightens you and excites you? And most importantly: who am I? With that knowledge, you can gain insight into your own personality and sense of self-worth.

    Best online websites to find your doppelganger

    iLookLikeYou

    The iLookLikeYou site takes selfies and automatically finds someone with a similar look to you. The site also has the option for you to upload other photos, as well as upload a photo of yourself. You can then search through various people based on things like hair color, eye color, race, etc.

    mytwinfinder

    mytwinfinder is one of many sites that lets you upload a photo and then it will show you users who look like you. You will then be able to view photos of these users and if they have accounts, read their profiles. Download mytwinfinder for android.

    starbyface

    Once you input your profile information on the starbyface website, it uses facial recognition software to create a virtual 3D rendering of what you would look like with another person’s bone structure.

    You can also upload a photo of someone else and see what they would look like as you. This is an easy way to send secret messages and allows for potential prank opportunities as well.

    familysearch

    familysearch website is for genealogy research and family tree building. The site offers free access to limited records and databases of family history information, making it possible for anyone around the world to learn more about their ancestors.

    twinstrangers

    twinstrangers website is pretty simple. All you have to do is upload a photo of yourself and then upload a photo of someone who looks like you. The site will tell you if the person that looks like you has another sibling out there and if so, it will give you their contact information for you to get in touch with them.

    conclusion

    The concept of the doppelganger is one that has existed in folklore and legend for centuries. Now, people are able to find their so-called doubles on the internet, which can be an interesting exercise for those who want to know what they might look like had they made different life choices.

  • How to Get Your Ghana Water Bill Through Email and SMS

    How to Get Your Ghana Water Bill Through Email and SMS

    The Ghana Water Company Limited (GWCL) in June 2016 piloted a new billing and payment system that makes use of technology by billing customers through text messages and emails.

    The new system started in some selected areas in the Tema Region, including Kpone, Ashaiman, Spintex, Baatsonaa, Sakumono, Kpong, Akuse, and Tema New Town. It has now spread accross the country and everyone can be a part of the new revolution.

    Now, you don’t have to wait for monthly bills or have to walk to ECG office before getting your bills. At the comfort of your home, your bills can be sent to you via Email or SMS and then, you make payment with MoMo. Just as simple as that.

    How to get your Ghana water bill through sms or email

    To be able to receive your bill through SMS or email, you must first be a registered member of GWCL with a meter ID.

    • Now, check your recent water bill sheet and look for the toll free number of GWCL. Toll free: 080040000 (Vodafone only)
    • Put a call through and let the customer agent know you want to receive your bill through SMS or email.
    • You will be asked to provide your meter ID, your contact, your email, your name and any other necessary information.
    • In a short possible time, the process will be done and you will start receiving your bills through the email address you provided or SMS on the number you provided.

    GWCL Toll free number: 080040000 (Vodafone only).

    GWCL Contact: 0207385088/0207385090/0302774011

    GWCL WhatsApp: 0555123393/0555155524

    You can also check your bills online using the GWCL mobile app. You first need to download the app from playstore and link your meter ID to the app. After that, you can register and check your bills online.

    How to link your Ghana Water Company meter ID number to the GWCL App

    1. Download and open the GWCL Customer App on your phone.
    2. Next, click on “Create Account” below the login section.
    3. Next, choose “Register As GWCL Customer.”
    4. Enter your 9 digits Ghana water company meter ID number (Can be found on your water bill receipt).
    5. Click on “Verify Account Number.”
    6. You will receive a verification code via SMS on your mobile phone number registered with the Ghana water company.
    7. Enter the verification code you received to confirm your Ghana water company’s customer account number.
    8. Now, follow the next instructions to enter your preferred Username.
    9. Set up a strong password.
    10. Complete the registration process.

    How to check your Ghana Water Bill online

    1. Now, you already have the GWCL App on your phone. Open it.
    2. Enter your Username
    3. Next, type in your Password
    4. Ensure you have entered the correct login details.
    5. Now, click on “Sign in” to login to your Ghana water company account online.
    6. Once you are logged into the App, you can view your current water bill, make payment, and check your consumption.

    Conclusion

    Technology is broadening and things are becoming more and more convenient. Receiving your water bill and paying them all has become more and more easier. You can follow the steps above to receive and pay your water bill at your comfort with less stress.

  • How to Remove Watermark from a PDF for Free

    How to Remove Watermark from a PDF for Free

    Watermarks are often used to protect PDF documents and can be problematic if you need to print or use the file in another way that prevents the watermark from being shown.

    Here’s how to remove watermarks from PDFs for free so you can copy and paste, convert, save, and otherwise work with your PDF files.

    What is a PDF

    A pdf is a type of file that can contain information in either a text-based or a graphical format. It is a native format used by Adobe Acrobat and many online document sharing services like Google Docs and SlideShare. One of the great things about pdf files is that they are generally non-editable.

    What is a watermark

    A watermark is an image or pattern in the background of a document. The original intent was to protect documents from being re-copied without permission, but watermarks also serve as branding and advertising.

    When you’re looking at a document it can be hard to read the words, so some people will try to remove or hide the watermark by either creating a new document with white space where the watermark should be or use a photo editing software such as Photoshop.

    Why do we put watermarks on PDF

    Watermarking is a popular practice among photographers and graphic designers who wish to prevent unauthorized copying or distribution of their work.

    Once watermarked, the creator retains ownership over the file and can take legal action against those who share it without permission. It’s also possible that the company you work for may ask you to put a watermark on all documents created on its equipment.

    Either way, removing a watermark is important in order to prevent infringement of copyright laws.

    Can watermarks be removed on PDF?

    Watermarking and legal disclaimers are often a necessary part of any copyright protection, but sometimes these can be a bit jarring when you’re trying to read the document.

    Fortunately, there are some simple ways that you can remove watermarks from your PDF files with no cost at all.

    How to Remove Watermark from a PDF for Free

    1. Remove using MS Word on foxit

    • Go to Foxit, scroll all the way down to the footer section of the page, and click on PDF to Word under the Online PDF column.
    • Drag and drop or upload your PDF file, then click on Start Conversion.
    • You’ll see a success message pop up, click on Download your file.
    • Now, open the converted file in Microsoft Word.
    • Word may warn you about potential compatibility issues when converting your PDF to Word. Review it and click OK.
    • Click on Enable Editing.
    • Go to the Ribbon area and click Design, then click Watermark in the right-hand corner.
    • When done, go to the bottom right of your screen and click Remove watermark.
    • Click on the watermark, then press Delete, and voilà, your watermark is removed. In some cases, you may have to select and delete the watermark letter by letter.
    • When done, save the file as PDF and you have your watermark-free PDF.

    2. Remove using Google docs

    • Sign in to your Google Drive account and click on the + New button.
    • Click on File Upload and select the watermarked PDF file.
    • You’ll see an “…upload complete” notification in the bottom-right corner of your screen. Click on the filename.
    • A preview will be generated. Click on the Open with drop-down at the top of the page.
    • Click on Google Docs.
    • If the watermark is not automatically removed, click on it > select it > press Delete on your keyboard.
    • Click on File, select Download, then click on PDF Document and your watermark-free PDF will be saved to your computer.

    NB: If a PDF file is encrypted, you’ll need to unlock it before you can remove the watermark.

    Conclusion
    Watermark is used to hold copyright of peopels content. Removing a watermark is important in order to prevent infringement of copyright laws. However, you shouldn’t use the steps to abuse peoples works and misuse them wrongfully.

  • VIP Parcel Service: How it Works, Official Contacts & Safety Tips

    VIP Parcel Service: How it Works, Official Contacts & Safety Tips

    Package delivery has come far since its conception, but how does VIP Parcel Service work? Why does it exist, and how can you use it to your advantage? Find out everything you need to know in this article.

    What is VIP Parcel service?

    VIP parcel service a courier service company duly registered in 2014 and regulated by the Postal and Courier Services Regulatory Commission of Ghana. The company is currently the fastest, most reliable, cost effective and efficient means of sending and receiving parcels across several locations in Ghana.

    How does vip parcel service works?

    The VIP parcel service is a means of sending parcels via VIP buses quickly from their origin location to destinations. It’s a simpler, cheaper alternative for consumers who need their goods delivered on time. With this service, items can be tracked online. Packages are delivered as soon as they’re scanned by a courier at the terminal.

    Is VIP parcel service a scam?

    Many people often ask whether VIP Parcel Service is a scam. They are afraid they will send their valuables somewhere only to have them never make it back. The good news is that the company has taken steps to make sure that doesn’t happen. The service is real and not a scam.

    How to be safe with VIP parcel service

    VIP parcel service is legit and with any legit businesses, there are third parties who tries to make bad money out of careless or unsuspecting individuals. Below are some few things to note when dealing with VIP parcel service in order to be on the safer side.

    • Go directly to the terminal authorities to give out your sending information and make the necessary payment.
    • Never make payment to any third party either than the right sources.
    • If possible, make sure your packages are given to the VIP bus driver before leaving the Station.
    • Provide correct details on the parcel you are delivering so that you can be contacted incase of any misfortunes.

    VIP Parcel Service Contact details

    • Vipex Parcels Office (Yaa Ataah Arcade) Anloga Junction – Kumasi Phone: +233204353512
    • VIP JEOUN Bus Terminal Circle – Accra Phone: +233204353513
    • VIP JEOUN Bus Terminal Asafo – Kumasi Phone: +233204353512
    • VIP Transport Terminal Sunyani Phone: +233540305280

    Conclusion

    Sending parcel from one place to the other has been made easier with VIP parcel service. Unlike the olden days you have to pass through alot to do such. With VIP parcel in existence, your parcel can be safely delivered without you having to worry about it. Just take them to the bus terminal point, make the necessary payment and wait for them to be safely delivered.

  • Melcom Ghana: How to Find Shops and Check Prices Online

    Melcom Ghana: How to Find Shops and Check Prices Online

    If you’re an expat living in Ghana, one of the first things you’ll want to do is figure out where you can buy the items that you need from around the world.

    While there are some modern supermarkets and convenience stores, for the most part, most Western products are hard to find outside of Accra and other major cities.

    Thankfully, Melcom Ghana allows you to find all of the shops that carry your favorite products and see their current prices online so that you can make sure they have what you need before heading out to shop.

    About Melcom Ghana

    Melcom Ghana is a department store chain based in Accra, Ghana. The company sells a variety of merchandise including clothing, furniture, electronics and appliances. Melcom has been operating since 1978 with its headquarters located at Mamprobi in Accra.

    How to shop on Melcom Ghana online

    Customers can now shop on melcom directly from the comfort of their home on the melcom online website.

    To shop on Melcom Ghana using their online process, you first need to create an account on their website.

    Create an account

    1. Visit Melcom.com and click on signup
    2. Fill the form with your name, your email and password.
    3. After successfully signing up, you will be required to fill in your default billing address and delivery address.
    4. Insert delivery and billing details and then save. Congrats! You have an account now.

    Make an order

    Now, you have an account with melcom and you can freely make an order online and get your product or goods delivered to you at ease.

    1. Visit Melcom.com
    2. All goods and products available will be displayed.
    3. Glance through using the search tab and look for the product you desire to purchase and save them in cart.
    4. Make payment and your product will be delivered to you at your comfort.

    How to check on Melcom Ghana products prices

    On melcom.com, you can explore the site or search for specific stores products. As you browse, you’ll see detailed product information on each page with options to compare prices with nearby competitors.

    How to Find a Melcom Shop in Ghana

    Melcom Ghana is the biggest shopping center in Ghana and they have various shops across the country. Anywhere you are in Ghana, there is a possibility a melcom shop is around you.

    The company has branches in,

    1. Melcom Accra Central Branch
    2. Melcom Plus – Kaneshie Branch
    3. Melcom Dansoman Branch
    4. Melcom Spintex Road Branch
    5. Melcom Madina Branch
    6. Melcom Plus Teshie Nungua Branch
    7. Melcom Kisseman Branch
    8. Melcom Kumasi Adum Branch
    9. Melcom Ashongman Branch
    10. Melcom Plus Tema Branch
    11. Melcom Adabraka Branch
    12. Melcom Ashaiman Branch
    13. Melcom Assin Fosu Branch
    14. Melcom Koforidua Branch 1
    15. Melcom Koforidua Branch 2
    16. Melcom Plus – Achimota Branch
    17. Melcom Kumasi Manhyia Branch
    18. Melcom East Legon Branch
    19. Melcom Lapaz Branch
    20. Melcom Weija Branch
    21. Melcom Cape Coast Branch
    22. Melcom Kasoa Branch
    23. Melcom Swedru Branch
    24. Melcom Takoradi Branch
    25. Melcom Kumasi Tanaso Branch
    26. Melcom Hohoe Branch
    27. Melcom Obuasi Branch
    28. Melcom Nkawkaw Branch
    29. Melcom Techiman Branch
    30. Melcom Bolgatanga Branch
    31. Melcom Ho Branch
    32. Melcom Kumasi Adiebeba Branch
    33. Melcom Koforidua Main Branch
    34. Melcom Aflao Branch
    35. Melcom Sunyani Branch
    36. Melcom Tarkwa Branch
    37. Melcom Wa Branch
    38. Melcom Tamale Branch

    Finding a melcom shop around you has been made simple. To find a melcom store around you, use the Melcom Store Finder and get yourself sorted.

    Conclusion

    Checking prices online is easy, even for international shoppers. Sites like Melcom make it even easier to find the exact products you’re looking for, get pricing information about any seller in the country, and buy them with your convenient payment method.

  • How to Restore Your Snapchat Streak Score

    How to Restore Your Snapchat Streak Score

    Snapchat streaks are just one way to keep in touch with your friends on Snapchat, but they’re also the only way to see the total number of days you and your friend have been snapping each other. However, if your score and your streak has disappeared and you want to restore it, then this guide is for you.

    About snapchat streak score

    Snapchat streak score is the measure of how many consecutive days you have chatted with a friend on Snapchat. Keep in mind that Snapchatters can only be added as friends for 7 days before being dropped from the list if they have not been chatted with. As the name suggests, keeping a streak alive for longer will increase its value up to 10 pointpoints.

    How does snapchat streak works

    Snapchat users engage in a streak when they go more than two days without snapping each other. Streaks are scored on the number of consecutive days that two people have snapped each other and can be seen by anyone who sends them messages.

    If you send somebody a message, but they don’t respond, you will still be able to see that you have a one-day or two-day streak with them on the app.

    How do you loose your snapchat streak score

    Snapchat streaks are the way that you can tell how much someone cares about you. If you don’t talk to them for a while, they’ll end the streak by flipping over their name and drawing a line through it, which indicates that they’re no longer interested in talking to you.

    How to restore your snapchat streak score

    It turns out that Snapchat’s score can be easily fixed. All you need to do is make a quick change on your account settings.

    1. Open Snapchat and sign in to your account.
    2. Tap Settings.
    3. Towards the bottom, go to the Supports section.
    4. Tap I Need Help, then Snapstreaks.
    5. From the What if my Snapstreak has gone? option, choose Let us know.
    6. Select My Snapstreaks disappeared.
    7. Fill in the form; include as much information as possible.
    8. Hit Send to submit your form.

    How to keep your snapstreak going

    • Send a snap to your friend at least one time in 24 hours – A message, picture, or video from Memories will not count.
    • Receive and open a snap from that same friend within that same 24-hour timeframe.
    • Send and receive Snaps from the same individual – A group message won’t count.

    Conclusion

    It can be hard to keep up with how many people you are chatting with on Snapchat, and losing a connection in the chat can also make it difficult. Luckily, if you know what happened and what caused your streak to break, it is relatively easy to get it back going again.

  • How to Add Multiple Stops on the Uber App

    How to Add Multiple Stops on the Uber App

    Uber is great at whisking you from place to place, but sometimes you have to make multiple stops along the way or change your destination entirely. After all, the whole point of Uber is getting from point A to point B quickly and easily.

    In this post, we’ll go over how to add multiple stops on the Uber app so that you can get around town as quickly and conveniently as possible. All you have to do is follow these instructions, and before you know it, you’ll be at your final destination.

    Uber multiple stops

    If you need to make a few stops before reaching your final destination, you don’t have a problem. Uber makes it easy to add multiple stops.

    How to add multiple stops on the uber app

    1. Start by opening the Uber app and tapping on the menu icon in the top left corner.
    2. Next, select Settings from the menu.
    3. In the Settings menu, tap on Multi-destination trips.
    4. From here, you can toggle multi-destination trips on or off.
    5. If you want to add multiple stops, make sure it is turned on.
    6. When multi-destination trips are enabled, when you’re headed somewhere on your list of destinations, press and hold down anywhere on the map.
    7. After a few seconds, a blue dot will appear. Tap that blue dot to save that as one of your destinations.
    8. You’ll also see an Add Stop button below the map where you selected your destination for that stop.

    Conclusion

    Adding multiple stops to your Uber ride is a great way to make sure you get where you’re going, even if your plans change. It can save you money by preventing you from having to take multiple Uber rides.