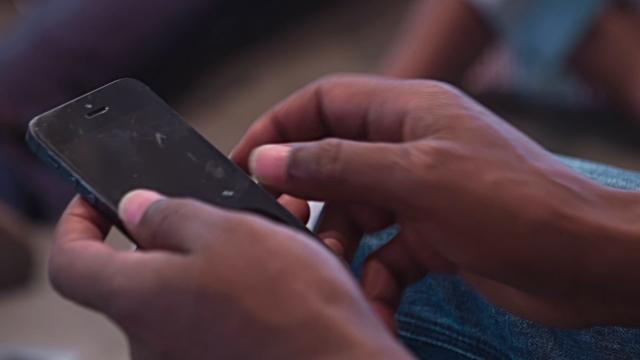
Category: Guides

  • How to use less mobile data when browsing on your phone

    How to use less mobile data when browsing on your phone

    When was the last time you bundled mobile data? How long did it take? Well, for a lot of people, data just runs too fast, and we end up blaming our Internet Service Providers. Like I said in a post sometime back, I don’t believe Internet Service Providers steal our data.

    Data usage is all about habits and a few tricks. I used to be very frustrated with how my mobile data was running until I reviewed my habits.

    The key to saving your data usage is knowing that apps have become more data-hungry and are constantly pushing new versions for an update.

    Earlier, web surfing used to be mostly in text. Now, video streaming services have gained widespread popularity, and social media platforms like Facebook and Instagram have also integrated video services as a mainstream appeal.

    It has become increasingly difficult to reduce data usage on Android and iOS.

    However, by adopting a few strategies (mostly available in the apps themselves) and changing a few habits, you can save more data than you think. We will look at how to use less data when browsing the web generally and also focus on WhatsApp’s data-saving features.

    Here is how to use less mobile data on phone:

    Use data compression in Google Chrome

    You know the Google Chrome browser right? It’s one of the browsers I recommend for mobile users.

    Google Chrome is one of the most popular Android browsers. It has an inbuilt feature that can significantly reduce data consumption on Android.

    When data compression is turned on, all of your traffic is passed through a proxy run by Google. This means that your data is compressed and optimized (size reduced) before being sent to your phone. This results in lower data consumption and also speeds up the loading of pages without any significant change in web content.

    To use data compression

    • Open Chrome
    • Tap on the 3-dot menu on the upper right corner
    • Tap on Settings and scroll down to Data Saver.
    • There you can tap on the upper right corner to toggle Data Saver on.
    https://mfidie.com/stop-snapchat-instagram-using-data/

    Watch and configure WhatsApp

    Yeah, WhatsApp. It’s very popular here in Ghana and comes with a few settings to reduce data consumption. You can also change a few habits on WhatsApp and you will be using much fewer data. Let’s look at which settings and habits to change.

    Let WhatsApp save data during calls

    Did you know WhatsApp has an option to save data during chats and calls? It allows you to lower the amount of data it uses during voice calls.

    To activate the data saving option, enter Settings, then Data Usage. In the options, check Low Data Usage.

    If you experience low-quality calls after activating the setting (less likely), you can turn it back on.

    Turn off auto-downloading of media

    You can set WhatsApp to download multimedia files automatically only when on Wi-Fi. This helps you save data and prevents the downloading of unnecessary media files, especially if you are in a lot of groups.

    In the Settings > Data Usage menu, there is a section for Media auto-download. Selecting ‘When using mobile data’ gives you a menu to check whether to download images, audio, videos, and documents or none of these (by keeping all options unchecked).

    Cut down on WhatsApp Status

    This is not a setting, but rather a habit. You need to cut down on the number of WhatsApp Status you watch in a day.

    When you first get the status feature in the whatsapp update
    When you first get the status feature in the WhatsApp update

    For a lot of people, they don’t realise watching videos on status is almost identical to streaming video on youtube – In both instances, you are viewing video content from the internet. Like the earlier part of this article stated, watching videos online takes up a lot of data, so limiting your WhatsApp status viewing would drastically save you a lot of data.

    So there you have them. Are there any other tricks or tips you have for improving data? Let us know in the comments section. Don’t forget to also read our data saving tips for Snapchat and Instagram.

  • How to use Twitter in Nigeria Even When Banned

    How to use Twitter in Nigeria Even When Banned

    Are you a Nigerian or resident of Nigeria thinking of how to use Twitter despite the ban in Nigeria? If this, is you then this article is the perfect fit for you? In this article, I am going to show you exactly how to use Twitter in Nigeria even when banned.

    Twitter, a sub-company of Facebook is one of the most used social media networks in the world. Since its launch on July 15, 2006, Twitter can now boast of about 330 million users all over the world (according to research conducted in the first quarter of 2019).

    One of the continents that use Twitter often is Africa, of which Nigeria is part. Recently, Twitter was banned in Nigeria a few days ago after the government decided to ban the social media platform.

    Why is Twitter Banned in Nigeria?

    On Tuesday, 1st June 2021, the president of Nigeria, Muhammadu Buhari made a post on his official Twitter account. This post according to some popular sources was flagged as a threat to suspected separatist militants in the southeastern part of Nigeria.

    Since this the post goes against the policies and terms of Twitter, the post was deleted on Wednesday, 2nd June 2021. The main reason given by Twitter was that the post was abusive.

    After the post was deleted, the Nigerian government under the leadership of the President, Muhammadu Buhari announced on Friday that they are banning Twitter indefinitely.

    The original post that was deleted read as “Many of those misbehaving today are too young to be aware of the destruction and loss of lives that occurred during the Nigerian Civil War”. “Those of us in the fields for 30 months, who went through the war, will treat them in the language they understand.”

    As a result, Nigerian citizens and residents of Nigeria were not able to log in to their Twitter accounts on Friday, 4th June 2021. Funny enough, the announcement by the Federal Government to suspend Twitter indefinitely was made on Twitter.

    But that should make you let your guard down because, in this article, I am going to show you how to use Twitter in Nigeria even when you are banned.

    How To Use Twitter in Nigeria with a VPN

    Since the ban of Twitter in Nigeria, many people especially those who earn their living off Twitter are finding it worried about how they are going to work. Many have tried several methods and it still did not work.

    The most effective way to use Twitter in Nigeria in this period is by using a Virtual Private Network (VPN). What the VPN does is that it takes your original IP address and then changes it into a virtual network or IP address usually outside your country.

    What it means is that whiles you are in Nigeria, the VPN will change your address from Nigeria to a different country in the world. For example, the United Kingdom, United States, Germany, Netherlands, etc.

    Before you proceed, make sure to logout of your Twitter account (if it’s still logged in).

    To use a VPN to log into your Twitter account in Nigeria:

    1. Download and install your preferred VPN app from the Google Play Store or the Apple App Store
    2. Open the app and login or signup with your details
    3. If it is paid, add your payment method, and choose your preferred package, otherwise proceed to the next step
    4. Set up the VPN on your device and make sure to turn it on
    5. Once you are done with that, open the Twitter app (if you have it) or visit the official Twitter website
    6. Log in with your details and you are good to go.

    Precautions to Take When Using VPN

    Although VPNs are incredibly good for bypassing certain restrictions, there are some precautions you need to take when you are using them. Some of them are listed below:

    • Never use VPN for your cryptocurrency apps
    • Do not log into your mobile banking app with your VPN turned on
    • Make sure the developers of the VPN are authentic and genuine before signing up
    • Check the reviews from past users of the platform

    Some VPN to Use For Bypassing the Ban on Twitter in Nigeria

    There are over one thousand VPNs available on the internet but not all these VPNs can be trusted. Therefore, below are some of the authentic VPNs that have been tried and tested. You can check out our tutorial on using a VPN on an iPhone if that’s your preferred device.

    • Express VPN
    • CyberGhost VPN
    • NordVPN
    • Surfshark
    • IPVanish
    • VyprVPN
    • ZenMate, etc.

    Conclusion

    In this article, I have explained how to use Twitter in Nigeria even when banned. Unlike the other methods stated on some websites, the method shown in this article is 100% genuine and authentic.

    Read through the article carefully and you will be able to find your way out of it. If you have any concerns, feel free to write them in the comments section below and I will make sure to reply to you as soon as I can.

  • How To Renew Your Drivers Licence Online In Ghana

    How To Renew Your Drivers Licence Online In Ghana

    On November 7, 2017, Ghana became the first west African country to begin issuing smart drivers licence throughout its country.

    Cost Of Renewing Your Drivers License In Ghana

    Renewing of License 1 costs GHS 45.00 whiles renewing of License 2 costs GHS 105.00

    Types Of Driving License in Ghana

    Ghana has 6 types of driving license and they are :

    A – License A is for those who drive Motorcycles.

    B – Is for those who can drive minibuses, pick up vehicles across the country and they must contain 1-15 passengers.

    C – Is for drivers who can drive buses and moderate goods. Must contain 1-45 passengers.

    D – Drives coaches and heavy vehicles, buses and must contain 1-65 passengers.

    E – License E is for those who can drive industrial equipment like harvesters, bulldozers, forklifts and many more.

    F – Drivers who are eligible for licence F are those who can drive heavy carrying vehicles like articulators and many more.

    To be eligible in applying for driving licence  in Ghana:

    • One must be above 18 years.
    • Must have basic education (BECE), adult education or must be able to read and write.
    • You must go through a 48-hour training with a DVLA authorized driving school before you will be eligible to get a driving license.

    After going through the needed procedures you are going to have your driving licence processed in two weeks time.

    When you finally get your driving license it becomes valid for two years starting from the date issued.

    So after two years, you will have to renew your driving license, do you know you can renew your driver’s license online without the need to visit any Driver and vehicle licensing authority (DVLA) office?

    In this article, I am going to take you through how to renew your driver’s licence online in Ghana.

    How to Renew Your Driver’s License Online in Ghana through the DVLA Website

    1. Visit dvla.gov.gh
    2. Select “Driving Licence” and select Renewal of Driver’s License.
    3. you will be briefed on the requirements and the procedure, now press on “APPLY ONLINE!”
    4. You will then be redirected to the sign-in page, sign in or if it’s your first time sign up for free when done.
    5. Now proceed with your renewing of licence by following the steps given by the website and providing the details correctly.

    What Is The Benefits In Renewing Your Driver’s License Online?

    1. Renewing your driver’s license online saves you more time as you get to get your driver’s license renewed sitting at the comfort of your home.
    2. It saves you from losing money by paying middlemen also refereed as “Goro boys” to do the process for you.

    Kindly note that before starting renewing your license online, you will need to have with you these documents to submit in the process:

    • Applicant must be present
    • Expired License
    • One coloured passport-sized photograph

    Conclusion

    Now the Driver and Vehicle Licensing Authority has made it easy for drivers to renew their driver’s license online without the need to waste much time in visiting their various office.

  • How To Make Money From Instagram in Ghana

    How To Make Money From Instagram in Ghana

    Instagram is a social networking service owned by Facebook Inc. The service was created by Kevin Systrom and Mike Kriegar and was launched in 2010.

    Instagram is more of a video and photography sharing service but has the ability for messaging services where you can connect and chat with friends and families.

    Highlighted Features Of Instagram

    1. Photo Filters – This powerful feature can turn anyone into a professional photographer. This photo filter is central to Instagram’s success. Everyone with a picture can try out with the over 30 plus filters to have a stunning photograph.
    2. Video Posts – In 2018 alone, 81% of businesses used video marketing to generate more leads and customers. Video engagements increase day by day, hence this Instagram feature helped a lot of marketers. Gone are the days when a high budget was needed for video advertisement, with Instagram’s video post, all you need is a good camera and you can become a marketer.
    3. Instagram’s Story – This feature was added to Instagram in 2019. Just like WhatsApp’s status and Facebook’s story, Instagram’s stories appear as little circles on top of your followers’ feed and disappear after 24 hours.
    4. Story Highlights – This is where your best stories are saved and kept on your account as long as you want.
    5. IGTV – Instagrams’ standalone video platform. This service is basically for videos. Before you can create or upload a video, you need to create a channel.

    This and many other interesting features on Instagram. You have probably heard stories of Instagrammers cashing in on the pictures shared every day. Just like YouTube and Bloggers, Instagram also pays people for the content they share.

    Synonymous with YouTube followers, Instagram followers determine how your account can be monetized to generate passive income from Instagram.

    I remember someone asking me if I can get him a 10k Instagram account for sale. If you get huge and engaged followers, you stand a chance of making money on Instagram. Luckily, there are proven ways to get Instagram followers.

    Before I engage you in today’s article, I want to share with you some content creators, celebrities, and influencers who are earning millions of dollars on Instagram with just a post

    Top Earners On Instagram Per Post.

    • Kylie Jenner – $ 1.2 million per post
    • Cristiano Ronaldo – $ 975,000 per post. Most followers on Instagram
    • Ariana Grande – $ 966,00 per post
    • Kim Kardashian – $858, 000 per post.

    These are the few I will like to share. With the data above, you see how much people are earning on Instagram per post. To earn on Instagram keep following.

    Earning On Instagram

    If you have small but engaging customers, you can also start earning on Instagram. People think you need over 10K followers on Instagram before you can start earning.

    Having many followers is a plus though but if you have even 1000 followers you can start to earn. Mind you, Instagram frowns on fake followers so do not use third-party apps to gain fake followers.

    Depending on your unique brand or niche of Instagram content, audience, and commitment, you can make money on Instagram in the following ways.

    Working With Brands On Sponsored Posts

    If you are big enough, the chances of brands finding you are high. In the same way, you can also find brands in your niche to work with. It’s advisable to market or promote brands based on your niche so that your fans/followers do not think you are “selling out.”

    For example, if your niche is about entertainment, you don’t have to market Real Estate, your marketing should be based on Entertainment.

    You can reach them directly to strike a deal or also you can list yourself on one of the many influencers market places to increase your chances of being discovered. Some of these markets are:

    • Grapevine – If you have over 5,000 followers you can list yourself in the Grapevine market place to work with brands in your niche.
    • Crodtap – Small audience users can visit Crodtap to do small content creation tasks to earn rewards. This service is available in the U.S only.
    • Indahash – 700 and above followers can participate in brand post campaigns. All you do is post a picture with the specified hashtags and get paid.

    Affiliate Marketing

    Instagram stories allow adding links to posts. This has opened ways for affiliate marketers to earn more on Instagram. Affiliate marketing simply means earning a commission by promoting other people’s products.

    In affiliate marketing, you will be given a trackable link or unique promo code to ensure clicks actually transforms into sales in exchange for a commission.

    Popular marketplaces that offer affiliate marketing are:

    • ClickBank – Opened for everyone.
    • Amazon Associates – Pays out a 10 % commission to marketers

    Opening Your Own Shop

    Working with other brands and affiliates is not the only way you can earn from Instagram. You can earn from Instagram by selling your own products.

    Digital, physical and services can all be marketed on Instagram. Building an audience related to what you sell will boost your sale on Instagram.

    Conclusion

    Many people do not make use of their services to gain or earn a passive income on social media. Social media has evolved so quickly and always keep up to consumers demands.

    Stay informed and be abreast of new features added to your social handles and keep the focus on how you can benefit from these features as competition goes high.

    All you need to do is keep your followers engaged so that the engagement will lead to buyers.

  • Internet Settings for MTN, AirtelTigo, Vodafone, and Glo in Ghana

    Internet Settings for MTN, AirtelTigo, Vodafone, and Glo in Ghana

    Most often, when we have a new phone, it is usually difficult to configure the internet settings and we are left with no choice but to go to the Customer Service of the Network Operator for your phones and other devices to be configured. Well, I bring you the recommended internet settings for all the networks in Ghana.

    For android users, you can just use the “General” settings that I have used on every android phone and it works perfectly.

    How to set up internet settings in Ghana

    1. Go to your device’s settings
    2. Go to wireless and settings
    3. Select Mobile networks
    4. Select Access Points Names
    5. Create new APN by taping the “+” sign or pressing Menu and selecting new APN
    6. Select Name and enter “General”
    7. Select APN and enter “internet”
    8. Save the Settings
    9. Activate to use new Access Point Name

    The Configuration above should work for every device. However, I attach below network-specific configurations, which are especially useful for feature phones.

    Airtel Ghana Internet Settings

    Homepage: myairtel.gh.airtel.com
    Connection name: airtelwap
    Data Bearer: Packet data
    Access Point Name (APN): wap
    User name: [Leave Empty]
    Password: [Leave Empty]
    Proxy Server Address: 10.93.85.88
    Proxy Port number: 9401

    Glo Ghana Internet Settings

    Homepage: www.gloworld.com/gh
    Connection name: Glo
    Data Bearer: Packet data
    Access Point Name (APN): internet
    User name: [Leave Empty]
    Password: [Leave Empty]
    IP Address: 10.161.85.4
    Port: 8799

    MTN Ghana Internet Settings

    Homepage: mtnloaded.com.gh
    Connection name: MTN
    Data Bearer: Packet data
    Access Point Name (APN): wap
    User name: [Leave Empty]
    Password: [Leave Empty]
    IP Address: 172.017.003.005
    Port : 8080

    TiGO Ghana Internet Settings

    Homepage: www.tigo.com.gh
    Connection name: tigo
    Data Bearer: Packet data
    Access Point Name (APN): wap
    User name: [Leave Empty]
    Password: [Leave Empty]
    IP Address: 010.004.001.007
    Port: 8080

    Vodafone Ghana Internet Settings

    Homepage: www.vodafone.com
    Connection name: vodafone
    Data Bearer: Packet data
    Access Point Name (APN): wap
    User name: [Leave Empty]
    Password: [Leave Empty]
    IP Address: 172.024.097.001
    Port: 8080

    Did these help solve your problem? If no, just leave a message in the comments below and I will get back to you.

  • How To Pin And Unpin A Post On Facebook Page And Why You Should

    How To Pin And Unpin A Post On Facebook Page And Why You Should

    Facebook Pages are business tools used by owners of various businesses and brands to manage the Facebook presence of their brands for marketing, Public Relations and sales purposes.

    A Facebook page several features which enable a business owner to perfectly achieve their objectives.

    One notable feature associated with a Facebook page is the pinning and unpinning of posts.

    To pin a post on a Facebook page is the digital version of sticking an important note on your walls so as to always remember to take action.

    So, a pinned post on a Facebook page appears as the very first post on the page no matter how many new posts are created and they last for as long as they are kept there.

    In this article, we shall look at the steps involved in pinning and unpinning posts on a Facebook page.

    How To Pin A Post On A Facebook Page

    The following steps will guide you in pinning a post to your Facebook page.

    1. Go to your Facebook page (A page you own)
    2. Look for an existing post which needs to be seen more.
    3. Click on the three dots located on the top right side of the post on both mobile devices and PCs.
    4. Select ‘Pin to top’ from the popup menu.
    5. Your page may refresh and then you’ll see your post on top of the page.

    How To Unpin A Post On A Facebook Page

    Unpinning a post from your Facebook page is relatively easy and requires very few clicks. Follow the instructions below.

    1. Visit your Facebook page.
    2. Locate your pinned post at the top of the page.
    3. On your mobile device of PC, click on the three dots on the extreme right corner of the post.
    4. Select ‘Unpin from the top’
    5. Your post should be unpinned from the top of your page following the previous step.

    Why You Need To Pin Posts To Your Facebook Page

    When people visit a page on Facebook, it is either they have heard of it somewhere else or they saw a post from the page on their newsfeed.

    Whichever reason is responsible for the visit, there is one thing that is being chased and that is ‘more information’.

    So pinning a post to the top of your page provides visitors with a firsthand view of what is currently trending with your business.

    It also enables you to promote an event to a large number of people since everyone who visits your page sees it first.

    People cease this as a source of advertisement. You can make money from people and keep their business flyers pinned to the top of your page. This depends on the number of page views and visitors you get periodically.

    Finally, as a businessman, you may actually be forgetful so pinning posts to your Facebook page may enable you to all very vital information and events that you need to attend to.

    Conclusion

    Pinning and unpinning a post on Facebook can only happen on Pages, groups and events. Your personal Facebook profile or timeline cannot be used for this purpose. Again, it is important for us to know that you can only pin one post at a time.

    If you wish to pin a different post, you’d have to unpin the first one or replace it with the new one. Finally, since you can only pin one post at a time, make sure that you use that space wisely because when used well, you can reach lots of people. If you have any comments or suggestions regarding this post, you can share in the comment box or contact me directly.

  • How To Stake Sportybet Online With The Mobile App

    How To Stake Sportybet Online With The Mobile App

    If you are a fan of betting or you are now trying to enter the world’s leading online gambling venture, then you know that Sportybet is one of the leading bookies where you can place your bet.

    With numerous events and numerous options and huge odds, many people have resorted to using sportybet as their number one sports bookie online. For most people though, they book their bets on the Sportybet website.

    This is partly because some people don’t know how to get the Sportybet mobile app so they could place their bets on the go.

    In this article, we shall look at how to stake a bet with Sportybet, using the mobile application.

    Bur before we get into the steps involved, let’s first look at how to get the mobile appp for your smartphone.

    How To Download The Sportybet App On Your Smartphone

    The sportybet application is not directly available on the Google play store for downloading so you may have to download from the Sportybet website.

    1. Click here to get the Sportybet app for your android phone.
    2. After downloading the application, click to open it.
    3. Your phone will ask you to grant permission for your file explorer to install the app on your phone. Kindly grant it access.
    4. If the app doesn’t install automatically after the third step, Go to your phone settings and select security.
    5. Under the security settings menu, enable “Install from unknown sources”.
    6. Go back to the downloaded app and install it now.

    The installation should start after successfully going through the process. The installed application will run in the same way as any other application you have on your phone presently.

    Now, let’s move on to how to place a bet on your Sportybet Application using your smartphone.

    How To Place Bet On Your Sportybet Account Using The Mobile App

    First of all, before you can start placing a bet on your Sportybet account, you must open an account and load the account with some funds.

    You can learn about How To Create A Sportybet Account In Ghana and How To Load Your Sportybet Account.

    Now, here are the steps to follow in placing bet on your Sportybet account:

    1. Click on ‘Sports’ in the list of menus on the top row of your app.
    2. Select the type of sports you want to bet on. It can be football, boxing, basketball or any other.
    3. Select the game you want to bet on and select the odds you want to go for.
    4. You can combine different games or just go for a single game.
    5. Once you select an odd, it gets automatically added to your bet slip.
    6. Enter the amount you want to place on your bet and click on ‘Place bet’

    You’ll receive a message indicating whether the bet has been successfully placed or not. Remember that you can’t place more than 1,000 GHS on any odds. And your bet must also not be less than 1 GHS. You can go on to stake as many bets as possible.

    Conclusion

    Betting is a great way to make some extra cash for yourself while enjoying the games you love to watch. But betting is even more enjoyable if you don’t have to keep refreshing a browser to check current updates.

    With the Sportybet app, you can place a bet on all your favourite events and all your high odds right from your smart phone.

    In this article, we talked about how to download the Sportybet App on your smartphone and also how to use it to place a bet.

    I hope the article was helpful to you and that you’ll share it with your friends. If you have any questions, comments or reservations regarding this article, kindly share with us in the comment box or get in touch with us.

  • What Happens When You Report And Block Someone On WhatsApp?

    What Happens When You Report And Block Someone On WhatsApp?

    Do you know what happens when you Report And Block someone on WhatsApp?

    We often report and block people on WhatsApp but little do we know about what actually happens afterward. In this article, you are going to find all that happens when you report and block someone on WhatsApp.

    Because WhatsApp is one of the most used social media platforms, most of the spammers use it to their advantage. This was the reason why Whatsapp introduced the ‘Report And Block’ feature about five (5) years ago.

    Since the introduction of this feature, most WhatsApp accounts have been suspended and others have also been banned. But what exactly will cause an account to be banned?

    Before an account will be banned/suspended, it needs to violate WhatsApp’s terms and policies, otherwise, the account cannot be banned.

    Some of these include engaging in fraudulent activities, sharing pornographic contents, and sending threats to a WhatsApp user.

    How To Report And Block Someone On WhatsApp

    • Open the WhatsApp app on your mobile phone.
    • Tap on the person you would like to ‘Report And Block’ to open a chat.
    • On the top of the screen, tap on the name of the person.
    • Scroll to the bottom of the page and tap on Report Contact.
    • Tap on Report And Block
    • A confirmation will be sent stating that a report has been sent and the contact has been blocked.

    What Happens When You Report And Block Someone On WhatsApp

    Your last seen will not be visible to the reported contact

    Once you report and block someone on WhatsApp, automatically your last seen will no longer be visible to the person you blocked. Thus, the person will not be able to tell whether you are online at the moment or not.

    Your WhatsApp status will be hidden from the reported contact

    Similar to the last seen becoming hidden, the person you blocked will also not be able to see your WhatsApp status. The WhatsApp status is similar to Instagram and Facebook stories.

    This is where you share media or text with your contacts and is visible to only your contacts by default. But, you can also change this in your WhatsApp settings.

    Your profile photo will not be visible to the reported contact

    After you report and block someone on WhatsApp, your profile photo will no longer be visible to him/her. The profile photo will become blank for the reported contact.

    Calls and messages from the reported contact will not be delivered

    This is one of the most obvious things that happens when you report and block someone on WhatsApp. All calls from the contact will not be delivered, it will just ring but it will not be delivered to you.

    Also, messages sent by the reported contact will not be delivered. It will tick on once on the person’s phone but it will not be delivered to you.

    Group chats will remain unaffected

    If you are in the same group with the person you reported and blocked, all messages sent by him/her in the group will be delivered to you. Calls made by the group involving him/her will be visible and delivered to you.

    WhatsApp will investigate the contact

    Finally, once you report someone, WhatsApp will perform an internal investigation of the report. This is mostly done by monitoring the person’s chats to find out if they have violated any of WhatsApp’s terms and policies.

    If they are found guilty, their WhatsApp accounts will be suspended or banned.

    Conclusion

    Now I believe you know what happens when you report and block someone on WhatsApp. These are not all the things that happen, but these are the most important things that happen.

    I hope this article was helpful. If you have any suggestions and comments, please write it down in the comments section below and I would assist you.

    Also, make sure to share this article with your friends and loved ones.

  • Facebook Ads Vs Instagram Ads: Which one is best for Brands?

    Facebook Ads Vs Instagram Ads: Which one is best for Brands?

    Ever felt the need to promote your businesses to gain engagement on Instagram or Facebook and increase your visibility but don’t have a large budget? If you are thinking about the same and can’t decide if you should invest in Facebook or Instagram Ads to promote your business, then this article might help you make an informed choice more quickly as we try to compare both down so you can increase engagement on Facebook and Instagram in no time! 

    Types of Ads

    Facebook is still ahead of Instagram when it comes to brand promotion through varied forms of advertisements and provides you greater control as is quite evident from the Facebook Ads Guide. Be it videos, images, collections, carousel, slideshow, lead generation, or canvas Ads, you can do it all with the help of Facebook! 

    Instagram, on the other hand, is relatively new to the game but it is growing exponentially and currently only provides advertisements through photos, videos (IGTV), stories, carousel, and in the explore section. So if you don’t care much about the numbers and don’t have a deadline to gain engagement on Instagram, then you can go with Instagram Ads but if you want to keep a close eye on the metrics, Facebook Ads will be better.

    Pricing 

    There’s no denying the fact that social media advertising campaigns can be a bit pricey. Since Facebook advertising offers a lot of options, several factors can affect the cost you incur while promoting through Facebook Ads. While an average click per post (CPC) for Facebook Ads is somewhere around $1.72, it can fluctuate due to factors like objective, ad quality, and audience.

    Despite the fact that the CPC for Instagram lies between $0.50 – $0.95 while the CPM (cost per impression) can be anything between $2.50-3.50 for campaigns performing well. Instagram pricing is also influenced by a number of factors like the objective of promotion, size and type of audience (larger the group, lesser the price), and the click-through rate (CTR) which is determined by the quality of your advertisements.

    So make sure you plan your campaigns well to get better results in a lesser amount. 

    Engagement

    Facebook boasts of over 2.38 billion active users every month which gives it an edge over Instagram in terms of user base and popularity and that’s one of the major reasons more than 65 million small businesses have created Facebook Pages. Surveys show that nearly 74% of marketers include Facebook in their market strategy to achieve better results.

    Instagram isn’t far behind as it has nearly 1 billion monthly active users which has encouraged over 65% of marketers to include this platform in their marketing strategy to increase sales and expand their business efficiently. With new features being rolled out every month by Instagram, these numbers are likely to soar higher in near future.

    So if you are targeting a mature audience (above 25 years of age) then Facebook Ads might help you generate better leads and results but when it comes to teens and promoting trending yet quirky stuff that might interest youngsters, Instagram is the way to go.

    Analytics and management

    Facebook’s Ad manager acts as a one-stop-shop for all your advertising needs. Be it selecting the right audience, choosing the type of Ads, analyzing the performance of the campaign through reports, or setting up advertisements. 

    For Facebook, the campaign manager allows you to try out various combinations before deciding on the one that you want to use for brand promotion. You can also preview all the available ads and also keep an eye on how well they are being received by the audience once the campaign starts.

    Just like the rest of the functionalities, the Ad Manager provides a simple and straightforward way to promote your posts, without going into too much detail or numbers.

    If you are new to advertising, then Instagram Ads can help you get things done in a breeze and once you’ve got a hang of things, you can take a more detailed approach using Facebook Ads.

    Content

    In the end, it all boils to one thing, content. You need to pay attention to the type of content you post and want to promote. Moreover, you also need to keep your objective in mind so you can pick the right audience which will benefit from your posts and will help you increase engagement on Facebook in an effective manner by buying facebook followers. Make sure your content aligns with your business goals and promotes eye-catching, brief yet sharable content to get better exposure. Promote your best posts which include witty captions and high-quality pictures or videos that are relevant to your business, to get the best results.

    If you tend to post more pictures, then Instagram Ads can prove to be effective but if you’re into writing engaging content, then Facebook Ads will benefit you more. 

    Final Verdict

    In the end, it all boils down to the kind of business you own and your goals. The points listed above clearly show that you can pick either of these to create brand awareness and strengthen your social media presence. You can also fine-tune your budget and use them simultaneously to get higher ROI as Instagram and Facebook Ads can help you gain more clients from all age groups! 

  • How To Know If Someone Has Accessed Your Facebook Account

    How To Know If Someone Has Accessed Your Facebook Account

    Have you ever woken up in the middle of the night to pee or early in the morning to see some unusual posts on your profile?

    Did you ever have to deal with seeing some strange messages sent from your Facebook account? Well, chances are that your account has either been hacked or someone close to you has accessed your Facebook account.

    But frankly, it’s just a matter of chances. These signs are not certain enough to indicate the worst. So, how do you confirm if truly someone has access to your Facebook account?

    In this article, we take you through things you should see before concluding that someone has accessed your Facebook account.

    Some of them may actually shock you. So, just stick around and ejoy your read.

    The Holy Truth About Social Media

    Social media and in fact, any resource on the internet can be hacked. I know it’s hard to accept but once it was built by a human, it can equally be hacked by a human.

    Even cryptocurrency exchanges which are highly encrypted and layered, get hacked all the time. So, social media platforms such as Facebook and likes are also susceptible to hacks.

    So, don’t be so alarmed if this happens to you. A hack to your account will primarily be your fault. But if it’s a platform-wide hack, then the platform could be at fault.

    So, while we delve into the signals to confirm that your account has been hacked, just know that, it’s not impossible for this to happen to you.

    Things To Check To Confirm That Your Facebook Account Is Hacked

    The following actions will guide you to find out if your account has been compromised or logged into by someone else. Follow each of them keenly to be sure of your account’s status.

    Checking For Last Active Uses

    Facebook has a feature that enables its users to discover the most recent times that their accounts were used. This feature indicates, the date, time, location and device on which the account was accessed.

    So, if you want to be sure whether your account has recently been used by someone else, then you should try this feature. The good thing is that it’s available on any of the Facebook platforms – be it on a smartphone or a desktop.

    So, how do you check this?

    On your smartphone, follow the steps below:

    1. Open the Facebook app on your phone
    2. Click on the three horizontal lines located in the top right corner
    3. Scroll to and click on ‘Security and Privacy
    4. Select ‘Security
    5. Under the ‘Security’ menu, select ‘Security and Login’.
    6. Under the heading ‘Where you’re logged in, you’ll see a list of the devices that logged in currently.
    7. You’ll see your current device at the top with ‘Active now’ written in blue ink
    8. Click on ‘See all’ to see the full login activities on your account.

    If you see any strange device logins on the account from this section, then you must know that someone else is using your Facebook account.

    How To Remove Unknown Logins From Your Facebook Account

    Now, you know the devices that have logged into your Facebook account. But what if there’s one or two which you don’t recognize?

    How do you logout all unknown devices from your Facebook account?

    Follow the steps below on your smartphone:

    1. Open the Facebook app on your phone
    2. Click on the three horizontal lines on the extreme top right corner
    3. Select ‘Settings and Privacy
    4. Click on security
    5. Go to Security and Login
    6. Click on the ‘See all’ button beneath the list of your logged-in devices
    7. Click on ‘Logout of all sessions’

    Once you’re done, you’ll be logged out of all devices that you’ve ever logged in with. And this includes the unrecognized or unknown devices.

    Note that, you’ll still remain logged in on the device you’re using to perform this action. So don’t worry about that.

    Now, once you’ve logged out of all devices, you can successfully change your password to prevent the other person from having access to your account again.

    Conclusion

    The thought of knowing that your Facebook account could be hacked is not just excruciating, it’s also scary. Like, how do you deal with sharing all the messages you’ve had on the platform with someone you don’t even know?

    Many times, when we hear people complain about their accounts being hacked, we get scared and wonder if that can happen to us. If you haven’t activated Second Factor Authentication on your account yet, then your worry is real.

    But not to worry. In this article, we discussed how to check if someone has access to your Facebook account. Do you know of any other ways?

    Let us know in the comment box below.

    If you have any questions, comments or reservations about this article, kindly let us know in the comment box below.