Have you ever woken up in the middle of the night to pee or early in the morning to see some unusual posts on your profile?
Did you ever have to deal with seeing some strange messages sent from your Facebook account? Well, chances are that your account has either been hacked or someone close to you has accessed your Facebook account.
But frankly, it’s just a matter of chances. These signs are not certain enough to indicate the worst. So, how do you confirm if truly someone has access to your Facebook account?
In this article, we take you through things you should see before concluding that someone has accessed your Facebook account.
Some of them may actually shock you. So, just stick around and ejoy your read.
The Holy Truth About Social Media
Social media and in fact, any resource on the internet can be hacked. I know it’s hard to accept but once it was built by a human, it can equally be hacked by a human.
Even cryptocurrency exchanges which are highly encrypted and layered, get hacked all the time. So, social media platforms such as Facebook and likes are also susceptible to hacks.
So, don’t be so alarmed if this happens to you. A hack to your account will primarily be your fault. But if it’s a platform-wide hack, then the platform could be at fault.
So, while we delve into the signals to confirm that your account has been hacked, just know that, it’s not impossible for this to happen to you.
Things To Check To Confirm That Your Facebook Account Is Hacked
The following actions will guide you to find out if your account has been compromised or logged into by someone else. Follow each of them keenly to be sure of your account’s status.
Checking For Last Active Uses
Facebook has a feature that enables its users to discover the most recent times that their accounts were used. This feature indicates, the date, time, location and device on which the account was accessed.
So, if you want to be sure whether your account has recently been used by someone else, then you should try this feature. The good thing is that it’s available on any of the Facebook platforms – be it on a smartphone or a desktop.
So, how do you check this?
On your smartphone, follow the steps below:
- Open the Facebook app on your phone
- Click on the three horizontal lines located in the top right corner
- Scroll to and click on ‘Security and Privacy
- Select ‘Security
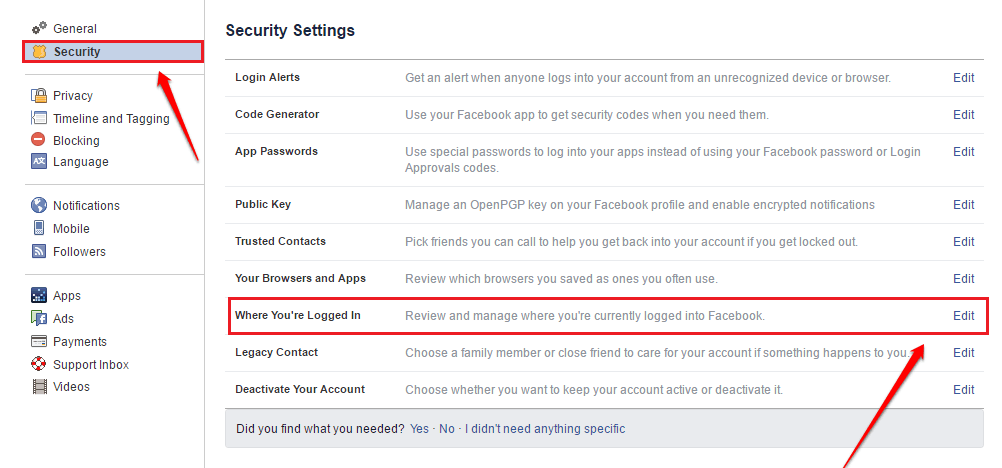
- Under the ‘Security’ menu, select ‘Security and Login’.
- Under the heading ‘Where you’re logged in, you’ll see a list of the devices that logged in currently.
- You’ll see your current device at the top with ‘Active now’ written in blue ink
- Click on ‘See all’ to see the full login activities on your account.
If you see any strange device logins on the account from this section, then you must know that someone else is using your Facebook account.
How To Remove Unknown Logins From Your Facebook Account
Now, you know the devices that have logged into your Facebook account. But what if there’s one or two which you don’t recognize?
How do you logout all unknown devices from your Facebook account?
Follow the steps below on your smartphone:
- Open the Facebook app on your phone
- Click on the three horizontal lines on the extreme top right corner
- Select ‘Settings and Privacy
- Click on security
- Go to Security and Login
- Click on the ‘See all’ button beneath the list of your logged-in devices
- Click on ‘Logout of all sessions’
Once you’re done, you’ll be logged out of all devices that you’ve ever logged in with. And this includes the unrecognized or unknown devices.
Note that, you’ll still remain logged in on the device you’re using to perform this action. So don’t worry about that.
Now, once you’ve logged out of all devices, you can successfully change your password to prevent the other person from having access to your account again.
Conclusion
The thought of knowing that your Facebook account could be hacked is not just excruciating, it’s also scary. Like, how do you deal with sharing all the messages you’ve had on the platform with someone you don’t even know?
Many times, when we hear people complain about their accounts being hacked, we get scared and wonder if that can happen to us. If you haven’t activated Second Factor Authentication on your account yet, then your worry is real.
But not to worry. In this article, we discussed how to check if someone has access to your Facebook account. Do you know of any other ways?
Let us know in the comment box below.
If you have any questions, comments or reservations about this article, kindly let us know in the comment box below.