Are you tired of not being able to multitask on your iPhone? Have you always wanted to use the Picture in Picture mode on your iPhone?
If you have any of the questions above, then you have found the right article. In this article, I am going to show you exactly how to use Picture in Picture mode on your iPhone.
One thing that iPhone users have always wanted was a way to multitask on their iPhones. This was very frustrating and annoying at the same time.
This is because some of iPhone’s Android competitors were able to use the Picture in Picture feature but iPhone didn’t have this feature.
As a result, Apple added a Picture in Picture mode to the iPad when the iPad OS 13 was released. Later somewhere in 2020 when the iOS 14 was released, Apple added the Picture in Picture feature on iPhones.
The Picture in Picture works with applications that play video contents. But, when you are using third-party apps, the app needs to have support for this feature.
How To Turn On The Picture in Picture Mode on Your iPhone
Before you can also use the Picture in Picture, you need to turn on the Picture in Picture feature on your iPhone. To do so, follow the steps below:
- Open the Settings app on your iPhone.
- Tap on General.
- From the list of available options, tap on Picture in Picture.
- Next, you need to make sure that Start PiP Automatically is turned on. If not, make sure to do that.
How To Use The Picture in Picture Mode on iPhone
To use the Picture in Picture mode on your iPhone, you need to make sure that your iPhone can support iOS 14. If it can, then you need to upgrade it to the latest version.
Next, you need to make sure that the app you are about to use also accepts Picture in Picture. If so, then follow the steps listed below:
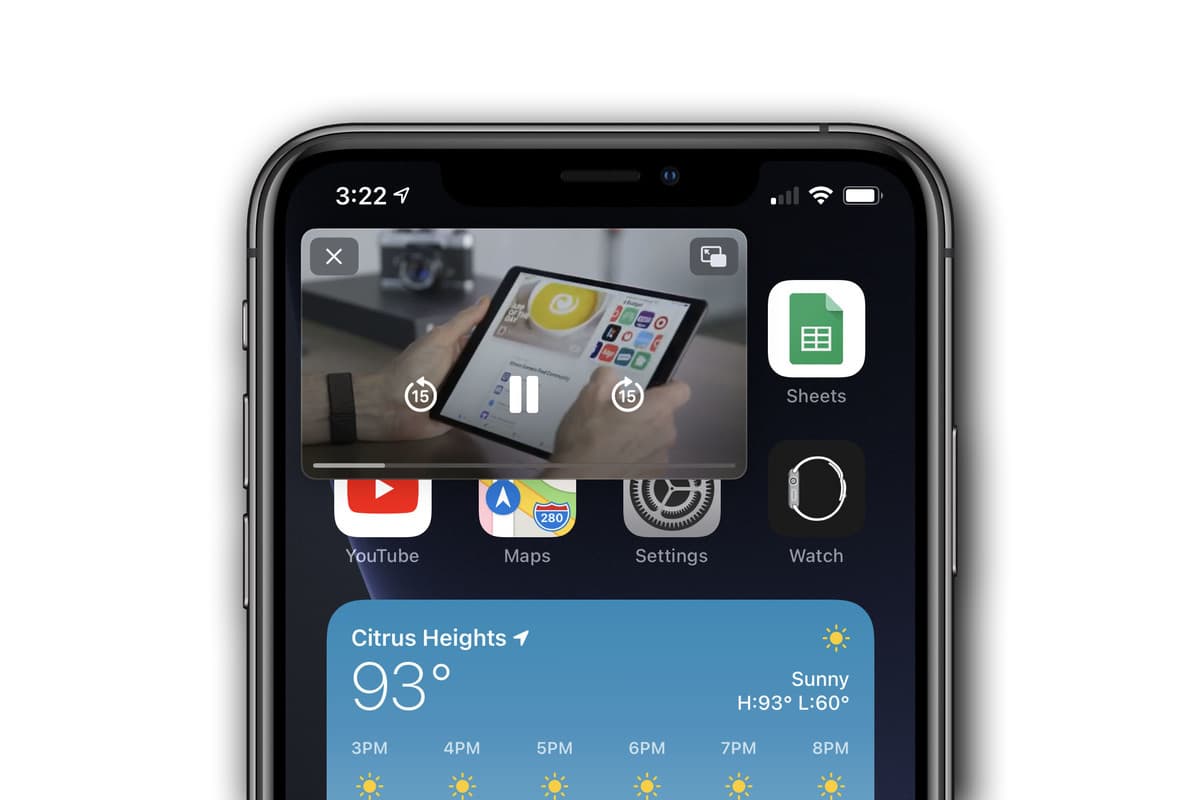
- To begin with, open a video player application on your iPhone. For example, Apple TV or Twitch.
- Start playing a video in the application. For example, if you are using the Apple TV tap on a movie or show.
- Next, tap on the Picture in Picture logo on the upper part of the screen. (This depends on the application. For some of the apps, you can just press the home button or swipe on to go home and it will automatically start playing).
- Once you swipe to go home or press the home button, the video will start playing on a floating screen.
- Now, you can do whatever you want to do while the video is still playing.
Conclusion
As you can clearly see, the process of using the Picture in Picture mode on your iPhone is very easy and very helpful. With this feature, you can now be replying to your emails while watching favourite movie or TV show.
Interestingly, all the methods and steps you need to be able to access this feature has been outlined in this article. Read through and you will be able to use the Picture in Picture feature on your iPhone.
Aside from that, if you face ant challenge while trying to use the method stated in this article, make sure to write it in the comments section below.