If you are in the market for a computer, there are several factors to consider. Will it be used for your home, your office or perhaps even your home office combo?
First off, you will need to set a budget for your new purchase before deciding whether to shop for notebook or desktop computers.
Many offices use desktop computers because they are not intended to be moved around a lot. Also, affordability often plays a large role in deciding whether to purchase a notebook or desktop computers.
Why You Should Purchase A Desktop Computer
While you are shopping around, it’s important to keep in mind some of the benefits of owning different computers. To that end, this article provides five important reasons to purchase desktop computers.
Desktop computers are typically much more affordable than notebook computers. With notebooks, you are paying more for the convenience of portability. For as little as $299.00, desktop computers can be purchased from one of the leading manufacturers and a notebook computer for as little as $499.00.
Unlike notebook computers, replacing a keyboard, mouse, speakers, or even a monitor does not require having your computer serviced by a professional repair shop.
Because notebook computers have everything built-in, including the aforementioned features, it is more difficult to replace a keyboard or monitor than desktop computers, which operate on external connections.
In the event of an unlawful entry into your home, desktop computers are not as likely to be stolen because of their weight and bulk. Notebook computers, on the other hand, are small and portable.
This, alone, makes them more appealing to a thief than desktop computers.
Desktop computers are stationary by nature. Unlike a notebook computer, which can easily be moved from room to room, they are less likely to be dropped or broken because they are not moved as often.
The vents on desktop computers are located on the back of the tower, which allows for proper ventilation to prevent the computer from overheating.
On the other hand, notebook computers feature only one vent on the back with the remaining underneath the base. If placed on a table, the air vents can become blocked, and the computer may overheat.
If prolonged use leads to overheating, damage may result.
When choosing from the many desktop computers on the market, always make sure that you purchase from a manufacturer who has experience creating computers.
Even though they are more affordable than notebooks, desktop computers are not cheap. With an investment that involves several hundred dollars, you will want to consider the length of time the manufacturer has been in business, their reputation with customers and their warranty.
Additionally, when choosing any system, including desktop computers, always look at future upgrading potential. As you grow, you will want your computer to grow with you, and a part of that will include a slight upgrade from time to time.
This is the only way to get the best use of your desktop computers and make sure that your investment is one that lasts for years to come.
Conclusion
If you are contemplating if you should buy a Laptop or a Desktop computer, the reasons provided in this article will help you arrive on a decision.
Are you tired of using Gmail as your official email account? Or do you want to switch your official email address from Gmail to another email platform?
Gmail as we are all aware of, is one of (if not) the most used email platforms in the world. As of October 2019, Gmail had 1.5 billion active users from all the countries around the world.
Most corporate and state companies use Gmail as the preferred email platform. For example, the University of Ghana’s students and staff’s email is powered by Gmail. For example, [email protected].
Once you make a choice and delete your Gmail account, all your emails and account settings will be permanently erased from the internet. Even if you delete your account, your username will still not be available for anyone to use in the future.
On the good side, deleting your Gmail account is not going to delete the entire Google account the email address is associated with. Google services like Google Drive, calendar, Google Play, etc. will still be accessible for you.
All you be asked is to provide an alternative email address you will like to sign in to these services in the future or whenever you may need it.
How To Delete Your Gmail Account
Before you decide to delete your Gmail account, make sure you are aware of the risks associated with it and that you have all the important documents and files you may need in the future.
Once you are certain that you have all that you need, you can then follow the steps below to permanently delete your Gmail account.
Open your web browser and sign in to your Gmail account via Google.com.
On the upper right-hand corner, click on the Grid icon and then select Account.
Under the Account preferences section, click on Delete your account or services.
From the options provided, choose Delete products.
Confirm your choice by entering your Gmail password.
If you want some important data, click Download Data to save it before it gets erased permanently.
On the next page, click the trash icon that is next to Gmail.
Enter an alternate email address. (This email address cannot be a Gmail)
Click on Send Verification Email. (This will be sent to the email address you just entered in the step above).
Open the verification email and then click on the deletion link in the message.
In case you are prompted, log in to the Gmail account you are deleting.
According to Google, if you use your Gmail through work, school, or other organization, the administrator is the only person who can delete your Gmail account. Thus, you need to contact him/her to delete your account for you.
After your Google account is deleted, all your account information will be permanently deleted from the internet’s database.
So, before you decide to delete your account, make sure you are certain of the choice you are making and its related consequences.
Your smartphone is not just a device for entertainment and making calls. Your smartphone can become your personal assistant and do virtually everything you want it to do.
Thanks to the android operating system and google’s powerful Artificial Intelligence systems, your smartphones can now give you daily weather forecasts and updates.
You are probably aware that Your Google Assistant Can Read Stories To You. But what you may not have known is that your Google Assistant can also remind you about daily weather updates.
In this article, we take a look at how to set up your google assistant to remind you of daily weather updates.
We also take you through how to check your daily weather update with the google assistant.
So, first, let’s look at what Google Assistant is.
What’s Google Assistant?
Google’s Assistant is Google’s innovative entry into the Artificial Intelligence (AI) marketplace.
The Google assistant is an Artificial-Intelligence powered software which serves as a virtual assistant.
It is basically available on Smartphones and smart home devices. The Google Assistant usually engages in two-way conversations with its users.
This means; it can receive commands by voice note and provide feedback through the same means.
The Google Assistant can help users with many tasks including reading notifications to you, controlling your music, running timers and reminders, open apps on your phone and so many others.
How To Set Up Your Google Assistant To Inform You About The Weather
The approach to setting up your Google assistant for Weather updates varies from device to device.
So, here, we shall look at how to set it up on your android phone and how to set it up on your iPhone or Ipad.
How To Set The Google Assistant Weather Update On Your Android Phone
Follow the steps below to set up the Google Assistant weather update feature on your android phone:
On your phone, touch and hold the home button for a while or say ‘Hello Google’ to activate the Google Assistant.
Say these words ‘Send me weather every day’. You can also type it if you wish.
Select ‘Yes’, when asked if you want to receive the updates daily.
Select a time of the day to receive your daily updates.
That’s all. Once you select your time for daily updates, your assistant will give you success notification – indicating that the setup was successful.
How To Set Up Your Google Assistant Weather Reports On iPhone and Ipad
Iphone and Ipad users are not left out of the goodies presented by Google Assistant.
To setup the weather report reminder on your iphone or ipad, kindly follow the steps below:
Open the ‘Google Assistant’ app on your iphone or ipad.
Tap the microphone which appears on the Google Assistant window. If you wish to type the command, then tap the ‘Keyboard’
Say the following words; ‘ send me weather everyday’. You can as well type those words if you prefer to.
Do select ‘Yes’ when asked to confirm if you’d like to receive your info daily.
Select a time of the day for receiving such updates.
How To Check and Confirm Your Daily Updates
To ensure that your susbcription to the daily weather update is successful, Google has an option available for you.
The process is different on android phones and Apple devices. See the various steps below.
How To Verify Your Subscription On Android Phones
To verify your Google Assistant daily weather update on your android phone, kindly complete the steps below:
On your phone’s home page, press and hold the home button. You can also say ‘Hey Google’
Next, say ‘ See my daily subscriptions’ or ‘What are my subscriptions?’. You can also Type the words.
A list of your daily subscriptions will be made available so you can confirm if the weather report is part.
In case it isn’t part of the list, then you have to go through the steps for subscriptions listed above.
How To Verify Your Subscription On Apple Phones
Open the Google Assistant application on your iPhone or iPad.
Tap the microphone if you wish to use voice command. You can also tap the ‘Keyboard’ if you wish to use text command.
3. Finally, say or type: ‘What are my subscriptions?’ or ‘See my subscriptions’
Conclusion
Worried about the numerous changes in the weather pattern these days?
Thinking you might get whipped up in some heavy rain while stepping out for your next appointment?
Well, your phone could be a little saviour for you. Thanks to Google’s virtual assistant – Google Assistant.
You can set up daily weather report reminders on your phone and have them delivered to you every single day.
This article gives you an overview of what Google Assistant can do for you, how to set up the daily weather report reminder and finally how to verify your subscription.
We hope the content of this article was helpful to you and that you’ll share it with your friends and relatives.
If you have any questions, comments or reservations, kindly let us know in the comment box below or get in touch with us.
This article will take you through the 7 great computer user tips and tricks for Windows users. Continue reading to know.
An Easy Performance Enhancement
If you’re using the NTFS filing protocol on your system, instead of FAT32, you can get a bit more speed by disabling Windows® Indexing. The downside to this is that searching your drive for a specific file might take a moment or two longer, but everything else should run faster.
To disable this feature open My Computer and then right-click on the drive you wish to reset – usually C-drive. Now click on Properties and then uncheck “Allow Indexing Service.”
It will take Windows a few moments to accomplish this task, based on your processor speed. If you have other hard drives, perform the same process for them.
After this is done, it’s a good idea to empty the Recycle Bin and then Defragment your hard drive(s).
Free Software
If you have a system and it does not have an office suite, such as Microsoft Office, and you don’t want to pay several hundred dollars to have one, try Open Office.
This is a great alternative to other suites, and it’s free! Simply direct your browser to www.openoffice.org and follow the instructions for downloading and installation.
Make no mistake; this free office suite is a compelling set of software tools – easily a match for any competitor.
Internet Explorer (Microsoft’s Internet browser) is unarguably the standard in computers. This is why hackers develop so many malware applications to invade it.
If you use a different browser, you have much less chance of an invasion by malicious software. There is a great alternative available, and it’s free. You can download a copy of Firefox at www.mozilla.org/products/firefox.
You can even move your Internet Explorer settings into Firefox automatically – so you don’t lose your Favorites, etc.
Laptop Printer Fix
If you’re using a laptop that is running Windows ME, and you’re having trouble printing through the USB, try this simple fix. Go to the website for the company that manufactures your printer.
If you use a Hewlett-Packard, for example, go to www.HP.com and download the appropriate drivers and install them.
ME has drivers that recognize the USB printer is present and attached, but not the drivers needed to make it print. Which drivers you download and install will be dependant on your printer.
After installing new drivers, update the printer as necessary in the Control Panel.
Save $$$ When Shopping On-line
If you’re making a purchase on-line, and you know the item you want to buy, you can easily compare pricing all across the Internet. This can amount to a very substantial savings.
At this writing, I went to www.mysimon.com and typed in that I wanted to buy a printer: a Canon PIXMA iP4000. The service instantly checked the Internet and returned prices ranging from $62.00 up to $286.00.
This kind of price spread is not at all unusual, especially for computers and electronics.
The My Simon website service only checks to price; it does not provide a platform for purchasing anything, though it does link to such places. It also gives a rating for the sellers and other users’ input regarding their experiences with the company.
You can order the search results for your product by price so that you can quickly find the lowest price from the highest rated dealer.
Windows XP Professional Only
A feature of Windows XP Professional that is not available in the Home Edition is the ability to encrypt files. This encryption prevents others from opening the files in the folder you encrypt.
To encrypt one or more a folders, follow these easy steps.
Click Start, then My Documents. Now locate the folder you wish to encrypt and right-click on it and choose Properties.
On the General tab, click on Advanced. Put a tick mark in the box for Encrypt Contents to Secure Data. Click okay two times and the confirmation dialogue box will appear allowing you to select the folder, the folder and all files, and/or the subfolders within it.
Now you’ll be able to place files in this folder (or folders) and since they’re encrypted, others will not be able to access them.
Internet Safety
It would help if you never reveal your username or password to anyone who e-mails you and asks for it. This information is frequently asked for by an Internet scheme called “phishing.”
In a common phishing scam, you receive an e-mail that looks quite official. It usually appears to come from a bank or credit card company.
A common title for these e-mails is “We need to verify your account information.” Another is “Please login to your account and verify your settings.”
If you click where instructed, you’ll end up on a site that appears to be the real one. If you fill in the username and password for your online banking account, you can expect serious problems within twenty-four hours.
If you believe that a company or business you do on-line business with really requires your information, then contact them. This way, you will know where you are sending your information, and what it will be used for.
CD Burning Error Fix
Burning music, video, and data CDs have become quite popular over the past few years, and the evolution of the supporting technology has yielded hardware and software that is better than ever – and very reasonably priced.
CDs offer a great place to store substantial amounts of data in a small, easily retained format. They also give us new control over aspects of our entertainment.
A relatively common error received during CD burning informs you that the CD cannot be burned or an error during burning. Of course, you could actually have a defective CD drive, but this is usually not the case.
If you receive a message indicating that your CD cannot be burned, go to the website of your CD drive manufacturer.
Look for the list of CD types (manufacturers/numbers) that are compatible with your device. Most often, you’ll find that your CDs are not listed.
The two types that seem to have the least difficulty being burned are manufactured by Sony and TDK. These cost a bit more, but they burn very reliably.
Along the same lines – H-P has introduced a new CD burner. This new burner requires the use of special CD blanks, but after you burn your data into the CD, you can flip it over and close the drive again.
Then you can use the laser to burn a title for the CD directly onto the CD itself. It’s a new technology, but perhaps it will catch on, and we’ll see newer, better such devices soon.
Conclusion
We all want to be that tech-savvy in our place of stay. There are some tips and tricks even if you are not a tech savvy it should be on your finger tips.
Buying a laptop is a major investment decision. As such it is not one that you should make lightly. Below are 5 tips that will help prepare you for making the best and most well-informed decision when buying a laptop.
Tip 1: Size Matters
Buying a laptop is a matter that requires some thought. Consider the size and weight of the laptop. How often will you be carrying your laptop?
Your answer will help determine which size and weight will best suit your needs. If you will be carrying your laptop frequently, a lighter model will be preferable.
The keyboard is another area to consider when buying a laptop. Why is the size of the keyboard important? A larger laptop will have a slightly larger keyboard area.
But keep in mind that if you worry about your fingers or wrists taking on too much stress from typing on a keyboard that is too small, you may want this to be the main factor in your purchasing decision,
Tip 2: Choose Your Mouse
A laptop it will come with a built in touch pad, an alternative to the mouse, whereby the pad is controlled by the user’s finger movement. For some people, this type of pad is uncomfortable and not easy to work with.
Before purchasing a laptop, determine what mouse options are available. Test each one and determine which one best meets your needs.
Tip 3: Wireless Options
Today, when many people think laptop, they think “wireless”. No doubt people want to make sure that their laptop computer will be able to access the Internet with a wireless connection.
Many try to account for this by ensuring that their laptop has potential upgrade options, such as room for an expandable PC card or a USB port.
However, since so many laptop users are looking for wireless connections, many of today’s laptops come pre-wired for wireless Internet. All you need to do is activate your wireless Internet service, and your laptop will take it from there.
So depending on your needs, choose your laptop whether it is capable of expanding or if it is already configured for wireless Internet.
Tip 4: Check for Ports
Peripheral equipment will be connected to your laptop through USB ports. You will make your life much less complicated by ensuring that your laptop has adequate ports.
Connecting equipment such as printers, scanners, and digital cameras will be much simpler if you have the ports readily available. If you are not sure, thoroughly read the specs for any laptop that you are considering purchasing.
Tip 5: Check Your Budget First
Finally, when buying a laptop, beware that you do not overspend. First create your budget and stick to it.
When you think that you have found the laptop that you want, do not rush into it.
Wait a day and check over your budget, requirements, and see if you are still as excited about the laptop in the morning, as you were when the sales clerk was showing off its specs. If you still feel that it is the laptop you want to purchase, then go for it.
Conclusion
There are so many reasons why you would want to buy a laptop but in this post, I have highlighted some of the top tips you have to consider before buying a laptop.
We live in a fast-paced world, and we’re always looking for the fastest way to get things done. We barely have time to wait for our chicken the KFC fast-food restaurant, our microwave popcorn to pop, so who has time to wait around for a slow computer?
Thinking of adding more RAM to your computer? There are 6 steps you can take to speed up your computer’s performance. Most of these steps will allow you to speed up your computer, free of charge since the needed applications are already installed on your computer.
Below are the steps to follow to speed up your computer.
Steps To Speed Up Your Computer
One of the first steps you should take is to empty the Recycle Bin. It’s easy to do. Just point your cursor to the Recycle Bin icon on your desktop, right-click, and choose “Empty Recycle Bin.”
Next, open up your Internet Explorer, go to Tools, Internet Options. Click on “Delete Cookies,” then on “Delete Files.” In the window that appears, check “Delete all offline content” and click OK. Once that’s done, click OK to close the Internet Options window, and close your Internet Explorer.
Those two steps are the quickest, and simplest ones, so that’s why we got them out of the way first.
Next, we’ll be conducting a Disk Cleanup. To do this, click on Start, All Programs, Accessories, System Tools, Disk Cleanup.
The disk cleanup function will now begin calculating how much space you will be able to free up. Once it finishes, it’ll give you a list of files to delete. It should already have some files checked, but you can go through the list and check off all the files you want to delete, then click OK.
Now it’s time to do a disk defragmentation. This can be a long process so you should probably set this up when you’ve got other things going on.
For example, set it up, watch your favourite TV show, mow the lawn, or go workout. You get the idea.
To begin, go to Start, All Programs, Accessories, System Tools, Disk Defragmenter. Click Analyze. If you’re lucky, you’ll get the “You do not need to defragment this volume” call-out, but more than likely, you’ll have to click on “Defragment.
” If so, click on it, go do something else and come back in an hour or two.
Once that’s done, it’s time to run a spyware scan. Most people don’t realize how easy it is to get infected with spyware, so running periodic scans is highly recommended.
You can use any anti-spyware program you choose. Just be aware that no one program gets rid of everything. To play it safe, you should run at least three different programs.
You might be surprised by what they find. You may have had spyware running on your computer and not even know it. Once the scans are complete, and all that spyware is taken care of, it’s time for the last step.
This last step is to run an anti-virus scan. Hopefully, you have an anti-virus program installed on your computer. If not, I highly recommend you get one as soon as possible. Once the anti-virus program is set, go ahead and run it.
This could take anywhere from 20 minutes to a couple of hours depending on how many files you have on your hard drive so once again, set it, and then do something else. Come back in about an hour.
Once all the steps are complete. Restart your computer, and you’ll be surprised at how completely nimble it now feels.
Conclusion
It’s a good idea to follow these 6 steps at least once per week (some steps you can even set up to be done automatically). By doing this, you will keep your computer performing almost like it did when you first bought it.
As an Android user, the number one place to get all your applications and software is the Google play store.
This is primarily for its safety. But, there are times when you may need some applications but may not find them on Google playstore.
In such instances, how do you get the apps without having to go through the Google Playstore app?
In this article, we shall guide you through how to download any android app without using the Playstore.
But, before we delve into that, let’s look at some of the reasons why there are some android apps unavailable on the Google playstore.
Why Are Some Android Applications Not Available On Google Playstore?
Google Playstore may look like the home of android applications. But frankly, there are thousands of android applications which are not available on this platform.
So, the big question is: Why?
1.Inability To Pay Developer Fee
You may get to download various applications for free on the Google Playstore. But, apart from Google’s own products on the platform, the owners of every other application you see on the platform had to pay some USD 25.
This may not be really huge for you but for some developers, they don’t see the reason for them to pay this amount just to have their free apps listed on the Playstore.
So, for some funny reasons, they decide to keep their applications away from Google’s Playstore.
2. Google’s Disapproval Of Such Apps
Usually, after getting your developer account with the USD 25, you are entitled to upload as many applications as possible.
But this is only possible if you do things right. If you don’t submit applications which go against Google’s rules and regulations.
So, when you submit your applications, they go to a review process. During this process, Google may either decide to approve your application or throw it out of the window.
For most developers, they already know the rules and regulations governing the use of the Google Play store. So once they realize that their applications may go against the regulations, they keep them away from the store entirely.
Others also submit the applications only to realize later that they go against the rules of the platform.
So, in such situations, the obvious solution is for them to keep the apps away from the Google Play store.
Since we’ve now seen why some applications are kept away from the Google Playstore, it is only appropriate for us to look at how to install such apps on your android phone.
How To Change Your Android Phone Settings To Accept Applications Not On Playstore
To enable your phone to accept and install an external application apart from those on Playstore, you’d have to change your phone’s setting.
So, to do this, kindly follow the steps below:
Go to settings in your phone menu
Select ‘Apps and notifications’
Select advanced
Select special app access
Scroll down and select ‘Install unknown apps’
Select the browser you wish to download the app with
Press to turn on ‘Allow from this source’
If the steps above don’t work for you, it means you’re using an Android version lower than 8.0. In that case, you should follow the steps listed below instead;
From your menu, go to settings.
Select ‘Security’
Turn on ‘Unknown sources’
Where To Download The Apps
After successfully turning on your phone’s ability to install apps from unknown sources, the next thing is for you to download your apps and start enjoying.
There is practically a large score of sources for downloading and installing applications on your phone. Some of them are applications on their own and some others are just websites.
Here, we shall look at some of the apps which you can use to download APK files on your smartphone without the use of the Playstore.
APK Mirror
APK Mirror is one of the authentic sites and apps for downloading your favourite android applications free of charge.
In fact, it contains hundreds of thousands of applications. It contains applications available on the playstore and those not available too.
For the most part, the APK Mirror is made of older versions or other versions of some popular apps.
Downloading from this platform is entirely legal and is usually as safe as it may be to download from Playstore itself.
APKPure
APKPure is also an alternative to APK Mirror. The APK Pure app, however, provides more categories and more applications for download. It covers a wide range of popular and newer applications than even the Playstore itself.
If you’re seeking to download photo filters and video editors, then APKPure is a good call for you. It’s filled with lots of photo and video editing applications.
Amazon Appstore
The official Amazon Appstore is also a good repository of some cool android apps which you can easily download on your phone.
The Amazon AppStore works almost the same as the Google playstore, in that, it provides a large database of both free and paid applications.
You can also get to download some paid applications for free using Amazon’s promotions and gift cards.
Like APK Mirror, the Amazon application is very safe.
Conclusion
You don’t have to rely on your Google Playstore all the time for applications. You can download thousands of android applications from other sites and applications free of charge.
In this article, we spoke about some of these platforms which allow you to download android apps, how to set your phone to accept such applications and why some apps are not on the Playstore.
It is also important to note that, there are hundreds of other applications and websites out there for downloading android applications. But due to their open-source nature, they are more than likely to contain malware.
So in your attempt to by-pass Google Playstore in downloading your android applications, always make sure to download from trusted sources.
If you have any questions, comments or reservations regarding this article, kindly let us know in the comment box below.
Please, do well to share this article with your friends and family as well.
Do have a virtual presentation with Microsoft Teams? Are you the host of a meeting where you are required to share your screen on Microsoft Teams?
The novel coronavirus (COVID-19) took the entire world by surprise and within this short period of existence has taught us many things. One of the things that it has taught us is to embrace technology and virtual events.
Unlike previously where people had to wake up at dawn, be in traffic and then go to work, almost 40% of the businesses in the world has now adapted to “work from home”.
As a result of that, most companies now have their meeting online and one of the companies that have enjoyed this the most is Microsoft. All over the world, Microsoft’s meeting software, Microsoft Teams is used to host virtual events.
Aside from using it to host meetings, it is also used to perform virtual presentations. For instance, instead of meeting at the office to discuss the end of year expenses and revenue, you can use the Microsoft Teams app to present this to your team all over the world.
To be able to do this, you need to enable the share screen on the Microsoft Teams app and then everything on your screen will be seen by all the participants.
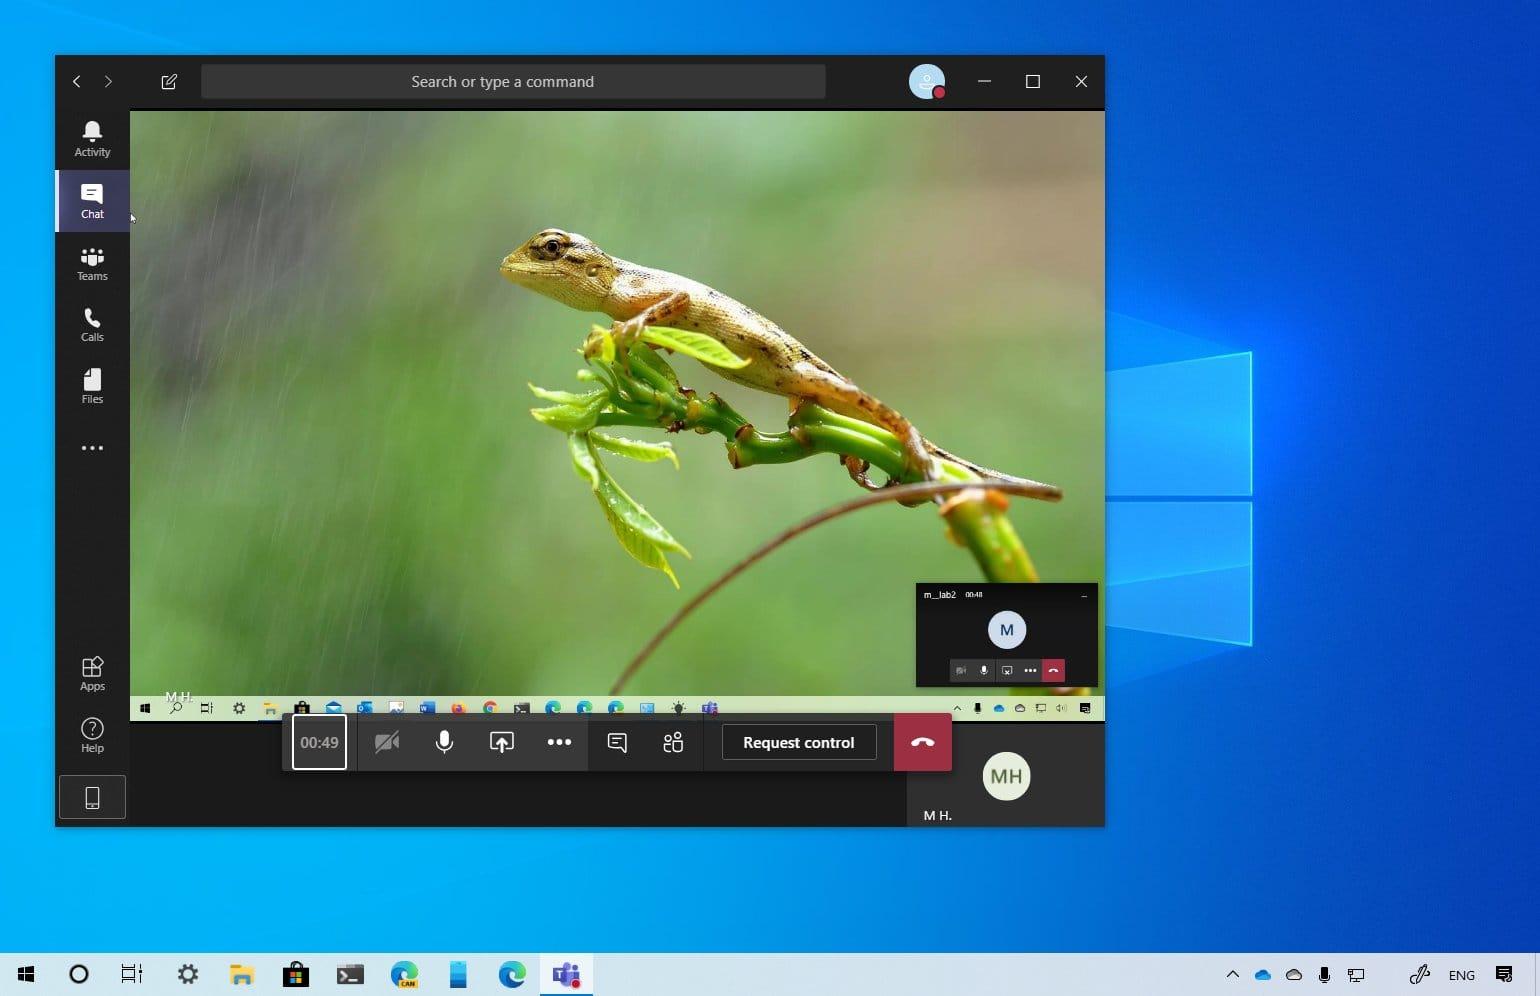
How To Share Screen on Microsoft Teams
First of all, you need to start a meeting on Microsoft Teams.
Move your mouse to the lower middle corner of the screen.
Choose the chat control options.
From the left, click on the third icon with the square box and the arrow.
Finally, choose whether to share the entire screen or a specific window on your screen.
Conclusion
During a meeting, you might want to share your screen with the rest of your team. In such situations share screen in the only way, you can be able to do so.
Have you ever shared your screen on Microsoft Teams? Let us know in the comments section below.
Bots are gradually taking over the entire online space.
Prominent among them are chatbots. These are increasingly being used by businesses seeking to automate their messaging platforms.
In fact, it is projected that chatbots would become the biggest online business assets in the coming few years.
Of course, apart from Chatbots, there are many other bots – used especially on social media. Telegram is one of those platforms which largely encourage the use of bots.
Its basic framework allows for channel admins to add bots to assist with the regulation of their channels.
One of the least-known features of the app is that it can be used to search, download and play songs and music videos. This is possible due to the telegram music bots.
In this article, we look at these music bots and how to use them to play music videos on the platform.
So before we proceed to how you can use the bots to find and watch music videos, let’s look at some of the best Telegram bots for this purpose.
Music Chatbots On Telegram
Here are some of the best music chatbots on Telegram. Read through the list to see the full scope:
Spotybot
Spotybot is a Telegram music bot specifically dedicated to Spotify. So, it tracks, searches and retrieves songs from Spotify playlists and albums based on the users’ instructions.
So, to get the best out of this bot, you must be sure that the song you are seeking is already available on Spotify.
How To Use Spotybot
First of all, search for the Spotybot in your Telegram system search box. In your results, you’ll see the Spotybot channel and then you’ll see the spotybot itself.
Ignore the channel and go for the spotybot itself. Be sure to select the one with the Spotify logo.
Enter the name of the song or artiste whose songs you want. Type it in this format ‘@Spotybet Eminem Made by @eug91
The bot will report results that match your search them. You can then select the one you want and start enjoying.
The bot produces both video and audio results.
FindmusicPlease Bot
The Findmusicplease bot is one of the greatest music bots on the Telegram platform. It is a general one and gets almost every song that can be found on a search engine.
Unlike the Spotybot which only retrieves music from Spotify, this particular bot can be used to search and get any song at all that has been previously released.
This is how to use the bot:
Search for the bot in your Telegram system search box.
Launch the bot
Click on ‘start’
Next, type the song title or name in the chat
Wait for a few seconds and the song will be available for you to download.
Bing Music Bot
Just as the name suggests, the Bing Music Bot is the official Telegram music bot for Bing.
It searches for and retrieves almost all songs ever uploaded to various websites on the internet. It looks out for Vevo, Youtube videos and audio from various streaming sites and just about anywhere on the internet.
With this bot, you can get any music file – audio or video from the internet.
This is the steps involved in using this bot:
Search for the Bing Music Bot in your Telegram system search bot.
Launch the bot
Click on ‘Start’
Type /Song to search for a song
Enter your song title and hit enter
A list of songs would popup and then you can choose from the ones available.
Conclusion
Technology has changed lots of things. And it keeps changing lots of things due to its continuously changing nature.
One of the trendy ways to communicate with your Telegram application is the use of bots. Now, channel owners and managers can set up bots to act in their absence.
Same also, you can download and listen to your preferred music on-the-go using Telegram bots. With these bots, you don’t have to do the hard work of searching through search engines and other streaming apps to get the song of your choice.
With just a few taps, you can get your song downloaded on your Telegram app and ready to play.
This article provided a full overview of what these Telegram Music Bots are and how each of them works.
We hope that you find this article helpful and that you’ll share it with your friends and family.
If you have any questions or comments regarding this article, kindly leave them in the comment box below and we shall attend to it. You can also get in touch with us.
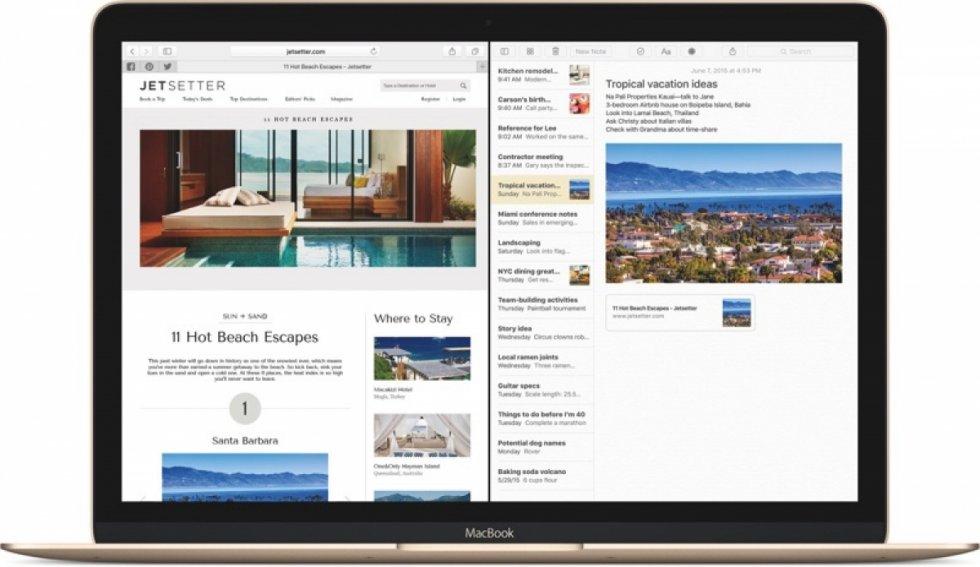
Are you tired of not being able to split-screen on your Mac? Do you always have to resize or manually move windows before you can use two (2) apps at the same time?
In case your answer to these two (2) is YES, then I know you are going to find this article very useful. Thus, in this article, I am going to show you how you can split screen among your Mac.
Split screen is one of the most useful settings you can ever make to your computer, being it Windows, Mac, or Chromebook.
If you are someone who likes multitasking with their PC, then I think you are going to agree with me. Otherwise, you might challenge me, but I know after reading this article and you practice it you will come back and agree with me.
Because of the split screen option, you can be able to watch your movie and at the same time reply to your emails or watch a movie and at the same time reply to your Facebook messages.
For some time now, most Mac users were not aware that they could also use a split screen. But this article is going to prove to you that it is also possible on Mac.
With the Split View on your Mac, you can be able to fill your Mac’s screen with two (2) apps without having to manually move or resize the windows.
How To Split Screen On Mac
As I earlier stated, a split screen is very helpful for persons who love to multitask. Due to the different types of macOS, I have classified the steps into two (2) different categories; depending on your macOS version, follow the steps listed below.
How To Split Screen On Mac With macOS Catalina or Later
If you are using macOS Catalina or later:
Hover your pointer over the screen button (the 2 arrows with the green background) in the top-left corner of a window. Alternatively, you can click and hold the button.
From the menu, choose Tile Window to Left of Screen or Tile Window to Right of Screen. Automatically, the window will fill that side of the screen.
Afterward, click a window on the other side of the screen to begin using both windows side by side.
How To Split Screen On Mac With macOS Mojave, High Sierra, Sierra, or El Capitan
Click and hold the full-screen button (the 2 arrows with the green background) in the top left corner of a window.
Once you hold the window, the window will shrink and you can then choose to drag it to the left or the right side of the screen.
Afterward, release the button and then click on a window on the other side of the screen to enjoy the split screen mode.
Conclusion
On certain occasions, the split might not work. In such circumstances, choose the Apple menu (the apple logo) >> System Preferences >> Mission Control, and then make sure that Display has separate Spaces is selected.
Once you are done, you can then follow the steps listed above and the split screen will start working on your Mac.
Finally, if you face any challenge, free to write it in the comments section below and I will attend to it as soon as possible.