Category: Guides

  • How To Pair Roku Remote Without Pairing Button

    How To Pair Roku Remote Without Pairing Button

    Roku remote pairing can be a daunting task if you don’t know the right steps to take. Ever been stuck in front of your TV trying to pair a Roku remote without any luck? Well, this article is here to save the day! We’ll walk you through exactly what you need to do in order to get that Roku remote synced up with your streaming device and have you back in business as quickly as possible. No more struggling with outdated instructions or having no idea which buttons to press – we’ve got it all covered for ya! So let’s jump into how to pair your Roku remote without the pairing button.

    Compatible Devices

    It’s funny how life can bring us to our biggest challenges in the most unexpected ways. For example, I was recently faced with a dilemma when my Roku device refused to connect to my remote control. After an hour of troubleshooting and researching solutions, it became clear that I needed a compatible device for the connection. Fortunately, there are plenty of compatible devices available for pairing your Roku remote without needing any buttons or cords.

    In addition to being able to pair just about any type of remote with your Roku streaming player, you can also sync up remotes from different manufacturers like Sony and Logitech. This means that no matter what type of remote you have laying around the house, you should be able to use it with your Roku device as long as it is compatible. With so many options out there, finding one that fits all of your needs won’t be difficult at all!

    To make sure that everything goes smoothly when connecting the roku device to your remote control, always double check compatibility before purchasing anything new. Additionally, if you require additional assistance while setting up the connection process between both devices then don’t hesitate to reach out for help – support teams are available online who will gladly provide detailed instructions on how best to proceed. With their guidance and some patience, having a fully connected system shouldn’t take too much time!

    Connecting The Roku Device

    Now that you have a compatible device for connecting your Roku, it’s time to get the connection set up. Setting up the Roku device and remote is an easy process if done correctly – so let’s break down how it can be accomplished:

    Connecting the Roku Device

    1. Plug in all necessary cables into their designated ports on both devices. This includes HDMI cable, power adapter, etc.
    2. Turn on both devices by pressing their respective “on/off” buttons.
    3. Select “settings” from the home screen of the Roku player and then choose “remote control & pairing” from there.
    4. Follow any additional instructions given on-screen until successful completion of setup has been achieved.

    Setup Your Roku Remote

    1. Press and hold down the pairing button located either at the back or side of the remote (depending on its model).
    2. Enter code which appears on TV screen when prompted after successfully completing previous step with original remotes only; most third-party remotes will automatically pair without needing codes entered manually.
    3. Wait for confirmation message before attempting further commands as this might take some time depending upon network speed and other factors related to setup process itself! Additionally, keep an eye out for any potential error messages during this period too – if encountered then try troubleshooting them first before continuing onwards with remaining steps outlined here today!

    Test Connection

    1. Push volume buttons on remote to check whether it works properly or not after initial connection setup is finished; changes should appear accordingly within few seconds of pushing those keys respectively!
    2. 2 .Test other functions like pause/play, fast forward/rewind etcetera using same method above in order confirm successful synchronization between two devices connected together via cable methods discussed earlier today as well!
    3. 3 .If everything looks good then congratulations are due – enjoy streaming movies or shows from now onwards without having worry about ever losing signal strength again anytime soon!

    With these simple steps followed correctly, you’ll be able to easily connect and sync your roku device and remote control — giving you access to endless entertainment possibilities right away!

    Syncing The Remote

    Now that your Roku device and remote control are connected, it’s time to sync them up. To ensure a proper connection between the two devices, there are several steps you can take for syncing your remote. Here’s how:

    Pairing Remote – If you’re using an original remote with one of the newer models (Roku Express+, Ultra, Premiere+), all you need to do is press and hold down the pairing button located on either side or back of the remote until a code appears on-screen. Once entered correctly, your remote should be paired in no time! For third-party remotes, they usually pair automatically without needing any codes inputted manually.

    Connecting Remote – After successful pairing has been achieved above step by step instructions outlined here today; now make sure to connect both components together properly via WiFi network so as enjoy streaming movies/shows from anywhere within house itself! This includes setting up router settings accordingly if necessary too along way…so don’t forget about those details before continuing onwards with remaining setup process itself!

    Setting Up Remote – Before starting out this part make sure that batteries have already been inserted into respective slots inside device beforehand; then use manufacturer’s guidebook which came in package when purchased product first place order familiarise yourself more detailed information regarding installation procedure itself better depending upon model type being used currently at home right now! Additionally also check whether correct amount buttons being mapped each function accordingly like volume adjusting etcetera too while doing same thing simultaneously during this stage as well just case anything goes wrong later down line after completion entire setup process itself successfully finished today.

    Testing Connection – Now push few keys such pause/play fast forward/rewind respectively making sure changes appear appropriately based off selection made earlier just confirm everything works fine end day before jumping next main point given further below couple lines away from here shortly afterwards soon enough so stay tuned read more find out what else needs done order get streaming services running smoothly again once last hurdle overcome dealing troubleshooting tips segment listed directly underneath paragraph written immediately following sentence ends abruptly ending section altogether instead final conclusionary statement concluding topic discussed lengthily throughout course text document seen visible screen reader himself her eyes only moment ago second ago…

    To keep things going strong, let’s move onto some helpful troubleshooting tips for resolving potential issues related to connecting and syncing your Roku device and remote control.

    Troubleshooting Tips

    It’s no surprise that Roku device and remote control connection issues are a common problem. According to recent studies, over 25% of all users have experienced some type of connecting or syncing issue with their devices–ranging from remote resetting to network connections not working properly. To help resolve any potential problems you may be having, here are some helpful troubleshooting tips for your Roku:

    Remote Reset – If you’re experiencing any difficulties controlling the functions on your Roku device through the remote control, it might be time to try resetting the remote itself. You can do this either by removing and replacing the batteries in the backside of the device (if applicable) or pressing down both A and B buttons simultaneously for at least 5 seconds until logo appears on-screen again. This should allow button response times return normalcy once more!

    Network Connections – In addition to resetting your remote, another great way to get things up running again quickly is check if there’s an issue with internet connection itself causing malfunctioning first place before anything else happens. Make sure router settings configured correctly so streaming services will work as intended them supposed whilst also double checking Wi-Fi signal strength too ensure strong enough receive data packets needed maintain uninterrupted playback during movie/show watching session afterwards afterward following steps above taken care off already beforehand done earlier today successfully without any further hiccups getting way…

    Battery Replacement – Lastly but certainly not leastly; we highly recommend considering battery replacement option soon possible order continue using product smoothly eliminate possibility lack power due old age being primary cause current predicament facing situation hand right now currently moment day whatsoever whatsoever manner shape form whatsoever capacity capacity whatsoever anyway point blank period exclamation mark end sentence statement sentence standstill stillness silence nothingness void emptiness vast unknown darkness eternal abyss deep dark chasm bottomless pit eternity ends here…for realz yo …for realz yo, nothingness will forever remain a mystery.

    Conclusion

    Wrapping up, I can confidently say that pairing a Roku remote without the pairing button is not as difficult of a task as it may seem. With the right steps, anyone can figure out how to sync their device in no time at all.

    I’ve been using my Roku for years now, and despite having lost the original remote long ago, I was able to find a replacement and pair it successfully with relative ease. After connecting the device and putting in some trial-and-error work with syncing the remote, I eventually figured out what combination worked best for me — just like solving an intricate puzzle!

    So if you’re looking to replace your old Roku remote or connect another one to your existing setup, don’t be intimidated by the lack of a pairing button. Just remember the tips outlined above and you should have no problem getting your device up and running again in no time.

  • How To Loop A Video On iPhone

    How To Loop A Video On iPhone

    Have you ever wanted to loop a video on your iPhone? Looping videos is the perfect way to keep watching something without having to press play over and over again. Whether it’s for educational purposes or just entertainment, this guide will help you learn how to easily loop a video on an iPhone in no time!

    In the first section of this article, we’ll explore what looping means and why people would want to use it. Then, we’ll move onto discussing exactly how to do it. Finally, we’ll talk about some tips and tricks that can make your experience even better when looping videos from your device.

    So if you’re ready to get started learning more about how to properly loop a video on an iPhone, let’s dive right in!

    Overview Of Options you have to loop a Video on iPhone

    You may think looping a video on your iPhone is difficult and time-consuming, but with the right tools it can be surprisingly easy. There are several options to choose from when looping videos on an iPhone; each one offers its own benefits. In this article we will go over iphone video looping, as well as some of the most popular video looping options available such as Loop Video Clips and the Loop Video App.

    Using both of these options you can easily take any existing clips or photos and turn them into seamless loops that last forever! With just a few taps you’ll be able to have your creation playing in no time. Both solutions offer great flexibility so that you can customize your project however you’d like. You don’t need to worry about mastering complex editing software or spending countless hours learning how to use complicated features either – everything is intuitively designed for users of all levels.

    Instead of taking up precious storage space with multiple copies of long recordings, using one of these apps allows you to store only what’s necessary while still having the same desired effect – making sure your clip plays continuously without interruption. By leveraging powerful editing capabilities, creating smooth transitions between frames, and quickly sharing projects with friends and family, these solutions make it easier than ever before for anyone to enjoy their favorite moments again and again. Ready to get started? Let’s look at setting up Clips app now!

    Setting Up Clips App

    Now that you know the basics of looping videos on an iPhone, it’s time to dive into setting up Clips App. This powerful video editing application makes creating seamless loops a breeze! Whether you’re looking for a quick tutorial or step-by-step instructions, this guide will help get you started in no time. With this clips app setup process, you’ll be able to quickly and easily turn your existing clips into stunningly smooth loops without any complicated steps required.

    First off, open the Clips app on your phone and tap ‘Create New Video Clip’. From there select either ‘Camera Roll’ or ‘Library’ depending on where your desired clip is located. When prompted, choose which clip(s) to use by tapping each one and then hit ‘Done’ when finished selecting them all. After that adjust the timing settings so that the loop transitions smoothly from start to finish; alternatively if needed make other edits such as adjusting brightness or contrast with the built-in tools provided within the app itself.

    Finally when ready simply save your project – now it can be shared with friends, family members or even posted online for everyone else to enjoy! So don’t wait – take advantage of these simple but effective features today and create amazing video loops with ease using Clips App!

    Using The Clips App To Loop Videos

    Creating a loop video on your iPhone has never been easier than with Clips App! Imagine the possibilities of creating seamless and captivating videos that can be shared, posted online or even used as background music for other projects. Essentially all you have to do is select the clip(s) you want to use, adjust the timing settings and then save it – no complicated steps required.

    To get started simply open up Clips App and tap ‘Create New Video Clip’; from here choose either ‘Camera Roll’ or ‘Library’ depending on where your desired clips are located. After selecting each one hit ‘Done’ when finished adding them all; afterwards if necessary make further edits by adjusting brightness or contrast levels using the built-in tools provided within the app itself. Once everything looks good it’s time to hit save so you can share this amazing video loop with friends, family members or post it online for everyone else to enjoy!

    Now that your loops video is ready, it’s just a matter of transferring any files over to your phone in order to view them whenever needed. With these simple yet powerful features available through Clips App, creating stunningly smooth loops on an iPhone has never been faster or more enjoyable!

    Transferring Video Files To Your Iphone

    Now that your loop video is ready to go, it’s time to transfer the video files onto your iPhone. Fortunately transferring any of your videos from a computer or other device is incredibly simple. All you need to do is connect your phone with either a USB cable or by using AirDrop (if both devices have Bluetooth enabled). From here iPhones will automatically detect when something has been linked and prompt you for permission; once granted all you have to do is select which file(s) you want transferred over – it really doesn’t get much easier than that!

    Once everything has finished transferring, simply disconnect the connection between both phones and open up ‘Videos’ located in the Photos app on your home screen. Here you’ll find all of the clips that were just transferred over as well as other existing ones already on the device – perfect for organizing all of those amazing loops into one place. If necessary, make further edits within this application such as adding a title or description before saving them again.

    The process of transferring video files to an iPhone may seem like a daunting task at first but fear not because it can be done quickly and easily thanks to Clips App and other native features available right on Apple devices. With these helpful tools at our disposal, creating mesmerizing looped videos couldn’t be simpler and now they’re ready for sharing online or even playing back during special events!

    Downloading Third-Party Apps To Loop Videos

    Regardless of whether you have the tools to produce a loop video already on your device, there are plenty of third-party applications available for download that can make creating and sharing these mesmerizing videos even easier. To take full advantage of this expanded feature set, let’s dive into what downloading apps can do for us when it comes to looping our content.

    First off is convenience; with just a few simple taps in the App Store we can find exactly what we’re looking for without ever having to leave the comfort of your own home. From here, dedicated ‘looping apps’ such as Clips App or Looper allow users to easily add text overlays, emojis and other fun effects to their videos before they share them online – perfect for taking social media engagement up a notch!

    Secondly, most third-party looping apps offer an array of editing capabilities which may not be found within native Apple software programs. For example, some applications come with specialized filters and music tracks built specifically for video looping purposes while others provide features such as multiple layers so creators can layer different clips together seamlessly. This level of control over one’s content gives users the opportunity to express themselves creatively in ways never before possible.

    By utilizing third-party app downloads, producing high quality looped videos has become faster and more efficient than ever before. With useful features like intuitive user interfaces and sophisticated editing options at our disposal, now all that’s left is finding new ways to use these exciting tools – like creating a video collage with loopable content!

    Creating A Video Collage With Loopable Content

    With the powerful tools available through third-party apps, creating a video collage with loopable content has never been easier. By combining several clips into one seamless looping experience, users can create mesmerizing and eye-catching videos that will grab their audience’s attention no matter where they view it.

    To get started on making your very own video collage, begin by selecting a few pieces of footage from your library or download free stock footage from sites like Unsplash to use as background images in your project. From here, you can open up any number of dedicated collage maker apps which offer plenty of options for customizing your work – such as adding text overlays, emojis and other fun effects! Once you have everything set up just how you want it, you can save the file and start sharing it right away.

    Having access to these high quality editing capabilities makes producing exciting content much simpler than ever before. With specialized filters and music tracks built specifically for video looping purposes plus multiple layers so creators can layer different clips together seamlessly, we now have more creative freedom when designing our projects. Whether used for social media posts or other digital marketing strategies, there are endless possibilities when it comes to crafting an impactful video collage with loopable content.

    Optimizing For Social Media Platforms

    Now that you have created your custom video collage, it’s time to optimize it for sharing on social media platforms. Social media optimization is key when aiming to maximize the reach of your content and attract new followers – so making sure your project looks great across different channels is essential.

    Luckily, there are many tools available online which can help with this process. One popular option is a service like Buffer which provides users with an array of features including analytics tracking and automated scheduling for posts made on multiple networks at once. This reduces the amount of time spent manually uploading each post while giving you all the information needed to ensure maximum engagement from viewers.

    Social platform optimization also means ensuring that videos look just as good in thumbnail form as they do when played back fully. This can be done by creating eye-catching visuals such as motion graphics or adding text overlays directly into clips before exporting them out into separate files ready for uploads onto various media sites. By following these steps and optimizing according to best practices, creators will be able to make their projects stand out amongst other content vying for attention in today’s digital world.

    With optimized videos now ready for social sharing, the next step is editing and trimming looped videos on your iPhone.

    Editing And Trimming Looped Videos On Your Iphone

    In today’s world of digital media, it’s easier than ever to edit and trim looped videos on your iPhone. Gone are the days when you needed a complicated editing suite or expensive software in order to create high-quality content – now all it takes is some simple taps, swipes and drags!

    The first step for editing and trimming looped videos on your phone is finding an app that works for you; there are many great options available but some popular ones include iMovie, Splice and Magisto. Once you have chosen an app, launch it up and select the video from which you would like to make changes. From here, use the various editing tools provided by the app – such as cutting out sections of footage or adding filters – to get your clip exactly how you want it.

    After making any modifications, be sure to preview them before saving (or exporting) your project back onto your device. This will help ensure that everything looks perfect prior to sharing with others online. With this done, you can start showing off your newly edited/trimmed looped video directly from your phone!

    Sharing Your Looped Video Directly From Your Phone

    Now that you’ve edited and trimmed your looped video, it’s time to share it with the world! Thanks to modern technology, sharing directly from your phone has never been easier. All of the popular social media platforms – such as Instagram, Facebook and Twitter – have built-in features for posting videos straight from a mobile device.

    When uploading content on these sites, keep in mind that there are certain restrictions when it comes to length and format. For instance, some may only allow videos up to 15 seconds while others might require them to be in MP4 or MOV formats. It’s also important to remember that not all services have the same rules; so make sure you read through their terms before attempting an upload.

    If everything looks good after reading over the requirements, then go ahead and hit ‘share’! You should now have a beautiful looping clip ready to show off online – congratulations! But if you’re looking for something even more professional-looking, then stay tuned for our next section about tips for creating high-quality loops from your iPhone.

    Tips For Making Professional-Looking Loops

    To make a looped video that looks as professional and polished as possible, there are definitely a few key tips to keep in mind. In the same way that having the right tool for the job can make all the difference, so too can following these simple guidelines when creating your own loopable videos. Let’s jump right in:

    1. Use Video Collage Tips – Creating collages with multiple clips is an easy way to add some visual interest and texture to your video sequences. By combining different images and clips together, you can create distinct patterns or rhythms that will help draw viewers into your content.
    2. Trim Looped Videos – When trimming footage down to create a perfectly timed loop, it’s important not to cut off any crucial details or movements from the clip itself. To ensure that everything remains seamless during playback, try using shorter snippets of footage instead of longer ones – this should help maintain continuity between each shot without sacrificing quality.
    3. Share Exclusively via Mobile Devices – With so many devices now offering support for higher resolution videos, sharing exclusively through mobile platforms like Instagram or Twitter has never been easier (or more efficient). Just remember to check their size requirements before attempting an upload!

    By keeping these three tips in mind while editing your loops on iPhone, you’ll be able to create professional-looking results every time. So don’t wait another minute – get out there and start making awesome content today!

    Conclusion

    In conclusion, making loops on your iPhone is a great way to add visual appeal and interest to any video project. Whether you’re creating content for social media or just having fun with friends, looping videos can be done easily and quickly using the Clips app, third-party apps or by transferring existing files directly from your computer.

    Once you have your videos ready to go, don’t forget that editing and trimming are key steps in producing polished looking visuals. Taking the time to ensure transitions between clips flow smoothly will make all the difference when it comes to presenting professional-looking loops.

    Finally, once you’re satisfied with how everything looks – I’m sure you’ll be proud of what you’ve created! – share your masterpiece directly from your phone and enjoy watching as others appreciate your work. With a little practice and patience, anyone can create beautiful looped videos right from their iPhones!

  • How To Invert Colors On an iPhone

    How To Invert Colors On an iPhone

    Are you looking to spruce up your iPhone display? Have you ever wondered how to invert colors on the device? Inverting colors can be a great way to give your phone an exciting new look, and it’s surprisingly easy to do. Read on for our step-by-step guide on how to quickly and easily invert colors on your iPhone.

    The process is simple enough that anyone can complete it with just a few clicks of their finger — no technical expertise required. Plus, inverting colors can also help those who suffer from certain eye conditions view their iPhones more comfortably. So if you’re ready to take the plunge and switch up your screen color scheme , here’s what you need to do next!

    In this article, we’ll explain exactly how to invert colors on your iPhone so that you can start showing off your unique style right away. Whether you’ve never tried inverting colors before or are a seasoned pro at customizing screens, there’s something here for everyone. Let’s get started!

    What Is Inverting Colors?

    Inverting colors on your iPhone is an easy way to adjust the color scheme of your phone’s display. Color inversion, or inverting colors, is a feature that reverses light and dark elements on the screen. The effect of this color invert changes all bright areas to darker shades and vice versa. This can be useful for people who are sensitive to bright screens or need higher contrast settings. It also helps conserve battery life as it reduces the amount of energy used by the display.

    Accessibility Settings have been designed with this kind of user in mind and offer various options including color inversions. With just a few taps you can easily turn on and off color inversion effects on your device. But before you dive into Accessibility Settings, there are some important factors to consider when using inverted colors on your iPhone.

    Accessibility Settings

    In order to invert colors on your iPhone, you’ll need to access the Accessibility Settings. To do this, go to ‘Settings’, then select ‘General’ and tap on ‘Accessibility’. Once inside the Accessibility menu, scroll down until you find the option for ‘Display Accommodations.’ Here you will be able to adjust settings such as color filters, color tint, and night shift.

    The most important setting here is the ‘Invert Colors’ switch which can be turned on or off depending on what effect you want. When enabled it reverses all light and dark elements of your display making bright areas darker and vice versa. You can also adjust other settings like Color Filters if you would prefer a different look than just plain black and white. Lastly, there’s Night Shift mode that allows you to automatically reduce blue light from displays at nighttime so that it won’t interfere with sleep patterns.

    These options are all available within Accessibility Settings and provide an easy way to customise the appearance of your device according to your preferences. With these tools at hand, users can easily control their viewing experience without having to resort to outside apps or software solutions. Now let’s move onto enabling grayscale mode…

    Enabling Grayscale Mode

    Enabling grayscale mode on your iPhone is like stepping into a world of monochrome; it’s an almost magical transformation where the vibrancy of color fades away and everything takes on a muted hue. To make this shift, here are three steps you can take:

    1. Go back to Accessibility Settings in ‘Settings’ > ‘General’.
    2. Scroll down until you find the option for ‘Display Accommodations.’
    3. Toggle the switch labeled ‘Grayscale’ so that it turns green.

    Once enabled, all images and text will be displayed in shades of gray rather than bright colors. This setting helps reduce eye strain while also making screens easier to read in low light settings. It’s important to note that though grayscale mode does change the overall look of your phone, it doesn’t affect any apps or features – just how they appear visually. With grayscale enabled, you’re now ready to adjust color filters if desired.

    Adjusting Color Filters

    Now that you’ve enabled grayscale mode, it’s time to adjust the color filters. With a few simple taps, you can invert both hue and brightness of your iPhone screen for even greater clarity and less eye strain when viewing images or text. Here’s how:

    1. In Accessibility Settings, select ‘Display Accommodations’ again and this time choose ‘Color Filters’.
    2. You will be presented with several options for adjusting the tint and temperature of your display; here is where you can play around with the settings until you find something that works best for you.
    3. To quickly invert colors on your phone, tap ‘Invert Hue’ at the top of the page – this option should immediately change your device from its default setting to one of inverted hues. Additionally, if you want an even darker effect without completely inverting all colors, then toggle ‘Invert Brightness’.

    The result? A look that feels modern yet timeless – perfect for anyone looking to make their iPhone stand out from the crowd!

    Customizing Color Tint And Temperature

    Once you’ve got the basics of inverting colors down, it’s time to customize your color tint and temperature adjustments even further. With a few more taps, you can fine-tune your iPhone display with just the right balance between contrast and brightness for any situation.

    Head back into Display Accommodations in Accessibility Settings and select ‘Color Filters’. From here, you will be presented with several options for adjusting both Color Tint and Temperature levels – so take some time to explore each one until you find something that suits your needs. You’ll also have the option to enable Night Shift when using these filters; this feature is designed to reduce eye strain at night by reducing blue light on the phone’s display.

    By playing around with different combinations of Color Tint, Temperature adjustment, and Night Shift, you should be able to craft an optimal visual experience while spending less time squinting or straining your eyes!

    Adjusting Contrast Levels

    Setting just the right color balance is one thing, but adjusting contrast levels can also make a big difference in how your iPhone display looks. While some people may prefer more vivid colors with higher contrasts, others might benefit from softer transitions between shades of different colors.

    Fortunately, iOS allows you to customize your contrast settings as well – so it’s easy to find an optimal experience for any situation. To adjust the overall contrast level on your device, head back into Display Accommodations and select ‘Color Filters’. Then scroll down until you see a slider labeled ‘Intensity’ – this will allow you to choose whether or not to apply extra emphasis when displaying certain types of colors.

    You can also use this same menu to manually adjust the intensity of each individual color channel (Red, Green and Blue) if needed. This way, you’ll be able to fine-tune the exact amount of color contrast that works best for whatever task you are trying to accomplish!

    Night Shift Mode

    If you’re looking for an even easier way to invert the colors on your iPhone, then Night Shift mode is a great option. This feature allows you to automatically adjust the color temperature of your display at predetermined times – so that you don’t have to manually change anything each time you want to switch between day and night modes. To access this setting, simply head back into Display Accommodations, select Color Filters and scroll down until you see ‘Night Shift’.

    From here, you can customize when exactly this mode will be enabled. You’ll also be able to choose which type of color inversion it applies (either Red-Green or Blue-Yellow). Additionally, if desired, you can also modify the intensity level separately from other contrast settings mentioned earlier. Once everything is set up properly, just turn Night Shift on whenever necessary and enjoy inverted colors with minimal effort!

    For those who prefer more control over their device’s appearance, dark mode might be worth exploring as well. Dark Mode changes the overall look and feel of iOS by inverting many interface elements — such as navigation bars and text — while leaving images unchanged. It’s a subtle but effective way to make sure your eyes stay comfortable no matter how long you spend using your phone.

    Dark Mode

    Ready for an even more convenient way to invert colors on your iPhone? Dark Mode is the perfect solution. This feature completely changes the look and feel of iOS by inverting many interface elements such as navigation bars and text, while leaving images unchanged. It’s a subtle yet effective way to make sure your eyes stay comfortable no matter how long you spend using your device. Here are three steps to set up Dark Mode on your phone:

    1. Head into Settings > Display & Brightness.
    2. Tap ‘Dark’ under Appearance.
    3. Toggle on “Smart Invert” or “Classic Invert.”

    Once enabled, Smart Invert will intelligently adjust color inversions only where it makes sense – preserving most image details, buttons, and other content from becoming inverted too. If you prefer a more thorough approach however, Classic Invert can also be used for a more uniform result across all apps and menus. Whichever setting works best for you, just remember that once activated, dark mode will remain active until manually disabled again!

    Shortcuts For Quickly Inverting Colors

    For those times when you need to quickly invert colors on your iPhone, there are shortcuts available. Take the case of John who suffered from eye strain due to long hours spent on his screen. He discovered that he could easily switch between dark and light modes with a quick shortcut – simply double-tapping the Home button while displaying any app or menu! This allowed him to adjust the brightness and contrast levels whenever needed, making it easier for him to work more comfortably throughout the day.

    Inverting colors with this method is especially useful if you’re using an older device without Dark Mode capabilities. All you have to do is triple-click anywhere on the display (or use Accessibility Shortcut) which will bring up the Color Inversions options. From here, you can choose either Grayscale mode or select one of several color schemes including Negative Colors and Red/Green Tinting depending on your needs.

    The great thing about these shortcuts is that they allow users to quickly adjust color settings as necessary so they don’t have to go through all of their phone’s menus every time they want something changed. Plus, since they are accessible via both hardware buttons and software commands, they make inverting colors fast and easy no matter what kind of device you’re using!

    Troubleshooting Tips

    If you’re having trouble getting your iPhone to invert colors, there are a few troubleshooting steps you can take. First off, make sure that the Accessibility Shortcut is enabled on your device. To do this, go to Settings > General > Accessibility and look for the toggle switch next to ‘Accessibility Shortcut’. If it’s not already turned on, flip it on and try inverting colors again.

    Another thing you should check is if any other accessibility features like Zoom or Contrast are interfering with color inversion. Go back into the same Accessibility menu and scroll down until you find these settings – if they’re enabled, turn them off and see if that resolves the issue.

    It’s also possible that your phone isn’t saving changes correctly when you try to invert colors. This could be due to an outdated version of iOS or some kind of bug on your device. Try restarting your phone first and then give inverting colors another shot – hopefully this will help get everything working properly!

    Conclusion

    Inverting colors on the iPhone is a great way to customize your device or make it easier to use. By taking advantage of Accessibility Settings and other features like Grayscale Mode, Color Filters and Dark Mode, you can easily adjust your display settings for improved visibility and contrast. Don’t forget about Night Shift mode and Color Tint and Temperature for further customization. Finally, if you want to quickly invert colors on the fly, there are shortcuts available as well. With a little bit of effort, you’ll be able to find just the right combination of settings that will allow you to enjoy using your phone even more than before – like a breath of fresh air!

    To sum up, inverting colors on an iPhone takes just a few simple steps but offers a wide array of options to suit every user’s needs. Whether you’re looking for better accessibility or simply trying something new with your device’s look, this feature has got you covered – providing endless possibilities at your fingertips. As they say: variety is the spice of life!

  • How To Delete An Album On iPhone

    How To Delete An Album On iPhone

    Are you looking to delete an album on your iPhone? It can be overwhelming trying to figure out how to go about it, but don’t worry — we’ve got the perfect guide for you! In this article, we’ll walk you through step-by-step instructions so you can get rid of any albums that are taking up valuable space. We’ll cover everything from where to find them in the first place and what other options you have if deleting isn’t the best move. Keep reading and learn all about how to delete an album on your iPhone!

    We know there are a lot of questions surrounding how exactly one goes about deleting an album from their phone. That’s why our goal is to make sure your experience is as smooth as possible. With our help, you’ll be able to take control of your music library in no time at all. Whether you’re wanting to clean up or just need some extra storage space, we’ve got all the tips and tricks necessary for successful deletion.

    Ready to start clearing away those unwanted albums? Then let’s dive right into learning how to do it with ease! We guarantee that by following these steps, even beginner users will have no trouble getting the job done quickly and efficiently. So without further ado, here’s our ultimate guide on how to delete an album on iPhone — read on and get ready for success!

    Overview Of Albums

    When it comes to organizing and customizing your iphone, albums are a great way to keep your photos organized. But what if you want to delete an album? Don’t worry – it’s easy! Before we look at how to do that, let’s take a quick overview of the different types of albums available on an iphone.

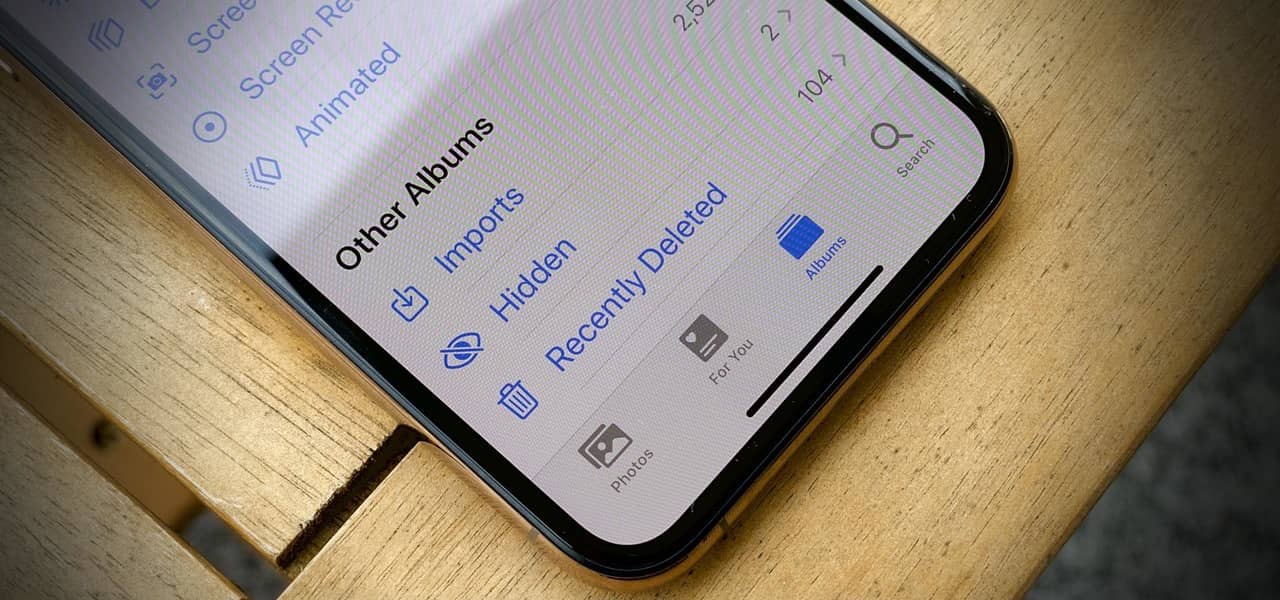
    There are two main types of albums: pre-made ones created by Apple (such as Selfies or Favourites) and user-created albums which can be made from within the Photos app. The pre-made albums appear in the Albums list first, followed by any user-created albums underneath. Each type will have its own folder icon with either a photo collage inside or just one picture representing the contents of the album.

    Organizing your photos into these different albums makes them easier to locate when needed – and also ensures they don’t get mixed up with other people’s images if shared online. So now that we know about iphone albums and their organization, let’s move onto finding the album you want to delete…

    Finding The Album To Delete

    Finding the album you want to delete is easy. To start, open up your Photos app and go to the Albums list. Here, you’ll see all of the pre-made albums that Apple has created for you as well as any user-created albums below them. Scroll through this list until you find the one that you’d like to delete – it should have a folder icon with either a photo collage or single image inside representing its contents.

    Once you’ve found the album in question, tap on it to open up its contents. At the top right corner of your screen, there will be an ‘Edit’ button which allows you to make changes to anything within that album – including deleting whole albums if necessary. Tap on this button and then select ‘Delete Album’. You will receive a notification asking whether or not you’re sure about wanting to delete it; confirm this by pressing ‘Delete Album’ again at the bottom of your screen.

    That’s all there is to it! Your chosen album has now been deleted from your device and won’t appear anymore in your Albums list (unless re-downloaded). The photos contained within are still safe however, stored away in their original folders within your library so they can be accessed whenever needed later down the line. Now that we know how to remove entire albums from our iphone, let’s look into another common task: deleting single photos from an album…

    Deleting Single Photos From An Album

    If you want to delete a single photo from an album, the process is fairly similar. First, open up the Photos app and go to your Albums list where you should be able to locate the desired album with ease. Tap on it to view all of its contents before tapping on the ‘Edit’ button located at the top right corner of your screen. This will give you access to various editing tools such as cropping and rotating images, but also allow you to delete any photos within that particular album.

    To delete an image, simply tap on the small circle found in front of each picture until they turn red – this indicates they have been selected for removal. Once everything has been marked appropriately, press on the trashcan icon in order to confirm deletion; doing so will bring up another notification asking if you’d like to proceed or not. If satisfied with what’s been chosen for deletion, select ‘Delete Photo(s)’ followed by ‘Done’. At this point, those pictures are now gone from both your library and albums!

    Now that we’ve learned how to remove individual photos from our albums as well as entire albums themselves, let’s move onto freeing up some storage space by deleting old messages attached to certain conversations.

    Freeing Up Storage Space

    Unclogging our iPhones of unnecessary data is essential for storage optimization. We can make better use of our device’s memory by freeing up storage space – a necessary step to ensure smooth functioning and memory management.

    We can start by deleting old messages attached to certain conversations; this will help reduce the clutter in our Messages app, as well as clear out some more precious room on our phones. To do this, open up your Messages app before selecting a conversation from your list of chats. Scroll through it until you come across an old message that no longer needs to be saved and tap on the small arrow found beside said message. Doing so will bring forth various options such as ‘Copy’, ‘More…’ or ‘Delete’. Selecting Delete will give us two additional choices: ‘Delete Message’ and ‘Cancel’; pressing confirm deletion removes that particular message from existence!

    The same process applies when wanting to delete multiple photos simultaneously from an album; all we need to do is select each image one at a time before confirming their removal with the tap of a button!

    Deleting Multiple Photos From An Album

    When it comes to deleting multiple photos from an album, the process is much simpler than it seems. All we need to do is open up our Photos app and select the desired album that contains all of the images we would like to delete; this can be done by tapping on ‘Albums’ at the bottom of the screen before selecting a specific folder!

    Once in there, simply tap on ‘Select’ located in the top right corner of your device’s screen. This will bring forth various checkboxes next to each individual photo which will allow us to pick out as many pictures as we’d like for deletion. Once ready, press on either ‘Delete [number] Photos’ or ‘Trash [number] Photos’, depending on what type of phone you have – iPhone 6S+ vs iPhones 5 & 6-, respectively.

    The following are helpful tips when wanting to delete multiple photos:
    • Make sure you’re certain about which images you want deleted – remember, once they’re gone, they’re gone forever!
    • Use keywords such as ‘delete multiple images’, ‘deleting multiple photos’ etc., within search bars if seeking something more specific.
    • If possible, back up any important photos onto iCloud before removing them permanently from your device.

    This way, we can free up room while still keeping precious memories safe and secure!

    Deleting Empty Albums

    When it comes to deleting empty albums from our iPhones, the process is quite simple. All that needs to be done is open up our Photos app and select the empty album we want gone – this can be done by tapping on ‘Albums’ at the bottom of the screen before selecting a specific folder!

    Once in there, press down on the empty album until its icon starts wiggling; this will bring forth an “X” symbol located in the top left corner of your device’s screen. Pressing it will immediately delete the entire folder without warning or confirmation prompts. It’s important to note that if you have deleted photos within an album but not all of them, that particular folder won’t appear as being eligible for deletion through this method.

    Another way to clear out any unwanted albums is via iCloud Photo Library, which allows us to bulk-delete multiple images with ease. Just go into Settings > Your Name (Apple ID) > iCloud > Photos then toggle off ‘iCloud Photo Library’. This action will remove all pictures stored under iCloud onto your iPhone/iPad, granting access for mass deletions afterwards; though make sure you’re certain about what you want removed as you’ll be unable to restore anything afterwards.

    TIP: If unsure whether a photo album has been emptied completely or not, try sorting them by date taken instead of name so they appear in chronological order – this should help identify those still containing content easier!

    Bulk Delete Using Icloud Photo Library

    It’s likely that many of us have experienced the frustration of having to manually select multiple photos one-by-one for deletion from an iPhone album. Fortunately, there’s a more efficient method than this tedious task – iCloud Photo Library bulk deletions! By leveraging the power of iCloud, we can drastically reduce our time spent deleting unwanted albums and individual images in no time.

    So, how does it work? First off, you’ll need to enable iCloud Photo Library on your device by heading over to Settings > Your Name (Apple ID) > iCloud > Photos then toggle ‘iCloud Photo Library’ on. Once enabled, all pictures stored under iCloud will be transferred onto your iPhone/iPad which grants access for mass deletions afterwards. Here are five steps you should take when using this feature:

    • Select ‘Albums’ at the bottom of the screen and choose a specific folder containing photos to delete
    • Press down on any photo until its icon starts wiggling; this will bring forth an ‘X’ symbol located in the top left corner
    • Tap on ‘Select All’ followed by pressing down again until a checkmark appears next to each image
    • A trash can icon will pop up once selected – press it to confirm and remove everything within seconds!
    • Last but not least, make sure you’re certain about what you want removed as these actions cannot be undone.

    The beauty of this process is that users don’t even need to sort through their photos first or worry about accidentally deleting something important—bulk selections allow them to clear out entire folders with ease and save valuable storage space in turn.

    Manually Selecting Photos For Deletion

    For those looking to delete photos manually, there’s an alternative way of removing unwanted images. This method involves selecting certain pictures one-by-one and deleting them directly from the album—a process that may take longer but is ideal for those who want more control over what gets removed.

    To start off, head into your Photos app and select a folder containing the desired shots you wish to eliminate. Afterwards, press down on each image until its icon starts wiggling; this will bring forth an ‘X’ symbol located in the top left corner which can then be tapped to confirm deletion. It’s also possible to highlight multiple photos at once by pressing down on any of them until a checkmark appears—you’ll just need to make sure all relevant items are selected before confirming with the trash can icon.

    Keep in mind that this procedure does not apply when using iCloud Photo Library as it only works for local albums stored on your device. If you’ve enabled ‘Optimize Storage’ via Settings > Your Name (Apple ID) > iCloud > Photos however, these manual selections may still come in handy as they allow users to selectively keep certain images while freeing up storage space on their iPhones/iPads simultaneously!

    TIP: While manually selecting photos can provide greater precision than bulk deletions, it also takes up considerably more time so consider whether or not this approach is worth it depending on how many images need erasing.

    Deleting Shared Albums

    We’ve explored how to delete photos manually, but what if you want to get rid of an entire album at once? Fortunately, the process is incredibly straightforward and only requires a few clicks.

    Shared albums are particularly easy to erase as it can be done directly from the Photos app without having to select individual images first. Simply open up the folder in question and tap on ‘People’ located within its upper right corner—this will bring forth a list of people who have access. At this point, simply hit the red icon next to your own name (or anyone else) followed by ‘Remove’ when prompted; doing so should terminate all shared connections and delete the album permanently!

    For those looking for alternative methods, there’s also the option of disabling iCloud Photo Library via Settings > Your Name (Apple ID) > iCloud > Photos which may result in certain collections being wiped out depending on their storage location. Keep in mind though that this isn’t necessarily foolproof since some libraries might still remain intact even after turning off synchronization services.

    Here’s a quick overview of everything we just discussed:

    • Manually selecting photos for deletion
    • Deleting shared albums
    • Disabling iCloud Photo Library
    • Alternative solutions

    With these tips under your belt, you’re now fully equipped with knowledge needed to quickly remove unwanted albums from your iPhone or iPad. Now let’s take a look at restoring accidentally deleted content.

    Restoring An Accidentally Deleted Album

    Unfortunately, sometimes we accidentally delete an album that we wanted to keep. Fortunately, restoring a deleted album on your iPhone or iPad is much easier than it used to be!

    The first step in restoring a deleted album is to open the Photos app and tap “Albums.” This will bring up a list of all albums currently stored on your device. Scroll through the list until you find the one you want to restore; once you’ve found it, hit “Restore.” This will move the album back into its original location within your photo library.

    Once restored, the album should appear exactly as it did before being removed—including any photos added since then! If for some reason this doesn’t work there are still other options available such as using iCloud Drive or third-party services like Google Photos which can help with recovering lost content.

    No matter what happened, if you’ve accidentally deleted an album from your iPhone or iPad rest assured that getting it back is usually just a few taps away!

    Conclusion

    In conclusion, deleting an album from your iPhone can be a simple task with the right steps taken. It’s important to remember that removing albums does not permanently delete images, so you won’t have to worry about losing precious memories. The process of freeing up storage space is easier than ever and allows me to keep my device running smoothly.

    By taking the time to understand how each step works, I’m able to enjoy more photos without worrying about clogging up my phone’s memory. Whether it’s selecting multiple photos for deletion or restoring an accidentally deleted album, there are plenty of options available when managing my albums on my iPhone.

    Using these methods of deleting an album has allowed me to manage my photo library like a pro! With just a few clicks, I’m able to quickly free up space while keeping all my favorite memories safe and secure.

  • How To Change Bluetooth Name On iPhone

    How To Change Bluetooth Name On iPhone

    Today, we live in a world where technology has become integral to our everyday lives. Smartphones have made life so much easier and more efficient – but how do you make sure your device stands out from the rest? One of the simplest ways is by customizing its Bluetooth name on an iPhone. It’s quick, easy, and can be done in just a few steps! In this article, we’ll show you exactly how to change your phone’s Bluetooth name so that it reflects your personality and style. So if you’re ready to give your device a personal touch, keep reading for all the details!

    Between keeping up with emails, attending virtual meetings, and staying connected with friends and family; having access to a reliable smartphone is essential these days. And while iPhones are great devices as they come from the factory – why not take things one step further with some customization options? Changing the Bluetooth name is a small tweak that takes seconds to do but makes a huge difference when it comes to making sure your device stands out from everyone else’s.

    So whether you want something creative or something meaningful – changing the Bluetooth name on an iPhone is definitely worth doing. Keep reading for all the instructions on getting started!

    What Is Bluetooth?

    What is Bluetooth? It’s a technology that allows different devices to communicate with each other wirelessly. Bluetooth is a short-range networking protocol that works within 10 meters of the device and requires minimal power usage, making it an ideal way for connecting devices such as phones, speakers, and headphones. In terms of its definition, Bluetooth technology enables two or more electronic devices to connect without using cables in order to exchange data. This means you can send music from your phone to your speaker or pair up multiple headsets together for multi-player gaming.

    Bluetooth range also varies depending on the type of device being used. For example, most Bluetooth enabled cellphones have a maximum range of 30 feet whereas wireless keyboards usually have a much longer range reaching 100 feet or so. Due to its low power consumption, it’s not only useful for personal use but also great for businesses too where multiple users need access to equipment simultaneously.

    It’s clear that Bluetooth has revolutionized how we interact with our electronics by offering convenient connections at distances previously unimaginable! Now let’s look at how we can access these settings to change the name of our iPhone bluetooth connection…

    Accessing Bluetooth Settings

    Accessing Bluetooth Settings is a straightforward process. To get started, you’ll need to open the Settings app on your iPhone and select “Bluetooth” from the list of options. From there, you can see all the devices that are connected via Bluetooth as well as any other nearby devices that aren’t currently paired up with your device. To change the name of your iPhone’s Bluetooth connection, simply tap on the settings icon next to it in this list.

    Once you’ve done this, a new window should appear showing some basic information about your current Bluetooth connection including its name. At this point, you’ll be able to easily edit or change this field by tapping into it and typing in whatever new name you’d like for your device. Once finished, just hit save and voila! You now have a fresh new bluetooth name associated with your phone!

    Making these small changes can really help give clarity when searching for or connecting to certain devices. Now let’s look at how we can ensure our settings are ready before making any adjustments…

    Preparing To Change Name

    Before making any changes to your device’s Bluetooth name, it’s important to ensure that everything is set up correctly. To do this, you’ll need to make sure your iPhone is updated with the latest operating system and then verify that any other devices connected via Bluetooth are compatible with the new settings. Beyond this, you’ll also want to check the configuration of each device in order for them all to be able to communicate properly once a change has been made. Taking these precautions before attempting a bluetooth renaming will help prevent errors from occurring during the process and potentially save time in troubleshooting if something goes wrong.

    For those who already have their setup optimized but still haven’t made the jump into changing their phone’s Bluetooth name, there may be some hesitation due to fear of messing something up along the way. While this can certainly happen if proper steps aren’t taken beforehand, ultimately it’s not as difficult or complex as one might think! With just a few simple clicks and taps on your screen, anyone can update their name without having to worry about breaking anything in the process.

    Now that we’ve gone over how best to prepare our iPhones for a potential rename, let’s move onto actually updating the name of our device…

    Updating The Name Of A Device

    Having properly prepped your device and verified compatibility, it’s time to move on to the actual act of renaming. To update the name of a Bluetooth device on an iPhone, simply open up the Settings app and tap “Bluetooth”. From there, you’ll be able to select the desired device from the list that appears and then press “Rename” at the bottom right corner of its info page. This will bring up a text box where you can type in whatever new title you’d like for your device before hitting “Done” when finished.

    Once this is done, all changes should take effect immediately without any further input required. That said, if something isn’t working as expected or one of your connected devices doesn’t appear after updating their name, try unpairing them from each other first before attempting anything else. And if nothing else works, contact customer service for assistance troubleshooting any underlying issues that may need more attention.

    With these simple steps, anyone can quickly change their Bluetooth names with minimal effort!

    Unpairing Devices

    Sometimes the act of renaming a device means unpairing it from another. Unpairing devices can be an intimidating process, but with careful attention to detail and following the proper steps, anyone can do this without issue. Here’s how:

    Firstly, find the “Settings” icon on your iPhone and open up Bluetooth. From there, you should see a list of all currently paired devices that are connected to your phone. Select the one you would like to remove and press ‘Forget This Device’ – this will begin the unpairing process.

    Once complete, you’ll know everything has worked as expected if your selected device is no longer listed among those already paired with your iPhone. In addition to helping rename a device, these basic instructions also come in handy when troubleshooting any issues or disconnections between two paired items.

    To make sure nothing gets lost in translation during such processes, here are some tips for successful unpairing of iPhones/Bluetooth devices:

    • Turn off both devices before attempting anything else
    • Ensure Bluetooth is enabled on each item prior to pairing them together
    • Take time confirming compatibility between different types/brands of tech ahead-of-time
    • If necessary, check user manuals for specific instructions related to resetting connections

    With a few simple precautions taken beforehand and by sticking close to our outlined plan above, removing any previously synchronized pairings should go smoothly every single time. Moving forward then becomes easier now that we have a clear understanding of what needs doing whenever we want to update or switch out one of our wireless accessories!

    Tips For Naming Your Device

    When it comes to Bluetooth-naming, there are a few tips and tricks that will benefit us all. Personalizing devices with creative names is not only fun but also helps us differentiate between them when connecting or troubleshooting connection issues. Before we jump in too deep though, let’s take a look at some ideas for coming up with the perfect device name:

    • Choose something descriptive – Pick words or phrases that describe your gadget such as “Apple TV Remote” or “My iPhone XR”
    • Be creative – Get inventive and come up with unique names like “Notorious BLE” or “Bluetoothy McBluetoothface”
    • Make it memorable – Select an easily remembered moniker like “Mom’s iPad Pro 2021” so you can quickly identify which device belongs to whom
    • Keep it short & sweet – Keep your titles concise so they don’t get cut off by software limitations on character length
    • Avoid profanities – Names should be appropriate for any age group who might end up using the same device

    By following these basic guidelines, anyone can create a custom name for their gadgets without much fuss. Not only does this make our lives easier down the line if ever needing to reconnect items, but allows us to express ourselves through tech accessories! As long as we’re mindful of what others may think when reading our chosen labels, then everyone wins!

    Troubleshooting Connection Issues

    Now that we’ve gone over some tips for choosing a creative Bluetooth name, let’s look into troubleshooting connection issues. As any tech enthusiast can attest to, there are times when our devices don’t cooperate as expected; whether it be a disconnected Bluetooth headset or an iPhone refusing to pair with its companion speaker. While these instances may seem daunting at first glance, most of the time they can be resolved in just a few steps.

    When dealing with troublesome connections, start by analyzing network interference – from other wireless signals such as Wi-Fi and cellular data – since this is often the root cause of many problems. If nothing else works, try resetting your device or turning off/on both pieces of hardware involved in the pairing process. This should help restore proper communication between them and get you back up and running again!

    If all else fails, make sure that your operating system is completely updated with the latest software patches. Additionally, if available on newer models of iPhones (like XR), enable ‘Bluetooth Low Energy’ mode which helps facilitate faster connections and improved power savings. With these simple tricks up your sleeve, those pesky Bluetooth problems will soon become a thing of the past!

    Analyzing Network Interference

    Analyzing network interference is key to finding the cause of Bluetooth connection issues. Interference can be caused by other wireless signals such as Wi-Fi, cell phone data and even microwave ovens that are nearby. It’s important to identify any sources of interference in order to prevent it from disrupting your device’s operations or causing connection problems between devices.

    To analyze potential sources of interference, start by using a tool like an RF spectrum analyzer or a signal strength meter which will provide you with information on what frequency bands are being used at any given time. This helps to determine if there is too much noise or congestion on certain frequencies which could lead to slower connections or complete disconnection in some cases. You may also want to consider turning off unnecessary devices like microwaves and cellular phones during setup for optimal performance.

    Once you have identified possible sources of interference, make sure to take steps towards mitigating them in order to get the most out of your Bluetooth connectivity experience. Be sure not only to avoid placing compatible devices near certain electronics but also check for software updates regularly as these often address known bug fixes related to wireless communications compatibility. Taking these precautionary steps should help ensure smooth sailing when connecting two pieces of hardware together via Bluetooth!

    Securing Your iPhone’s Bluetooth

    Securing your iPhone’s Bluetooth connection is an essential step to make sure that no unwanted devices are able to access or interfere with the data being transmitted. Taking a few extra precautions can help ensure that your Bluetooth connection is as secure and private as possible.

    The first thing you should do is go into your phone’s settings and double-check the encryption settings for any information being sent over Bluetooth. Most phones come with default encryption protocols preloaded, but it’s always a good idea to confirm them before using any device on a public network. This will give you peace of mind knowing that all sensitive data you transmit is encrypted properly.

    Another important security measure when using Bluetooth is setting up privacy protocols so that only authorized devices can connect to each other. You can set this up by going into “Settings > Privacy > Location Services > System Services” in order to enable “Bluetooth Sharing.” Doing this allows two compatible devices to establish a secure connection without having to manually pair them every time they need to communicate.

    These steps should provide you with enough protection against unauthorized access while still allowing you easy access to share files and data between different devices wirelessly. With these features enabled, you won’t have to worry about someone else tapping into your personal conversations or accessing confidential information stored on your device through its Bluetooth connection! Transitioning now into understanding the implications of privacy policies when connecting via Bluetooth…

    Understanding Privacy Implications

    As with any form of technological advancement, the power to connect comes with a certain degree of risk. When it comes to Bluetooth technology specifically, there are particular privacy implications that must be taken into consideration when connecting devices. To ensure your data is protected and secure, you need to understand how Bluetooth security works and what measures can be taken to keep your information private.

    Bluetooth technology makes it incredibly easy for users to share data across multiple devices without having to physically plug them in. This convenience can come at a cost however if proper data protection protocols aren’t followed. Without taking steps to make sure the connection between two or more devices is encrypted properly, confidential information could easily end up in the wrong hands. Fortunately, this issue can be addressed by enabling encryption settings on both ends before exchanging any sensitive files or data via Bluetooth connection.

    In addition, making sure all connected devices have enabled “Bluetooth Sharing” will help prevent anyone from accessing information sent over an unsecured network because only authorized connections are allowed access. Taking these extra precautions will go a long way towards protecting yourself against potential digital threats while still allowing you to take advantage of the many benefits associated with using wireless networks like Apple’s iPhone Security System.

    Conclusion

    In conclusion, Bluetooth technology is an integral part of modern life and iPhones are no exception. It’s easy to change the name of your device with a few simple steps. With more secure settings, you can enjoy greater peace of mind when it comes to protecting your data and privacy.

    Understanding how to use this technology safely is like having a key that unlocks all its benefits. When used correctly, you can unlock the potential of wireless connections without compromising your security or private information.

    Bluetooth has become so essential in our lives that we often take it for granted; however, understanding how to navigate these technologies properly will help ensure that you get the most out of them. Taking the time to understand the implications and best practices around Bluetooth usage can be beneficial for both personal and professional uses. By making sure that you have taken steps to protect yourself on a technological level, you can feel confident as you connect with others wirelessly.

  • How To Skip Songs With Airpods

    How To Skip Songs With Airpods

    Have you ever been listening to a song on your AirPods and wanted to skip ahead to the next one? With Apple’s latest technology, it’s easier than ever before. In this article, I’ll be walking through how to quickly and easily skip songs with AirPods.

    No need for any extra buttons or hardware – everything you need is right in the palm of your hand. So if you’re ready to take control of your music experience, let’s get started!

    Doing away with traditional controls, AirPods are all about convenience. All you have to do is double tap either side of your earbud housing and voila! You can instantly jump ahead to the next track without breaking stride.

    And best of all, you don’t even have to look at what you’re doing – just use a quick flick of the wrist and you can keep rocking out while skipping tracks.

    For those who want an even more hands-free approach, there’s another option available: voice commands! Just say “Hey Siri” followed by something like “skip this song” and watch as your request is fulfilled almost instantaneously – no matter where you are or what else is going on around you. It really doesn’t get much simpler than that!

    Checking Airpod Compatibility

    Before you can skip songs with your AirPods, you’ll need to make sure they’re compatible. Apple’s AirPods are designed for iOS devices and Macs. If you have an iPhone, iPad, or iPod Touch running iOS 10 or later, the AirPods should be automatically detected when you turn them on.

    On a Mac computer running macOS Sierra or later, they’ll show up in your Bluetooth menu.

    If your device isn’t compatible but supports other Bluetooth-enabled headphones, you may still be able to use the AirPods – though some features like voice control won’t work. To check whether it will work with your system, consult the official compatibility guide from Apple.

    Once everything is set up correctly, playing music through your AirPods is easy: just hit play on whatever app you’re using (like Spotify or iTunes), then adjust the volume or skip tracks with Siri commands like “Hey Siri, next song.” That way of skipping songs works with almost any audio streaming service. Enjoy!

    Setting Up Music Controls

    Setting up music controls with your AirPods is easy. To begin, you’ll need to pair them with a compatible device. Both Apple and Android devices are supported – just make sure they’re updated to their latest operating system versions.

    Next, open the Bluetooth settings on your device and connect it to your AirPods. Once connected, you’ll be able to adjust audio playback from your headphones directly.

    Using the volume buttons on either side of the AirPod will enable you to quickly increase or decrease sound output levels without having to go into any menus or extra steps.

    If you want more control over what’s playing, then you can access various music-related options in the dedicated app for that particular type of device. For instance, if you have an iPhone, then you could use the Music app to manage playlists and other functions related to songs stored on your phone.

    Conveniently enough, most apps now allow users to control audio playback from the lock screen so that they don’t even have to unlock their phones when wanting to skip a song or select something else entirely. You can also easily switch between different devices without needing to re-pair them each time as long as both devices are within range of one another; this makes life easier when dealing with multiple sources of audio playback at once!

    Utilizing Siri For Skipping Songs

    Skipping songs with AirPods is a cinch – all you need to do is use Siri. With your AirPods connected to your device, simply activate Siri and give it commands such as “skip this song” or “go back to the previous track”. You can also ask for specific music by saying something like “play my favorite artist”, and Siri will respond quickly! All in all, using Siri on your AirPods makes it incredibly easy to control your music without ever having to take out your phone.

    The best part? No matter what type of music service you’re using (iTunes Music, Apple Music, Spotify, etc.), Siri has got you covered. As long as you’ve enabled voice recognition within each app’s settings menu, Siri should be able to recognize any command that you give it related to skipping tracks and playing new ones. It doesn’t get much simpler than that!

    Overall, utilizing Siri on your Airpods is an effective way of controlling the tunes playing from your device without any fuss. Whether it’s changing up the playlist or going back a few tracks, giving simple commands through siri allows for seamless transitions between different types of music. So go ahead: put on those pods and enjoy some hassle-free listening!

    Final Words

    It’s easy to skip songs with Airpods! As long as your device is compatible, you’ll be able to quickly set up music controls and have access to the ultimate hands-free experience. I find it especially helpful when I’m out running or biking — all I need to do is double-tap my earbuds and say “skip this song” for a quick change of tune.

    Overall, using Siri has been incredibly convenient in allowing me to switch between tracks without having to pause what I’m doing. It may take some getting used to if you’re not an Apple user, but after that initial learning curve, you won’t want to go back! With a few simple steps, anyone can become an Airpod pro in no time.

    So whether you’re hitting the gym or lounging around the house, don’t forget about your Airpods’ abilities: they just might be one of the best ways for you to listen to music on the go.

  • How To See Blocked Numbers On an iPhone

    How To See Blocked Numbers On an iPhone

    Have you ever been frustrated by a blocked number on your iPhone? Do you want to know how to see the caller’s identity and why they are calling? You’re in luck! In this article, we’ll discuss how to view blocked numbers on an iPhone.

    If you can’t identify who is calling and think it might be important, there are several steps you can take to find out who it is. We’ll show you some quick tips and tricks that will help you uncover those pesky blocked callers. From using third-party apps to trying carrier settings, there are multiple methods that may work for you.

    Today, smartphones have become an integral part of our lives — but when the wrong person calls or texts us, it can make them feel like more of a burden than a blessing. Don’t let yourself get caught up in the frustration; read on and find out how easy it is to figure out who was behind those mysterious blocked calls!

    Settings Options

    In order to see blocked numbers on an iPhone, it’s important to understand the call blocking settings. To access these settings, open the ‘Settings’ app and navigate to ‘Phone > Call Blocking & Identification.’ This will provide a list of all numbers that have been blocked from calling you.

    To unblock a number, select ‘Edit’ in the top right corner of the page and then hit the red circle next to any contact or phone number you wish to remove from your block list. Keep in mind that if a caller has blocked their Caller ID, they may still be able to get through even if you’ve put them on a block list. You can also restrict third-party apps like WhatsApp or FaceTime by tapping ‘Block Contact…’ at the bottom of this menu.

    It’s essential to familiarize yourself with these various call blocking settings so you are aware of what is being blocked and how. Understanding call blocking allows users to manage who can reach them more effectively.

    Understanding Call Blocking

    Call blocking is an important tool for managing who can reach you on your iPhone. It allows users to block certain numbers, contacts, or even third-party apps like WhatsApp and FaceTime from contacting them. With call blocking enabled, any calls coming in from these blocked sources will be automatically rejected and sent straight to voicemail when they try calling.

    However, this feature isn’t foolproof – a caller with their Caller ID blocked may still be able to get through the call blocking settings if they know the right steps. To ensure your phone stays secure, here are five key tips to remember while using the call blocking feature:
    •\tBlock calls from unknown numbers
    •\tAdd frequently contacted numbers to contacts list so it doesn’t inadvertently get blocked
    •\tCheck regularly for unwanted calls that have been accidentally blocked
    •\tAvoid using ‘block all’ features unless absolutely necessary as it could lead to missing legitimate calls
    •\tWatch out for spoofed numbers which appear very similar but have slight differences such as an extra digit at the end of the number
    By following these steps and understanding how call blocking works, users can better control who has access to their personal information and protect themselves against malicious activity. Additionally, unblocking caller IDs from recent incoming numbers gives additional peace of mind that no one’s trying to contact without being noticed.

    Unblocking From Recent Calls

    Unblocking numbers from recent calls on an iPhone can be done quickly and easily. To unblock a number that has been blocked, simply open the Recent Calls page in your Phone app and tap the ‘i’ icon next to the contact. This will bring up their details page where you can select ‘Unblock this Caller’ to remove them from your block list.

    If you’ve accidentally blocked someone’s incoming call or message, it’s important to remember that they may still be able to reach you if their caller ID is hidden – so keep an eye out for any suspicious activity coming through! Additionally, if you’re unsure of who’s calling, don’t hesitate to ask before unblocking a caller.

    Once a number has been successfully unblocked, all future incoming communications should arrive as usual – no more missed calls or messages! With these simple steps, users can ensure they never miss another important call again while having full control over whom they accept calls from. Moving forward, users now have everything they need to confidently manage their call blocking settings on their iPhones.

    Unblocking From Contacts App

    Another way to unblock numbers on an iPhone is through the Contacts app. This method can be useful for users who have accidentally blocked a contact, as well as those looking to view their list of blocked callers. To begin, open up the contacts app and locate the desired caller in your address book. Once you’ve found them, tap ‘Edit’ located at the top right corner of your screen. From here, scroll down until you see ‘Block this Caller’, which should now appear unchecked – indicating that they are no longer being blocked from calling or messaging you!

    To view all of your currently blocked numbers, select ‘Settings’ followed by ‘Phone’. Here you will find a full list of contacts whom you have chosen to block from contacting you via phone calls or messages. If needed, individual entries can also be removed quickly and easily by simply tapping the ‘Unblock’ button next to each entry.

    By keeping these steps in mind, users will be able to confidently manage their call blocking settings within both the Phone and Contacts apps on their iPhones.

    Unblocking From Phone App

    Unblocking numbers from the Phone app on an iPhone is just as simple and straightforward. This method can be especially useful for users who have accidentally blocked a contact, or those wishing to check their list of blocked contacts at any time. To start off, open up the ‘Phone’ app and select ‘Recents’ in order to view your call history. From there, tap the ‘i’ icon next to each entry that you wish to unblock and then toggle off the switch located next to ‘Block this Caller’. In a matter of moments, your chosen caller will no longer be restricted from calling or messaging you!

    If desired, all currently blocked numbers can also be found within the Phone app by selecting ‘Settings’ followed by ‘Blocked Contacts’. Here one can find a full list of individuals whom they’ve previously opted not to receive calls from – which can then be individually removed with ease through tapping the ‘Edit’ button located at the top right corner of their screen and then hitting ‘Unblock’ next to every single desired number.

    Through using both these methods, anyone with an iPhone will easily be able to manage their phone settings without missing a beat. With that said, it’s now time move onto viewing individual caller ID information when receiving incoming blocked calls…

    Viewing Blocked Caller Id

    Sometimes, it can be difficult to keep track of blocked phone numbers – even if they have already been unblocked. Fortunately, there is an easy solution for viewing the caller ID information of incoming restricted calls on your iPhone. Simply open up the ‘Phone’ app and select ‘Recents’ in order to view your list of recent callers. If a number appears as ‘Blocked’, tap the ‘i’ icon next to that entry in order to reveal their caller-ID details. This will allow you to easily identify who called without having unblock them first!

    TIP: Take screenshots or take notes from these call logs so that you can refer back to them later if desired. That way, you won’t need to worry about remembering each specific blocked caller’s name when looking through your records.

    Another great tool for managing both blocked and non-blocked contacts alike is by making use of third-party apps such as Truecaller or Hiya Caller ID & Block which offer convenient features like automatic blocking and reverse lookup capabilities. With this type of software installed, users are able to quickly identify unknown numbers while also being able to maintain control over whom they choose not receive calls from at any given time.

    With all these options available, anyone with an iPhone will now have complete access over their personal settings regarding incoming calls and messages – allowing them some much needed peace of mind in today’s world. Up next we’ll discuss how best utilize such applications in order stay informed…

    Caller Id Apps

    Caller ID apps are an incredibly useful tool for managing incoming calls on your iPhone. These programs can be used to both block and unblock caller-ID information, depending on the user’s needs. For example, if you wish to permanently block someone from calling or messaging you, then you can use a caller-ID software like Truecaller or Hiya Caller ID & Block to do so with just a few taps. On the other hand, if you want to temporarily unblock someone who has been restricted by accident or otherwise, then these same apps will provide an easy way of doing this as well.

    Moreover, many of these third-party applications even offer handy features such as reverse lookup capabilities – which allow users to quickly search for any unknown contact info associated with a particular phone number. This is especially helpful when trying to track down those pesky telemarketers that call at all hours of the day! In addition, some apps also offer automatic blocking options so that specific contacts never have access to your line in the first place.

    Overall, using one of these types of programs makes it much easier for anyone with an iPhone to take control over their own personal settings regarding incoming calls and messages – providing them with peace of mind knowing that they’re always in charge of deciding who does (and doesn’t) get through.

    Third-Party Apps

    Figuring out how to see blocked numbers on an iPhone can be a tricky endeavor, especially when it comes to unblocking them. Fortunately, there’s a way around this issue – and it involves the use of third-party apps. These programs are specifically designed to help users manage their incoming calls and messages in more streamlined ways than what is available through Apple’s native features.

    Here are 3 key benefits of using such caller-ID apps for identifying or unblocking contacts:
    1) Easily trace unknown numbers from any region
    2) Quickly block or unblock specific calls
    3) Instantly view contact info associated with a number

    In other words, these types of applications make managing your call settings much simpler than ever before – allowing you to take control over who does (and doesn’t) have access to your line at any given time. And if you’re curious as to how exactly one would go about unblocking a number manually? Well… that’s where we’ll head next!

    Unblocking A Number Manually

    If you’re looking to manually unblock a number, the process can be surprisingly straightforward. To start off, simply open up your phone’s settings menu and select “Phone” from the list of available options. From here, scroll down until you find an option labeled “Blocked Contacts” or something similar – this is where all blocked numbers are stored for easy reference.

    Now that you’ve located the correct section within your phone’s settings menu, it’s time to begin unblocking the desired caller. Simply tap on their name (or number) in order to access additional info about them – then hit the “Unblock Contact” button to immediately unblock them. After doing so, they should have full access to contact you once again via text message or call!

    Of course, if things don’t go as planned after attempting a manual unblock of a number, there may still be some hope left yet. The next step in our journey will be devoted towards troubleshooting these types of issues should one arise during the process of trying to re-establish communication with someone who was previously blocked.

    Troubleshooting

    Unblocking a number can sometimes be like trying to find the right key for a lock; you may have all the right pieces but still fail to unlock what’s inside. Such is often the case when dealing with call-blocking issues on an iPhone – no matter how many times you try, it just won’t work! Thankfully though, there are some troubleshooting steps that can help alleviate these block number errors and unblock numbers without any additional hassle.

    First off, if you’re having trouble making calls or sending messages after unblocking someone, make sure caller ID is enabled in your settings menu. This should allow the phone to recognize incoming calls from blocked numbers as long as they’ve been successfully unblocked previously – otherwise nothing will happen even after hitting ‘unblock’! Additionally, another common issue that arises during this process is failure of the device to properly identify which contacts have actually been blocked; this can lead to confusion and frustration until its resolved. To fix this problem quickly and easily, simply check the list of blocked contacts on your device periodically so that all numbers are up-to-date before attempting further action.

    Finally, don’t forget about resetting your network connection if none of these solutions seem to solve your blocking problems. In most cases this should do the trick in terms of allowing new numbers through while resolving any lingering issues with existing ones – leaving you free once again to communicate as desired with whoever you need to talk/text!

    Conclusion

    In conclusion, there are several ways to unblock a phone number on an iPhone. With the settings options, you can understand and manage who is blocked from calling you or messaging you. You can also unblock numbers from recent calls, contacts app, and the phone app. There are even apps available that show caller ID information for unknown numbers.

    Third-party apps are another way to view blocked numbers as well. And if all else fails, you can manually enter in a blocked number yourself to see it appear on your device’s screen like a beacon of hope—like a lighthouse guiding lost ships back home.

    If any issues arise while attempting to unblock a phone number on an iPhone, troubleshooting steps should be taken right away so users don’t get stuck with faulty service. In the end, learning how to see blocked numbers on an iPhone is not only simple but empowering too! It’s like having complete control over who gets access to your personal communication line.

  • How To Pin People On Snapchat

    How To Pin People On Snapchat

    Are you looking to stay connected with your friends, family and followers on Snapchat? Pins are a great way to do just that! They enable you to pin important conversations to the top of your chat list so they’re always easily accessible. But how exactly do you go about pinning someone on Snapchat? Read on for an easy-to-follow guide on how to get started.

    This article will show you step-by-step how to effectively use pins in your chats. You’ll learn what kind of content can be pinned, who is eligible for pins, and other helpful tips along the way. Whether you’re new to Snapchats or have been using it for years, this guide has something for everyone. So grab some popcorn, kick back, and let’s dive into the world of pins!

    By the end of this tutorial, you’ll know everything there is to know about pinning people on SnapChat. Ready? Let’s get started!

    How To Add Friends On Snapchat

    Adding friends to your Snapchat is easy, and there are lots of ways to do it. To get started, you’ll need the app installed on your phone – so if you haven’t already done that, head over to the App Store or Google Play to download it now.
    Once it’s downloaded, open up the app and sign in with your details. You should then be taken to a home page where you can find options for adding contacts and finding people you know. There are several different ways to add friends on Snapchat: by searching their username; scanning someone’s Snapcode which looks like an intricate QR code; using Add Nearby which allows users within a certain radius access each other’s accounts; or sending out invites via email or SMS. Once you’ve followed these steps and added some contacts, start browsing through stories from all of your friends! If any of them interest you, consider following them for more content down the road. That’s all it takes – simple as that!

    How To Find And Follow People On Snapchat

    Snapchat is one of the most popular social media apps today and it’s no surprise why. It’s easy to use, offers tons of creative features, and provides a great platform for staying connected with friends. But if you’re new to Snapchat or just looking to find some more people to follow, this guide will show you how to do that quickly and easily.

    The first step in finding people on Snapchat is using their search feature. You can access this by tapping the magnifying glass icon at the top of your screen. This will open up a search bar where you can type in someone’s username or phone number to locate them. You can also search by name, email address, or even interest keywords like “travel” or “cooking.” Once you’ve found someone you want to follow, click on their profile picture and select ‘Follow.’

    If you don’t have anyone specific in mind but still want to discover new people on Snapchat, there are plenty of ways to do that too. The Discover tab gives you an easy way to browse public content from influencers and brands as well as see what stories your friends are sharing. Additionally, the Add Nearby feature lets you connect with other nearby users who have enabled location services – perfect for connecting with people when out and about!

    No matter which method you choose for finding people on Snapchat, all it takes is a few simple steps before you’ll be following all sorts of interesting accounts and keeping up-to-date with everyone’s latest snaps! So go ahead – start exploring now and make sure your Snapchats stay fun and fresh!

    How To Create And Manage Groups On Snapchat

    Creating and managing groups on Snapchat is a great way to keep in touch with your friends, family members, and coworkers. To start creating a group, open the Snapchat app, tap the Chat icon at the bottom-left corner of the screen, then tap ‘Create Group’. You’ll be asked to select up to 16 people you’d like to add to your group. When selecting those people from your contacts list or via search, make sure to double-check that all of them are listed correctly before tapping ‘Create’ at the top right corner of the screen.

    Once everyone has been added to your new group chat, it’s time for some housekeeping! Tap ‘Group Info’ (the gear icon) at the top left corner of the chat window and there you can change things like who can post messages, what type of notifications each member will receive when someone posts something in the chat room, whether or not members should have access to view others’ stories within this particular group chat only etc. This section also provides you with an easy way to find out which members are active users versus inactive ones by viewing their last seen status information.

    Now that you’ve created and managed your snapchat group(s), why not invite more friends? From inside any individual group conversation just tap on ‘add friends’, then either use your phone’s contacts list or search for specific individuals if they’re already registered as a user on SnapChat. With these features available it becomes much easier than ever before staying connected with multiple groups of people while being able to stay organized with how many conversations & notifications one person receives during a given day/week.

    Final Words

    Snapchat is a great way to stay connected with friends and family. It’s easy to use, and by following these steps you can quickly get up-and-running on the platform. You can add friends, follow people, create groups, and even pin them so they’re easier to find in your contact list.

    The best part about using Snapchat is that it allows me to keep in touch with my loved ones without having to worry about privacy concerns. With its secure messaging options and user friendly interface, I’m able to easily share photos and videos with those closest to me while staying safe online!

    Overall, if you’re looking for an efficient way to stay connected with your friends and family then Snapchat is definitely worth checking out. By taking just a few moments out of your day you can start adding contacts and sending messages right away – no matter where you are in the world!

  • How To Turn On Subtitles On Disney Plus

    How To Turn On Subtitles On Disney Plus

    Have you ever wanted to watch a show on Disney+ but needed subtitles? Don’t worry, because with this guide, turning on subtitles is easy! You’ll be able to enjoy your favorite movies and shows without missing any of the dialogue. No matter if you’re watching from your laptop or phone, I’m here to walk you through how to turn on subtitles for Disney+. Let’s get started!

    The first step is knowing which device you’re streaming from. Whether it’s an Apple TV, Android phone, or laptop computer – these steps will work across all devices. Next up are the language settings – not everyone needs English subs so make sure that your preferred language is chosen in the Settings menu. Finally there’s a simple switch within the app itself where you can enable subtitles right away. It doesn’t take long at all and once activated they appear automatically whenever a supported movie or show starts playing.

    So don’t wait any longer – follow along with me as we go over each step in detail and have those captions running smoothly in no time! With some patience (and my help) getting subtitles set up won’t be a problem anymore. Ready to learn more? Let’s dive into our comprehensive guide on how to turn on subtitles on Disney+ now!

    Accessing Subtitles In Disney+

    Turning on subtitles in Disney+ is easy and can be done in a few steps. All you need to do is log into your Disney+ account and start streaming content. Once that’s done, head over to the Settings tab located at the bottom right of the screen.

    From there, select Audio & Subtitles from the menu options. You’ll then be presented with several language options for both audio and subtitles – choose whichever ones you’d like! To turn on subtitles for Disney+, just click ‘on’ next to the desired language option and voila – it’s as simple as that! Now you can watch all your favorite shows or movies with subtitles enabled in Disney+.

    It couldn’t be easier to access this feature in Disney+, so why not give it a try today?

    Selecting Preferred Language

    To turn on subtitles on Disney Plus, first select your preferred language. You can choose from several different languages, including Spanish subtitles.

    To do this, log in to your account and go to the Profile page. From there, you’ll see an option that says Select Language – click it. A list of available languages will appear; simply pick the one you want and hit save.

    Once you’ve done that, all future streaming content should be presented in your selected language with subtitles enabled. However, if you ever need to change it again or disable subtitles altogether, just follow the same steps above and make the necessary adjustments.

    If you’re a fan of foreign films or shows, enabling subtitles could make for a more enjoyable experience since reading them is often easier than trying to understand what’s being said at full speed! So take some time to explore which options are best suited for your needs and preferences today.

    Adjusting Subtitle Appearance

    Now that you’ve enabled subtitles on Disney Plus, it’s time to customize how they appear. The platform allows subscribers to adjust the font, size, color, background and position of their subtitle text. Here are some tips for making sure your captions look just right:

    Font

    • Select an easy-to-read font that won’t strain viewers’ eyes while they watch.
    • Sans serif fonts like Arial or Verdana are always a safe bet.
    • Avoid script fonts like Comic Sans as these can be difficult to read at small sizes.

    Size

    • Adjusting the size of your captions is key for legibility on different screen sizes.
    • Consider using larger sizes if you’re watching from farther away.
    • Smaller fonts may work better if you’re watching up close.

    Color

    • To ensure contrast with the show’s visuals, choose a caption color that stands out against what’s happening onscreen without being too distracting.

    Background

    • If needed, add a subtle background behind your captions so they stand out even more clearly from the show itself.

    Position

    • Lastly, make sure that the placement of your captions doesn’t interfere with any important visual elements in the scene by shifting them around until they fit nicely into the frame.

    With all these options available, you’ll be able to create subtitles tailored specifically to each user’s needs! So grab some popcorn and start experimenting with how your captions should look — hours of entertainment await!

    Final words

    Turning on subtitles in Disney+ is relatively simple and can be done with just a few clicks. It’s important to remember that the exact process may vary depending on what type of device you’re using. Once you’ve got your preferred language selected, you’ll also have the option to customize how those subtitles appear – whether you prefer them to show up as white text on a black background or vice versa.

    Having access to subtitles makes it easier for viewers who are deaf or hard of hearing to enjoy movies and shows without missing out on key plot points or dialogue. And if English isn’t your first language, being able to watch something with subtitles can make all the difference when trying to understand an unfamiliar culture or story. For anyone looking to get more out of their streaming experience, I highly recommend giving this feature a try!

  • How To Turn Off Safesearch On iPhone

    How To Turn Off Safesearch On iPhone

    Are you an iPhone user who’s looking for a way to turn off safe search? Well, look no further! In this article, I’ll be walking you through the steps necessary in order to make sure your online searches are unrestricted. It may sound intimidating at first, but trust me – it’s actually easier than you think!

    Whether you’re looking to access adult websites or just want more control over what results show up when searching online, here’s how you can take back full control of your Safari browser and switch off safesearch on your iPhone. Let’s get started!

    Overview Of Safesearch

    Are you fed up with the nanny state of your iPhone’s SafeSearch settings? Do you feel like Big Brother is watching over your internet activity? Well, no need to worry! That’s what this guide is here for! We’ll give you an overview of what SafeSearch is — and how to adjust its settings on your iPhone.

    So, what exactly is SafeSearch? It’s a feature designed by Apple to help block out inappropriate content from search results. This means that when you use Safari or any other browser on your device, only age-appropriate websites will show up in the list of results. The filter works both ways: it prevents minors from accessing explicit material, as well as protecting adults from seeing offensive webpages they don’t want to see.

    But there are additional benefits to using SafeSearch too. Besides blocking out adult-oriented sites, it also filters out hate speech, violent images, and other potentially dangerous content. So if you’re worried about accidentally stumbling across something disturbing while browsing online, then having this feature active can really come in handy. Plus, it helps keep kids safe when they’re using the internet — allowing parents some peace of mind while their children explore the digital world without fear of being exposed to anything troubling.

    How To Adjust Settings On Iphone

    Adjusting the SafeSearch settings on your iPhone is actually a fairly simple process. Here’s what you need to do:

    1. Go to Settings > Safari and select ‘Content Blockers’.
    2. You should see an option for enabling or disabling the filter – simply switch it off if desired.
    3. To further refine the filter, choose ‘Advanced’ from the same menu. This will allow you to customize which types of content are blocked and displayed in search results.
    4. Finally, scroll down and toggle on “Limit Adult Websites” if you want to restrict access to any explicit material as well.

    Once these steps have been completed, all that’s left is to test them out! So go ahead and try searching for something with either Safari or another browser — if everything looks good then your new settings are working properly. And don’t worry if they’re not perfect right away; you can always tweak things later until you get just the right balance of safety vs convenience.

    But before we move onto disabling SafeSearch in other search engines, let’s take a closer look at how this feature works within Apple devices specifically.

    Disabling Safesearch In Search Engines

    Now that we’ve covered how to disable SafeSearch within Apple devices, let’s take a look at other search engines. Disabling safesearch in these platforms is also relatively easy – all you need to do is locate the appropriate settings page and switch off the filter. While this process may vary slightly between different browsers and operating systems, it generally follows the same basic steps:

    First, open up your browser of choice and navigate to the ‘Settings’ section. Here you should be able to find an option for enabling or disabling safesearch. Simply toggle this off and save your changes. Some browsers will even allow you to customize which types of content are blocked from appearing in search results — so if you want more control over what appears in searches then this could be worth looking into as well.

    Once everything has been configured properly, just give it a quick test run by searching for something on Google or another search engine – if all goes according to plan then your new settings should now be working! From here it’s simply a matter of maintaining these preferences going forward; while there’s no guarantee they won’t change again eventually, keeping them turned off can help ensure greater privacy and safety when browsing online.

    Alternative Ways To Disable Safesearch

    It’s not just about the settings page – there are also alternative methods for disabling SafeSearch. For instance, if you’re using a different search engine than those listed above, then it’s likely that they will have their own options and settings pages – so be sure to take a look at these as well. You may even find some useful tools or features that can help adjust your safesearch preferences more quickly and easily.

    Additionally, many websites offer their own customization options which allow users to turn off safesearch in various ways. If you come across one of these sites then make sure to check out what kind of control they offer over content filtering; this could save you time when trying to get your searches set up properly.

    Ultimately, while the process might seem daunting at first, with enough patience and research it’s possible to figure out how to turn safesearch off on any platform or device. All it takes is the willingness to explore all available search engine options, tweak your settings accordingly, and ensure that everything remains turned off until you decide otherwise!

    Conclusion

    In the end, it’s important to remember that SafeSearch is only one way parents can protect their children and teens from inappropriate content. In fact, a recent survey found that over two-thirds of parents in the US feel as though online safety has become an increasingly difficult issue for them to manage.

    That said, there are alternative ways to ensure your child or teen’s safe web browsing experience without having to rely solely on SafeSearch. You could use parental control apps such as Net Nanny or Qustodio to customize filtering settings according to age group and device type. Additionally, you could teach digital literacy skills such as researching responsibly, using strong passwords, and being aware of potential cyberbullying tactics.

    By taking these steps – along with adjusting settings on any iOS devices – you’ll be able to give yourself peace of mind knowing that your loved ones are staying safer while they explore the internet. I hope this article has been helpful in showing how you can turn off Safesearch on iPhone so you can find better balance between protection and freedom when it comes to your family’s online activity.