A few decades back, if you needed to identify a telephone number, you’d thumb through the listings within the public directory or phone book for your country or area code until you found the person you wanted to call.
Today, our phones hold our phone books in a tiny SIM card, which saves phone numbers, email addresses, and the contact’s photo.
However, if you get a call or text message from an unknown number that’s not saved on your phone or SIM card, you’ll need a special service to find the person’s name or identity.
In this article, I will share some of the best sites to identify phone numbers unknown to you.
Best Sites To Identify a Phone Number Online
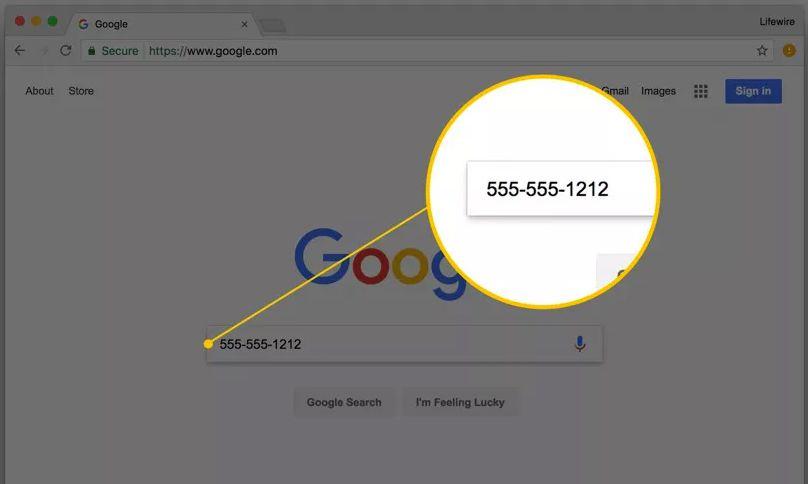
Most people look for anything they’re searching for on search engines like Google, Bing et al., but these aren’t pretty much as good for finding phone numbers as people search sites are.
However, you may find phone numbers associated with a business or company depending on its internet presence.
People Search Engines

People search engines on the other hand, not only assist you find who you’re searching for, but they also show you contact details, relatives, location, work history, and more.
Most of these sites rely on information from public records and permit you to search using what you already know.
They also use reverse tactics, social media profiles, web searches and other methods.
For example, you’ll be able to search a telephone number belonging to an individual if you recognize their name, email address or physical address. the following list of the most effective search sites will assist you in finding people online with just a telephone number.
However, a number of these sites charge a fee, and a few of the information could also be outdated, so you’ll or might not find the proper identity.
Social Media Platforms
One of the simplest ways to spot a telephone number is by looking it up on social media platforms like Facebook or LinkedIn, which have a huge user base from everywhere in the world.
Most of these users share information, including their personal and/or business phone numbers, so you’ll easily find the person behind a particular number. Just enter the telephone number into the platform’s search bar and see what it turns up.
However, not everyone’s profile is public, so you’ll need to connect with the person first before accessing and seeing their personal details. Some also hide such information from their friends, which makes it even harder to find.
While you’ll be able to use social media to identify a telephone number at no cost, there’s no specific search function for identifying phone numbers.
If you had no luck identifying a telephone number using social media platforms, you could try number lookup services, which are specifically made to search out phone numbers and their owners. Below are some useful options:
True Caller
This is a well-liked app for smartphones that displays the name of the person calling you, even if they’re not in your address book.
It runs via mobile data or WiFi, but if you don’t want to use the app on your phone, you’ll be able always to run an online check to identify an unknown telephone number via the TrueCaller website. However, you’ll need to register with an email address to get the results.
Apart from matching names and phone numbers, Truecaller also block unwanted calls, preventing annoying spam callers and marketers from disturbing you.
ZabaSearch
ZabaSearch provides public data about people and the way they’re connected to others. Such data are often a telephone number , physical address and birth date, or any personal information available on the internet.
It collects information and puts it in a convenient platform for anyone to access. You’ll be able to look for a telephone number and find people that way, or if you’ve got a name or address, it’ll run a check through its database and provide you with the results, where possible.
Conclusion
Finding information about people using their phone number is something difficult but with the information provided in this article, you can be lucky to find people using their mobile numbers. Not 100% assured but there is a high percentage you can find them.