In late 2018, WhatsApp introduced click to chat, where you’ll begin a conversation with someone without having their telephone number saved in your contact list.
As long as you recognize this person’s telephone number and they have an active WhatsApp account, you’ll be able to create a link which will allow you to begin a chat with them.
There are diverse ways to scan the WhatsApp QR code to save a contact or initiate a conversation. Below are the steps;
Scan face to face
Open WhatsApp > tap More options > Settings.
Tap the QR icon displayed next to your WhatsApp name.
Tap Scan Code.
Hold your device over the QR code to scan.
Tap Add.
You can also scan from the WhatsApp camera:
Open WhatsApp > tap Camera.
Hold your device over the QR code to scan.
Tap Add.
Scan from Gallery
You can also scan the QR code received from your friend, just in case you don’t have their phone in hand. They can share their QR code and you’ll be able to scan from your Gallery or Photos. Follow the steps below;
Open WhatsApp > tap More options > Settings.
Tap the QR icon displayed next to your name.
Tap Scan Code.
Tap the Gallery icon on rock bottom of the screen.
Select the WhatsApp QR code from your Gallery or tap More > Photos to pick from your Photos.
Tap OK.
Tap Add.
Scan from the New Contact Screen
Android Users:
Open WhatsApp > tap New chat.
Tap the QR icon next to New contact.
Tap Scan Code.
Tap Add.
iOS Users:
Open WhatsApp > tap New chat.
Tap New Contact.
Tap Add via QR code and scan the QR code to add.
Scan from WhatsApp camera
Open WhatsApp > tap Camera.
Select the image with the QR code to scan.
Tap Add.
Scan within a chat
Open WhatsApp and go to an individual or group chat.
Tap the camera icon.
Select the image with the QR code to scan.
Tap ADD.
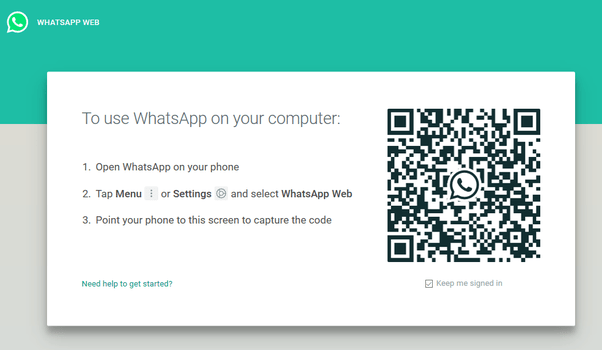
How Do I Find My WhatsApp QR Code?
You might be asking, how can I find my WhatsApp QR Code to share with others? Below are the steps to follow to find your personal QR Code. This is for Android users, iOS users follow.
Open WhatsApp on your Android device
Tap More options (Three dots)
From the drop-down menu tap Settings
Tap the QR icon displayed next to your name
Tapping on the icon will display your personal QR code on the screen.
iOS users
Open WhatsApp on your iPhone
Next tap Settings
Now click on the WhatsApp Web/ Desktop
Tap the QR icon displayed next to your name.
Once you are done scanning your QR codes, you can also enjoy conference calls on WhatsApp with your friends and many other things you can do on WhatsApp.
Conclusion
The QR code is the new game changer when it comes to adding new friends on WhatsApp. All you need to do is scan your friend’s QR code and that’s all, your friend will automatically be added to your contacts.
When the internet first became mainstream in the early 90s and thereon, one amongst its key components was anonymity.
Nobody used their real names and you could live a second life online, at a blazing 30 kbps.
The internet of today is extremely different. Not only is there a robust push to deanonymize people, but the websites you visit on a day to day also can record and capture all kinds of information about you. What sorts of information?
Continue with me to find out.
Your IP Address
This is the most common type of information that a website will log. Your IP or Internet Protocol address is a number that denotes where on the web you’re located.
It’s basically an identical thing as a real-world address. If someone wants to send you a letter, they’ll write your address on it. once you receive it, their address are going to be on the back. So you recognize where it came from.
If you replace “letter” with “internet packet” you basically know how an IP address works. The problem is that a website can actually find out quite lot of personal information about you from just your IP address.
They’ll know more or less where you’re browsing from and which ISP you’re using. With a bit more detective work (and perhaps a legal warrant) an IP address can lead someone directly to your door.
This is why numerous people are using VPNs (virtual private networks) lately. The VPN acts as a middleman, so only their IP address is visible to the location you’re visiting.
Hardware & Software Details
Web browsers report all kinds of information to a website that asks for it. This includes a wealth of data about the PC you are using.
The site will know your OS, processor, GPU and more. this might seem innocent but can be used to track or identify a particular machine.
One way to get around this is often to browse from within a virtual machine, which can provide generic system information to the website.
1st & 3rd Party Cookies
A cookie is a small file that a site leaves on your computer to keep a record of things like your site preferences. Therefore the next time you visit, it’ll already know things about you.
Cookie technology isn’t a bad thing in itself. Session cookies, for instance, delete themselves once you close the browser.
You also get first-party persistent cookies, which are those saved to your device by the site for its own use.
A tracking cookie is a persistent, third-party cookie which is read by sites aside from the ones which created them.
That cookie accumulates information about your web activities and that information can then return to the cookie’s creator.
Legislation about how and when cookies are often used has been tightening in recent years. Which is why almost every site has its cookie policy pop the minute you visit it for the first time.
If you disagree with that policy then no cookies are going to be stored on your machine.
However, there’s nothing stopping a rogue site from peppering your machine with tracking cookies without your knowledge.
Luckily you’ll be able to use your browser’s privacy settings to block and delete cookies as desired.
Invisible Trackers
Cookies are perhaps one example of an invisible tracker, but as a larger category, invisible trackers also include web apps and external sites embedded in a legitimate site.
Major news sites and other popular sites often have advertising content embedded at the bottom of an article which incorporates some sort of tracking. Google does this also .
This is often why when you look for a specific product in Google you’ll see ads for it pop on every other site that features Google Adsense.
Luckily there are privacy-focused search engines like DuckDuckGo which explicitly don’t track you.
Modern browsers now also support a feature referred to as “do not track”, which tells a site that it should shut down its tracking technology when you visit. However, this is often a voluntary agreement that the site can ignore it if it wants to.
The most effective tool in the fight against invisible trackers is the EFF’s, Privacy Badger.
Autofill Data
You’ve probably noticed that when you need to fill in shipping details on a new site you’ve never visited before, your browser automatically fills in details like your name and address.
It’s a convenient feature, but it’s also a privacy nightmare.
Unscrupulous sites are often coded to capture that information the second its autofill. this implies that the site has now captured your full details without your knowledge.
As you can imagine having information like an address, full name or Social Security number are often used to wreak havoc within the wrong hands.
It’s best to simply disable autofill in your browser settings.
There are many ways your data may be leaking which we will include in future updates of this post.
How To Check What You Are Leaking
Several websites exist which will assist you to discover where and the way you’re leaking information. Panopticlick and Coveryourtracks are great tools by the Electronic Frontier Foundation which does just that.
Just click the large “test me” button and every one your paranoid fears could also be confirmed. Luckily there’s never a bad time to sharpen up your privacy practices.
Conclusion
Many people do not care about the type of browser they use to access the internet. Also, people seem free to enter their personal details on public computers without VPN’s.
This sometimes leads to data theft and all other forms of internet impersonation when your data gets to the wrong hands. In this article, I have elaborated on the data your web browser may be collecting you might not know.
Due to the high cost of electronics, the best option is to go to a refurbished one. With the refurbished type of electronics, they have been used before but they have been checked out and re-packaged.
Although buying a refurbished electronic device saves you money, you might end up buying a “thrash”. In this article, I am going to show you some of the important things you need to know before you refurbished electronics.
Basically, the main reason why we all end up buying refurbished products is to save money. But, the only problem with refurbished products is that they have been used already, maybe for a long or short period.
Also, you do not know what happened during that period the device was used by the person and how well that problem or fault has been attended to. As such, you need to be very careful whenever you are buying a refurbished electronic device.
Things You Need To Know Before You Buy Refurbished Electronics
Is The Product Refurbished or Open-Box Return?
Sometimes, the product you are buying is an open-box return and not refurbished. The difference between these two is that, an open-box return is a device that was purchased and opened but was never used by the buyer.
On the other end, a refurbished product is the one that was purchased and used but was returned or was used and sold, etc. There are several meanings of a refurbished product.
But with the open-box return, maybe the recipient did not like the packaging or the product they saw inside and then decided to return it. Or they just decided they don’t like the device anymore and decided to return it to the seller.
Therefore, when you are buying a refurbished electronic device, ask the seller whether the product is an open-box return or refurbished. Mostly the refurbished ones have been crossed examined before selling it; while the open-box is often not cross-checked since they think the product is working perfectly.
Does The Device Come With All The Stuff You Would Have Gotten If You Were Buying A New Product?
One other thing you need to know is whether the device comes with all the stuff as if you are buying a new device. For example, if you are buying a refurbished iPhone, you need to know whether it will come together with the lightning cable, headphone, charger, guide, warranty card, etc.
This is often ignored when we are buying a refurbished electronic device. Once you forget to enquire about it, they end up becoming your personal issues. Because you will have to get the additional stuff at an extra cost.
The Refurbishing Was Performed By Who?
Before you make any decision to buy a refurbished electronic device, you need to the person or company that performed the refurb. If the company is a well-known company or it was done by the original manufacturer of the product, you are rest assured that it is genuine.
Other than that you might end up buying a troubled device instead of a refurbished device. You can also make sure of it by visiting the website of the company that performed the refurb to see whether they performed the refurb indeed.
Does The Product Have A Warranty?
Finally, you need to check whether the product you are buying has a warranty attached to it. If it doesn’t have any, I would advise you not to buy the product or device.
Since the product was used before you bought it, there is a high chance of the device getting a fault in the future. Therefore, the warranty is your only source of assurance that you will get a new device back in case it gets any fault or problem.
Conclusion
In this article, I have shown you some of the important things you need to know before you buy a refurbished product. The tips listed here are not the only ones available in the world, but I think these few steps will guide you whenever you decide to buy a refurbished electronic device.
Are you tired of the same old keyboard keys on your keyboard? If yes then you found the right article because I am going to show you how you can remap your keyboard keys.
Do you think the CAPS LOCK would have been better somewhere for you to easily press or you think the TAB key should be somewhere else? All these are some of the things you can remap your keyboard keys for, using the steps listed in this article.
Sometimes we feel that the person who did the keyboard layout didn’t do a good job. But the problem is that you cannot just get up and change the layout of the keys on the keyboard; it doesn’t work that way.
The only way you can change the layout is by remapping the keys and that is the reason why you are here right now so let’s right into it.
How To Remap Your Keyboard Keys
There are several methods that you use to remap your keyboard keys and I am going to show you that in a bit. Please note that the methods we are going to use in this article apply to only Windows users. You can also edit your Android keyboard here.
How To Remap Your Keyboard Keys Using SharpKeys
For those of us who just want to remap one key to another, the perfect solution is by using SharpKeys. For example, changing the CAPS key to the TAB key or vice versa.
SharpKeys is an open-source program that uses the Windows registry. Because SharpKeys writes directly to the Windows registry, it is the best tool to use if you are planning on doing a simple key remapping.
To use this method, follow the steps listed below:
Download the SharpKeys application and install it on your Windows PC.
Once the app has finished installing on your device, launch it.
After the app has opened, click the Add button and choose the keys from the two columns. The left column is the key you will press and the right column is the action that key will take.
When you are done, click on OK.
If you want to remap any other key, follow the same process listed above.
Once you have finished with all your remapping, click on Write to Registry.
After that, close the application and restart your computer for the changes to start working.
How To Remap Your Keyboard Keys Using Your Keyboard’s Software
If your keyboard comes with its own software, it may have some remapping features that you might not be aware of. With some of the software, you can even create multiple key shortcuts.
First of all, download the software from the developer’s website.
Select your keyboard.
Look for the option to create new hotkeys, macros, or actions.
Follow the steps (depending on your keyboard) and complete the process.
Once you are done, restart your PC for the changes to take effect.
Conclusion
These are just a few of the several ways you can remap your keyboard keys. With the second method, whenever you find any difficulty, visit the support page of the developer and your questions will be answered.
Within just a short time frame, WhatsApp has grown to become one of the most popular texts and voice messaging applications in the world. It has over 1 billion active users in 180 countries all over the world.
One of the reasons why it is used by most people is that the data charges are very low as compared to the other social media platforms. Also, it saves the high cost that you would have paid when calling numbers outside your home country.
With WhatsApp, people can chat you only when they have your mobile number. This is far different from Facebook, Instagram, Twitter, TikTok, and all the other social media platforms where people can just see you at random.
Thus, the rate of spam messages on WhatsApp is very low when compared to its neighbours like Facebook, Instagram, Twitter, etc.
WhatsApp groups are one of the interesting features we have on the WhatsApp apps. Here, you can chat with all your friends, family, or relatives in one place.
Once the group is created, it’s only the Admin(s) who can be able to add new members to the group. By default, the Admin of a WhatsApp group is the person who created the group.
But, you can also add new Admins to the group. Or in the case where the Admin exit the group, WhatsApp will automatically choose someone as the Admin.
Can you imagine if the Admin needs to add 100 new members to the group? That will be very stressful right?
But that doesn’t have to happen, with just a simple WhatsApp, everyone who is interested in joining the group can join without any effort by the Admin to save their contact and then add them to the group.
How To Share WhatsApp Group
Here are the steps you need to follow to share a WhatsApp group link. You can share the link on WhatsApp, Facebook, SMS, Email, or any other method you might find helpful.
First of all, open the WhatsApp app on your device.
Scroll through and tap on the group whose link you will like to share.
Once the chat opens, tap on the name of the group on the upper part of the screen.
Scroll to the middle part of the screen and click on Invite to Group via Link below Add Participants
Now, you choose whether to share the link or to copy the link to the clipboard.
NOTE: Please note that only Admins can use the method shown above. If you are not an admin, ask your admin to follow the steps above and then share the link with you. Once you get it, then you can also share it with the person you want to invite to the group.
Conclusion
I hope this article was helpful and that it met your expectations. If you have any problems, questions, or concerns, please write them in the comments section below.
Finally, make sure to share this article with your friends and loved ones as well.
Have you made any wrong AirtelTigo Money (ATM) transaction you wish you reverse? No problem, I am going to show you step by step how you can reverse wrong transactions on AirtelTigo Money (ATM).
AirtelTigo Money (ATM) has been in the fintech industry for quite some time now. The then Tigo cash was one of the first mobile money services that were launched in Ghana.
After some years, the other networks followed and now almost all the network providers in Ghana have mobile money services. As a result, mobile money services are one of the most used financial platforms in Ghana.
Due to the high number of active mobile money users, fraudsters and other unforeseen circumstances might lead us into making wrong transactions. When such things we end up frustrated and confused; especially when that is your last money.
Because of such circumstances, AirtelTigo Money has rolled out a special option that allows users to reverse wrong transactions they made. Once you request for reversal and your reason for applying is valid and reasonable, your money will be reimbursed in your wallet.
How Does AirtelTigo Money Reverse Wrong Transactions?
I have received this question from many people across the country and I would like to explain to you briefly how it works. Please note that the fact that you apply for a wrong transaction reversal doesn’t automatically guarantee that you will get your money back.
Basically, the process for wrong transaction reversal begins as soon as you apply for it. Once you apply, your information will be sent directly to the AirtelTigo Money (ATM) reversal desk.
After that, AirtelTigo will perform an audit/investigation on your account and the transaction history. This normally happens within a 30-day period (might vary depending on your account and the time you made the complaint).
Finally, after the 30-day period and you are found to have made a wrong transaction, Airtel Tigo Money will pay the amount back into your account.
How To Reverse Wrong Transactions On AirtelTigo Money (ATM)
To reverse a wrong transaction on Airtel Tigo Money, you need to pay close attention to the steps listed below:
Dial *110*8# on your phone.
Select option 5 (My Transaction Reversal).
Choose option 1 (AirtelTigo) to proceed with the process.
Select option 1 for the last 5 transactions or 2 for other transactions.
Once you are done with the process, AirtelTigo will investigate the transaction and get back to you in due time.
Conclusion
Before you decide to request a wrong reversal, you need to take note that, AirtelTigo will only refund claim of a wrong transaction that has been reported within 30 days of effecting the transaction. Also, a careful investigation has been conducted to establish the claim.
Once you have understood the statement made above, you can then proceed with the transaction reversal. If you think your reason is genuine and valid, then expect to get back your money within the 30-day period.
Please make sure to share this article with your friends and relatives and let them all be aware that they can reverse wrong transactions. Finally, make sure to subscribe to our newsletter to get new articles sent right into your email.
Misinformation is one of the many problems we have with online news portals. Mostly, the reason why they give out fake news is as a result of them being eager to break the news first or just to drive attention to their news portal.
These portals may see this as a normal thing but in actual sense, there are a lot of people who depend on these portals for their daily news stories.
Instead of these portals to take their time, research, and then fact check the story before they bring it out, they all ignore these processes and write the news the way they heard.
Due to the high rate of fake news in Ghana and the world at large, there are some online tools you can use to check facts and detect fake news.
5 Fact-Checking Tools For Checking Facts And Fake News
There are several fact-checking tools available on the internet. But, in this article, I am going to show you some 5 of them which have been tried and tested by many people all over the world.
Google Fact Check
Google as we all know is the biggest search engine in the world. As a result, almost everyone searches for their news and article from Google. This is the reason why Google has developed their personal fact-checking tool called Google Fact Check.
Google Fact Check is a feature introduced to Google search results which indicate when a search result is deemed worthy of the label “fact check”. This is done by checking the criteria set by third-parties like PoliFact, Snopes, etc.
What Google does is that they provide a link to these third-party sites and indicate whether that site deemed the information true or false. In addition to these third-party sites, Google also collaborates with all the top news companies in the world.
International Fact-Checking Network (WhatsApp Number: +17272912606)
WhatsApp is one of the leading social media platforms that is used daily. In Ghana alone, over 1 million people use WhatsApp daily. Also, WhatsApp is one of the most used means of sharing news in the world.
Because of that, there is a fake checker bot on WhatsApp. The name of this company is International Fact-Checking Network; an umbrella organization for fact-checkers around the world.
All you have to do is to save the WhatsApp number above and then follow the options that they provide. Since it is a chatbot, it will give you instructions on how to ask whether a certain news article is true or false.
Fact Check Ghana
Fact Check Ghana is Ghana’s own fact-checking tool that is used to check whether news or article is fake or genuine. This tool or site was developed by the Media Foundation for West Africa to combat the spread of fake news in Ghana.
On this site, you can see controversial news stories that have been regarded as fake news and those that have been fact-checked. The ones that has been fact-checked, you will find fact-checked under the story or article.
The categories on this website are Politics, Economy, Education, Health, and Monthly Round-ups. Also, you can listen to their podcast on SoundCloud (there is a link to the podcast on their website).
GhanaFact
GhanaFact is Ghana’s Independent Fact-checking platform for checking facts and detecting fake news.
On this website, you will find fake news and those that have been fact-checked. The fake news has the prefix “FAKE” and those that have been fact-checked have the prefix “FACT-CHECKED”.
If you have a claim you wish to submit for GhanaFact to check for you, you first of all click on the three horizontal lines on the homepage of GhanaFact and then click on “Submit a claim to check”. Or, send your claim to the WhatsApp number +233244499971 and they will fact-check the claim and get back to you as soon as possible.
Dubawa
The last fact-checking tool on our list is Dubawa. Dubawa is an international fact-checking tool created to help combat the spread of fake news in the world.
Just like all the fact-checking tools on our list today, you can also check for facts and fake news on Dubawa. They played a major role in the combatting of fake news in the 2020 General Elections in Ghana.
Head over to Dubawa and check your facts and let’s all help combat the spread of fake news in and out of Ghana.
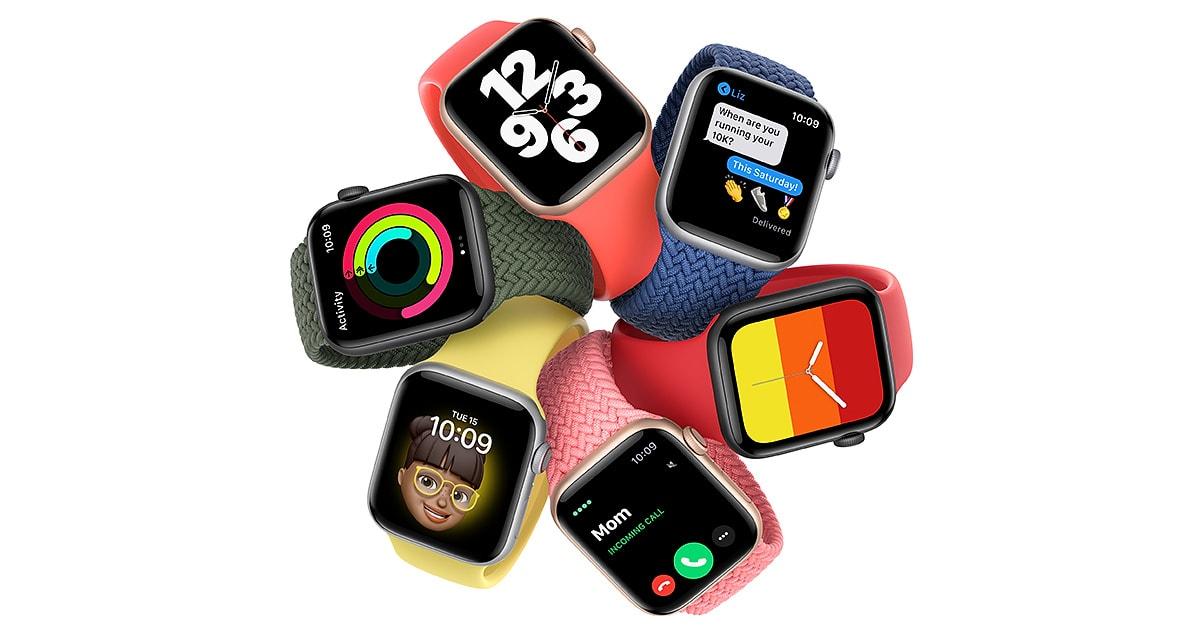
Is it your hope to buy an Apple Watch sometime soon but you are wondering how you are going to use it without having an iPhone? Don’t worry because I know of the perfect way you can use your Apple Watch without you having an iPhone.
Previously, Apple Watch could only be used by persons with iPhones. That is not the case anymore, now everyone can use an Apple Watch; whether you have an iPhone or not. This is as a result of the latest watchOS 7 and the iOS 14 releases.
But, before you do this, you need to have a friend or relative who has an iPhone and for that matter an Apple ID. So in this guide, I am going to show you how to set up an Apple Watch for someone who doesn’t have an iPhone.
Before you can do this, you need to make sure that your iPhone has or supports iOS 14. Otherwise, this is not going to be possible.
With the introduction of iOS 14, Apple has added a lot of features that weren’t available on the previous iOS versions. Some of which include how you can actually hide the hidden photos album, and a whole lot of others.
Another feature that was introduced in the watchOS 7 and iOS 14 is a feature called Family Setup that allows an iOS 14 user to set up an Apple Watch for their family relatives who doesn’t have an iPhone.
Also, if the person you are setting up the Watch for is a student, you can add school time to limit the period within which he/she can use the watch. Once you set it up, the Watch can make and receive calls, send and receive messages, a variety of Apple Watch features.
Some of which include Health, Activity, App Store, Emergency SOS, Fall Detection, and Noise Notifications.
How To Set Up An Apple Watch For Someone Who Doesn’t Have An iPhone
To set up an Apple Watch for someone who doesn’t have an iPhone, you need to follow the steps listed below:
First of all, you need to update your iPhone to iOS 14 and your Apple Watch to watchOS 7. On your iPhone, go to Settings > General > Software Update. On the watch app on your iPhone, go to General > Software update.
Once you have successfully updated your iOS and watchOS versions, you then have to pair the iPhone to your relative’s Apple Watch. To do this, all you need to do is to power up the Apple Watch, place it near your iPhone and Wait until you see Use your iPhone to set up this Apple Watch. When you get to the next screen choose Set Up for a Family Member.
Follow the remaining steps to set up the Apple Watch. From here, you choose the orientation of the Digital Crown and which hand you will wear the watch on.
Once you are done with the setup, you can customize the watch based on the person’s preferences. That’s all the Apple Watch is now set up for the person without the iPhone.
Conclusion
As easy as that, you can set up any number of Apple Watch for your relatives and family members who don’t have an iPhone.
In the future when they get their own iPhone, you can visit the Watch app on your iPhone, select all watches, and then unpair it with your iPhone.
In addition to that, they also develop software for the Apple iPhone, Watch, iPad, Mac, and TV.
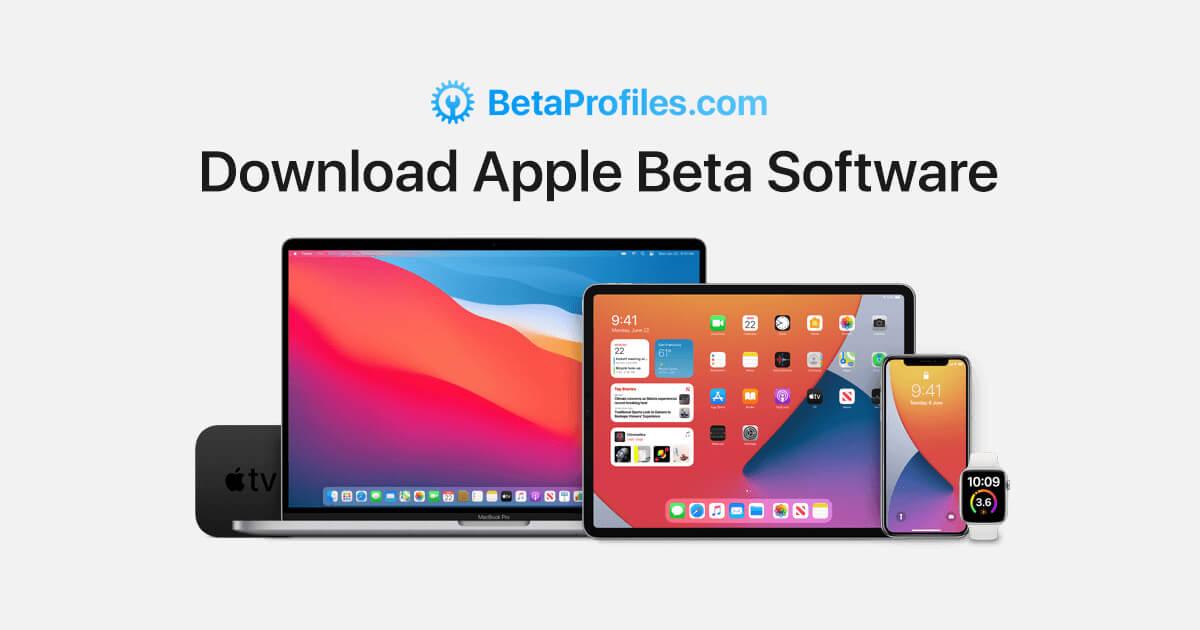
In their quest to develop quality software and apps, Apple has launched the Apple Beta to help individuals try out pre-release software on all the Apple devices and then share their feedback on this software.
In this article, I am going to show you how the Apple Beta works, and how you can also join to test new software directly from Apple. But before we proceed, you need to have an Apple device before you can join the Apple Beta program.
Apple is known to be releasing new software almost twice or more in a year. If you have ever wanted to be among the first people to try out any new Apple software, then this is your chance to do exactly that.
What is the Apple Beta Software Program?
The Apple Beta Software program is a program that was introduced by Apple Inc. for volunteers to download a beta version of the new operating system for their device and test it before it is officially released.
The signing up process is completely free and accessible to everyone, everywhere. The software that are available include:
iOS
iPadOS
macOS
tvOS
The whole idea behind this program is for you to install the pre-release software and use it on your device and then give your feedback to Apple using the built-in Feedback Assistant. The feedback includes (but not limited to) crashes or other behavioural challenges you encounter.
There are two options available, the Public and the Developer. The only difference being that the Developer options have some technical options for the developers. The Developers are registered developers on Apple’s Developer Program and you can enroll on that for $99 every year.
How To Sign Up For Apple Beta And Download Your Beta Software
To sign up for the Apple Beta program, you need to be above 18 years and must have an Apple ID. Also, you need to have any of the Apple devices listed above. Finally, you need to accept the confidentiality agreement where you agree not to share any screenshot with anyone.
Once you are done, follow the steps listed below:
Go to the Apple Beta program page and click the Sign Up icon.
Next, you’ll be asked to enter your Apple ID, after which you will reach the page for the Guide for Public Beta.
Select the device you use and then scroll down the Get Started section and click on the Enroll your device option.
Next, click on Download the Profile and wait for it to install.
Whenever there’s new beta software, Apple will send you a notification for you to download and then give your feedback.
At any point, if you decide to unenroll, you can visit the Unenroll page and then end your participation.
Social media is a remarkable modern phenomenon. Some people use it exclusively to remain connected with friends, while others practically Livestream their life on social networks.
Regardless of what sort of person you’re , at some point you would possibly attempt to limit what others can find out about you online.
Or even do an entire social media cleanup. That’s where you would possibly face certain difficulties.
Before we get into that, let’s check out the reasons why you may want to think about deleting your tweets, Facebook posts, and Instagram posts in the slightest level.
Digital detox, spending a particular period of time without using gadgets or social networks especially, is a popular one.
Other reasons include applying for employment (your new boss doesn’t necessarily get to see your party pictures or read your tipsy tweets) or starting a new relationship.
You don’t want your new partner to constantly be reminded of your old relationships.
Finally, you would possibly just want to do a bit of a private re-branding by getting rid of somewhat embarrassing old photos or updates.
Whatever your reasons are, here’s the way to delete your social media updates in bulk once and for all.
How To Delete Multiple Tweets
As you most likely guessed, Twitter doesn’t have a built-in function to delete multiple tweets at the same time either.
In order to delete a personal tweet, do the following:
Find the post you’d prefer to delete on your timeline.
Click on the arrow on the upper right corner of your post.
Choose Delete Tweet.
Use TweetDelete To Delete Multiple Tweets
If you would like to batch-delete your tweets, you’ll have to be compelled to use an app or a browser extension to do it.
TweetDelete is a free app which will help you mass delete Tweets. It works in any browser, and you’ll be able to use it on your desktop also on your smartphone.
Here’s the way to delete your tweets using TweetDelete: Go on the TweetDelete website and sign up with your Twitter account. Once you’re signed in, click Delete tweets.
You can choose whether you wish to delete all of your tweets or simply tweets from a particular period of time. You’ll be able to also use a text search tool to filter the posts you’d like to be removed.
When you’re pleased with all the configurations, click Delete my tweets! You can set the app to run a Twitter cleanup regularly if you wish to keep updating your feed.
If you’ve got over 3,200 tweets that you’d wish to remove, you’ll be able to repeat the method until they’re all gone. There are other tools that can assist you to mass delete your tweets in one go, but most of them you’ve got to purchase.
Similar to Facebook, we recommend you archive and save your Twitter content before doing a whole clear-out.
How To Delete Multiple Facebook Posts
When it involves Facebook, the most obvious option is to delete your posts one at a time. so as to try and do that, do the following:
Find the update on your profile that you simply want to delete.
Tap the three dots within the upper right corner of the post.
Select Delete.
Alternatively, you’ll be able to delete Facebook posts using Activity Log:
Find the Activity Log button in the upper right corner of your profile.
Select the category of posts you’d prefer to access from the Filters column.
In order to delete a post, click the pencil icon on the right of each post.
Both options only allow you to delete your Facebook updates one by one.
How To Delete Multiple Instagram Posts
Unsurprisingly, the Instagram app doesn’t allow you to delete over one post at a time. more than that, you’ll be able to only delete your posts using the mobile app, not your web browser.
To delete an Instagram post, do the following:
Log into your Instagram account on your smartphone.
Find the post you’d prefer to delete. Then click on the three dots in the upper right corner of that post.
Choose Delete.
You can also prefer to Archive your posts rather than deleting them. Unlike deleting, that action is reversible. The post also will retain all the likes and comments if you ever change your mind and need to restore it.
Conclusion
If you feel your social handles have been bloated and its time for general cleanup, follow the tutorials discussed in this post to mass delete your posts.