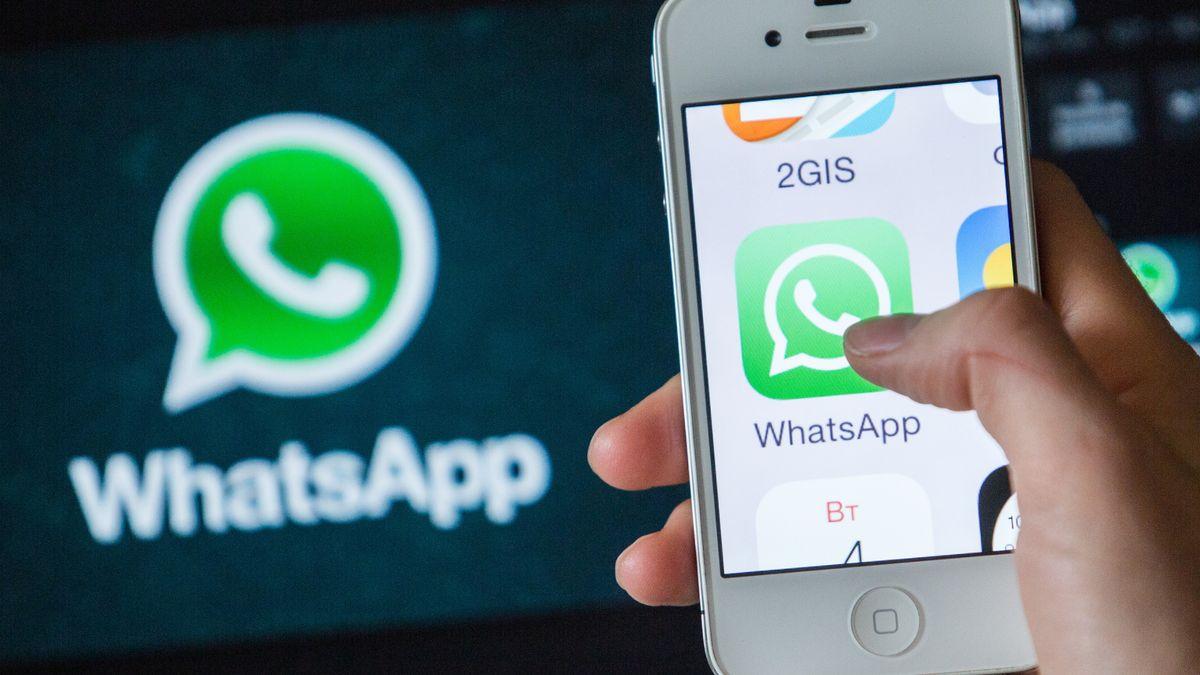
Category: Guides

  • How To Download Instagram Stories On Mobile

    How To Download Instagram Stories On Mobile

    In early 2019, Instagram’s story grew to over 500 million daily users. This shows that over half of Instagram’s 1 billion daily users make use of Stories. Individuals and businesses use the Story feature to promote their business, educate or entertain their fans or to convert users to clients.

    Instagram stories willingly let Instagram users post videos and lovely pictures that vanish instantly after 24 hours. 

    We mostly come along to an interesting photo or incredible video on stories which we’d tenderly love to have but Instagram frowns on letting users download images and videos from other accounts for privacy reasons.

    More importantly, there are legitimate reasons for wanting to download images and videos from other people’s accounts which do not necessarily involve a breach of privacy.

    For example, you might want to save a video from a friend’s story which includes you or reuse a video that falls under your own business niche for business purposes.

    Today, we are going to look at the different ways you can follow to save your own stories and stories from other people’s accounts.

    Saving Your Own Stories

    As mentioned earlier, images or videos posted in stories have a time bomb of 24 hours. They disappear with no traces, however, you can access them via Archive or you can save and show them permanently as highlights.

    Stories saved in your Archive or Highlights can only be seen by you. To toggle Story Archive on, go to your Profile > Settings > Privacy and Security > Story Controls. Enable the save to Archive toggle.

    There is also a secondary option for saving stories to your Phone’s Camera Library. To save a single story or individual clip from your own account, here is what you do.

    • Go to your story
    • Tap on More
    • Press Save, then press save video.

    Your clip or story will be saved in your phones’ camera library.

    One may ask the need to save your stories on the phone. Saving stories on phone is useful if you want to share the same content on other social media sites like Twitter and Facebook.

    Alternatively, you can enable the option “Save to Camera Roll” at the Instagram story settings menu to automatically save your stories to your phone’s camera library.

    Saving Stories From Other Accounts

    For non-moving images or still images, Screenshot is extremely useful. After the screenshot, you can remove unwanted parts of the image by editing. However, screenshots don’t work for Videos.

    For video stories, we apply the use of third-party apps on Mobile devices. A lot of third parties are available that offer the same function. For tutorial’s sake, I will mention some of the popular apps available including, StoriesIG, Story Saver, Weynstag, etc.

    On Android devices, Story saver can be downloaded freely on Google Play Store. After installation, Open and log-in with your IG details. Once successful log-in, you can download stories from all the accounts you follow. The only drawback of Story Saver is the many ads served in the app.

    On IOS, download and install Story Reposter from the IOS app store. With the Story Reposter, Logging-in to the app is not necessary. You can search and download stories from users with their handle names. This app is free, but the only setback is the many ads they serve.

    Conclusion

    There are over a million Instagram photos and videos shared on Instagram stories daily. Since Instagram does not allow downloads on other people’s accounts, videos, and photos that catch our attention always vanish forever after 24 hours.

    In this article, I have provided some of the ways you can follow to download Instagram stories on your mobile device. If you also have any knowledge of the discussed topic, please feel free to leave a comment.

  • How To Stop Websites And Apps From Posting On Your Facebook Timeline

    How To Stop Websites And Apps From Posting On Your Facebook Timeline

    For as much as Facebook is a social media platform and therefore involves sharing posts and information globally via the platform, there is still a need for privacy on the world’s biggest social media platform.

    One privacy issue which most people have to battle with on the platform is the manner in which different apps, websites and games tend to post on their timeline without their permission.

    Mostly, these are applications or other third parties which the user has already given a one-time approval to post on their behalf on their timeline. Most people really do this without even realizing because they are in a hurry to enjoy the application or website.

    The bad thing is that most times, some of these posts made on your behalf by these third parties can be negative and hence tarnish your image somehow.

    So, the big question is: how can you undo what you’ve done and prevent these sites from posting on your timeline without your permission?

    In this article, I shall provide you with details on how to prevent applications and websites from posting on your Facebook profile.

    But, before that, let’s look at how you get yourself into that situation in the first place.

    How Do Applications Get Access To Your Timeline?

    The answer to this question is simple and funnily so too. These applications or websites cannot have access to your timeline without your permission.

    So yes, they actually get access to your timeline through your permission. Wondering how?

    How many times have you tried accessing a website and application and you were asked to login with your Facebook details?

    Do you take time to read and review the instructions that accompany such sites when you are logging in with your Facebook account?

    I guess not. Well, there you have it. Usually, when installing such applications or accessing such websites, we do not take time to read the instructions and information that comes with some of these applications and websites.

    Apparently, these sites request various permissions from you. They let you know and then provide the option for you to ‘Continue’ or ‘Agree’. Most people click on the continue or ‘Agree’ button without reading.

    Once you do that, you have given the third party access to your account and they get to post on your behalf.

    So, if you’re wondering how those applications have access to your Facebook timeline, there you have your answer. Be sure to read such instructions in future.

    How To Prevent Apps From Posting On Your Timeline

    To deactivate the ability of third-party applications and websites having access to your Facebook timeline, follow the steps below:

    1. Visit Facebook and login to your account on a desktop browser.
    2. Click the little black triangle on the top right corner of your homepage for a dropdown list.
    3. Click on settings from the list that appears next.
    4. Click on ‘Apps and Websites’ in the menu on the left side of your screen.
    5. Scroll down. Under Apps, Games and Websites, click on ‘edit’
    6. Click on disable.

    Congrats! You are free from unsolicited posts from websites and Applications on your Facebook timeline.

    Note: Once you deactivate this feature, you won’t be able to login to any application or website using your Facebook account anymore. All previously logged in applications would be logged out, and all posts by those applications would also be deleted from your timeline.

    Conclusion

    Privacy and security are one of the major features for safety and protection on the internet. Once your privacy and security have been breached online, you open yourself up to lots of attacks and negative personal image.

    Facebook, the world’s biggest social media platform gives you almost 99.9 per cent safety and privacy for as long as you decide to play by the rules.

    However, there is a tendency of you creating loopholes in your account for other applications and third parties to control your account and post on your behalf.

    In this article, I spoke about why applications post on your timeline without your permission and how to disable that.

    I hope it was a wonderful and helpful read for you. Kindly leave your comments, reservations and questions in the comment box below or contact us.

    Please do well to share this article with friends and relatives.

  • Tips To Stay Cyber-Safe For Ghana’s General Elections 2020

    Tips To Stay Cyber-Safe For Ghana’s General Elections 2020

    The Ghana National Cyber Security Centre has through an official blog post on its website shared safety tips that all Ghanaians can use to stay safe during the upcoming elections.

    You can read the full copy below.

    Ghana’s General Election will be held on December 7, 2020. During the elections held in other countries, there have been reports of increased malicious cyber activities. This could happen in Ghana, too. These activities may be directed at the information and communications technology (ICT) systems of political parties and the Electoral Commission of Ghana,

    The ongoing COVID-19 pandemic and Work-From-Home arrangements have increased the opportunities and attack surfaces for cyber threat actors. Political parties will rely more heavily on online platforms such as social media, messaging apps and websites to reach out to voters.

    Cyber threat actors may use Election-themed phishing baits to lure voters into downloading malicious software on their devices or divert them to spoofed websites. Such baits could take the form of:

    • Invites to engage in web conferencing with political parties, or to participate in pre- or post- rally polls, or surveys
    • Applications (apps) that may require voters to follow through with instructions to download malicious software, such as plugins, to complete the installation
    • Spoofed emails or messages that may look similar to those sent by the government or the political parties, and which may purport to provide information such as the latest news on political parties or updates on polling results

    Cyber Hygiene Measures For Members Of The Public

    Cyber threat actors could also continue to leverage on COVID-themed lures or adapt quickly to create fresh baits based on the latest news and events of interest during this period. As a precautionary measure, members of the public and enterprises should be on heightened vigilance during this period.

    • Only use official sources; beware of websites masquerading as official websites
    • Only Download Apps from Official Play Store (Android) and App Store (iOS)
    • Be Vigilant about emails or texts asking for sensitive information or request financial payments
    • Use Anti-Virus, and Update your Software, Applications and Browsers Promptly

    Enhanced Cybersecurity Posture For Enterprises

    • Heighten Vigilance by monitoring their ICT systems and networks for any unauthorised connections or unusual activities
    • Use Anti-Virus; Update your Systems, Software and Applications Promptly
    • Encrypt all Data, and Keep an Offline Backup Control privileged access to authorised personnel
  • How to Register for AirtelTigo Money RetireRite Pension

    How to Register for AirtelTigo Money RetireRite Pension

    As an active worker, one of the most important things you could do is to save money for your retirement. The traditional way of saving for your retirement involves a long process especially when you are trying to access your funds after retirement.

    Therefore, the introduction of technology in the saving of money towards your retirement is a very good initiative. This introduction is going to make your retirement savings easier to access and convenient.

    In view of this, AirtelTigo in partnership with the People’s Pension Trust (PPT) has introduced a tier 3 personal mobile pension scheme in addition to a savings account called RetireRite. This scheme is aimed at helping customers of AirtelTigo Money to live a peaceful financially independent pension life.

    Before you decide to register, there are some things you need to know and in this article we are going to show you all that you need to know so keep reading.

    What is RetireRite?

    RetireRite is a mobile pension scheme that allows subscribed AirtelTigo customers to make monthly contributions towards their retirement with as low as GH¢ 1. The scheme comprises of a pension account and a savings account.

    How does RetireRite work?

    Once you register, all the contributions you make will be disbursed equally into the two accounts, i.e. the savings and the pension accounts.

    With the savings account, you can withdraw up to 50% of your contributions six months after your initial deposit with the available interest.

    If a customer decides to stop contributing, he or she can only access their pension funds at age 60; depending on the date of birth of the ID you used for the registration of the SIM card.

    Should in case of a customer pass away, there’s a life bonus cover to ensure that the beneficiaries of the deceased customer receive up to four times the total contributions made by the deceased in the previous calendar year.

    Meaning, if the deceased made a total contribution of GH¢ 100 in the previous calendar year, the beneficiaries can receive up to GH¢ 400.

    The most interesting thing about this package is that no matter your occupation you can still contribute every month with the little amount you have on you.

    There’s no minimum age for registering but before you can subscribe to the AirtelTigo RetireRite, you need to be a subscribed customer on AirtelTigo Money.

    How to Register for AirtelTigo Money RetireRite Pension Scheme

    You can register for the AirtelTigo Money RetireRite pension scheme using the steps below:

    1. Dial *110#
    2. Select Pay Bill (option 4)
    3. Select Insurance & Pension (option 6)
    4. Select RetireRite (option 1)
    5. Select Register (option 1)

    Conclusion

    Most people don’t find a pension saving a profitable initiative because they don’t know where to invest their money or based on what they hear from other people.

    But from the explanation given by AirtelTigo and the People Pension’s Trust, this is a very good initiative but you need to be willing to contribute consistently (every month) before you decide to sign up on this scheme.

    Please share this post with your friends and relatives because there might be someone looking for such an initiative.

  • How  To Setup A Facebook Username For Profile Or Page

    How To Setup A Facebook Username For Profile Or Page

    Facebook, like any others social media platform comes with a unique username for each account. This name is completely different from the account name or the display name.

    The only difference here is that apart from the likes of Instagram and Twitter, where it is compulsory for you to set up your username before you open an account, Facebook actually allows you to open and operate an account without creating a username.

    The Facebook username operates in the same way as Twitter Username and Instagram Username, in other words, we call them ‘handle’. The ones that begin with @.

    So for example, if your business name is Setor’s Boutique And Makeup, your username can be set as @setorsboutique. The Username is a unique name created by a page admin or profile owner to enable people to get access to their page or profile faster, from a list of other similar profiles or pages.

    When you search for certain names, be it a business name or a profile name on Facebook, you’d realize that there are hundreds of pages or profiles bearing the same name. How do you spot the difference and know the exact one you are looking for? The answer is Username.

    So, in this article, we shall discuss ways of setting up a username on your Facebook business page or personal profile.

    How To Setup Username On Your Facebook Profile

    To set up a username on your Facebook profile, follow the steps below. Remember however that once you change your username, you cannot go back to the previous one you used.

    1. Login to your account with a desktop device,
    2. On the top-right corner, click on the little black triangle.
    3. From the dropdown list, select ‘settings’.
    4. Click on ‘general’ on the left panel
    5. Beside ‘Username’, click on edit.
    6. Write your new username and click on save changes.

    Note that when changing the Username, Facebook informs you about the availability of the name you intend to use. So if your username has already been used, then you’d have to change it to something else. If it’s available, you’d see it written next to your username.

    How To Setup A Username On Your Facebook Business Page

    Like your personal profile on Facebook, you can give your business page a unique Identity by creating a username which makes you stand out of the crowd. Here are the steps to follow:

    1. Visit the page you wish to create the username for, on a desktop device.
    2. On the left panel of your page, right below the page display photo, you’ll see ‘create username’, that’s if you don’t have one set up already. If you have one already, you’ll see the current username written there.
    3. Click on ‘create username’ if you don’t have one yet. Click on the old username to edit it, if you already have one setup.
    4. Type your preferred username and wait for availability check. Once you confirm that it is available, click on ‘create username’. Your username has been set hence.

    To confirm if your settings worked, go back to your Facebook account and type the exact username you set, with the @ symbol in the search box and run a search. Your page should show up in the top spots of the results.

    Conclusion

    Facebook has over 2 Billion users and over 80 million business pages. It is only a matter of simple logic to understand that there may be tens of profiles bearing the same name as yours on this huge social media network. You can confirm this by quickly running a search for your name on Facebook. You’ll be shocked at the results you get.

    So the big question is; how do you stand out of all these huge numbers of pages showing up when people search for your business page or your personal profile?

    The answer as provided in this article is by setting up a username for your account or business page. So, in this article, we spoke about steps involved in setting up a username for your Facebook profile or business page.

    I hope that this article contains enough information to satisfy your needs regarding setting up Facebook usernames.

    If you find any part of this content worth corrections or you’d like to seek some clarifications on this, kindly leave a comment in the box below or get in touch with us. Please, do well to leave some feedback at all costs since it helps us in producing more quality content for your consumption.

    Finally, kindly share this article with friends and family.

  • How to Register For AirtelTigo Money

    How to Register For AirtelTigo Money

    There may be days that you desperately need money but going to the bank for such money sometimes seems awful and weird. For example, travelling all the way to the bank to withdraw GH¢ 10 could be a waste of time.

    With the introduction of technology into financial transactions, the need for physical cash when doing a transaction is now very low as compared to what it used to be some years ago. It is the intention of tech and financial experts to see Ghana in the near future migrating to almost 80% cashless when doing transactions.

    In view of that, AirtelTigo has collaborated with the Bank of Ghana to introduce a mobile money service called AirtelTigo Money. This service allows subscribed customers to make withdrawal, deposit, send and receive money from all networks all through their mobile phone.

    In recent additions, subscribed customers can receive money from international transfers as well.

    What is AirtelTigo Money?

    AirtelTigo Money is a mobile financial service that allows all subscribed AirtelTigo customers to send, receive money. It also allows the customers to buy airtime, pay bills, and pay for goods and services right on their mobile phone. The activities of this service are monitored by the Bank of Ghana and therefore there’s no need to be scared of using this service.

    There are two ways of registering for AirtelTigo Money. We have Office registration and Self-registration.

    How to register for AirtelTigo Money at the Office

    For this option, you can simply visit any AirtelTigo office nationwide with a valid national photo identification document (Ghana card, Voters ID, Drivers’ license or passport).

    A merchant will take your details and then ask you to create a 4-digit secret PIN which you will use to make transactions. Upon completion, a welcome message will be sent to your phone via SMS.

    How to self-register for AirtelTigo Money via WhatsApp

    The Self-Registration option is very useful in this COVID-19 pandemic era. Under this category, you can choose to register using USSD or Whatsapp without leaving your house.

    To use WhatsApp to register, you just need to send “Hi” to the official Whatsapp number 0577000084 to begin the process. You will be asked to provide the following:

    • Picture of your valid ID card (should be the same as the one you used to register your sim card)
    • Date of birth (should correspond with the one on your ID card)
    • Location and
    • Your AirtelTigo number

    How to Register for AirtelTigo Money by via USSD

    Initially before Airtel and Tigo became one company, this feature was available, but after they became one company this feature is no longer available.

    But it’s our hope that they might some day re-introduce this feature again.

    Therefore, if you are not having a smartphone, you need to do the Office Registration.

    Conclusion

    The steps for registration is very easy and quick so you can easily follow along and register for the service.

    After you receive the confirmation SMS, you can receive or send money or buy airtime or pay for goods and services right on your mobile phone.

    Please be aware of fraudulent persons who impersonate AirtelTigo to claim money from customers. AirtelTigo will never demand money from you through an agent or an employee, all official items will be sent to you via SMS with the assigned name AirtelTigo Money.

    Please stay vigilant and report any suspicious activity or persons on your account. I hope the guide above serves its purpose.

  • How To Block YouTube Ads On PC & Android

    How To Block YouTube Ads On PC & Android

    In early 2018, YouTube rolled out a new way of serving advertisements to potential users. Unskippable ads can pop-up and stay as long as 15 – 30 seconds. This in common is not a bug or an error but new way ads are adequately served to users.

    Sometimes it’s very annoying when watching an interesting video or clip and an unskippable ad just pop-up for about 15 seconds before the video continues.

    We can’t blame YouTube that much, because YouTube generates funds from Advertisers by promoting and serving their ads on videos. It’s very bad to watch an unwanted advertisement forcefully over and over again.

    Unendingly two or more unstoppable ads can be displayed in a particular video which is very annoying. If you have searched for a way to obstruct YouTube ads on both your Android and PC then keep following.

    How To Block YouTube Ad On Android

    1. By using an Ad-free Browser – YouTube ads can be blocked by using Ad-free browsers. Instead of using the YouTube native app, you can download one of the many Ad-free browsers like Brave browser, Ghostery Privacy Browser, AVG browser, and many more. These browsers come with a built-in VPN, ad blocker, tracker blocker, private browsing mode, etc. When the ad-blocker is enabled, it will block all Commercial ads on any website including Youtube.
    2. By using an Ad-blocker app – Ad-blocker apps do not work in the Youtube Native app but there is a way to get around it. Download and install Adblock application for android. To block ads, open the YouTube app, and search for the video you want to watch. Click share below the video and select AdBlock. This will play the video without any advertisement. This trick can work on many Ad-blocking apps.

    How To Block Youtube Ads On PC ( Chrome and Firefox)

    On the computer, YouTube is accessed via web browsers like Chrome and Firefox. Chrome and Firefox provide a lot of free extensions to extend the capabilities of their service.

    There are a lot e of efficient extensions to block ads on both browsers using ad blockers. Below are the steps to install ad blockers on both browsers.

    1. Google Chrome – Chrome offers a lot of extensions to enhance the browser features and interact more with the content presented to you. For our case, we will need to install an ad-blocking extension. To install an extension, follow the steps.
    • Open Chrome and navigate to the menu
    • Go to More tools and click on Extensions
    • In Extensions, Click on Main Menu at the left-hand side of your screen. Find and click on the Open Chrome Web Store
    • In the search box, type Adblocker Youtube. A list of Youtube ad blockers will show. Install any of them.
    • You can now browse Youtube with no ads.

    2. Mozilla Firefox – Firefox also offers browser extensions to enhance the capabilities of the browser. There are a lot of Youtube Adblockers to block ads on Youtube. Follow the steps to install an extension in Firefox.

    • Open Firefox and Navigate to Menu. Select Addons.
    • In the search bar, type Ad Blocker Youtube and press on Search or enter.
    • You can select from any of the listed AdBlockers.
    • Press the Add to Firefox to download the Extention.
    • When you are prompted to Accept Permission, click on accept. This will install the add blocker and stop ads on Youtube.

    Conclusion

    Ads can cause inconvenience and make Youtube watching very sour. Youtube is very addictive and during fun time watching videos, anyone will not accept an interruption.


     To get rid of the ads on both your Mobile and Computer, you can use an Adblocker extension or application to block the ads.

  • Best 5 Websites To Learn Adobe Photoshop 2020 From

    Best 5 Websites To Learn Adobe Photoshop 2020 From

    Adobe Photoshop is a raster graphics editor developed by Adobe Inc. Photoshop is available for Windows and Mac users. The initial release date was on February 19, 1990.

    Uses Of Photoshop

    Photoshop can be used for any purposes of which some are highlighted below:

    • Graphics Creation
    • Pattern and Texture Styling
    • Website Designing
    • Image writing
    • Picture Retouching
    • Cover photos

    Photoshop can be used for so many purposes depending on what the designer wants to use it for. The software is popular because of the wonderful features it possesses.

    Photographers, designers, web developers, filmmakers, and others use Photoshop to complete their final projects in a professional way.

    Features Of Adobe Photoshop

    1. Photoshop Layers – Layers gives you more control of your design. Layers make the design very easy because unlimited edits can be made to each layout of your design.
    2. Selection Tools – Making selections on an object.
    3. Pen Tool – Pen tool is one of the most used tools in Photoshop. It is used to draw paths together with an anchor point. It can be used to creatively draw shapes and edit shapes to a designer’s liking.
    4. Shapes – Shapes can be used to add objects to our document.
    5. Vector mask – For creating masking portions of an object
    6. Slice Tools – The slice tool is used by web designers to speed up the loading time of pages. It slices images to speed up loading time. With CSS the slice tool is not mostly used but it’s still popular.
    7. Retouching tools – As the name suggests, it is used to edit raster images and correction of images.

    There are so many features of Photoshop but few are listed above for reference. With the popularity of Photoshop, a lot of people have the interest to learn photoshop but don’t know where to start.

    Websites to learn Adobe Photoshop from

    Today in this article, I will show you the 5 best websites you can learn Photoshop 2020 from.

    Adobe

    Adobe provides free online courses from scratch to pro level. If you have no experience in Photoshop, I will recommend Adobe Photoshop lessons for you. I personally used Adobe’s video series on Photoshop to equip myself in mastering Photoshop.

    SkillShare

    Once you are done with the basics of Photoshop, you can head over to SkillShare to improve your skill. SkillShare provides comprehensive lessons in over 13 hours of video lectures called The Adobe Photoshop CC – Advanced Training Course.

    If you are a beginner in Photoshop, first go to Adobe to learn the beginner course before heading over to SkillShare.

    LinkedIn Learning

    Photoshop is also used for web designing. LinkedIn provides Photoshop For Web Design course in 2.5 hours video lecturing time. If you wish to use Photoshop to improve on your Web Design skills, LinkedIn Photoshop for Web Design course is for you.

    Udemy

    There are over 1000’s of courses at Udemy on Photoshop from beginner to Pro level. Udemy provides both free and paid courses. As a beginner, you can access some of the free courses and then advance to Pro level with some of the paid courses.

    Photoshop Cafe

    Photoshop Cafe provides free tutorials on Photoshop. It’s very similar to lessons from other sites but they make sure their language used is simple enough for beginners to have easy understanding.

    Beginners can go to Photoshop Cafe to learn at their own pace.

    Conclusion

    With the popularity of Photoshop and designers’ choice, acquiring a skill in Photoshop is not a waste of time. Photography, Web, and Graphic Design are one of the Lucrative skills in the world now.

    In this article, I have covered some of the best websites you can learn Photoshop from beginner to Pro level.

  • How to Buy A University of Ghana Application Voucher Using Mobile Money on All Networks

    How to Buy A University of Ghana Application Voucher Using Mobile Money on All Networks

    Prospective University students can apply for admission even before their results are released by purchasing a voucher.

    Getting admission in your dream University is one of the expectations of every Senior High School student. But, unlike Senior High School admissions, before you can be offered admission into a University, you need to apply personally.

    At first, before you can apply for a University programme, you needed to:

    • Have your SSCE/WASSCE results at the time of application
    • Fill a hard copy application form and after that, mail it to the school through the post.

    Due to technology, now you can apply to a University at the comfort of your home even without your SSCE/WASSCE results at the time of application. In order to do this, you need to purchase an E-voucher code either from the bank or at the comfort of your home using mobile money on all networks.

    How to Buy a University of Ghana Application E-Voucher Using Mobile Money on All Networks

    In April 2020, the University of Ghana in collaboration with ITCONSORTIUM introduced a new method of buying the E-Voucher for an application using mobile money. It’s not clear whether the introduction of this service brought about as a result of the coronavirus or it was something they had planned already.

    All the same, in this article, we are going to show you how you can purchase a University of Ghana application E-voucher using mobile money on all networks in five (5) simple steps.

    But before you begin with the process, you need to make sure that you have not less than GH¢ 202 in your mobile money wallet.

    You can buy a University of Ghana Application E-Voucher by following the steps below:

    1. Dial *887*18#
    2. Enter UG
    3. Confirm your details
    4. Authorise the payment
    5. Receive your voucher via SMS

    Now, let’s break down the whole process for you.

    Dial *887*18#

    After checking the balance in your mobile wallet and it is exactly GH¢ 202 or more then, on your mobile phone, open your phone app and dial the short code *887*18#. This shortcode works on all mobile networks and all mobile phone types; whether “yam”, Android or iOS.

    Enter UG

    After entering the shortcode, a new welcome screen will show with the heading ‘Welcome to e-Voucher Service.

    Under the welcome message, you will be asked to ‘Enter the Name or Alias of the Institution’ you are buying the voucher for. An example will be shown under that and that is the same school we are talking about today.

    Therefore you can type University of Ghana or UG but not both. After that then you press enter or next or reply, anyone that fits your phone type.

    Confirm details

    After inputting the name or alias of your preferred institution, a new page will be shown with the name of the institution you selected and the price of the voucher (in this case GH¢ 200).

    You will then be asked to ‘Press 1 to proceed or 0 to cancel’ the transaction.

     If the details shown matches the one you are requesting the voucher for, you can proceed. But if the name of the institution does not match the one you are looking for, you need to cancel and restart the process again.

    Authorize Payment

    When you are done checking for errors, and you select to proceed, a page will show displaying ‘Transaction processing. Please wait for the bill to approve payment’.

    You can then dismiss and wait for a bill from your mobile money provider. When you receive the bill from your provider, you then need to approve it by following all the necessary instructions.

    Receive your Voucher via SMS

    After successful authorization, an SMS of Voucher is sent to your mobile money number.

    The Voucher includes:

    • a Voucher serial of the format: UGXXXXXXX, where the XXXXXXX is a 7-digit number and
    • 13-digit PIN.

    What if I Don’t Receive Any SMS?

    In some situations, your Voucher will be sent to your mobile number late due to network issues OR you may mistakenly delete the message containing the Voucher. If such a thing happens, you can use the steps below to retrieve your Voucher.

    1. Dial *887*18#
    2. Select “Yes”
    3. Retrieve E-Voucher
    4. Details of your E-Voucher will be displayed (this include the University of Ghana, Serial Number and PIN)

    NOTE: You can always retrieve the details of the E-Vouchers that you have purchased using your mobile money.

    Conclusion

    You need to be willing to learn hard and pass your exam after you have applied because more than 20,000 students apply each year out of which only about 10,000 will be selected.

    The University of Ghana has one of the easiest online application procedures in Ghana, where you can apply for admission in less than 30 minutes.

    That’s it, you are all set now to apply for admission at the University of Ghana.

  • How To Get More Space on your phone by managing WhatsApp Photos and Videos

    How To Get More Space on your phone by managing WhatsApp Photos and Videos

    Smartphones are nice. They are beautiful and they are very powerful too. For most people, smartphones are a great source of entertainment. They use it to play games, watch videos and chat with friends and family.

    No matter what you are using your Smartphone for, there is one application which is visible on almost all smartphones. Yes, you guessed right. It’s WhatsApp. WhatsApp is not just the world’s biggest instant chatting application. It is also the app that consumes the most space on most smartphones.

    Due to the volumes of images, videos, sounds and documents sent through WhatsApp groups and personal chats daily, a large volume of storage space is eaten up by this application.

    So, the big question most people ask is; should I delete my WhatsApp? Should I reinstall it to reduce the space? How do I reduce storage space on my phone?

    Well, worry no more. In this article, we shall look at how to get more space on your smartphone by reducing the space used for WhatsApp photos and videos.

    I know you are itchy already to jump straight into the steps because this is a major problem for you. Let’s get right into the process below.

    How To Reduce The Space On Your Whatsapp App For Iphone Users

    To reduce the space and size of your WhatsApp application on your Iphone, kindly follow the steps below:

    1. Launch your WhatsApp application and click on the settings tab.
    2. Under the Settings tab, search and click on ‘Data and Storage Usage’.
    3. Next, swipe down and click on ‘storage usage’.
    4. On the next page, you’ll see a list of all your WhatsApp chats and the storage capacity they occupy. It is usually listed from the highest to the lowest. From top to down.
    5. Select the chat with the highest storage capacity and scroll down to click on ‘Manage’
    6. Select the files you want to clear. Examples; you can select texts, contacts, videos, photos, voice messages, documents, Gifs or stickers. But for the sake of this article, just select photos and videos. Because they occupy most parts of your space.
    7. Scroll down and click on ‘Clear’

    Once you click on the clear button, the phone will automatically delete the selected files from the chat and free up a whole lot of space on the device. You can repeat the steps for all other chats to clear up even more space.

    How To Reduce Your Whatsapp Storage Space On Android Phones

    The steps for clearing up images and videos from your WhatsApp chats in iPhones is different from those for Android phones. Here are the steps that apply to Android phones;

    1. Open your WhatsApp application on your android phone and click on the three dots on the top right corner.
    2. Select ‘settings’ from the list of menus that come up.
    3. Next, select ‘Data and storage usage’ from the list that comes up.
    4. The next page that appears is a ‘Storage usage’ menu. From the menu, you can see how many files, images, videos and Gifs are associated with each of your chats.
    5. Click on ‘Free up space’ in the bottom-right corner of your screen.
    6. Look through the list of media for the selected chat and tick the ones you wish to delete.
    7. Click on the ‘delete items’ button beneath.
    8. Click on ‘Clear messages’ options in the next popup screen which appears.

    To free up more space on the phone, you can repeat the step for more and more chats. Also, be careful to select only the files you genuinely feel you won’t be needing anymore. Since once deleted this way, the files are removed from the phone completely.

    Conclusion

    Despite the numerous advantages that come with using WhatsApp on your smartphone, one disadvantage we all complain about is storage usage. Somehow, you’ll realize that WhatsApp is among the list of applications using the most space on your phone.

    In this article, we looked at how to reduce your WhatsApp space by deleting files that are no longer relevant from your system.

    I hope that with this article, you have been able to delete unwanted images, videos and documents from your WhatsApp account and you’ve been able to free up more space on your phone.

    Kindly leave your comments, questions and reservations about this article in the comment box below. Please do well to share this article with friends and relatives as well. Help save someone from the frustration this storage issue puts people through.

    You can also checkout How To View Deleted WhatsApp Messages.