Author: Mfidie

  • How to Fix iPhone Hotspot that Keeps Disconnecting from Your Device

    How to Fix iPhone Hotspot that Keeps Disconnecting from Your Device

    Despite the fact that iPhones are among the most dependable and stable smartphones, the hotspot feature has consistently disappointed many customers.

    Users of iOS have long complained that their iPhone hotspot frequently disconnects, but Apple hasn’t done much to permanently remedy the issue.

    The problem even appears on the newest iPhone 13 devices running iOS 15 and later, proving its existence. Fortunately, you can get past this by using a few short-term fixes and workarounds.

    Why do iPhone hotspot connections keep losing connection?

    1. There are a number of potential causes for your iPhone hotspot to constantly disconnecting, including:
    2. The iPhone gets too hot.
    3. Hotspot has been idle for more than a minute.
    4. Drops in internet connection
    5. Wi-Fi or mobile data is turned off.
    6. After a fresh software upgrade, a bug or problem.

    How to properly fix iPhone hotspot that keeps disconnecting issue

    You can use the solutions in this section to circumvent the problem if it bothers you.

    1. Restart your iPhone

    Even though restarting a device is one of the most straightforward troubleshooting techniques, it’s the most popular since it frequently resolves a variety of annoying problems. Restarting the device and attempting again should thus be your initial course of action.

    Be aware that restarting the phone could only be a temporary fix if there is a persistent software bug; you might have to restart the phone each time the issue arises. If a restart doesn’t work, look at our other possible remedies.

    2. Reset your hotspot

    To test whether it solves the issue, you may try setting up your hotspot once more. To accomplish this, all you have to do is choose Forget in the Wi-Fi settings on your PC, Mac, or other device that you want to connect to the iPhone hotspot. Reconnect to the hotspot after which type the password once more.

    You may even reset your iPhone’s hotspot if you want to take things a step further by doing the following:

    1. On your iPhone, open the Settings app.
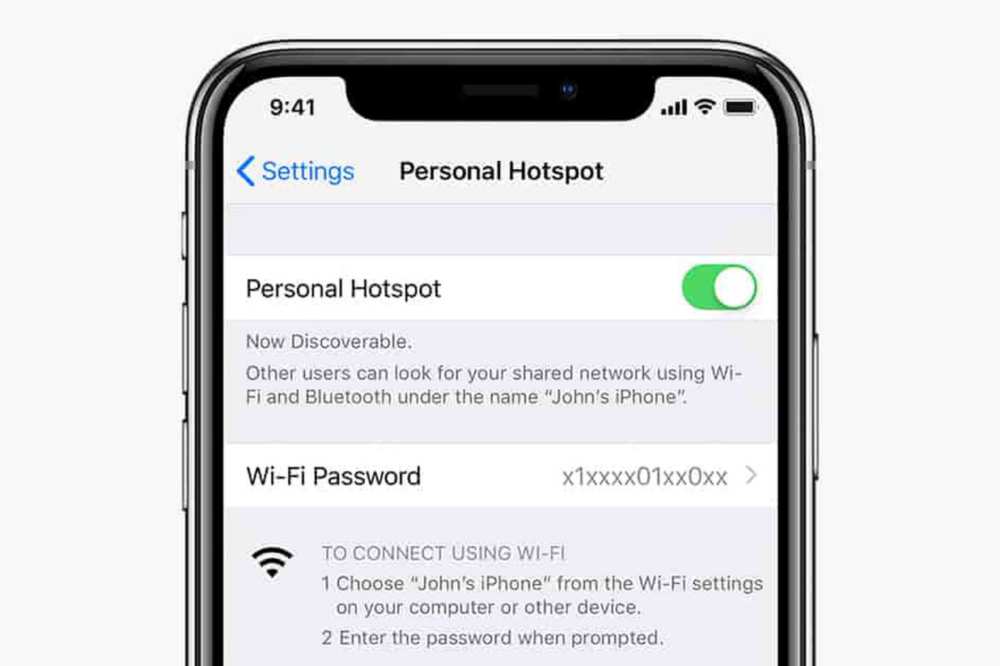
    2. Hit the Personal Hotspot button.
    3. Change the hotspot’s password, then click Done.
    4. Turn on the option to let others join.
    5. Connect to the hotspot right away using any device, then input the password to reconnect.

    Maximize compatibility by enabling

    As the name implies, the hotspot disconnecting issue on your iPhone will significantly decrease if you choose the Maximize Compatibility feature, especially when connecting it using older hardware.

    The iPhone 12 and subsequent devices have this option. Take these actions to turn it on:

    1. Open the Settings application.
    2. Tap Personal Hotspot in step two.

    3. Switch on the Maximize compatibility setting

    Please take note that if you enable this option, your internet speed may be reduced. Use this functionality only when essential, then.

    Switch on automatic network selection

    Most users may ignore this approach because the Automatic Network option is turned on by default. Toggle this setting back on, especially if you’re out and about, if you’ve already done so for whatever reason.

    When the functionality is deactivated, the hotspot will disconnect or switch off if you leave your network’s coverage region. The network wouldn’t immediately connect to the closest tower, which would cause the internet to cease functioning. To see if the Network Selection is on Automatic, follow these steps:

    1. Activate the Settings app.
    2. Decide on Mobile Data.
    3. Next, choose Network Selection.

    4. Turn on the Automatic switch

    Ensure You Have Sufficient DataWe frequently use all of our limited cellular data without even realizing it. Your hotspot may continually disconnecting if you have over your weekly, daily, or monthly data allotment. Use your iPhone as directed to check your data usage:

    1. Start the Settings app.
    2. Choose Mobile Data and view the Personal Hotspot’s data use.

    Why the Personal Hotspot on your iPhone keeps disconnecting can be explained if you see a high data use that exceeds your allowance. In order to guarantee that the data consumption does not go above the limit moving ahead, you will need to monitor it.

    5. Turn off the Low Power Mode

    Although the iPhone’s low power mode is very useful, it also makes other capabilities, such as the Personal Hotspot, difficult to use or use. As a result, the hotspot can disconnect if you switch on Low Battery mode on your iPhone.

    Furthermore, the Personal Hotspot may frequently disconnect even if you activate it with Low Power Mode enabled.

    1. Open the Settings application.
    2. Access the Battery settings.
    3. If Low Power Mode is selected, turn it off.

    6. Apply the most recent system updates

    Due to an issue that has already been resolved in a recent version, your iPhone hotspot can occasionally disconnect. Therefore, updating your phone’s software often is a great approach to fix problems like these. Follow the steps below to see if your phone has the most recent iOS update:

    1. Select General from the Settings menu.
    2. Choose Software Update next.
    3. Await for your device to check for the most recent update before installing it.

    Conclusion

    It might rapidly become annoying when the hotspot on an iPhone 13/14 or an earlier model keeps disconnecting. You should be able to get the hotspot to keep a steady connection to all devices, though, by using the solutions suggested above.

    The best course of action is to send feedback to Apple’s customer care team and wait for a speedy update that fixes any bugs if, for some reason, it still doesn’t function as planned.

  • Solana Price Prediction

    Solana Price Prediction

    The cryptocurrency market offers hundreds of digital assets that are used for different purposes. A popular way to acquire crypto coins is staking. Unlike the mining method (used in early crypto assets such as BTC), staking is much simpler and less costly. One of the brightest representatives of the Proof-of-Stake protocol is Solana. Let’s talk about this project today.

    What is Solana?

    Solana is a cryptocurrency project that has all the chances to replace the Ethereum network. The incredibly high number of transactions on the Ethereum network causes blockchain congestion. In addition, the execution speed leaves much to be desired. Unlike Ethereum, the Solana network has lower transaction rates and offers a very high throughput of 50,000 transactions per second; besides, the Solana network runs 20 times faster. These are the reasons why dApp developers around the world prefer the Solana blockchain.

    SOL coin is one of the top-ranked cryptos in the market. You can buy SOL on any large crypto platform (Binance, WhiteBIT, etc.).

    Solana is one of the industry’s leading decentralised networks. At its core is the Proof-of-Stake consensus protocol. That means that coins can be obtained through staking instead of traditional mining.

    Solana blockchain benefits:

    • Can be used by anyone with an Internet connection.
    • It does not require expensive equipment or maintenance.
    • No mining equipment required.
    • Environmentally friendly.
    • Fast, cheap, and secure.

    More About SOL Crypto

    SOL is the native cryptocurrency of the Solana blockchain. As of October 2022, the price of SOL coins is $28.02. Analysts made the Solana crypto price predictions based on the Solana chart and historical indicators and patterns they identified. So, by the end of 2030, the Solana price is supposed to reach $739.83. Seeing the number of partnerships that the Solana project has, there is probably more reason to believe that this platform will be widely adopted and receive more use cases in the future.

    For more information on the Solana crypto, visit the WhiteBIT blog. It is a valuable resource with many interesting articles and overviews on promising crypto projects, helpful guides on trading and tips for those who only begin their journey to the crypto world.

  • New 1xBet bonus – your chance to get a free bet

    New 1xBet bonus – your chance to get a free bet

    Sports betting attracts many people who enjoy unforgettable emotions. Bets on the exact score of a sporting event are especially popular – the odds for such outcomes on 1xBet are very high, and the anticipation of victory is thrilling.

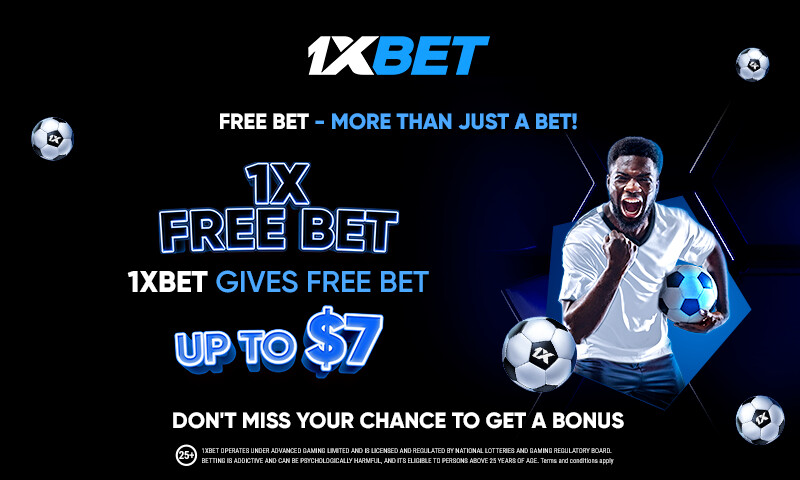
    Now, to please their customers, even more, 1xBet has launched a bonus called 1xFreebet, with which users can get up to $7 free bet every week simply for betting on the correct score.

    How does it work?

    To take part in the promotion, you must have a 1xBet account. Therefore, if you still need to register with this renowned betting company, do it now. You will also need to agree to participate in bonus promotions in your personal account and click on the “Take part” button on the promo page.

    Then, from Tuesday to Monday, simply make at least one single bet on the exact score of any sporting event from $2. Then, the following Tuesday, the bookmaker automatically awards free bets of up to $7 to participants of the promotion based on the results of the past bonus week.

    What determines the amount of the free bet?

    The amount of free bet you can receive depends on the amount wagered. For example, the minimum bonus is awarded for a bet from $2 to $7. For a bet from $16 to $30, 1xBet is guaranteed to give a free bet in the amount of $1.5. And for a bet over $50, you will receive a free bet of $7. Please note that the bonus is credited based on the first calculated bet according to the specified parameters within the bonus week.


    Check out the details of this and other cool bonuses on the 1xBet website.

  • How to Buy and Sell on Facebook Marketplace

    How to Buy and Sell on Facebook Marketplace

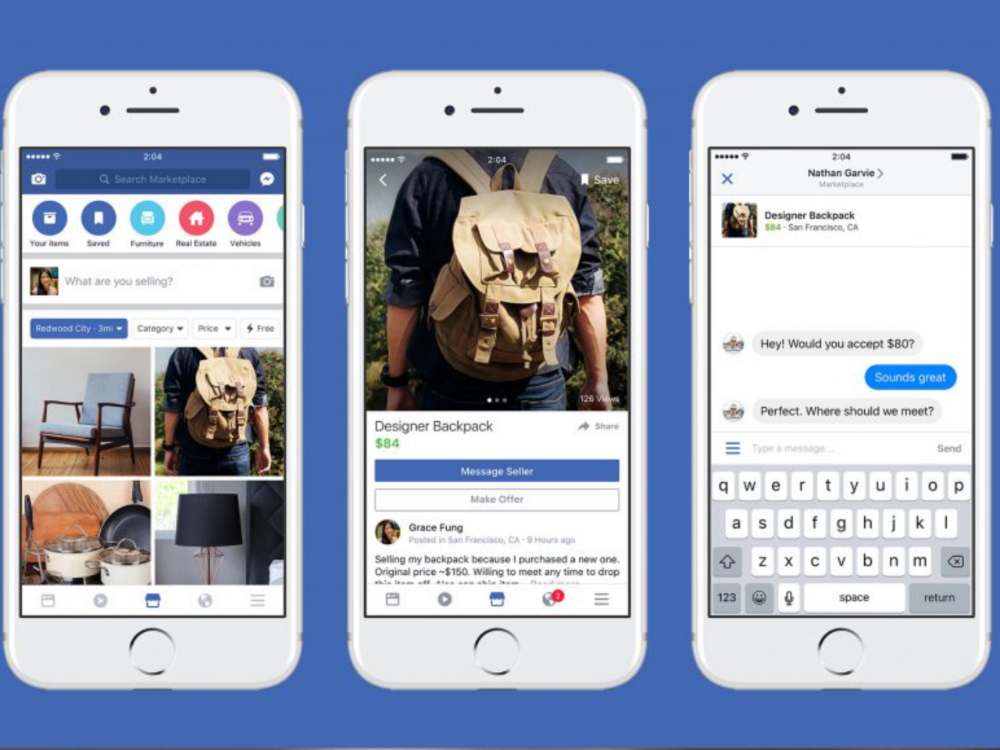
    Everyone is familiar with Facebook as a platform for socializing, sharing images, and joining interest groups. You may open an online store and sell goods there, too, did you know that?

    Facebook launched the Marketplace in 2016, and it has since gained popularity as a platform where people can sell their possessions to nearby purchasers. Facebook Platform is a safer and more user-friendly marketplace to utilize when selling locally compared to Craigslist.

    If you’re thinking about launching an e-commerce business, we’ll teach you a few tried-and-true methods for creating a marketplace listing and how to sell on Facebook Marketplace in this comprehensive tutorial.

    What is Facebook Marketplace?

    Selling locally on Facebook Marketplace is safer and easier than using other marketplaces. Facebook distinguishes itself from Craigslist even further by enabling qualified vendors to provide nationwide delivery for goods falling under specified categories, giving them access to a considerably bigger market than local-only merchants.

    On the Facebook Marketplace, who is authorized to sell?

    Anybody, I mean anyone can sell on Facebook marketplace. The Facebook Marketplace isn’t only for folks who have spare items they want to sell; it’s also for company owners, e-commerce companies, Amazon sellers, woodworkers, handcrafted artists, brick-and-mortar establishments, you get the idea.

    What are the requirements to begin selling on Facebook?

    An active Facebook account is all that is required to begin selling on Facebook Marketplace. It truly is that easy! You must go through the extra effort of adding your payment and shipping details if you want to provide shipping on your listings.

    How to Market Your Products On Facebook

    On a desktop

    1. Log in to Facebook by opening the app.
    2. Click the Marketplace link on the left column.
    3. Make the choice “Create New Listing.”
    4. Decide on “Item for Sale.”
    5. Upload up to 10 images of the item using the Add Photos button.
    6. Give as much information as possible about your item while filling out the required fields. Set the price to 0 if you wish to list it as a free item. Next, press.
    7. Select a delivery method if necessary, then click Next.
    8. To publish the listing, click Publish.

    On Mobile

    • Log into your account after launching the Facebook app.
    • Choosing the Marketplace tab.
    • Pick Sell.
    • Select Items from the pop-Create up’s New Listing menu.
    • Hit Next after adding the necessary details and at least one photo for your item.
    • f necessary, decide on a delivery mechanism.
    • To post your ad, click Publish.

    Facebook Marketplace Payments Methods

    The merchant determines the payment method on Facebook Marketplace. However, it is urged that Etransfer and PayPal never, ever accept checks. Which payment option is most convenient for both parties should be discussed on messenger. For instance, the buyer doesn’t like PayPal or local bank transfers, whereas you do. If they are local, arrange a monetary transaction for pick-up or delivery.

    How to sell on Facebook Marketplace

    1. Submit A Complete Item Description

    Use imaginative language in your descriptions to convey the unique qualities of your product. Include it as well if you have any further pertinent information, such as the item’s condition.

    The purchasing and selling process will go more smoothly for everyone involved if precise information is provided, as it will assist prevent any misunderstandings between buyer and seller.

    2. Set competitive prices for your products

    When pricing your goods, you want to strike a balance between a cheap price that draws customers in and a high price that ensures a profit. It requires balance.

    Investigate what others are charging for comparable things being sold by others to get an idea of how much to charge for your own. You may start out well with that and then change your prices from there.

    If you have products that are well-made or unusual, it’s OK to charge a little bit more for them. People are frequently prepared to pay more for things they believe to be of greater quality.

    3. Take Excellent Photos of products

    When selling products like apparel, furniture, or pricey commodities like cars, it’s crucial to include high-quality images in your listing. Include images from different angles since prospective customers will want to see how the item appears on a person or in a space. Include a remark in the image’s caption if there are any imperfections or damage.

    4. Quickly respond to inquiries

    It’s understandable that there will be occasions when you are unable to respond straight immediately. A little politeness goes a long way, but in general, try to answer to questions on Facebook Marketplace as quickly as you can.

    5. Always Be Willing To Bargain

    Keep in mind that while negotiating, it’s not just about what you want; it’s also about what the other party wants.

    Respectful etiquette is required. Consider making a counteroffer if the initial offer seems too low. Inform the other party and try to come to a mutually agreeable solution.

    Do your best to find a medium ground. Always keep in mind that negotiations include giving and taking.

    Plan for leaving the deal if necessary. It’s OK to walk away from a deal if it’s unfair or if the other party is acting inexplicably.

    What products cannot be sold on Facebook Marketplace?

    Remember that not all things are permitted on the property. Sellers who violate these community guidelines and rules will have their things removed and face penalties, such as Facebook warning letters or bans from the marketplaces. Some of these products are;

    1. Subscriptions, digital products, or digital media
    2. Supplements, medications, alcohol, and tobacco products for use on animals and wildlife
    3. Guns and other weapons
    4. Items that are not tangible
    5. something that is racial
    6. Currency/Crypto
    7. advertisement for casinos (i.e., gaming, lotteries, casinos)
    8. Product theft
    9. Services for Adults

    How to Buy on Facebook Marketplace

    1. Pay close attention to the pictures and listings.
    2. If you see anything you desire, reach out to the sellers.
    3. If necessary, negotiate the order for pickup and provide a half-payment deposit.
    4. courtesy and deference

    The Advantages of Using Facebook Marketplace for Sales

    1. Extensive reach
    2. Consumer experience that is personalized.

    Does Facebook impose fees for Marketplace sellers?

    You won’t be charged a listing fee by Facebook if you sell products on Facebook Marketplace.

    There are, however, selling costs associated. For shipments of $8 or less, there is a flat price of $.40 instead of the selling fee of 5% per shipment.

    Conclusion

    When seeking excellent prices on used goods, internet consumers now frequently visit Facebook Marketplace. These pointers can assist you in selling more successfully and simplify the process for both you and your consumers, whether you’re new to Facebook Marketplace or have been selling there for some time.

    Spend some time learning about Facebook Marketplace’s features. Knowing how to list an item, add images, establish a price, and write a description is part of this.

    Use precise and comprehensive information when listing an item. This will lessen the chance of miscommunication or misunderstandings in the future. When selling on Facebook Marketplace, using high-quality photographs is crucial. 

    You’ll have no trouble ranking among the top sellers on Facebook Marketplace if you keep these suggestions in mind. Enjoy your sales!

  • Does a Digital TV Need a Decoder?

    Does a Digital TV Need a Decoder?

    The majority of modern digital TVs now include built-in capabilities that let the user see satellite TV channels or Digital Terrestrial TV channels. A new technique that combines digital satellite and terrestrial TV signal decoding software with smart interactive television capabilities makes this feasible.

    However, there have been several complaints that many digital TV consumers find it challenging to activate and utilize these value-added satellite and terrestrial TV decoding devices. I’ll provide further information about how to activate your satellite TV or the built-in digital terrestrial TV in this article.

    Digital TV Overview

    In order to buy a digital TV with an integrated cable or satellite TV channel system, you must first determine whether the technology brand or the signal service provider is offered in your region.

    Because the DSTV satellite TV signal provider has reached the whole Ghanaian skyspace, for instance, an LED smart TV with an integrated DSTV channel system would function everywhere in Ghana.

    So, if you’re unsure whether the satellite TV branch is offered in your region, you might need to get in touch with a local expert or dealer to find out.

    Despite how crucial television is to a lot of people, the technology that underpins the medium hasn’t advanced significantly since its invention.

    Do you still require a separate decoder to get signals from major radio stations in this day and age of Smart TV and digital TV proliferation?

    However, it is not surprising to learn that some of you have digital TVs but are unaware of their capabilities, or that some of you don’t even know that the TV on your TV stand is a digital TV and that you can use it to watch free-to-air cable and satellite channels from some independent satellite TV providers as well as with access to the internet.

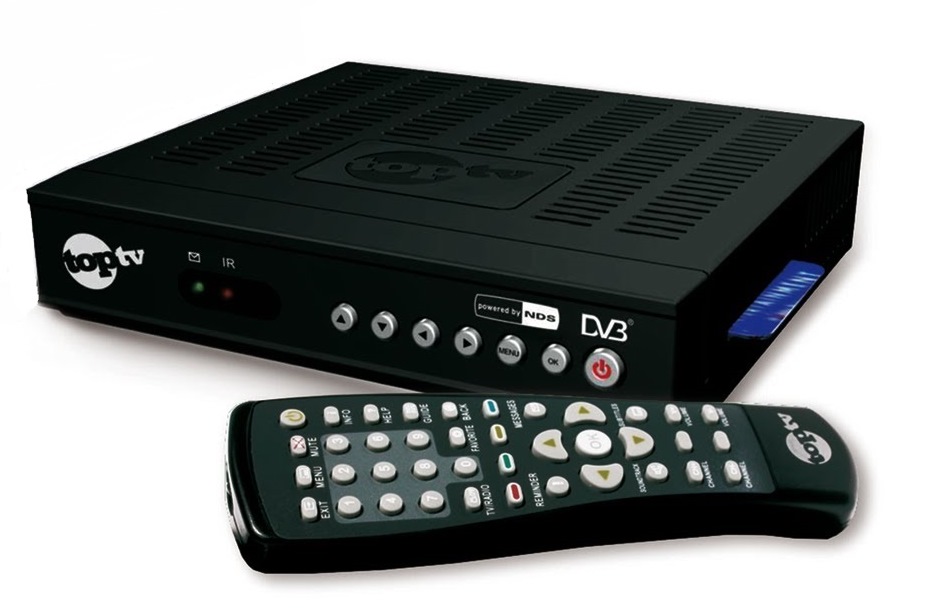
    The inclusion of a decoder is one of the characteristics of Smart TVs that allows them to receive certain satellite signals or channels (or an inbuilt decoder). In order to determine if your digital TV requires a decoder or already has one built in, follow the easy steps below.

    How to check if your TV is a Digital TV and has an inbuilt Decoder

    1. Turn on the television, then select a dish from the menu.
    2. You can view UHF, VHF, and CABLE by using the search function.
    3. Your TV set should have an integrated decoder if the CABLE option appears on the search menu alongside the UHF and VHF options.
    4. Your built-in decoder TV makes it possible for you to receive, view, and enjoy free-to-air satellite channels from certain cable/satellite TV providers by keeping track of their proper frequency. The decoder also suggests that your TV is internet-ready.

    In a very short period of time, home technology—especially TVs—has developed extremely quickly. Everyone wants a good, sparkling, functional TV at home, but the key question is what to buy.

    The differences between a Smart TV and a Digital TV

    Currently, one would want to have an Android-powered smart TV, but due to the cost, they choose a “digital TV. But how do they differ? Many people currently prefer to classify all modern technology as “digital,” but that isn’t actually the case when it comes to TV.

    The majority of digital TVs come with a decoder service already installed, allowing you to view your preferred channels.

    This is obviously done without the inconvenience of making monthly membership payments, which is incredibly beneficial. However, there could be a better, more advanced option. The smart TV comes into play here.

    A Smart TV

    Simply explained, a smart TV is a combination of a computer and a television that can easily access the internet and install apps without the use of an additional device. For this, they frequently include the manufacturer’s preferred web browser, making it simple to download streaming apps like Netflix and Showmax, among others.

    A Digital TV

    A digital TV may, however, also be used to access the internet. You just need to make sure you have a reliable internet connection and an official TV box or firestick. You may purchase these gadgets from retailers or online stores under the names of companies like Google, Apple, Amazon, Roku, and others.

    Conclusion

    We hope this article gives you some great insight into how digital TV works as compared to smart TV. Feel free to share your view or issues in the comment section

  • How Technology has Revolutionized the Online Casino Industry

    How Technology has Revolutionized the Online Casino Industry

    Our day-to-day tasks have grown considerably easier to manage due to the rapid development of technology. There is no aspect of our lives that technology has not improved in some way.

    Online gambling is one of these sectors that has undergone significant enhancement. Online casino platforms like Betway casino Zambia leverage digital advancements to provide players with a state-of-the-art experience. Due to the enhanced gameplay experience coupled with multiple technology innovations, the online casino industry is expected to reach a value of $150 billion in the next few years. 

    In this article, we will go through some of the factors to learn how technology has revolutionized the online casino industry.

    4 Ways in Which Technology Has Evolved the Online Casino Experience

    1. Instant Loading And Accessibility

    There are now many rapid-loading interfaces and timely access functions on gambling websites. With the incorporation of Flash technology, gambling online without downloading additional software is feasible. The player merely needs a plug-in to visit their preferred online casino. Flash-enabled visitors can enjoy stunning images and audio while playing games. This new digital development has enormously impacted many elements of the online casino industry to the benefit of millions of gamers.

    When video games emerged a few decades ago, extensive loading times were the standard. Nonetheless, it is unacceptable in the present day. Users dislike waiting a long time for a game or website to load. Therefore, speed is vital. 

    Fortunately, most casinos have introduced innovative technologies that substantially minimize loading times. Therefore, consumers can simply access their preferred games and navigate portals.

    2. Gaming Based On Virtual And Augmented Reality

    Augmented Reality (AR) and Virtual Reality (VR) make casino games significantly more immersive (VR). The 3D environments created by these cutting-edge technologies allow players to interact with the different people and objects displayed in the game. 

    However, specialist VR headsets and other virtual technology are required to fully access this fascinating virtual world. There is little doubt that VR and AR games greatly interest the gaming industry. Although few virtual reality (VR) casino games are now accessible, these technologies are continually being employed to develop new games.

    3. Bitcoin Innovation

    The introduction of Bitcoin transactions represents one of the most recent technological advancements. According to what we have seen up to this point, it can permanently affect how payments are processed. The application of cryptocurrencies, such as Ethereum and bitcoin networks, is a fundamental component of today’s digitalization innovation. Based on the current status of most casinos, it appears only a matter of time before cryptocurrency becomes the de facto accepted payment method.

    Cryptocurrencies offer gamblers various innovative chances. They are a simple and safe payment option for online casinos. In 2022, cryptocurrencies will have even fewer restrictions compared to traditional currencies. Players who fund their online casino accounts with cryptocurrency are free from exposing personal information.

    4. Flexibility

    It was a significant limitation that online casino gamers could only access their favorite games while glued in front of a computer. Even though numerous gamblers utilized computers, transporting them around was still somewhat cumbersome. When mobile casinos were ultimately launched into the market, everything changed.

    Consequently, customers can now play casino games while taking the bus, lounging on the couch, or strolling in the park. This degree of adaptability has increased the number of people participating in online gaming. In addition, the visual quality of mobile casino games is equal to that of online casino games, and the gameplay is significantly enhanced.

  • How to Know if Someone is Video Recording You

    How to Know if Someone is Video Recording You

    There are a plethora of different covert methods that someone may use to spy or listen in on you. In your house, business, computer, automobile, or cell phone, there may be concealed cameras or microphones. Fortunately, there are several symptoms of surveillance that might reveal their presence.

    The following are some of the most evident indications that you are being video recorded:

    1. It appears like someone is constantly “bumping into” you in public. They seem to always be aware of your whereabouts and schedule.
    2. Your ex-partner may be aware of more information about your activities, finances, or other matters during a divorce or separation than is appropriate.
    3. Your company rival frequently outbids you or appears to have access to certain trade secrets.

    Other typical indications of monitoring do exist, though. Discover more below.

    Signs of surveillance in your home or office that are often physical

    Microphones and spy cameras are more affordable, widely available, and compact than before. They may thus be hidden and fitted with ease. Installing can be straightforward, but often people are pressed for time and leave behind evidence of their labor. Maybe you’ve already picked up on a few things that don’t seem right.

    Wall plates for the electrical fixtures are somewhat out of place

    Search for indications of a problem. Because people frequently overlook them, areas like light switches, electrical outlets, and smoke alarms are particularly attractive for listening devices. For instance, look for small color changes in the wall plate color or trash on the floor beneath a light. Similarly, keep an eye out for any gaps or misalignment that might be the product of a hasty installation.

    Where the floor and wall converge, inspect your vinyl baseboard

    Your vinyl baseboards changing is another typical symptom of surveillance. Spy equipment frequently needs wiring for power or data transfer. Thus, the suspect must conceal wires.

    The area behind the vinyl baseboard is a popular hangout. In order to find a hidden microphone or wire, first search for a ridge, lump, or discoloration.

    Check the walls and ceilings for discoloration

    A circular area that is no bigger than a penny in diameter is a clue that you are being watched, regardless of how little it may be. Particularly small equipment that lies on the other side of a wall or ceiling, such as pinhole microphones or video cameras, may make an imprint.

    In your home or workplace, a familiar object or sign just seems odd

    In order to avoid detection, eavesdroppers strive to conceal their equipment. For this reason, people frequently choose nondescript fixtures like lights and clock radios.

    This implies that a damaged item is seldom left in the same condition. As a result, check to see whether any are slightly off-center, have an odd semi-reflective surface, or perhaps have a tiny hole. There doesn’t appear to be anything missing, but it appears like your documents or possessions have been disturbed or rummaged through.

    Inadvertently, eavesdroppers frequently believe that things are forgotten while hidden from view. As a result, they don’t worry as much about putting things back in their original places while digging through file cabinets, desk drawers, or dresser drawers. There is every reason to be cautious if anything seems a bit strange and isn’t precisely how you remember it.

    Additional sings of Spying at Your Office or Home

    Beware of suppliers or sellers carrying electronic gifts

    Giving you an alarm clock, radio, desk light, or nearly any other form of the electrical device is a common ploy. Despite the possibility that the gift-giver hid a microphone or camera, you don’t think it was bugged because you know them. Sadly, it doesn’t only apply to electronic presents. In particular, workplace accessories like pens, calculators, and even Post-It dispensers might include surveillance equipment.

    You get a copy of a private chat you had in writing or on tape

    This is unequivocal evidence that you were being watched. In order to let you know they have information on you, eavesdroppers occasionally send copies of private talks.

    You observe utility or cable company cars often performing “maintenance work” in your neighborhood or parking close to your house or place of business but with no one inside.

    As was already noted, eavesdroppers frequently set up shop in service vehicles to watch and listen in on your behavior. Of course, there are occasions when their presence is completely benign. However, if you spot the same track or van more than three times in a short period of time, it can mean you’re being watched. If you want to know if work is needed on your street, you can get in touch with the individual utility company.

    Unusual interference starts to appear on your television. Similar to your radio, surveillance equipment emits signals that might obstruct your TV’s reception, especially on UHF channels.

    You hear a tone on your phone line when it is hung up

    You may have a “slave” eavesdropping device connected to your phone line if you can hear a faint but persistent dull tone. There is a good likelihood that you are being watched in this situation.

    You might hear sounds coming from the handset when your phone is hanging on the hook

    Your phone’s receiver functions as a microphone when you use a hook switch bypass. When they are installed, they make noise when your phone is hung up. The fact that it works within a 20-foot radius of the phone adds another layer of difficulty. Therefore, even when you are not talking on the phone, someone can listen in on what you are saying.

    When you’re on the phone, your line makes strange noises like static, popping, or buzzing

    The use of wiretaps is another indicator of monitoring. A capacitive discharge happens when two conductors are connected to make a phone tap. The phone makes noises as a result of the capacitive discharge.

    Conclusion

    Hearing tones without somebody on the other end is the last indication that you are being watched. Even while it could only be a FAX machine dialing the incorrect number, the problem might also be caused by multiple listening bugs. The others include a harmonica insect, a line extender, an infinite transmitter, and a slave device. We hope this post helps.

  • How to See the Date You Became Friends with Someone on Facebook

    How to See the Date You Became Friends with Someone on Facebook

    The most well-known social networking site where you may establish an account and add contacts is Facebook. When you add someone you know, you can view the photos, videos, status updates, posts they’ve liked and commented on, as well as posts they’ve shared.

    If you’ve had Facebook for a while, you’ve definitely added a ton of friends throughout the years. You may view your friendship with someone since you added them on Facebook by looking at your history with them. You may view all of the posts you’ve shared with them, tagged them in, etc., taking you on a trip down memory lane.

    How to check when you became someone’s facebook friend

    You may use the activity log and the friendship function on a friend’s Facebook page to check when you became friends with someone on Facebook. This will enable you to be able to view the day, month, and year that you each accepted the friend request.

    You may find out how long you’ve been a Facebook friend with someone by using certain methods. The question “remember the date you promised to be their friend?” is one such example of such an approach.

    To find your most recent anniversary with a friend, use the other option, which uses the Activity Log feature. If you use the Friendship feature on your own Facebook page, you can find out when you first became friends, as well as other details like the posts you’ve shared, the friends you’ve connected with, and the pictures you’ve both been tagged in. You can also find out these details by using the Friendship feature on a friend’s page on Facebook.

    How to find out when and in what month you become friends with someone

    1. Search for the person you wish to view on Facebook using a web browser.
    2. Select See Friendship by clicking the three dotted lines next to Message.
    3. Your friend-making month and year will be listed on the left.

    How to Determine the Exact Date You Became Friends

    The month and year you previously located may be used to traverse a calendar and utilize it to identify the precise day, even though this approach is much more time-consuming because you’ll have to scroll through one.

    1. Select Activity Log under your profile.
    2. Choose More from the left column.
    3. Friends can be found in the left column.
    4. On the calendar on the right, choose a year.
    5. You may view the precise day that someone becomes your buddy.

    By using the social engineering Method to find out how long you became friends with someone

    By enquiring about their opinion of your friendship with them.

    You may always ask them if you can’t recall when you became friends with them on Facebook. To keep track of how long they’ve been friends on Facebook, some users set up friend anniversaries on their pages.

    If a friend recalls when you first became friends, you should also create a friend anniversary so you never forget.

    Set up your anniversary as soon as the friend informs you of the date because it will depend on whether or not you can remember accepting their friend request. Facebook will let you know when that date is getting closer by sending you an alert.

    A message will show on your Timeline to remind you that you have been friends for a year once it has been a year since you accepted that specific person’s friend request. On that particular post, you can also see the year that you two became friends.

    Take a look at your initial Messenger message to them.

    You may always check the date you sent someone a Facebook Messenger message to discover when you two became friends.

    Facebook Messenger should now be visible on your smartphone. The home icon may be seen in the bottom left corner; click it to get back to the home screen.

    You may see a list of every user you’ve ever communicated with, arranged by the time you first interacted with them, on the home screen (most recent ones first).

    On this list, look for the name of the person whose earlier messages you want to read, then tap on their name to access their messages.

    The most recent discussion they had with you will be forwarded to you. Moving forward, you will need to scroll down to find the messages you were searching for.

    Downloading your Facebook data is an option if you don’t enjoy scrolling. Here is how;

    1. Access Facebook.
    2. At the bottom of the page, you may download a copy of your data.
    3. After entering your password, wait for Facebook to give you a link to the file’s download.
    4. After entering it once more, wait until the download is finished.
    5. Please extract/unzip the file you downloaded before opening it and entering your login information in the corresponding area. After that, an “index.html” HTML file will appear, which you should open.
    6. When it opens, select the Messages tab to access everything. Hopefully, your PC has the processing power to access every Facebook message you have!

    Take a look at the times you have tagged them in things.

    When a person is specifically mentioned in a Facebook post, a link to their profile is established, allowing everyone to learn more about them. This is known as a tag.

    When posting a text message or leaving a remark, you can add someone by using the @ symbol and their name. If you want to get a general notion of when you first became friends with someone, look through the photographs you’ve tagged them in.

    You must go to their page if you are unsure if you have ever tagged someone. Click on the profile after typing the name of a Facebook friend into the search bar.

    Select “Photographs” to view the photos. This section will display all of the images and videos that this user has been tagged in.

    Since the quantity of information you can see is controlled by the person’s privacy settings, which you have no control over, you might not be able to see all of the photographs.

    You will be able to determine the date, which will show when your Facebook relationship started if you see a familiar photo that you tagged the person in.

    Conclusion

    There are several techniques on Facebook to discover how you met someone. enabling you to remember each year when you first befriended someone There is an anniversary function on Facebook. We hope that these choices will be helpful.

  • How to Backup and Restore Your Contacts on MTN SIM Card

    How to Backup and Restore Your Contacts on MTN SIM Card

    On the MTN Backup Service platform, customers may save (backup) and recover their phone and SIM contacts. These services provided by MTN enable each user to randomly back-up and restore their contact anytime they want.

    Once you sign up for the MTN Backup service, all of your contacts saved on your SIM and phone will be transferred to your MTN online account.

    These contacts remain safe, so the excuse “I’m sorry, I lost your contact” will no longer be an acceptable defense.

    You can retrieve all the contacts and SMS backup on the MTN backup service, which is amazing since anything might go wrong with your phone or SIM, including theft or damage, and you receive a new mobile device.

    The MTN service provider also bi-weekly (every two weeks) automatically backs up all of its subscribers’ contacts in the belief that a person should update his or her contact list at least once every two weeks.

    This, in my opinion, is a great technology. All MTN subscribers can backup up to 200 SIM cards and up to 5000 mobile phone contacts, respectively. 

    Methods for signing up for MTN backup service

    If you have been ignoring the SMS from MTN that asks you if you want to back up your contacts, no problem. However, if you decide that you now want to back up your SIM and phone contacts, I will give you two ways to achieve so. There are essentially two methods for signing up for the service.

    1. Access your SMS menu.
    2. compose a text message with Start in it.
    3. submit it to 307
    4. patiently await an answer from the MTN online account service
    5. On your phone
    6. Access your menu
    7. Decide on MTN Service.
    8. Decide on MTN Backup

    Then watch for a reply message. If you’re still having trouble, call the MTN online customer assistance center at (181) or (18O).

    NOTE: It is important to keep in mind that any type of mobile device may be registered with the MTN backup service, including SMS and Contacts, with the exception of Windows OS users, who can only back up their contacts.

    Restoring a backup contact

    Typically, after you register, you’ll receive an SMS with a piece of login information that includes your username and password, allowing you to access your backup contact.

    You’ll need to enter your login information to log in. You can utilize the Don’t have an account yet or the Forgot your Password options if you accidentally did not get them or are likely to have forgotten them.

    What is the cost of MTN’s backup service?

    The MTN backup service has a fee; at the time of registration, you will be charged GHS 5, and then GHS 2 every two weeks. This price is charged regardless of how many contacts you back up, that is, each time MTN updates the backup service.

    Can I ask MTN to stop providing backups for my contact?

    You can stop using the MTN backup service at any time you choose by sending an SMS with the word STOP or UNSUB to 307. The service is not required.

    Conclusion

    That is all about How to back up and restore your contacts on MTN SIM Card. We hope this post helps you to back up and restore your contact.

  • SHAQ Express adjudged Postal and Courier Company of the Year

    SHAQ Express adjudged Postal and Courier Company of the Year

    A wholly Ghanaian-owned tech startup, ShaQ Express, has been adjudged the marketing-oriented Postal and Courier Service Company of 2021 at the just-ended 33rd Chartered Institute of Marketing, Ghana (CIMG) awards.

    ShaQ Express, which has revolutionised the postal and courier sector beat of competition from its counterparts to emerge victorious in the landmark awards.

    The company as presented a certificate and a citation at the awards held over the weekend. It is organised by the CIMG.

    This year’s event brought together big players in diverse industries to celebrate their marketing efforts toward the economic growth of the country.

    The citation said the prestigious award given to ShaQ Express was in recognition of the company’s excellence in strategic marketing, from marketing insights through the effective formulation of marketing mix programmes that helped to create value for the market, thereby delivering excellent results.

    The Managing Director of ShaQ Express, Anthony Owusu-Ansah, said it was an honor to be recognised by a giant institution like the CIMG in the young life of the company.

    “This is a huge win for the business, and we would like to thank our customers. We are here because of them. They challenged us to go above and beyond, and we owe this to them,” he said.

    About ShaQ Express

    ShaQ Express is an electronic commerce and logistics company seeking to provide a connected digital experience between vendors and customers.

    By providing a seamless platform, ShaQ Express allows vendors and shops to sell and also gives the convenience to customers to shop from a variety of stores, order food and cakes and move packages from one point to another.

    The businesss, which started in 2020 as a delivery business, offering swift, secure and reliable services to customers in Accra, has now grown into a technology startup built around marketplace and logistics.

    It currently has an active user base of over 13,000 customers, operating in four regions, namely Greater Accra, Central, Northern and Ashanti regions with plans of expansion to the other regions in Ghana and certain African countries in the pipeline.

    Electric bikes

    The company deployed electric bikes in Accra earlier this year as part of efforts to operate in a sustainable manner and also to cut down on its recurrent expenditure, particularly fuel.

    Although a burgeoning business with dozens of delivery companies in operation, not many courier operators use electric motorbikes, making ShaQ Express one of the first companies to do so in the country.