When you share a Facebook post with someone other than yourself, Facebook enables the target audience to see the post, respond, leave a remark, and share it with others.
It’s simple to see how many people have shared your post on Facebook, but whether or not you can see the identities of all of those individuals depends on your privacy settings.
There are a few ways to find out who you shared with, and Facebook lets you modify your sharing options to match your privacy requirements.
In this post, we will list out two possible ways to answer the question “How to see who shared your post on Facebook”.
How to See Who Shared Your Post on Facebook
Checking Your Facebook Notification
Once you’ve logged in to Facebook, select the bell symbol on the right side of the blue navigation bar.
After that, anytime you get your post shared, liked or commented, you will be notified on your notification bar.
If you recently posted something, you’ll see all the latest information about it, including comments, likes, and who shared it.
Checking Your Timeline on Facebook
In the cover book of your timeline, you may also see who shared one of your posts. The procedures below might be used to find out who shared your post.
Go to your “Profile Name” and click to access your timeline.
You may view a list of the posts you’ve made on Facebook in reverse chronological order on your timeline.
As a result, your most recent post will be displayed first.
Below the post, you’ll see features for liking, commenting, and sharing.
Check the “to share” section of your Facebook post to see who shared it.
The number of times your post has been shared on Facebook will be updated here.
Simply click “to share” to view the user who shared your content. Also visible is the person’s name.
Can i check who shared a post that Is not mine?
You can also check who shared a post that isn’t yours as long as the respective post is public. To do so,
Go to the page of the person or organization that published that post.
Click on the button indicating the number of shares.
A list will pop up with the names of the people who shared that post.
Is it important to see who shared my Facebook post?
How important who shared your post depends on you. You may have posted something vital on your timeline and you want to see how far it has reached. For that, it will be necessary for you to check its progress and see how far it has gone so thats makesuit important for you to keep tabs
Conclusion
I just showed you how to discover who shared your Facebook post. You may discover who shared your Facebook posts using the methods mentioned above in two straightforward ways.
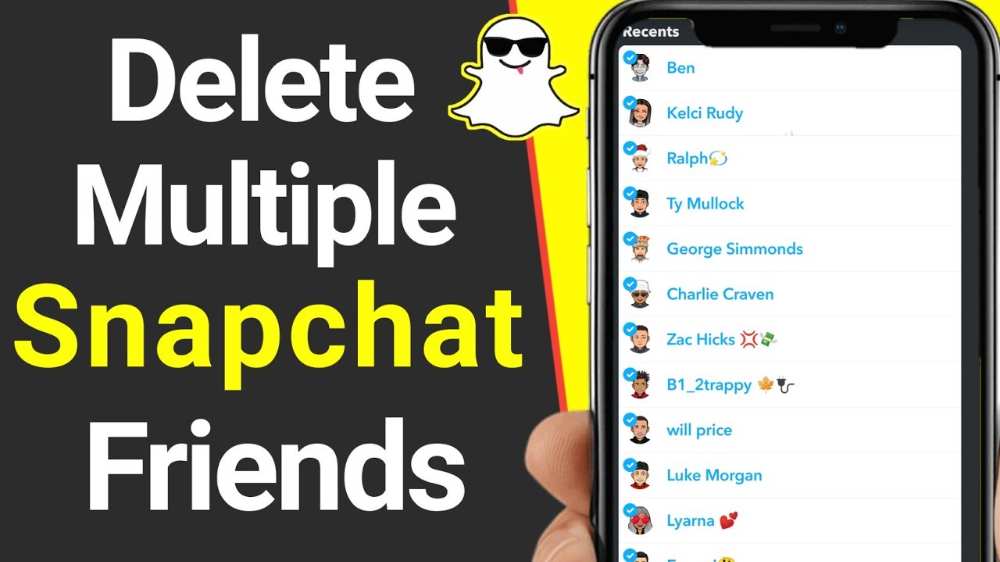
You might wish to swiftly delete a large number of your Snapchat buddies and are unsure how to go about doing so. You might as well stop using Snapchat and other social networking applications if you don’t have many friends to interact with there.
Speaking with them, making Snapchat calls, and competing with their streak scores are all more enjoyable the more friends you have on Snapchat. Having a lot of Snapchat friends, especially strange ones, is never nice since you’ll receive a lot of unsolicited messages and snaps.
What Normally Occurs When You Delete A Snapchat Friend?
They won’t be able to see any stories or other anything you have posted that is not public after you delete them as a friend. The history of your conversations will also be erased, and they won’t be able to see you on the Snap Map. Unadded friends can still see your public stories if you make them public.
How to delete more than one snapchat friend
A built-in capability to choose multiple friends for the deletion or unadding does not yet exist. You do have a few choices, though:
You have the option of deleting your whole Snapchat account, creating a new account, and adding your old friends again.
Each friend can be eliminated separately (which may take a long time.)
To expedite the entire procedure, utilize a macro tool.
1. Delete your Snapchat account completely
All of your pals will undoubtedly disappear from your Snapchat friends list if you delete your account. Additionally, everything connected to your account—memories, saved stories, chats, Snap Score, and more—is deleted. Your Snapchat account enters a 30-day “deactivation period” after deletion. Everything is permanently destroyed after the 30-day period has passed.
As you wait, you may create a new Snapchat account and add all of your remaining friends. This can wind up being the best option if the information associated with your Snapchat account isn’t crucial to you and you have too many friends to attempt to delete.
First, click the supplied link to launch the Snapchat portal.
The Snapchat site will appear. Open the “Delete My Account” link in the support section.
To continue with account deletion, follow the link.
When it opens, type your Snapchat password and username.
Log in to your account after providing the necessary information.
You will input the OTP given through it and click the “Submit” button after receiving it on the cellphone number associated with your account.
A page titled “Delete Account” will then be shown to you.
Click the “Continue” button after entering your login and password a second time.
All of your friends’ accounts, including yours, will be terminated simultaneously.
2. Remove Friends One by One
We wish to avoid this one since it is tiresome. However, it is usually simplest to just remove fewer than 100 friends the traditional method.
Removing a buddy shouldn’t take longer than 10 seconds if you’re attentive. This implies that you have to be able to cut pals at a rate of at least six every minute, or 180 per hour. You may unfriend someone on Snapchat by doing the following:
By selecting the Bitmoji symbol, navigating to the bottom, and selecting “My Friends,” you may access your friend list.
Locate the buddy you wish to cut off.
For a few moments, hold down on their name until a box appears.
Select “More.”
To remove a friend, click.
On the confirmation box that appears, select “Remove.”
This procedure completed completed in 5 seconds or less if you’re quick, according to a source. This would still be finished in under 2 hours, even if you were to remove a staggering 1,000 individuals. and most likely act as a useful reminder to be pickier about who you choose to include in the future.
Will someone on Snapchat notice if you remove them and then add them back?
There is a potential that they will find out if you remove someone from Snapchat and then add them back. If they don’t find you thereafter using the search feature to look for the newly added friends, they will know that you have unfriended them. They could, however, believe that you blocked them.
Apply a macro
This is a fascinating one. Maybe you’ve never heard of a macro, it’s basically a means to record an activity that you want to repeat continuously on your phone for as long as you like.
You can even speed up some macros so you can simulate taps on the screen more quickly than people are physically capable of doing so!
Therefore, the concept is to record a macro of a buddy being removed. The procedure is then automatically repeated by the macro so you don’t have to.
The program plainly has no notion who you want to keep and who you don’t, which is the sole drawback of this tactic. It can go through your list of friends and delete them one at a time for you, but it cannot ignore those you want to keep.
Even so, this could be a better option than completely deleting your Snapchat account and losing all of the associated data.
How to Make Your Phone a Macro
Currently, only Android phones can use macros (although there is a workaround for iPhones that I’ll cover in a bit).
Since every macro app is unique, discussing the precise programming of each is outside the purview of this tutorial. But some of the most well-liked Android macro applications are as follows:
MacroDroid
AnkuLua
QuickTouch
Automate
E-Robot
NB: Even though everyone on your friends list would be deleted if you delete your account, this should only be done as a last resort. If you need to unfriend a big number of individuals, do it one at a time or with a macro. Even while it is frustrating, if you remain focused, it actually doesn’t take that long.
Conclusion
Despite the fact that Snapchat doesn’t have a built-in feature to delete numerous friends at once, there are a few workarounds
2010 saw the launch of the messaging platform Kik. Kik is currently one of the top platforms for online dating and forming friendships throughout the world.
As part of a recent upgrade, Kik now offers the “Go Live” function, which enables users to interact with other users while watching live videos and broadcasting their own content.
So let’s examine how to use your gadget to join the live chat on Kik.
The most effective chat messaging service to communicate with friends and strangers worldwide is undoubtedly Kik. You may create public or private groups, exchange images or videos, send stickers or emojis, gifs or memes, and doodle messages.
Not long ago, Kik launched “Go Live,” a new feature on its platform (somewhere on June 9, 2021). With a recent upgrade, Kik now offers free live broadcasting and going live. Additionally, you may give presents to other Kik members as well as watch their live streams online.
Kik Live: What Is It?
Since we now know that the Kik app allows live streaming, let’s examine what Kik live is in the first place. You may live stream to other users of the Kik program using this function. As a result, every Kik user may utilize this platform to reach a wider audience. What are the advantages of using Kik live?
Benefits of Going Live on Kik
Making new friends on Kik
Live-streaming videos are the most efficient tool for connecting with people across the globe. Making new acquaintances and establishing connections with them is a fundamental human right.
As a result, you might meet a lot of new individuals from all around the world if you start broadcasting on Kik. You don’t need to add them to your Kik app; just create a live-streaming video and invite users of Kik to participate if they find it interesting.
Gain More Kik Followers
Kik, like the majority of social networking sites, lets users follow one another if they enjoy their content. So, by creating engaging and fun live streams, you may gain more followers on the Kik app. This can encourage others to follow you on Kik.
Create a more effective business profile on Kik
When several channels enter the business, the portfolio of that firm becomes stronger. Kik may most certainly be used as a platform for company marketing. The live feed may potentially obtrude and draw viewers to your establishment. Be inventive in your approach, and you’ll be grateful for the advantage Kik live stream will probably give you.
How Does Kik Live Stream Work?
Your live stream is shown in the application’s live area after you go live on Kik. Anyone who taps on that area will be able to see your live broadcast and participate.
You must be a well-followed user on the Kik program in order to compete and move up on the live stream page. After that, you may access the leaderboard, where users can touch on the live streams that are displayed on the front.
By asking to join the live session, users may also watch your feed in real time. Alongside less well-known live streams, you may also challenge more well-known ones.
Can you go live with the Kik application?
In their most recent update, Kik included a feature called “Go Live.” Due to the significant amount of critical comments Kik was receiving, they had to develop a better and safer platform for their users. Today, the “go live” function has generated attention and established Kik as a popular online platform.
Before, neither the Kik app nor the Kik desktop version had a Kik live feature option for live streaming. The new and unique feature that Kik incorporated in the most recent version to initiate and conduct Live Video calls within the Kik application is called “Go Live.”
What are kik live stream guidelines and conditions?
Kik established various guidelines for its users after receiving criticism from many of its users for being graphic and containing inappropriate content. The guidelines and conditions for live streaming on the Kik app are listed below.
Nudity or pornography is prohibited.
Bullying And Hate Speech Are Not Acceptable
Unlawful Conduct
Living with children
Minors cannot watch streams
False Identity
How can i go live on Kik using iPhone or Android
Open the Kik app
Sign in with your account
Tap the Live icon
Select Go Live.
Accept the terms and conditions.
Press The Got It button
Begin Your Life
How can you cancel a live kik
You can terminate the live session at any time by following a few easy steps if you decide for whatever reason that you no longer wish to stream.
Click the End button on the live
Press the X icon after selecting “End Stream.”
How can i watch a live stream?
Users may now stream live videos to their contacts using Kik’s new Kik Live functionality. The procedures listed below might let you join a friend’s Kik Live session.
Start Kik
From the bottom right corner, select “Live.”
Choose the participant(s) for their live session. Kik Live may also be joined by choosing from the categories For You, Trending, New, and Favorites.
To exit someone’s Kik live broadcast, just hit the “X” icon in the top right corner.
How Secure Is Going Live On Kik?
A secure live broadcasting platform is available on the app Kik. You may research the privacy and security of the Kik application. You don’t need to worry about your safety if you just join other people’s live broadcasts or go live on Kik.
Make sure, nevertheless, that you abide by all the guidelines for using the application as well as going live. You must avoid viewing objectionable information if you are a minor user. Apart from that, Kik is a secure live-streaming service.
Is Kik live stream unrestricted?
Kik live streaming is, in fact, entirely free. It costs nothing to watch someone else’s live stream or to go live yourself. You are only needed to pay money if you want to send presents and prizes to other users, for which you must make an in-app purchase. Everything on the Kik live broadcast is free except than this function.
Are Kik live streamers paid?
Live broadcasters on Kik may, in fact, use their gifts and incentives to purchase in-app currency. Your Kik gifts and awards may be exchanged for real money. With these incentives, you may also make further purchases.
What is the purpose of Kik Live?
Kik Live enables you to create a live-streaming video and share your ideas and opinions online.
Is it possible to remove Kik Messenger’s live stream feature?
It is possible to uninstall the live function on the Kik app without any problems, but you must download the previous version of the program.
Conclusion
Finally, you may use your iOS or Android device to go live on Kik by following a few easy steps. However, before you start live streaming, be sure to abide by the necessary laws and standards. If you want to become a widely known live streamer on the Kik application, you need also be aware of what going live implies and the types of live streaming that attract more viewers.
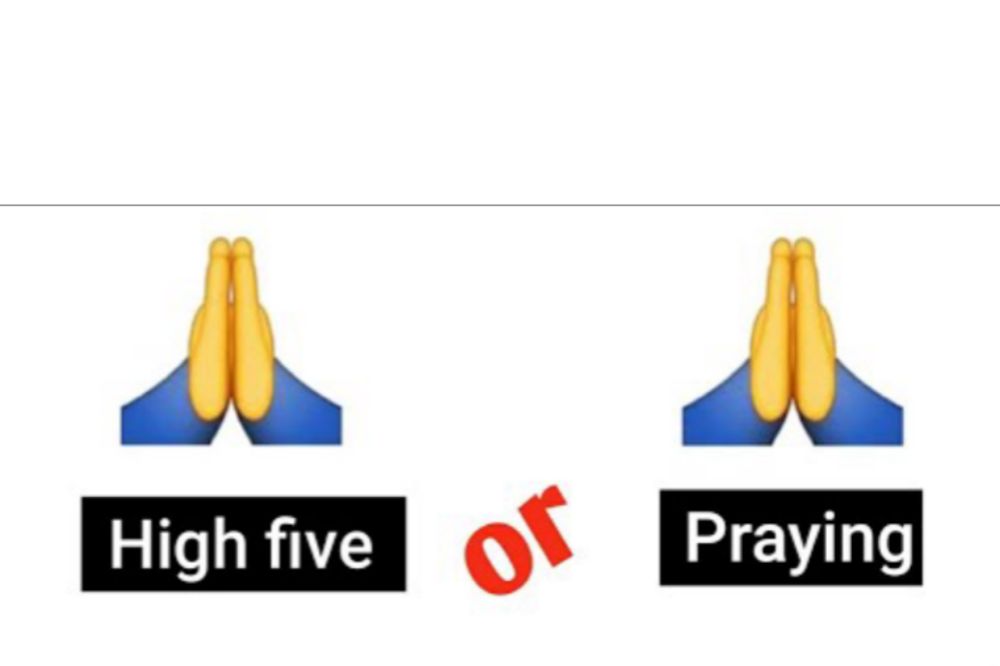
There has been much discussion over what exactly this emoji, formerly known as the “person with folded hands emoji,” signifies. While some claim it’s a high five, others say that it’s handed in prayer.
Additionally, it can be used to express gratitude or request something. Previous versions of the emoji included images of thumbs and light rays coming from the hands as well as variations on the emoji’s actual picture.
Individual interpretations and the symbol’s importance in different cultures may lead to variations in usage. In Japan, holding hands together might be interpreted as “thank you.” Hands clasped together are symbolic of the “Namaste” salutation in Hindu culture. It translates as “I submit to the divine in you.”
Prayer hands vs high fives
Although it’s OK to use this emoji to give a high-five, the majority of evidence suggests that the hands are clasped together as if in prayer.
The sleeves on both hands are the same color and pointed in the same direction. This shows that the hands are joined together rather than belonging to two different persons, indicating that the configuration is a “prayer hand” rather than a high-five.
The controversy and misunderstanding around this emoji serve as a reminder of the subtleties of written and visual language. As with anything else, the context of how this emoji is used should be taken into account. And it’s typically okay to inquire if something is extremely unclear.
On iOS, an earlier version of this emoji had a yellow flash of light behind the two hands. Android 5.0 displayed a blob character with closed eyes and clasped hands.
Under the name “Person With Folded Hands,” Folded Hands was accepted for inclusion in Unicode 6.0 in 2010 and added to Emoji 1.0 in 2015.
Additional Names
Please
pray
say a quick
namaste
thank you.
The actual name of the symbol in question is “Folded Hands,” according to all sources used to categorize emojis (including Unicode).
The “Folded Hands” image was classed by the instant messaging service Slack under the keyboard command “:pray:,” and according to an entry in an encyclopedia, its major meaning is “please or thank you in Japanese culture.” The emoji is frequently used in phrases like “pray,” even though its official name is “person with folded hands.”
Conclusion
The explanation comes in folds so however you want to use it depends on you. How it will be explained depends on the sentence you are using it for.
One of the most widely used social media networks nowadays is Snapchat. It is an application that offers users the ability to communicate with one another using images or snaps.
With the aid of this social media platform, many individuals also get to speak with new people. Many people are curious about the fundamental words used on Snapchat. We’ve put together thousands of Snapchat slang and their definitions and meaning today.
About snapchat slangs
Snapchat is an instant-messaging app that lets users send and receive photos, texts and videos (known as Snaps) for up to 10 seconds before they disappear.
Snapchat users have created their own unique language, known as Snapchat Slangs, for easier communication and also include emoticons that convey how someone is feeling at any given time.
We take a look at some of these slangs and emoticons that you might want to keep in mind when using Snapchat or conversing with other Snapchat users.
Snapchat slangs and their meaning
Snapchat Slangs
Meaning of Snapchat Slangs
Atm
At the moment
Amos / Amosc
Add men on snap /Add me on Snapchat
Asl
Age sex location
Asap
As soon as possible
Alr
Alright
Alt
Alternatives
Awl
Always with love
Brb
Be Right Back
Bml
Bless my life
BMS
Break my scale
BTS
Be there soon
CBA
Can’t Be Arsed
CBF
Can’t Be F**k
CC
Carbon copy / Credit Card
CYA
Cover your A**
DM
Direct Message
DTB
Don’t Text Back
DW
Don’t Worry
DWU
Don’t wait up
FFF
Follow for follow
FGF
Formal Girl Friend
FPF
Favorite Person friend
FR / FRFR
For real /For real for real
FT / FTM
Face Time / FaceTime Me
FWB
Friends with benefits
GM
Good Morning
GN / GNS /GNS
Good Night /Good night streak /Good night/ Snapshot
HBU
How About You
HG
Holy Grail
HKD
Hate Kill Destroy
Hon
Honey
Hsub
Husband
HTL
Hit the line
HRU
How are you
IBF
Internet Best Friend
IDK
I don’t know
IDC
I don’t care
IDM
I don’t MInd
ILYSM
I love you soo much
IML
In my life
LGHT
Let’s Get High Tonight
LK
Low Key
LLS
Laughing like shi*t
LMAO
Laughing my A** out
LML
Laughing Mud Loud
LOL
Laughing Out Loud
LOML
Love of my life
SMH
Shaking My Head
WCW
Woman Crush Wednesday
How important are Snapchat slangs?
Snap chat slangs makes chatting simple and easier. It also makes non snap users not to decode what Snapchat users are communicating about, making it interesting and unique among the other social platforms.
Conclusion
With slangs in snapchat, communications become easier. As a snapchat lover, its necessary to know your popular slangs in order not to be behind the new trends.
Are you attempting to modify your Amazon billing address? Changing your billing address is simple and only takes a few minutes, whether you’re planning to place an order or have already done so.
Regardless of whether you’re using a computer or a mobile app, we’ll walk you through the process in this post.
About amazon billing address
A billing address is where Amazon will send your orders, but it doesn’t have to be your current home address or even one that you check frequently.
You can designate any address for shipments, as long as it meets Amazon’s guidelines for a valid delivery address, and note that you can also set up more than one shipping address if you’d like to give gifts or ship items elsewhere more easily.
Why you may want to change your billing address
One way criminals get credit card information is by getting their hands on unshredded billing statements. If you are trying to avoid identity theft, it’s important to know what your shredding requirements are.
How to change Amazon’s billing address on a PC
Initially, visit Amazon’s official website.
If you haven’t done so previously, you must log into your Amazon account next.
The Accounts and Lists option must be selected next.
From there, you must choose the “Payment Options” link.
The list of all the cards you’ve added to your Amazon account is the next thing you’ll see.
After choosing any of the cards, there is also a button to modify or update the “Billing Address.”
Following the directions on the screen, you may then modify the “Billing Address.”
How to change your Amazon Billing Address using the Amazon App
Therefore, we have demonstrated how to alter your Amazon billing address on the desktop version of Amazon’s website above. On the Amazon app, you may, however, also alter the billing address. And we shall discuss I in this section.
On your smartphone, launch the Amazon app.
If you haven’t already, log in to the account from which you wish to alter the billing address.
The next step is to touch on the hamburger icon or the three horizontal lines in the top-left corner of the screen.
Following that, you must tap on Your Account on the left sidebar.
Following that, you must scroll down and touch on the option labeled “Manage Payment Options” on the following screen.
You may get a list of all the cards linked to your account on the following page.
Additionally, you will see an Edit option underneath each card. So choose Edit from the menu.
Will changing amazon billing address affect my account?
Changing amazon billing address will have no negative impact on your account. You can continue using your account manually. But whenever you want to make an order, note that, your new address will be where the delivery will be sent to
Conclusion
Changing your amazon billing account should not be a struggle for you if you follow the steps above. I hope these steps help you to resolve the issue of changing the billing address in your amazon account.
It might be difficult to begin a new paragraph on Facebook Messenger, especially if you’re accustomed to using your computer’s default text editor. On Facebook Messenger, there is no set method for beginning a new paragraph.
When writing longer texts, paragraphing is a crucial factor to take into account. Paragraphs can help you communicate your ideas more clearly, whether you’re sharing a crucial fact or an engaging tale.
How to start a new paragraph in Facebook Messenger
Method 1
Using your desktop and laptop browser
On your PC’s web browser, go to FB.com or Facebook.com.
Enter your Facebook ID now by giving the necessary information.
Then, from the top menu bar, select the ‘Message’ icon.
You may now pick any of the discussions you want to start from the list.
Choose the recipient of your message accordingly.
As a result, the chat box will show up on the screen.
Enter your message in the message field to begin.
Simply press the “SHIFT+ENTER” keys on your keyboard simultaneously every time you want to add a new paragraph or a line break. In this manner, you will be able to observe that a new line break has been made and the message has not yet been delivered.
In a PC browser, this is the simplest method for adding a new paragraph to Facebook Messages. All you need to do is keep in mind the shortcut key combination “SHIFT+ENTER” to use that.
Another brief hint is that if you need to manually create a new paragraph or a line break in any other programs, you may use this shortcut key combination to do so.
If you haven’t already, sign into your Facebook account first. Start typing your new status update in the relevant area now.
Now, for PC browser users, adding a new line is as easy as pressing the Enter key twice on your PC keyboard. This will create a new paragraph or line break.
Additionally, users using the Facebook app for smartphones can touch the “Done” or “Enter” key on the floating/virtual keyboard on their device’s screen.
Using the Facebook app on mobile phones
If you haven’t done so before, first log into your Facebook account.
In the relevant area, begin by typing your new status update.
In order to add a new line, PC browser users just need to hit the “Enter” key twice on their keyboard.
New line breaks or new paragraphs will be created as a result.
For those who use the Facebook app on their smartphone, you may also touch the “Done” or “Enter” key on the floating/virtual keyboard on the device’s screen.
The result will be the addition of a new paragraph.
Method #2
You can easily add a new paragraph to a status update by clicking the “Enter” key twice on your keyboard if you’re using Facebook’s desktop version. This adds a line break so that you may begin typing the following paragraph after the first one.
If you’re using a mobile browser or the Facebook app on a smart device, the same technique will apply to status updates (smartphone, table).
The “Enter” option does not always start a new paragraph when entering and uploading a remark on Facebook. Instead, it works with the Facebook app on smartphones, tablets, and the majority of mobile browsers.
However, using the “Enter” key will only submit the remark while using Facebook’s desktop application. Thus, you must simultaneously press “Shift” and “Enter” to start a new paragraph.
Conclusion
I’m curious why there isn’t a way to start a new paragraph on Facebook. But everyone is aware that in the future, we will have the opportunity to add a new paragraph and perhaps other techniques to make our content appear more appealing. But until then, we must utilize two keys: shift and enter.
A lot of people don’t know that ShowMax can be added to your DSTV subscription, and so many people are missing out on the chance to watch movies and TV shows when they want.
This article will show you can add ShowMax to your subscription so you can watch new content whenever you want.
What is Showmax?
Showmax is a video on demand and online streaming service that offers a variety of movies, TV shows, and original content.
It was created by the same people who founded M-Net in 1986, but it’s now operated as an independent company.
It can be streamed or downloaded through a range of devices including smart TVs, tablets, smartphones and laptops.
How Do I Get a Showmax Account?
To get a Showmax account,
Visit showmax website using your PC or mobile device.
If you have a Showmax account, click Add on the top of the page next to your name.
If you do not have an account, click Sign Up on the top of the page next to your name
Fill out all required information and submit.
Verify your email and you will be automatically logged into your dashboard.
What Devices Can I Use To Stream on showmax
Showmax is available on a wide range of devices, all you need is an internet connection and the app.
For mobile devices you can download the app from the iOS App Store or Google Play store.
You can also stream straight from your TV by connecting your mobile device to your television using a HDMI cable.
Can I add ShowMax to Dstv subscription?
Showmax is one of the most popular streaming services available. It is the best way to watch TV shows and movies online. Most people know about Showmax, but not everyone knows how easy it is to get it on their DSTV subscription.
How to add ShowMax to your Dstv subscription
Showmax standard can be added to DSTV premium customers account with no extra cost to allow you to watch your shows whenever you want.
Not only for premium customers, DSTV compact plus, Compact family or Access customers can enjoy 50% off by adding showmax standard to their subscription.
How to add Showmax to your DStv subscription on your desktop for DStv premium customers:
To do so,
Login to your DSTV account.
On your dashboard, locate the Showmax banner.
Click ‘Activate’.
You’ll be prompted to create a Showmax account.
Click Create Account if you don’t have a Showmax account.
If you already have a Showmax account, just sign in and start watching.
Its just as simple as that.
How to add Showmax to your DStv subscription on your desktop for Dstv Compact Plus, Compact, family or Access customers
To do so,
Login to your DSTV account
On your dashboard, locate the 50% Off Showmax banner on your account dashboard.
Click ‘Activate’.
You’ll be asked to add Showmax for 50% off
If you want it, click ‘Add to bill’.
Then you’ll be redirected to the Eazy Self Service payment portal.
Under Select payment option, choose ‘Once off payment’ to top up your DStv account with the balance of the month’s Showmax subscription.
Enter your bank card details and click ‘Save and Pay’.
Once payment is successful, select ‘Activate Account’ to start watching Showmax.
How to add Showmax to your DStv bill from the My DStv app
Showmax can also be enjoyed on the my DSTV app. To do so,
Download the My DStv app on your iOS or Android device.
Login to your dashboard.
Select ‘Showmax on Us’,
Click on ‘Activate Now’.
If you are using a premium account, you can start watching
If you are using a non premium account, you will need to make a 50% payment with your card before you can start watching.
Conclusion
Adding ShowMax to your DSTV package is a great way of adding more variety and viewing options. Once you’ve paid for your subscription, you can have it added by to your account. If you’re not sure which TV show or movie you want to watch, it’s easy enough to browse through what’s available on the app until something catches your eye.
There are tons of videos on YouTube that are worth watching, but you can’t watch them all at the same time, right?
If you like to switch between work and play or vice versa, then you might want to learn how to download the transcripts of your favorite YouTube videos. In this article, we are going to talk about how to download transcripts of YouTube videos.
What are transcripts
Transcripts are text versions of audio or video recordings. They provide a record of what was said as well as who is speaking, and are often used for research purposes.
Transcription services may also provide translation services for people who speak languages other than English.
What are YouTube videos
YouTube is a video streaming site where users upload and share their own videos for others to view, comment on, or like.
There are many different types of content available on YouTube that can be enjoyable and educational.
Can you download transcripts from YouTube videos
With many hours of content uploaded every minute it can be hard to find time to watch all the videos you’re interested in.
One way around this is by downloading the transcripts of your favorite videos so you can read them anytime you have free time.
How to download transcripts of YouTube videos
How to download transcripts of YouTube videos using your mobile (android device or iphone)
Get to the videoyou want the transcript of on the YouTube app.
Click on the arrow next to the description to get the video details.
Scroll down and click ‘Show Transcript.’
You will then see the transcript popup under the video.
Clicking any of the timestamps will move to that part of the video you want.
Tap ‘More’ (mostly three dots) to select from the available languages to translate your transcript.
Now, download by copying the text from the transcript and paste it wherever you need to download it.
The downloaded transcript will appear as text just like in any other word document.
How to download transcripts of YouTube videos using your PC or desktop
Go to YouTube and find the video you want to get a transcript from.
Click ‘More‘ (mostly three dots) under the video description.
Click open the transcript window.
You will then see the YouTube transcript generator show up on the right side of the video.
Click on any timestamp to skip to that part of the video you want.
Click the down arrow next to the language at the bottom.
You can then translate the transcript into any available language.
Now, download by copying the text from the transcript and paste it wherever you need to download it.
The downloaded transcript will appear as text just like in any other word document.
Are There Any Other Ways to Get YouTube Transcripts?
Not all videos on YouTube will give you a transcript. For that, you need to find another way such as getting an extension such as notta chrome extension if you are using the chrome browser. The extension will easily transcribe the video you want and then, you save them into any format you desire.
Is transcript important?
A transcript is an audio recording that has been transcribed into text.
Transcribing a video can be a helpful tool when you are trying to learn something new, need clarification on something that was said, or simply want to read along with a video.
Conclusion
Now you know how to transcribe a video into text format and get along to know what want said that you didn’t understood. Transcription will make such difficulties abit easier.
There are several ways one can purchase data bundle in Ghana. It can be a direct scratch card, credit transfer, purchasing from MoMo and also from bank accounts.
Technology has now made life easier. If you don’t have physical cash on you and you run out of data, you can purchase from your bank account directly.
Do Banks in Ghana supports data purchases?
Several banks in Ghana has embraced the new technology world and are moving alongside. With that, most banks in Ghana now has ways you can transact with them even without visiting them. So yes! You can purchase data bundle from your bank account.
How to buy data directly from your bank account in Ghana
To buy data from your bank account, you can either use the banks mobile banking app or the banks USSD code. To do that, you must have already been registered for the service. if not, you would have to do that before you can make a purchase.
Below are banks in Ghana and their attached USSD codes. All you have to do is to dial the USSD code with the number you registered or want to register and link your bank account to.
From there, you can follow the remaining simple procedures to purchase data or airtime from your bank account to any number of your choice in Ghana.
Banks in Ghana and their USSD codes
Bank in Ghana
USSD Shortcode
Prudential Bank
*772#
Access Bank
*901#
GT Bank
*737#
Cal Bank
*771#
FBN Bank
*894#
ADBank
*767#
CBG Bank
*924#
Fidelity Bank
*776#
First Atlantic Bank
*442#
GCBank
*442#
Republic Bank
*771#
Stanbic Bank
*715#
Standard Chartered
*977#
UBA Bank
*822#
Zenith Bank
*966#
You can also download the mobile banking app of the above banks by visiting Google playstore or appstore, type in the banks name in the search bar and then make a search and downloand the app.
Register if you have not yet done so and link your bank account and your mobile money number together. Now, you can easily buy data or airtime whenever you desire from your bank account to any mobile number you want in Ghana.
NB: Not only will you be able to buy data or airtime using the above USSD codes but you can easily bank from any comfort zone of yours in Ghana without visiting the bank.
Conclusion
Banking has now been made easier with mobile banking apps and USSD codes. Now, you don’t need to visit your bank and be in a long queue. You can do almost everything on your phone with less stress and buying data and airtime is no exception.