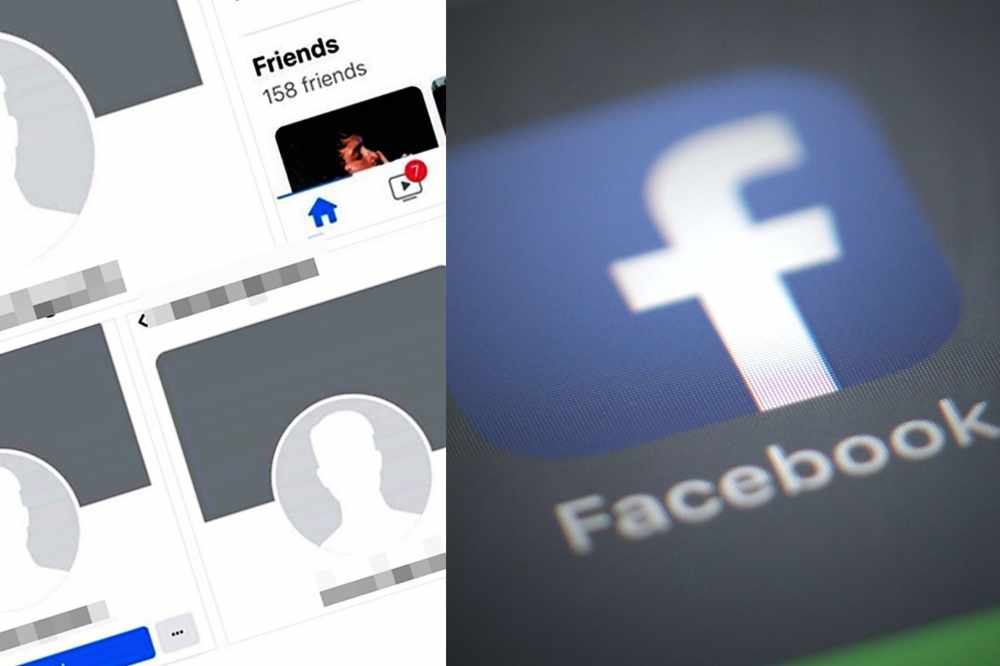
Category: Guides

  • How to Set Alarm on Apple Watch

    How to Set Alarm on Apple Watch

    Set an alarm on the Apple Watch to ensure you always wake up on time. If you own an Apple Watch and have the most recent version of watchOS installed, you can set an alarm that will wake you up in the morning, even if your iPhone isn’t nearby.

    About apple watch

    Apple watch is an iPhone companion, a health and fitness tracker, a messaging device, and also your watch. It runs apps just like your phone. It’s also very stylish and if you have one I’m sure you will love it.

    However, with so many features and purposes, it can get confusing sometimes. But setting alarm for your event and activities reminder shouldn’t be confusing for you.

    How to set up alarm on apple watch

    If you want to set up an alarm on your apple watch, the steps below can be your guide;

    1. Open the alarms app on your apple watch.
    2. Tap on add alarm.
    3. Edit time to your satisfaction by toggling the AM or PM, then tap the hours or minutes.
    4. When you are done editing, tap on done to save your alarm.
    5. Now, tap on the switch to turn on the alarm.
    6. When editing, you can set alarm to repeat, label, and snooze.
    7. If you want alarm to go on without making a noise, you can set your phone to silence and when it’s time, the alarm will vibrate only.

    When you switch on the SNOOZE, your alarm will repeat itself after its done ringing and there has been no action. If you don’t want such to happen, then you have to turn the SNOOZE off.

    How to turn off snooze on apple watch

    When an alarm sounds, you can tap Snooze to wait several minutes before the alarm sounds again. If you don’t want to allow snooze, follow these steps:

    1. Open the alarms app on your apple watch.
    2. Tap on the precised alarm you want to edit in the list of alarms.
    3. Togglw through to locate Snooze and turn it off.

    How to skip a wake up alarm

    In setting your alarm, you may have scheduled them for the week but now, you want to skipup specific day since you don’t need the alarm to remember you of it.

    Then, you have to skip it so it doesn’t affect the other schedules. To skip a wake up alarm,

    1. Open the alarms app on your apple watch.
    2. Tap the alarm that appears under sleep or wake up, then tap skip for tonight.
    3. Thats it!

    How to set same alarms on both iPhone and apple watch

    You may want to set your alarm on both of your iOs devices so it doesn’t disappoint you. Incase the apple watch alarm doesnt go off at the right time, it will go off on the iPhone. But if the apple watch alarm goes off, it won’t ring on the iPhone. To do so,

    1. Set the alarm on your iPhone.
    2. Open the apple watch app on your iPhone.
    3. Tap My Watch
    4. Then tap Clock
    5. In the clock section, turn on Push Alerts from iPhone.
    6. Thats it!

    Conclusion

    Alarm is essential when you are a busy person who always needs to wake up on time for your activities or a forgetful person who always wants to get remembered for something important. Set your alarm on your apple watch and reduce the pressure.

  • How to Find People Online Easily

    How to Find People Online Easily

    If you’re looking to meet new people or even someone you already know, it can be difficult to know where to start.

    There are plenty of ways that the internet can help you find people online easily, including social media sites, dating sites, and even forums dedicated to specific hobbies or interests that will help connect you with people who share your passions.

    Here are some ways that you can use the internet to find people online easily.

    Is it easy find someone online

    Whether you need a new friend, a significant other, or just someone to help get through a tough time, finding people online can be surprisingly easy and rewarding.

    Whether you’re looking for new people or someone you already know or simply hoping to find new connections in your personal and professional networks, these tips will help you locate the person easily.

    How to find someone online using their name

    Finding someone online with their name can be sometimes challenging. The question will be, how? Well, with a search engine assistance, it can be somehow possible as people do alot of their activities on the internet.

    To find someone online using their name, visit any search engine and type in the name of the person in quotation. Eg “kwame mfidie”. If you know of any other information such as address of stay and others, it will be advisable to add so the search can be specific on such person.

    How to find someone online using their phone number

    One of the best ways to find someone is by using their phone number. If you know their phone number, you can search the number through some popular social media sites like Facebook, LinkedIn or even WhatsApp.

    Through that, you can find the persons activeness on social media. However, if the number is not a social media linked number, then you have to choose a different method.

    How to find someone online using their email address

    Alot is done on the internet nowadays with email address. There is no way you can register for an activity online without your email address or phone number. Because of that, most people are connected online through their email address.

    Open any search engine and type in the email address with a quotation mark. Eg: “[email protected]” and if the email of such person is connected to any social media account, you can follow through to check them out.

    How to find someone online through social media

    Who are you trying to find online? Everyone has his/her reasons. Some may just want to find someone they can chat with to kill off boredom and others also want to track someone they already know. Well, social media platforms can be of help in any of your search query.

    To do so, visit any social media site of your choice. There are many to make mention of, try finding someone who seems active by looking at the time of their last activeness and your current time. If it matches your preferences, then you already know what to do next.

    Conclusion

    Finding someone online can be challenging especially if its someone you already know and has few details of the person. But I’m sure with the above methods, it can be of a bit helpful. If not, then you need to use other ways to do so.

  • How to Use 2 WhatsApp Numbers on an iPhone

    How to Use 2 WhatsApp Numbers on an iPhone

    iPhone is one complicated device that needs external attention to get used to compared to android which is an easy go and a carefree device. There are lots of cracks android can do but iPhone can’t all in the name of security reasons.

    In this article, let’s discuss about how you can install two WhatsApp application on one iPhone and use all of them together with no worries.

    About WhatsApp

    WhatsApp, is a messaging and voice over service owned by American company. It is runned on mobile phones and allows users to send text and voice messages, make voice and video calls, and share images, documents, user locations, and other contents across the world.

    Can you use 2 WhatsApp on one phone?

    Yes. It is now possible to use two WhatsApp on one phone. For android, it has been possible for a long time but such was not allowed on iPhones. Now, you can also use 2 WhatsApp on one iPhone.

    Will using 2 WhatsApp on one iPhone cause any problem?

    With a safe and genuine method, using two WhatsApp on an iPhone will cause you and your phone no harm. All you have to do is to use genuine methods that is acceptable by the mother company of WhatsApp and you will have no problem having two WhatsApp on an iPhone.

    How to Use 2 WhatsApp Numbers on an iPhone

    You can use two WhatsApp on an iPhone by downloading WhatsApp Messenger and WhatsApp Business from appstore.

    To download WhatsApp Messenger,

    1. Visit appstore on your iPhone
    2. In the search bar, type in WhatsApp Messenger and hit on search.
    3. Click on install to install it on your iPhone.
    4. Now, open the app and verify with the mobile number you want to use.
    5. Congrats! You now have installed and verified WhatsApp Messenger on your iPhone.

    To download WhatsApp Business,

    1. Visit appstore on your iPhone
    2. In the search bar, type in WhatsApp Business and hit on search.
    3. Click on install to install it on your iPhone.
    4. Now, open the app and verify with a different mobile number.
    5. Congrats! You now have installed and verified WhatsApp Business on your iPhone.

    All two WhatsApp apps will be installed separately on your iPhone and will do exactly the same thing with two different numbers used for the verification. Now, this is how you can use two WhatsApp on an iPhone.

    Conclusion

    You may want to use a different WhatsApp on your iPhone for business for something else but don’t know how to get two WhatsApp on your iPhone. If so, then follow the steps above to do so.

  • How to Pay DSTV Subscription With Vodafone Cash

    How to Pay DSTV Subscription With Vodafone Cash

    The next time you are going to pay your DSTV subscription, you can use Vodafone cash to pay to make subscription more simple and easy.

    About DSTV Subscriptions

    Dstv is a subscription-based satellite television service. It is available in a variety of different packages and offers over 130 channels in both English and Afrikaans.

    Is it safe to pay DSTV subscription with vodafone cash?

    Yes. Vodafone cash is a reliable payment service and thus, you don’t need to be afraid using them for DSTV subscription renewal. It is safe to use for your DSTV subscriptions. You can either use the vodafone app or you use the vodacash USSD code to make payment.

    Steps to pay DSTV subscription with vodafone cash

    To pay your DSTV subscription with vodafone cash so you can continue watching your favourite movies and sports, follow the steps below.

    1. On your phone, dial *110#
    2. Choose option “4” to make payments with Vodafone Cash.
    3. Choose “1” to pay your DStv bill.
    4. Select option “3” for utilities.
    5. Select option “3” again for a DStv subscription.
    6. Enter your smart card or IUC number.
    7. Also, enter one (1) for the amount due or “2” to input the amount you want to pay.
    8. Reply with option “2” and continue the payment with your Vodafone Cash.
    9. Now, enter the amount you would want to pay for the DStv subscription and press send.
    10. Finally, enter your Vodafone cash PIN to complete the payment.
    11. You will receive an SMS indicating your payment has been made successfully.

    How long does it take for payment to reflect

    Payment is instant. You dont need to wait for days before you see the effect. Once you make a successful payment, your subscription has been activated for the next 30 days.

    NB: Incase you encounter any problem in the process, call the Vodafone customer care on 100 and lodge your complain. You will be assisted to and then, you can make your payment and enjoy your DSTV.

    Conclusion

    Vodafone cash has made it more easier to make your subscriptions payment without needing to go stand in a queue. With vodacash, even as the comfort of your hope and following the steps above, you can pay for your subscriptions any time and any day.

  • How to Make Money on OnlyFans Without Showing Your Face

    How to Make Money on OnlyFans Without Showing Your Face

    Do you want to make money from an OnlyFans page without having to show your face?

    Whether you’re looking to cash in on the paid fan club craze or just want to learn how to use OnlyFans, this guide will teach you everything you need to know about the service and how to make money on it.

    What is an OnlyFan?

    OnlyFans is a website where fans can subscribe to see exclusive content from their favorite celebrities, such as photos and videos. You can choose not to show your face on this site so it’s perfect for people who want to keep their private life private.

    Why should I use an OnlyFan?

    It’s sometimes hard to interact with fans when you’re embarrassed or ashamed of your appearance.

    For example, some people may have a skin condition that makes them self-conscious about their skin in photos. Others might have scars from acne or other injuries.

    You can use an OnlyFan for these reasons and more. OnlyFans is a social media site that allows you to connect with your fans without worrying about showing your face.

    Am I allowed to show my face?

    Yes. If you are confident enough and want to show your face, you are 100% allowed to do so on Onlyfans.

    What happens if I don’t show my face?

    If you’re not comfortable sharing your face, don’t worry. There are still plenty of ways to make money with OnlyFans without exposing your face.

    How can I make money on onlyfans without showing my face?

    OnlyFans is a platform for content creators and not generally a point site. There are plenty of content creators who can be models without displaying any nudity. 

    Here are some ideas on how you can make money while being anonymous;

    1. Sell feet pics

    There are users on OnlyFans who have a foot fetish and are looking for pictures of gorgeous feet.

    Make sure that whatever pictures you choose to create and upload to the platform are of good quality. You monetize them and then, your followers pay to watch them.

    2. Use a stage name

    To be anonymous, you must not use your real name. Avoid using any names that sound similar to your real name. Don’t give it too much thought. Come up with a simple idea.

    A stage name makes your followers to notice you anytime they see it somewhere. It helps grow tour account.

    3. Provide a Subscription Service

    You can monetize your onlyfans account in many ways and providing a subscription service is no exception. If you can provide exclusive content for your followers, then its best you provide a platform where they can subscribe and have access to such contents.

    4. Use a niche

    Everything you do on social media comes from a niche. Having a specific niche you specialise on the most helps to easily grow your presence.

    Doing anything anyhow can confuse your viewers but if you have a specific niche you have mastered in, it makes your page unique.

    5. Be an anonymous influencer

    You are growing your account for more followers in order to showcase yourself to them. Those followers are the same people who can make you rich.

    After popularising your account, you can easily influence them because they now believe in you. Its time to strike deals with top companies and be their ambassadors.

    6. Advertise on your platform

    Your niche has companies who want to advertise their product to your followers. Sell yourself on your anonymous social media platforms and bring their attention to you. Insert their products in your videos as advertisement or affiliate form and make extra bucks.

    NB: There are several ways to riches kn onlyfans. The above are just few but as time goes on and you get used to the platform, more ideas will pop up for you.

    Conclusion

    So far as you are creative and have a niche specific quality content, you can still make some bucks on onlyfans even without showing your face.

  • How to Stop Auto Renewal of Data on MTN, Vodafone, Airteltigo and Glo

    How to Stop Auto Renewal of Data on MTN, Vodafone, Airteltigo and Glo

    In this tutorial, I will be discussing how to stop auto renewal of data in your MTN, Vodafone, Airteltigo and Glo lines so that you can continue using the services without having to renew the data every time it finishes. This process will work on all platforms; iOS and Android.

    Data auto renewal

    Some phone networks offer auto-renewal for data packages. This means that when you purchase a data package for your phone, it will automatically renew at the end of your billing cycle if you don’t make any changes to your plan.

    This might be useful for some people who are very busy and forget about their data plans. For others, this can be an expensive mistake as they fail to turn off auto-renewal before their original package expires.

    Why you want to stop data auto renewal

    Data is expensive in Ghana and it’s easy for the auto renewal system for data plans to rack up costs. You may not want auto renewal your data because its not everyday you will have money for that.

    But the problem is that, most people don’t know how to stop this from happening.

    How to stop data auto renewal on MTN Ghana

    You may have activated auto renewal data for a certain subscription and you now want to stop but finding it difficult to do so. Well, that’s not easy.

    To stop auto renewal data on MTN Ghana through SMS,

    1. Open your phone menu and tap on the messaging app.
    2. Now, on the message app, send STOP to 138.
    3. All your data auto renewal subscriptions will be cancelled.
    4. You can now buy your airtime without worrying about getting deducted when your data finishes.

    To stop auto renewal data on MTN Ghana through USSD code,

    1. On your dial pad, dial *175#.
    2. Select option one (My subscriptions).
    3. All services you have subscribed to will appear.
    4. Select all the MTN services you want to unsubscribe.
    5. Follow the prompts to cancel your MTN Subscriptions.

    How to stop data auto renewal on Vodafone Ghana

    There are two USSD code you can use to unsubscribe for Vodafone data auto renewal. One for direct data unsubscription and the other for all subscriptions on your phone.

    To directly unsubscribe from data auto renewal,

    1. On your keypad, dial *700*3#
    2. All your data subscriptions will unsubscribe.
    3. You can now buy your airtime and not worry about auto subscription.

    To unsubscribe from all subscriptions,

    1. Dial *463# and press send.
    2. Select option one (My subscriptions).
    3. Choose option one again (View subscriptions)
    4. All your Vodafone subscriptions will appear here. Now, you choose from the pop up the ones you want to unsubscribe.
    5. Follow the prompts to cancel your Vodafone subscriptions.

    How to stop data auto renewal on AirtelTigo Ghana

    To stop data auto renewal subscription on airteltigo Ghana,

    1. Dial *100# and press send.
    2. Select option four (Content Services)
    3. Select Deactivate subscriptions.
    4. A list of all your Airteltigo Subscriptions will appear. Now, select from the list the ones your want to unsubscribe.
    5. Follow the prompts to cancel your Airteltigo Subscriptions.

    How to stop data auto renewal on Glo Ghana

    To stop auto renewal data on Glo Ghana,

    1. Open your phone menu and tap on the messaging app.
    2. Now, on the message app, send CANCEL to 555 OR 127 and your data auto renewal subscriptions will be cancelled.
    3. You can now buy your airtime without worrying about getting deducted when your data finishes.

    Conclusion

    Auto renewal can be quite annoying especially when you are not ready to subscribe for it anymore. Its best to follow the steps above and stop all data auto renewal subscriptions on your phone.

  • MTN Free After 1: New Rules, Shortcode, How to Subscribe

    MTN Free After 1: New Rules, Shortcode, How to Subscribe

    To make Ghanaians feel at ease when using MTN and to provide them with amazing deals that they can’t resist, MTN has always been the preferred network in Ghana. As part of their packages to make the life of their customers comforting, they introduced the MTN Nkomode (Free After 1 Service).

    A closer look at the MTN free after 1 promo

    MTN Free After 1 is one of the most exciting packages from MTN. It allows all customers to enjoy free calls and texts after the first minute into your call. The service was introduced in 2018.

    With this service, you will be charged for only the first minute and the remaining talk time for the next hour next 10 minutes will be free. You also get 50MB to browse after the call.

    The free after 1 new rules

    There are terms and conditions attached to the service and as time goes on, it gets altered. With the new rules introduced, customers can now enjoy the free after 1 with all networks unlike the initials when it was only allowed for only MTN to MTN customers.

    Also, you can use your bonus which you acquired from the airtime you purchase to make calls to all networks.

    The new rule makes the service more open and customers can now enjoy talktime with their loved ones on other networks and in addition gets free 50MB to browse.

    How to enjoy the MTN free after 1 service / nkomode

    You enjoy free talktime for 1 hour 10 minutes to all network and you will be deducted only GHS0.30 for the first minute of your call. You also get 50MB data to browse the Internet. Your bonus can also be used to make calls to all networks.

    What is the shortcode for MTN free after 1 service / nkomode

    The shortcode for MTN free after 1 service which is also know as MTN Nkomode is *550#

    How To activate MTN free after 1 service

    1. Dial *550#
    2. Then, Select Option 6 (Free After 1).
    3. After that, Select Option 1 (Activate) to activate the service.
    4. Finally, Select Option 1 once again to confirm.
    5. Congrats! You have now subscribed to the MTN free after 1 service.

    NB: For the first minute of every call, you will be charged GHS 0.30, but the rest of the call is free once you successfully register for the free after 1 service.

    Conclusion

    The MTN free after 1 service or Nkomode gives you some goodies for a quick need. Subscribing will be worth it if you are someone who makes longer calls.

  • How to withdraw your money from E-Zwich

    How to withdraw your money from E-Zwich

    The process of withdrawing your money from your E-Zwich account can be simple and easy with the right procedures. This steps will guide you on how to get an ezwich account as well as withdraw money from your ezwich account.

    What is E-Zwich?

    E-zwich stands for National Switch and Smart card payment system which is managed by Ghana Interbank Payment and Settlement in Ghana. The card is mostly used in Ghana by government workers and especially students in the tertiary system to access their loans and service salary.

    Why should I use this service instead of other services?

    The system is easy and simple. Unlike any other visa or master card, you don’t pay any monthly charges for card maintenance and the withdrawal charges are very low.

    How to create an E-zwich account

    Creating an Ezwich account is very simple. The E-zwich system is mostly runned on the rural banks in Ghana so to make it faster in acquiring one,

    1. its advisable to visit any rural bank around you.
    2. Talk to the customer agent on seat and make him or her aware to neneeds e-zwich card.
    3. You will be asked to provide some few details including your name, number and your ID card.
    4. In just some few minute, you will be issued a card which you can use to receive, save and transfer money from your ezwich account to another.

    Things needed to withdraw money from an E-zwich account

    To withdraw money from your ezwich account, all you need is,

    • your ezwich card,
    • your mobile number
    • your signature
    • your finger print.

    In recent times, some banks do require your ID card number as well but its rare in most cases.

    How to withdraw money from an E-zwich account

    Withdrawing money from an ezwich account is just as simple as withdrawing money from your mobile money account. There are two ways you can withdraw from an E-zwich. Using an E-zwich ATM or visiting the bank.

    Using an Ezwich ATM

    1. Visit any Ezwich ATM with your E-zwich card.
    2. Insert the card and request withdrawal
    3. Confirm with your fingerprint and load your wallet if you haven’t.
    4. If you have, just go straight and pin in the amount you want to wuthdraw.
    5. In just some few seconds, your money will be delivered to you, then you take out your card and receipt.

    Visiting the bank

    1. Visit any bank around you. Preferably a rural bank to make withdrawal faster.
    2. Get to any available teller at the time and made a request you want to withdraw from E-Zwich.
    3. A machine will be brought out for you to insert your card.
    4. After some few settings from the teller, you will be required to confirm your card with your fingerprint.
    5. You then mention the amount you want ti withdraw.
    6. In just some few seconds, your money will be given to you by the teller.
    7. You then receive your card and you sign and pen down your telephone number as well.
    8. Thats all for your ezwich withdrawal.

    Do I need to pay any money before i can get an Ezwich account?

    No. You pay nothing for an e-zwich account. Just vist any rural bank of your choice with your name, number and iD card and you will be issued an account.

    Also, you don’t pay any money to withdraw. You will be automatically deducted when you make withdrawal just like it does happen when you withdraw from your mobile money account.

    Conclusion

    Wwithdraing money from your E-zwich account is as easy as withdrawing money from your mobile money account. If you need any E-zwich withdrawal assistance, read the procedures above.

  • How to Download iPhone 14 Wallpapers + Websites With Free Nice Wallpapers

    How to Download iPhone 14 Wallpapers + Websites With Free Nice Wallpapers

    The iPhone 14 is the latest iPhone to be released from Apple, and it comes with many new features. One of those features is the ability to easily download wallpapers from your phone without having to connect to a computer or any other device.

    If you would like to learn how to download iPhone 14 wallpapers, then you need to continue reading.

    About iPhone 14

    Apple recently announced the new iPhone 14 which is the latest and greatest iteration of Apple’s smartphones.

    The Apple company brings a major refresh to its iPhone lineup by launching four models. iPhone 14, iPhone 14 Plus, iPhone 14 Pro, and iPhone 14 Pro Max. And just like every year, the new iPhone 14 and iPhone 14 Pro come with a bunch of gorgeous-looking wallpapers.

    iphone 14 wallpapers

    When the new iPhone comes out, one of the most popular activities is finding and downloading new wallpapers. It can be a little tricky at first, but luckily, there are a few easy steps that will help you find some great images.

    How to download iPhone 14 wallpapers

    You can directly access varieties of live photos of wallpapers to download straight from your phone settings. Follow the steps below;

    1. First, go to your home screen and click on the Settings icon in the bottom right corner of your screen.
    2. Next, click on Wallpaper near the top of the screen.
    3. Scroll through the available options until you find iPhone
    4. Click iPhone
    5. Scroll down until you see Live Photos.
    6. Download any Live Photos that take your fancy.

    Alternatively, there are websites you can also access and download nice wallpapers for your new iPhone 14.

    Websites to download free wallpapers

    1. Unsplash

    On Unsplash website, you can find the best iPhone wallpapers, from black and white background to blue backgrounds. All iPhone wallpapers are free to download. They have the perfect wallpaper for your iPhone lock screen.

    2. Zedge

    Zedge is a website that is well designed with numerous wallpapers for your iPhone. It has wallpapers that you can freely download for your iPhone, Mac, iPad and even desktop.

    3. Pinterest

    Pinterest is one of the popular and best place to think of when you want beautiful wallpapers for your iPhone. You can download amazing wallpapers for your iPhone and iPad on its website.

    4. iPhone Walls

    iPhone walls is a website that has an easy navigation. You can download several images for your phone. It categories has massive wallpapers and I am sure you will surely get your desire.

    5. iDesign iPhone

    iDesign iPhone is a great website to download free iPhone wallpaper. The website has various wallpapers you can download to beautify your phone screen.

    NB: Once you visit any of the website and you finish your download, head over to the downloads folder on your phone and then set it on your phone’s home screen or lock screen and start using it.

    Conclusion

    Wanting a wallpaper for your phone shouldnt be a struggle. With the above websites, you can get as many wallpapers as you want.

  • SIM Registration App: Download now & Steps to Register

    SIM Registration App: Download now & Steps to Register

    The GH Self SIM Registration App is a new system rolled out by the National Communication Authority in Ghana to help make registration of SIM cards more simple and easier.

    With the app, you don’t need to be in a queue at your network providers office. All you need is to download the app and at the comfort of your zone, you register your SIM with ease.

    How to download the GH SIM Self registration app

    To download the GH SIM Self Registration App,

    1. Visit playstore on your android phone
    2. In the search bar section, type in GH SIM Self Reg App
    3. The app will show app after your search and you hit on download.
    4. In some few minutes, the app will be downloaded and installed on your phone.

    Things needed to register your SIM with the app

    1. Smart Phone.
    2. Ghana Card.
    3. Internet Connection.
    4. Email Address.
    5. Your Unique Code for your SIM after Stage 1 Registration.
    6. Ghana Digital Address.
    7. Mobile Money wallet.

    Steps to Register your SIM with the GH Self SIM Reg App

    1. Download the App from playstore with the steps above.
    2. Create an account by providing your phone number (note that the number does not necessarily have to be the SIM you are registering).
    3. Provide your email address, first name, last name and a 4-digit PIN.
    4. Now, you are done creating an account.
    5. Log in using the credentials you used in creating your account.
    6. Select the type of ID (Ghana card).
    7. Select your netvwork provider (MTN, Vodafone, AirtelTigo or Glo) from the list provided.
    8. Now, enter the number of the SIM you want to register.
    9. Enter the phone number you want to use for mobile payment.
    10. One you have selected the Ghana Card ID, enter your unique code (the number your network operator provided to you when you did the *404# registration).
    11. If you have forgotten the unique code, dial *400# to get it back.
    12. After inserting the unique code, you will be prompted to confirm your payment.
    13. Click on confirm to initiate the payment process.
    14. Confirm payment.
    15. After the payment is confirmed, you will need to scan your Ghana Card ID in the next step.
    16. The app will load your personal information and the document number on the screen.
    17. Kindly pay attention to the screen and follow the prompts on the screen to capture the front and back of your Ghana card.
    18. After scanning your Ghana Card, the app will ask you take a selfie for verification.
    19. If successful, the app will send you to the next step to scan your fingerprints.
    20. After reading the instructions, click to start scanning.
    21. If successful, you will get a notification.
    22. Now that’s it! You have successfully registered your SIM Card.

    Is the GH Sim RegistrationApp available on iOS?

    No. The app is currently on Google playstore only and thus, can be accessed by only android users. As to when it will be released on iOS has not been yet communicated.

    Is registration on the app free?

    Registering your SIM Card on the SIM Self Reg App is not free. Users need to have at least GHS5 in their mobile money wallet before they begin the registration process.

    Conclusion

    The GH SIM Self app has been introduced to make registration of SIM Cards more easier and thus, every Ghanaian who has not yet registered his/her SIM must do so to prevent any odd days.