When you get a brand-new iPhone, the default Auto Lock settings are 30 seconds. That means after half a minute of inactivity, your phone will dim down and automatically lock the screen. This feature is designed to protect your data and keep it secure, but if you are like many users, you may find it annoying and unnecessary. Fortunately, there is a way to turn off the auto lock feature on your iPhone, and this article will show you how.
Changing auto lock time on iOS 6 and below
If your iPhone runs on an older operating system, follow the steps below to turn off Auto-Lock.
Open the “Settings” on your iPhone
Go to “General.”
Select the “Auto Lock” option.
Select “Never.”
You will see a small blue checkmark next to that option that confirms your selection.
If you don’t want to completely turn off, you can increase the minutes, which might work best for some people.
Changing auto lock time on iOS 7 and above
The process of turning off Auto Lock on newer iPhone operating systems is similar, it only involves one change.
Open the “Settings” on your phone.
Select “Display & Brightness” option.
Tap “Auto Lock.”
Select “Never” from the list of options.
If you don’t want to completely turn off, you can increase the minutes, which might work best for some people.
How to fix auto lock troubleshooting
When your iPhone battery is running low, the auto lock settings cannot be changed. The device’s Low Power Mode automatically turns on and pulls back the Auto Lock feature to the default settings. But it can be changed by turning off the Low Power Mode.
Go to “Settings” on your iPhone
Select “Battery.”
Next to the “Low Power Mode,” move the toggle button to off.
Once that is done, you can go back to “Settings”.
Select “Display & Brightness.” for older ios version and “General” for newer versions.
Tap on “Auto Lock” and select “Never.”
Conclusion
With the simple steps outlined above, you should now know how to easily turn off auto lock on your iPhone. Remember to always secure your device by setting a passcode, as this is the best way to ensure that your data remains safe.
Beats headphones or earbuds are famed for their excellent sound quality, making them a popular choice among many iPhone users. Connecting Beats headphones to an iPhone is a simple process that takes just a few seconds. Whether you are using a wired or wireless connection, connecting your Beats headphones to your iPhone is fast and easy.
How to connect Beats to iPhone
Before all this, you must first confirm that your gadget is discoverable. After that, you can follow these simple steps.
Turn on your Beats headphones by pressing the “Power” button.
Go to “Settings” on your iPhone.
Click on “Bluetooth” and enable it.
With Bluetooth now enabled, you’ll see your “Beats” headphones under “My devices or other gadgets” section.
Select “Beats Wireless” from the list of choices.
Once paired, Beats and iPhone will now be connected.
What to do if your Beats is refusing to connect to the iPhone
If you have trouble connecting your Beats wireless device to your iPhone, then there might be some minor errors that needs to be checked. You have to check if your Beats is really on and then also check if there is no other Bluetooth devices next to it. Now, make sure your Beats is closer to your iPhone and then,
Go to your phone Settings
Locate Bluetooth.
Look through the paired devices to see if you will find your Beats device name.
If you see see click on it and tap on the lowercase “i” icon next to your device in the Bluetooth menu.
On the next screen, choose “Forget This Device”, then pair your Beats with your iPhone again.
Wait for a while to get your successfully connected message.
Conclusion
Now that your Beats headphones are connected to your iPhone, you’ll be able to enjoy the full capabilities of your device. With your headphones, you can listen to music, take calls, or control your audio playback. You will also be able to customize your listening experience with your favorite audio settings. By following the steps above, you can now easily connect your Beats wireless headphones to your iPhone.
The ability to connect with people via Snapchat is great, but sometimes it might reach a point where everything isn’t great anymore. For example, you don’t want someone to see your post, or you’re receiving messages that you don’t want. In such situations blocking someone can be the ideal thing to do. Blocking someone on Snapchat is a simple process, but it’s important to understand what it means and the implications that come with it. in this article, we will give a step-by-step guide on how to block someone on Snapchat.
How to block someone on snapchat
Open Snapchat on your phone
Find the user you want to block by navigating to your conversations tab.
If the user is not in your chat, tap on the search function at the top, marked by the magnifying glass icon at the top.
Enter their name in and search.
Tap on the user to open a chat with them.
Tap the menu icon in the upper-left corner of the chat tab.
Tap Block from the list of menu options that appear.
Confirm that you want to block the user by tapping the Block button on the confirmation box.
What happens when you block someone on Snapchat?
Blocking means you are preventing the person from seeing any of your future activities. Blocking any Snapchat account means the user cannot reach you again with their account. To them, your account exist no more. A blocked account user will not be able to send you photo or video snaps, start a chat with you, view your stories, find your account if they search for you, etc.
If you block someone on Snapchat, will they be alerted?
No. Snapchat will never alert a user they’ve been blocked. The only way they will be able to find out is through their activities. That is when they try to send you a message using their blocked account or any other activity.
Can you unblock a blocked account on Snapchat?
Yes. It Is 100% possible to unblock a Snapchat account you have blocked. When you block an account, they are listed in a blocked users section. So anytime you are ready to unblock a blocked user, all you have to do is to visit the blocked list, tap on them and then unblock the user.
Conclusion
Blocking someone on Snapchat is a simple process that can help protect you from unwanted messages or content. Blocking someone prevents them from seeing your Story, adding you as a friend, or sending you any messages. If you ever decide to unblock someone, it’s just as easy to do so. With the steps above, you now have the knowledge to easily block someone on Snapchat.
Playing video games on a Playstation 4 can be a great way to pass the time, but you might not know how to turn the console off properly when you’re done. Turning off your PS4 in an odd way ca cause damages and that is why it is good to know how to turn off your PS4 properly. Turning off your PS4 is relatively simple, and it only takes a few steps.
How to turn off PS4 using quick menu on your controller
Your controller can make turning off your PS4 easier. Imagine sleeping on your bed feeling lazy and you have to get up to off your PS4. But with your controller with you on the bed, you can go ahead to turn off your PS4. The quick menu is one of the menus on your PS4 and there’s an option that allows you to switch off your phone. To do so,
Press and hold down the PS button on your controller.
Select Power from the Quick Menu that appears on your screen.
On the right, select the Turn Off PS4 option to turn your console off.
Make sure not to unplug the power cord until your PS4 has fully turned off. If you do unplug it, you risk the chance of corrupting the data on your console.
How to turn off PS4 using the Power menu on your controller
The Power menu is also an option you can use to turn of your PS4. It can be controlled using the controller. It is mostly located at the top of your PS4.
Highlight the Power menu at the top and select it.
Select Power Options on the following screen.
Select Turn Off PS4 to turn the console off.
How to turn a PS4 Off without a controller
The controller is not the only way to turn off your PS4. Without your controller, you can still turn off your PS4. On your PS4 console, there is a power button that can be used to switch it off and turn it on. The power button on the original PS4 will be at the center on the front of the console. On the PS4 Pro, you’ll find it on the bottom left side. On the PS4 Slim, you’ll see it near the left side next to the disc eject button.
Find the Power button on the front of your PS4.
Press and hold down the Power button for about seven seconds.
Release the button when you hear the beep sound twice.
Your PS4 will turn off.
Make sure to remove your hand only after hearing the second beep. If not, your phone will enter rest mode instead of switching off.
How to put your PS4 in rest mode
Rest mode is a mode on your PS4 that uses significantly less energy than normal mode and allows certain activities to continue in the background. When your PS4 is in this mode it can continue tasks, like downloading games or software updates.
In rest mode, your console uses less energy compared to when it is completely on. Also, rest mode allow some activities to continue running at the background. Activities such as when you are downloading a game or updating a software. To put your console on rest mode,
Open the Power menu.
Glance through the options and select Enter Rest Mode.
Your PS4 will go into rest mode.
To come out of the mode, press the PS button on your controller or use the Power button on your console.
NB: In all the switching off process, allow the console to completely switch off before trying to remove the power plug. That is to safeguard the console as well as your data. Removing power before completely switching off can damage your data or even the console itself.
Conclusion
Turning off your PlayStation 4 is easy and should only take a few seconds. Make sure you save your progress before shutting down your console, and that you turn it off correctly. By following the steps above, you will be able to quickly and easily power off your.
It’s always great to stay connected with your friends and family, and one of the best ways to do that is by using the popular social media app like Snapchat. This app allows you to share photos, videos, and messages with your contacts, and even pin important conversations to the top of your list.
When using Snapchat, you might want to pin someone important on you list for regular conversation but don’t know hpw to do it. If you are in such position, then tis article is for you. We will be discussing everything you need to know about pinning a person on Snapchat, including the steps involved and some helpful tips.
What does “Pin Conversation” mean on Snapchat
Pin conversation on Snapchat is a feature that allows you to pin a conversation with one or more of your contacts. This means that, when you open the chat window in Snapchat, you will see the pinned conversation at the top of your chats list. Pinning a conversation allows you to easily keep track of important conversations without having to scroll through your entire list of chats.
How to pin a conversation with someone on Snapchat
Method 1
Open Snapchat and swipe right on the camera screen to open the Chat or Friends screen.
Select the conversation or group chat you want to pin.
Tap your friend’s name or profile picture to open their profile.
Tap the menu icon in the top-right corner of the profile page and tap Chat Settings.
Select Pin Conversation on the pop-up menu.
Method 2
Open Snapchat.
Swipe to the chats page on the left side of the camera screen.
Press and hold the chat of the person you want to pin.
Click ‘Chat settings.’
Tap ‘Pin conversation.’
NB: After pinning your conversation, it will stick at the top of your chats making it easy to locate the particular chat anytime you open your Snapchat.
How to unpin people on Snapchat
Unpinning people on Snapchat is just as easy as pinning them:
Open Snapchat.
Swipe to the chats page on the left side of the camera screen.
Press and hold the chat of the person you want to unpin.
Click ‘Chat settings.’
Tap ‘Unpin conversation.’
Can I access the Snapchat Pin feature both on android and iOS ?
The pin feature is currently available on both iOS making only iPhone users to access it. Works are been done to make android users access it but at the moment, it is only available on iPhones.
Conclusion
Pinning someone to your Snapchat story is a great way to stay in touch with them. By pinning someone, you can ensure that their stories always appear at the top of your Friends screen and that they never get lost in the shuffle. Pinning conversations is also a great way to show your appreciation for those closest to you and let them know you’re thinking about them.
Microsoft Teams is an online workspace that allows individuals and teams to collaborate, share information, and communicate in real-time. It is available for use on multiple devices, including Windows, Mac, iOS, and Android. Teams allows users to quickly and easily share files, work together on projects, chat with colleagues, and access applications from within the platform.
Microsoft Teams is a great tool for keeping everyone connected, no matter where they are located. With its range of features, it can make collaboration easier and more efficient for teams of all sizes. This article will be talking about how to change your background when you are on Microsoft teams.
Why you might want to change your background on Microsoft teams
If you use Microsoft Teams on a regular basis, you may want to change the background of your screen. Customizing the background can be a great way to give your workspace a personal touch, add a sense of creativity, or simply keep things looking fresh.
In addition to just being aesthetically pleasing, changing the background of your Teams can also help you focus on tasks by reducing distractions from the outside environment. There are multiple ways to customize the background of your Teams, from using images to custom video backgrounds. You can also add blur and animation effects for a more dynamic look.
How to change your background on teams
Changing your background on Microsoft teams can be done in two ways. One is when you are about to enter your teams meeting and the other is when you are already on the teams meeting.
Changing your background on Microsoft Teams before your meeting for PC
Before entering your teams, you already know your readines. If it is one that does not deserve to be on a teams meeting, then its best to change it before you start. When you set up your video and audio preferences before joining a meeting,
Select the Background filters button. You can find this button below the video preview image.
A selection of background options will display on the right-hand side of your screen. Choose the background that works best for you.
You can choose to blur your background if you are not sure of which background color to use.
After setting your background, you can then enter your meeting with it.
If you want to remove your background choice, you go back to the settings to turn it off.
Changing your background on Microsoft Teams during meeting for PC
Sometimes, your decision to change background on teams meeting will be when you are already in the meeting. That is also a possibility to do so without any hassle.
Navigate to your meeting controls panel in the meeting and select the three dotted lines you will see (More option).
Select Show background effects for the pop-up menu.
Now you will be presented with a choice of background options that you can pick from.
You can either choose to blur your background or choose any colour of your choice.
When you are happy with your background, select Apply.
Now your new background is in action.
Changing your Teams Meeting background before meeting for mobile device
Select the Settings button while you are getting ready for the meeting.
Tap on Background effects.
A range of background options will appear below your image.
Select the option you like the most.
Press Done.
Changing your background on Microsoft Teams during meeting for mobile device
Go to your meeting controls buttons and tap on the three dots (more options).
Tap on the Background effects button.
Choose the background you like.
Tap Done.
Now your background has been changed.
How to add your own backgroun on Microsoft Teams meeting
You might not want to use custom background colours for the teams meeting. Don’t worry because it is also possialso to use your own preferred picture as the cover. It in a way can help promote something you want to promote during the meeting.
Start by creating your own background image. Save this in a .JPG, .PNG, or .BMP file on your device.
When changing your background, navigate to the background effects options and then select “Add new”.
Now you can choose the background image file from your device and use this as your background.
The file will save into your selected background options, so you can use it again if you ever need to change to a custom background.
Conclusion
Changing the background of Microsoft Teams is a great way to customize your workspace and make it more personal. It’s also a great way to create a sense of unity and collaboration when working with teams and colleagues. Whether you’re using your own images, a picture provided by Microsoft Teams or a pattern, you can easily change your background to reflect your team’s work style and culture. With a few simple clicks, you can quickly and easily customize your workspace with the perfect background
Creating a table of contents in Google Docs can help you organize and structure your document in a clear and concise way. A table of contents allows readers to quickly find and navigate to the section of the document they are looking for.
In this article, we will walk you through the simple steps for creating a table of contents in Google Docs. With these tips, you will be able to create a professional-looking table of contents that will make your documents easier to read.
What is Google docs
Google Docs is a free online word-processing service from Google. It allows you to create and share documents with other people. With Google Docs, you can create, collaborate, and store documents in one place. You can also format text, add images and tables, and even collaborate on the same document with multiple people. Google Docs is a great tool for both personal and professional use. It’s easy to use, secure, and available for free.
How important is the table of content in Google docs?
Having a table of contents makes it much easier for readers to find the information they are looking for in your document. Instead of having to search through the entire document, readers can just look at the table of contents and quickly jump to the section that interests them.
A properly formatted table of contents can really enhance the visual presentation of your document. It gives your document an organized look and feel, which will make it more appealing to readers.
A table of contents also serves as a navigational tool. It allows readers to quickly move from one part of the document to another by simply clicking on the relevant section. This makes it much easier for readers to review and scan through large documents.
If you ever need to add new sections to your document, it’s easy to update your table of contents by simply inserting a new entry or re-arranging existing entries. This is much faster than having to manually update all the page numbers associated with each section.
How to create a table of contents in Google Docs
Using a computer
Navigate to docs.google.com and open the document if you want to add a table of contents to.
Select a document with multiple sections, each set apart by header text.
In the top options menu, beneath the title of the document, select “Insert.”
Scroll to the bottom to select “Table of contents” and select if you prefer page numbers, which is best for a document that will be printed, or blue links, ideal for an online-based piece
After clicking on the table of contents, your table of contents will appear on the page.
Using a mobile device
Open Google Docs and create a new document or open an existing document with multiple sections, each set apart by header text.
Tap the three dots in the top-right corner, and make sure that “Print layout” is enabled.
Tap the edit button (the blue pen icon in the lower right) to open editing options at the top of your iPhone or iPad screen.
Tap the “Insert” button, or plus sign icon, and scroll to the bottom of the options menu to select “Table of contents.
Your table of contents will appear at the top of the page.
What to do if your table of content does not appear after inserting it
In some instances, your table of contents will not appear even if you follow the steps above and click on it. If such cases show, it means there is an error in your google docs and you need to format it before you can proceed to create your table of content.
Conclusion
Creating a table of contents in Google Docs can be a great way to organize your work and make it easier for readers to navigate. It’s a quick and simple process, allowing you to customize the appearance and structure of your table of contents with ease.
If you are having trouble typing on your iPhone, resetting your keyboard can help you get back on track. Resetting your iPhone keyboard can help you resolve many of the common issues that can occur with your keyboard, such as freezing, lagging, auto-correct mistakes, and incorrect autocorrect predictions. By resetting the keyboard dictionary, you can clear all stored words and phrases, which can help improve the performance of the keyboard.
Resetting the keyboard will also give you a fresh start if you have recently switched to a new language or added a new text replacement phrase. Resetting your iPhone keyboard can also be beneficial when troubleshooting an issue with your device or if you want to make sure it is clean and optimized for use.
In this blog post, we’ll explain how to reset your keyboard on an iPhone and why it’s important to do so. With a few simple steps, you’ll be able to quickly and easily reset your keyboard and get back to typing on your iPhone
How to reset your iPhone keyboard
Open the Settings app on your iPhone.
Tap the General option from the menu.
Scroll down to the bottom of the screen and tap the Transfer or Reset iPhone option.
On the bottom of the following screen, tap the Reset option.
Now, tap the Reset Keyboard Dictionary option from the menu that appears at the bottom.
Enter your phone passcode and tap the Done button in the upper-right corner.
Tap the Reset Dictionary verification message, and you’re ready to go.
The process will restore the keyboard dictionary on your iPhone or iPad.
You cannot undo this process. Once you tap Reset Dictionary, it will permanently delete your keyboard history.
After the reset, the keyboard dictionary will slowly learn your habits and store new words. If you want to prevent your iPhone.
Can I see my iPhone keyboard history?
As you use your phone, the keyboard dictionary learns and stores words which later gives to your keyboard as auto-correct and predictive words. However, there is no way you can see your keyboard history which contains a list of all words you have typed using your phone’s keyboard. You can reset when you start seeing unwanted text and your keyboard start responding slowly.
How Do I Delete My iPhone Keyboard History?
You can only delete your iPhone keyboard history by resetting it. Make sure you are ready to reset before doing so because if you reset, you can’t undo the action.
Conclusion
Resetting the keyboard on your iPhone can be a great way to start fresh with your typing experience. This process is easy and quick, and it will restore your keyboard’s settings to their default values. By resetting your keyboard, you will be able to type messages, emails, and more, as well as help ensure your privacy is better protected.
Learning how to copy and paste on a Chromebook doesn’t have to be a difficult task. With just a few simple steps, you can be on your way to copying and pasting. When you copy and paste, you can easily move text, images, and other data from one place to another without having to re-type everything from scratch.
This means that you don’t have to spend time creating new content or researching again when you can simply copy and paste from something that already exists. Having the ability to copy and paste on a Chromebook also makes collaboration easier.
You can easily copy and paste information from one person’s document to another, allowing you to quickly and easily share information. This is especially helpful in team projects where multiple people are working on the same project.
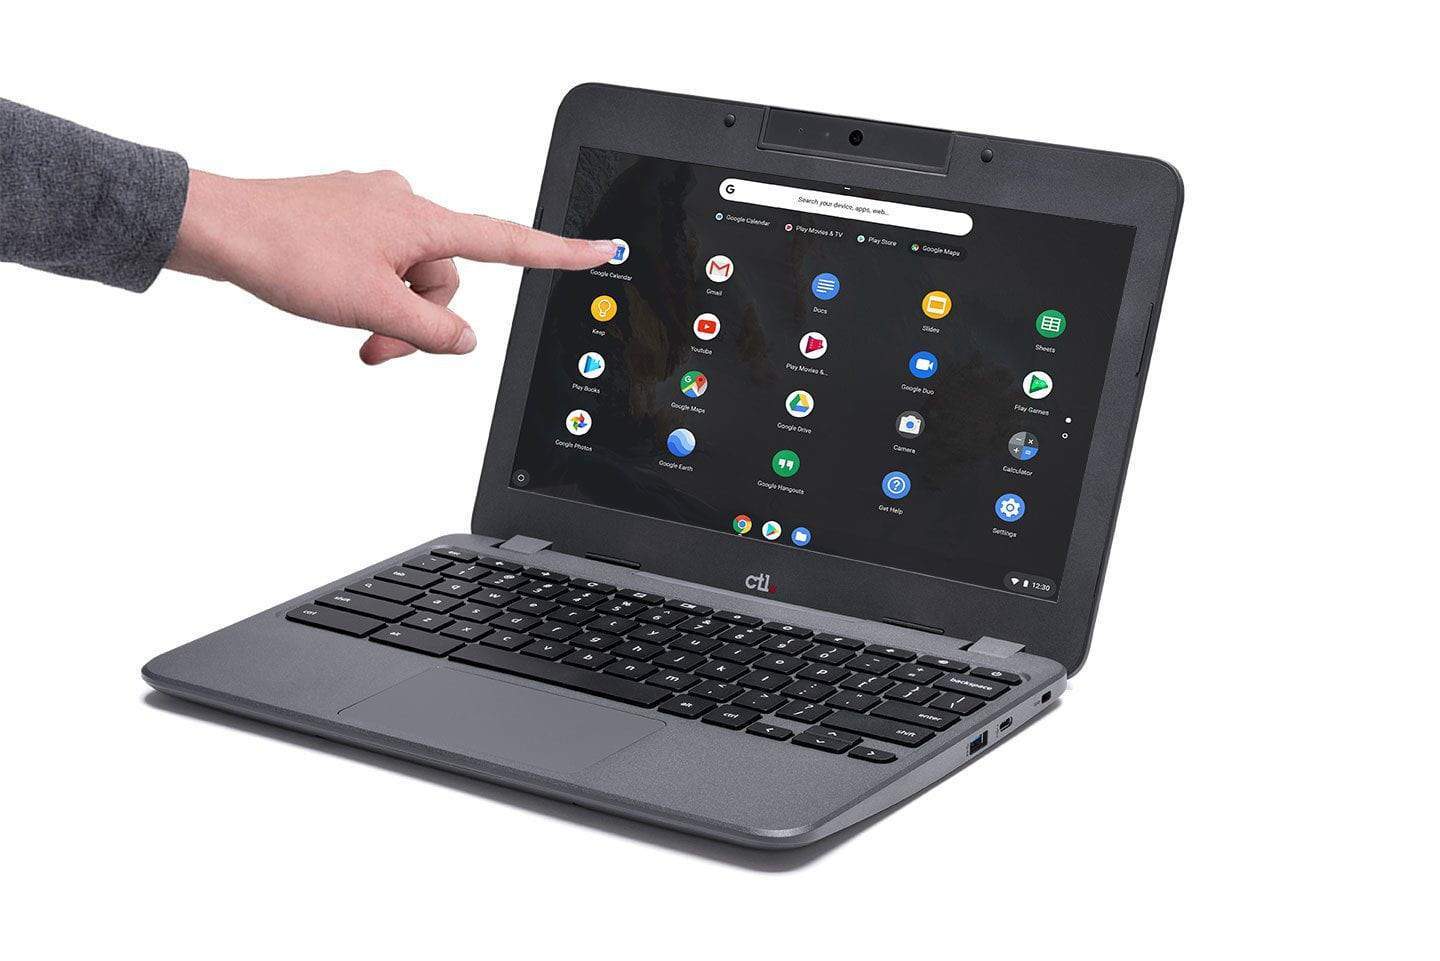
What is a Chromebook
A Chromebook is a laptop or tablet powered by the Google Chrome operating system. This operating system uses the same basic technology as Chrome web browsers, but it is designed specifically to run a laptop or tablet device. Chromebooks are primarily used to access the internet and to run web-based applications. They are popular for their portability and ease of use, making them ideal for students and people who work on the go.
What is copy and paste
Copy and paste is an essential function on any computer or laptop. It allows you to quickly and easily duplicate text, images, or any other kind of data from one place to another. Copy and paste is a great time-saving tool that allows you to quickly duplicate and move data around your device. When you copy something, the information is stored in the device’s memory and can be pasted wherever needed.
How important is copy and paste on Chromebook?
Copy and paste can save you time. When you need to transfer text or images between applications, copy and paste can do it quickly and easily.
Copy and paste allows you to easily move information from one place to another. This can help with note-taking, organizing files, and creating documents quickly.
With copy and paste, you can copy text from a website or document and use it in a new document without having to retype it.
You can also use copy and paste to quickly add formatting elements like headers and footers to documents or email messages.
Copy and paste can be used to share links and other information between applications or websites quickly and easily.
How to copy and paste on a Chromebook using keyboard shortcuts
Press control and the “A” key to highlight all of the text on a page.
Press and hold the control button (which is generally located in the left corner of your keyboard) and press “C” to copy or “V” to paste.
Press and hold “CTRL,” as well as the shift key (located just above the control key) and press “V” to paste.
Your copied text will be pasted without any formatting.
How to copy and paste using mouse right click
Move the mouse cursor to the text you want to copy.
Click and hold the left pad of the mouse and drag to highlight the text you want to copy or paste over.
After you are done highlighting, Leave the left pad and right click on the mouse.
Select “Copy”
Move to the space you want to paste the copied text,
Right click on any empty space and click on Paste.
Conclusion
With copy and paste on Chromebook, it makes your work easier, now you will not have to type every text you see from start to finish. All you have to do is to do copy and paste and you are done.
If you looking for a fun and creative way to display your favorite memories, then making a photo collage on your iPhone is the perfect way to do it. Creating a photo collage on your iPhone can be a great way to capture multiple moments in one image. Whether it’s for your own personal collection or for an upcoming social media post, this tutorial will guide you through the process of creating a beautiful photo collage with your iPhone.
With just a few simple steps, you’ll have a stunning collage that will look great on any platform. There are several different options for laying out your photos. For example, you could choose to place all the photos side-by-side in a grid, or you could use one of the many pre-made templates to create a more complex design. You can also adjust the size and shape of each photo, as well as the spacing between each image. Once you’ve settled on a layout, it’s time to add the finishing touches.
Adding text or artwork to your collage can give it an extra special touch. There are plenty of fonts and styles to choose from in the photo editing app, so be sure to experiment with different combinations until you find something that fits your style. If you’d like to add more than just text, there are plenty of stickers and clip art to choose from too.
Tips for making a photo collage on your iPhone
Keeping this tips in mind when making a photo collage can give you a great results.
Use burst mode to take a sequence of pics, then use those pics for the collage.
Tell a story from start to finish using your photo collage as the canvas for your story.
Choose pictures that are all the same color or texture for your photo collage.
Mix up-close pictures with distant scenes to provide the viewer with a sense of contrast.
How to make a photo collage on iPhone using Photo grid
Head over to the App Store and download PhotoGrid.
Open the app and tap the X in the upper left corner to use the free trial, but if you want paid too, you can subscribe.
Allow any permissions necessary to use the app.
Tap on the green + sign at the bottom of the page to create a new collage.
Tap on the number of photos you’d like to include in your collage. Then, select the layout.
Tap the + sign in the collage to add photos from your iPhone.
Add the photo’s from your device’s camera roll and tap Next.
Tap Save in the upper right-hand corner.
Now, select one of the options to share your collage.
How to make a collage on iPhone using Google Photos
Download Google photos app from appstore.
Start the Google Photos app.
At the bottom of the screen, tap Library.
At the top of the screen, tap Utilities.
In the Create New section, tap Collage.
Select 2-9 photos from your camera roll and then tap Create.
The collage is automatically saved to your camera roll.
How to make collage on your iPhone using Canva
Download Canva from app store and open.
In the search box at the top of the screen, type “collage” and tap Search.
In the search results, tap the entry for Photo Collage that has a collage icon to its left.
Scroll through the collage results and tap one that you like.
When the collage appears on screen, tap one of the photos in the template and then tap Replace.
Choose a photo from your camera roll to insert it in the collage. Repeat that for all the other photos in the collage.
You can use the tools at the bottom of the screen to continue to customize the collage, change the background color, add or edit text, and so on.
The collage is automatically saved to your camera roll after you are done and saved it.
Is there a built-in collage editor option on iPhone?
There is no built-in way to make a custom collage on the iPhone, but you can choose from among many photo apps which can get the job done. Google Photos has a collage mode, for example, and another of our favorites is with an app called Canva.
What are some of the best collage apps for iPhone?
PicCollage.
Picsart Photo & Video Editor.
Canva.
PhotoGrid Video Collage maker.
Collageable.
piZap.
Unfold: Story & Collage Maker.
Photo Collage Maker PicJointer.
Conclusion
It’s easy to make a photo collage with the built-in Photos app, and there are also plenty of third-party apps that allow you to create even more advanced collages. No matter which method you choose, making a photo collage can help you share your memories with friends and family in a creative and fun way. With the right tools, you can easily make an eye-catching collage that captures the special moments in your life.